Jet Kit Recommendations
 03-31-2015, 08:37 AM
#31
Member
Squid
Thread Starter

Join Date: Dec 2014
Posts: 43

Alright, so all I am waiting for are my vacuum pistons which should be in today. Since it has been posted here already I figured I would continue.
I installed my Krieger CCT's and they look like this. I think the back looks about right from what yall have said but is there too much thread showing on my front?
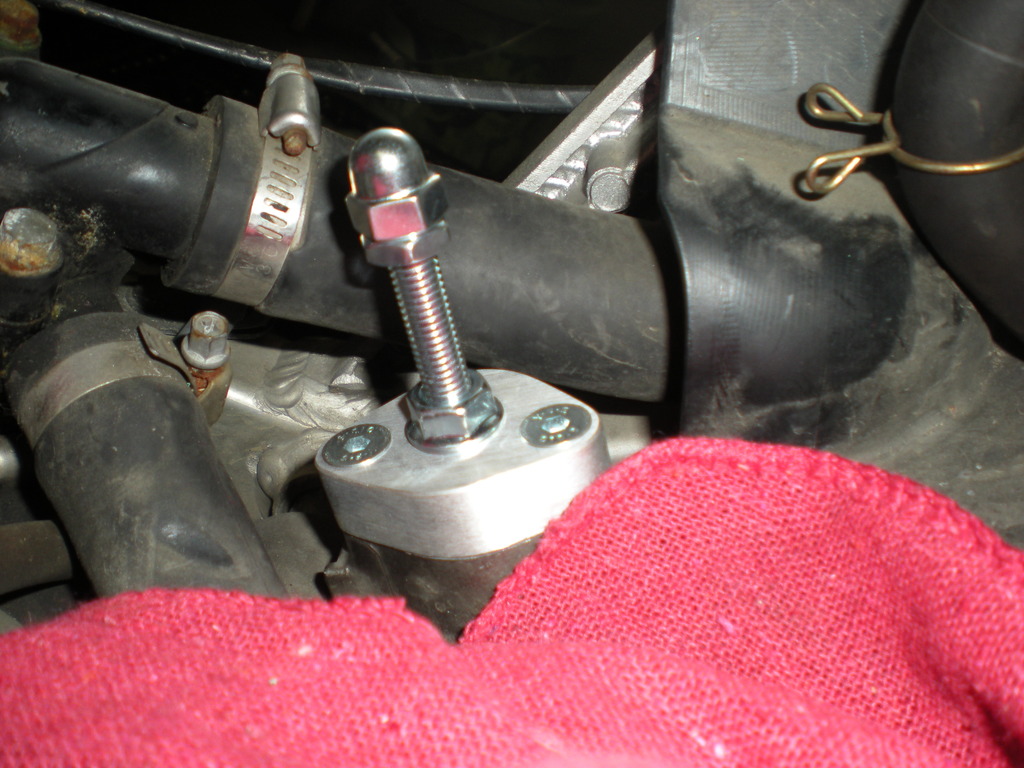
I will be adding some loc-tite when I know they're good.
My other question is about the PAIR system. It seems like this is a pretty standard removal? Meaning it won't hurt anything? This is what they look like now so what I'm seeing is a blocked off PAIR system correct?
And then I can take this out? Or if I don't have a cap for the airbox where this connects should I just leave it?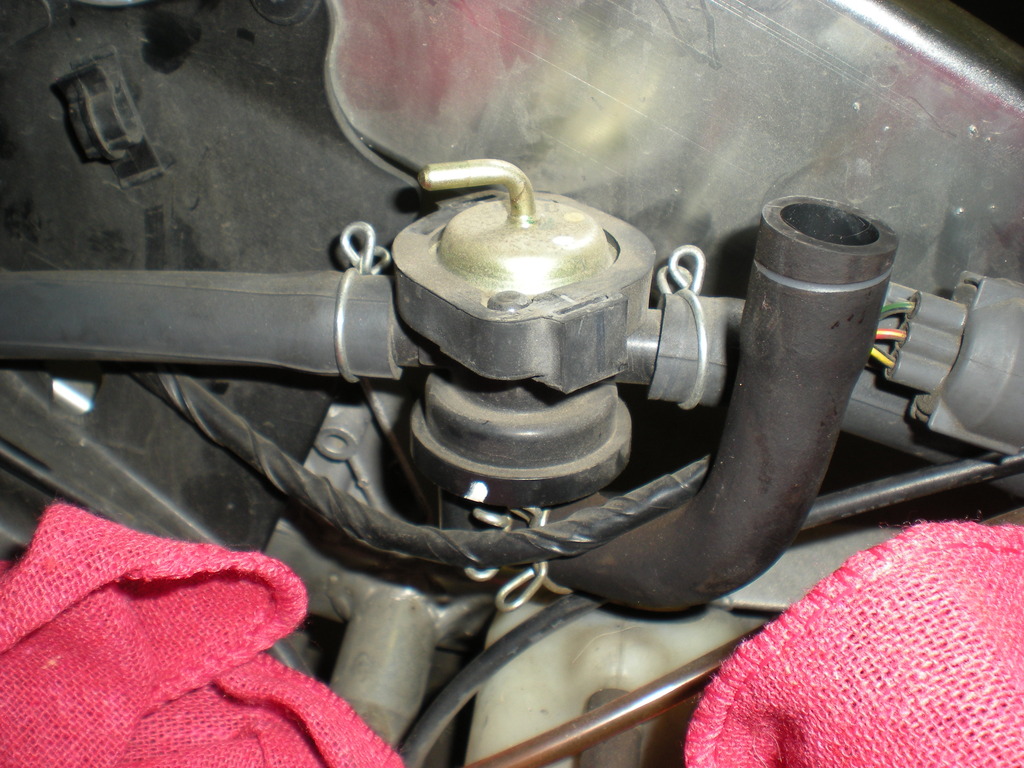
Then I read to just re-route the hoses, can I just remove them and cap the little inlet on the cam cover or should I just leave those hoses 'dangling'.
I installed my Krieger CCT's and they look like this. I think the back looks about right from what yall have said but is there too much thread showing on my front?


I will be adding some loc-tite when I know they're good.
My other question is about the PAIR system. It seems like this is a pretty standard removal? Meaning it won't hurt anything? This is what they look like now so what I'm seeing is a blocked off PAIR system correct?

And then I can take this out? Or if I don't have a cap for the airbox where this connects should I just leave it?

Then I read to just re-route the hoses, can I just remove them and cap the little inlet on the cam cover or should I just leave those hoses 'dangling'.
 03-31-2015, 10:15 AM
#32
Banned
MotoGP

Join Date: Aug 2007
Location: Lake View Terrace, CA
Posts: 5,942
Sorry if that sounds rude but all this stuff has been done and tried many times.
Your mid\high issue is the split diaphragm, so no jet kit would fix that issue,
Personally I would never put another DJ kit in a VTR.
Used them with good results on other bikes but not this one.
IMHO I do have a pretty good handle on these carbs and I personally spent close to 2 years trying to get a DJ kit to work correctly with no luck.
There was always a hole somewhere in the powerband.
So if you just have to run a kit, the go with FactoryPro or like the thread I wrote.... save your cash and just do a couple of tweaks and the bike will run just fine.
03-31-2015, 10:20 AM
#33
Rex Kramer-Thrill Seeker
SuperBike

Join Date: Jan 2011
Location: Brookfield, WI
Posts: 2,312
My other question is about the PAIR system. It seems like this is a pretty standard removal? Meaning it won't hurt anything? This is what they look like now so what I'm seeing is a blocked off PAIR system correct?
And then I can take this out? Or if I don't have a cap for the airbox where this connects should I just leave it?
Then I read to just re-route the hoses, can I just remove them and cap the little inlet on the cam cover or should I just leave those hoses 'dangling'.
And then I can take this out? Or if I don't have a cap for the airbox where this connects should I just leave it?
Then I read to just re-route the hoses, can I just remove them and cap the little inlet on the cam cover or should I just leave those hoses 'dangling'.
You will want to leave that piece with the orange part inside the valve cover, since the orange part is the gasket.
Last edited by CruxGNZ; 04-02-2015 at 09:28 AM. Reason: I'm a freakin' moran
03-31-2015, 07:44 PM
#34
Member
Squid
Thread Starter
Join Date: Dec 2014
Posts: 43
8541Hawk, not rude, thank you for being candid, sadly I had received the jet kit before I got into the carbs(it's my first time and I was waiting to be taught by a friend).
The DJ guide said to up the jet size for the exhaust baffle bull I have so I'll give it a try(dealing with their different jet measurements we'll see). I didn't toss the original jets so I can just add them back if it's too rich. If they don't work you'll have another dude on your team to tell people not to re-jet.
I will try the springs to maybe get that extra 'spring' and if they don't work I have the originals and an extra set of carbs from my local shop(coincidence). After seeing the recommendations here, I knew I was going to try the short springs no matter what(I do like physics) and that I would be in the carbs more than once.
Please let me know if I'm totally off here.
CruxGNZ: Got it, it just seemed like(call 'em an acorn nut, nut, and fluted nut) the nut was really tightened against the acorn so I assumed it should stay there to hold that on, I'm def going to take off the acorn when I get the others tightened down so I don't lose that. I'm sure it's generic but I don't need that bouncing around at 70.
So I got that, but do my lengths look good on the bolts?
And: What would you call the those rubber covers here https://www.superhawkforum.com/forum...val-how-20918/ in pic 4 that he caps with and I could use those on the valve cover correct? Yea, leave the gasket but the reed is correct? I'm finding a lot of this bike is half assed(Reeds flipped but hoses not capped or removed)...
Thank y'all soooo much. I just passed both my A+ cert tests and am waiting for that first magical ride of the season on the super. It's close...(In the meantime I have a '93 Nighthawk 750 for sale in MI ; ) )
Last edited by hondahawk; 03-31-2015 at 07:50 PM.
04-02-2015, 06:25 AM
#35
Member
Squid
Thread Starter
Join Date: Dec 2014
Posts: 43
Yup I understand that now but do my lengths look ok? When you were explaining to the other guy you said about a half inch on the rear and double that on the front. My front seems like it's going to be out more than that.
04-02-2015, 08:22 AM
#36
Senior Member
Superstock

Join Date: Mar 2015
Location: San Fran Freako
Posts: 394
You can not use the external bolt as an accurate tension measurment. You should really pull the covers and check the chain "up and down" free play. (5-7mm I believe?) Other members were commenting that when the tension is checked, on a typical VTR, there will be about a 1/2" of threads showing on the rear Krieger bolt. Mine has less for some reason.
But eyeballing the threads is not a reliable chain tension adjustment method.
But eyeballing the threads is not a reliable chain tension adjustment method.
Last edited by Hangfly; 04-02-2015 at 08:29 AM. Reason: clarify
04-02-2015, 09:22 AM
#37
Rex Kramer-Thrill Seeker
SuperBike
Join Date: Jan 2011
Location: Brookfield, WI
Posts: 2,312
If the body of the CCT is threaded, then the nut against the CCT would be the jam nut. Looking on another monitor (I was on my phone the last few times and couldn't see very well), I can see that the acorn nut is not staked, so the thinner nut is the jam nut for the acorn nut. You in fact had it right and I am a real putz! Now I know what you meant about removing the acorn nut so it didn't fall off at 70.
I appologize and I'm going to delete what I wrote in my above post.
I understand Krieger CCT's come with really good instructions. Just follow those.
04-02-2015, 04:11 PM
#38
Member
Squid
Thread Starter
Join Date: Dec 2014
Posts: 43
You can not use the external bolt as an accurate tension measurment. You should really pull the covers and check the chain "up and down" free play. (5-7mm I believe?) Other members were commenting that when the tension is checked, on a typical VTR, there will be about a 1/2" of threads showing on the rear Krieger bolt. Mine has less for some reason.
But eyeballing the threads is not a reliable chain tension adjustment method.
But eyeballing the threads is not a reliable chain tension adjustment method.
04-18-2015, 03:57 AM
#40
Member
Squid
Thread Starter
Join Date: Dec 2014
Posts: 43
Update: I got the bike all back together last night. Went with 180f/185r main jets, dynojet springs, new diaphragms, Krieger CCT's, PAIR removed, and new air filter. She runs like a bat out of hell now, exhaust doesn't seem to be too rich so far... She scares the **** out of me now. Time for new brakes lol. Thanks y'all for the tips.

Thread
Thread Starter
Forum
Replies
Last Post


