
Carb set up


Thread Starter
Banned
MotoGP
Joined: Aug 2007
Posts: 5,942
From: Lake View Terrace, CA

8541hawk, thanks for this info but I have a question about the shims:
" So what I do when setting up a set of carbs is remove the stock thin washer that is under the front needle and leave it in place on the rear. With this method you actually end up with the front needle approx. .030" higher than stock and the rear .040" higher than stock which seems to work well."
The 'thin' factory installed washers are .020" thick. How are you getting a .010" differential by leaving out the stock .020" shim from the front?
Am I interpreting the total shim stack correctly based on your statement above since both needles come stock with a .020" shim?:
Front:.050"
Rear:.060"
TIA for clarifying, maybe I'm just dense or something.

Thread Starter
Banned
MotoGP
Joined: Aug 2007
Posts: 5,942
From: Lake View Terrace, CA
So now you know why these guys put up with me......

Senior Member
Superstock
Joined: Oct 2011
Posts: 273
From: Pompano Beach, Fl.
Senior Member
Superstock
Joined: Oct 2011
Posts: 273
From: Pompano Beach, Fl.
Air Filter
Hey Hawk, Tweety must be busy, but when you use the stock filter do you alter or cut off the air dam baffle on top or use it factory stock? I read that someone else altered it as described with good results.
Thread Starter
Banned
MotoGP
Joined: Aug 2007
Posts: 5,942
From: Lake View Terrace, CA
Yes I have talked with some folks who have run the modified set up.
It can be made to work but it will take a bit of tuning (dyno time would be the fastest and most reliable)
I would recommend running a flo-commander Flo-Commander by Performance Design with a modified filter because the change in air flow patterns and turbulence in the air box will cause some odd problems without one.
Even if you don't mod the filter it can be a good investment to install a flo-commander.
So yeah you can do it, properly set up you might see 1-2hp. Which makes it not worth the extra time and effort, in most cases, unless you are racing or building a engine. That or you just want every HP you can get.
For most it is more a placebo effect.... either the added intake noise makes them "feel" like they have more power or they end up with a hole in the power band and now feel a "hit" as the engine pulls through it.
Last edited by 8541Hawk; Dec 20, 2011 at 11:00 AM.

Junior Member
Squid
Joined: Oct 2011
Posts: 2
Just wanted to say "Thanks". My 98 had a nasty cough and was extremely cold blooded even at temps well above 40. My son and I just performed the mods you suggested and the bike runs much better. No more cough, very little choke required. ;D

Senior Member
Superstock
Joined: Oct 2011
Posts: 273
From: Pompano Beach, Fl.
Hole
Here are a few new pics to update this tread a little...
The nice thing about the HRC jet kit is that all the parts come in these nice Keihin packages....
Attachment 11035
Here are a couple of the rarely seen HRC slide. You can even see the witness mark where the second lift hole should be drilled.
Attachment 11036
Attachment 11037
The nice thing about the HRC jet kit is that all the parts come in these nice Keihin packages....
Attachment 11035
Here are a couple of the rarely seen HRC slide. You can even see the witness mark where the second lift hole should be drilled.
Attachment 11036
Attachment 11037
8542Hawk
I have the slides out and notice stock needles with .030 shim, 5.25 inch springs, a 3d hole that was drilled and then filled in and so I filled one of the stock holes in tonight but do you think that will be compatible with the non stock springs. Don't know if they're firmer or weaker than stock but it sure was responsive the way it was. I took these carbs down today and found a non Honda 180 jet in front and stock 45s slo jet. In back I found Honda 178 and 45s jets. When I pulled the carbs no gas drained out the the fuel lines at all and supports the idea that the float valves were bad, which I also replaced, as it always smelled of gasoline in the garage when I parked it. I don't want to wait for new slide springs to arrive so I'll use the current ones but would you, all things considered leave the hole I closed, closed and hope the responsiveness isn't gone?

Snap, Tap or Nap!!!!
Back Marker
Joined: Feb 2012
Posts: 197
From: Melbourne, FL
Ok well thats interesting, been fallowing this thread and have my own started cause of low end leaness. Took the carbs off today and as it turns out I dont have a jet kit, I do have sloted needles. The rear jets are 175/45 stock right? The fronts are 172/45, stock right? The front is stamped 38 but someone scribed 45 in it. Hmmm, I have a stock 45 ordered from local honda dealer.Cleaning everything now then on to the pilot screws.
Last edited by 00SUPERHAWK; Mar 18, 2012 at 10:42 AM.

Senior Member
MotoGP
Joined: Mar 2007
Posts: 3,132
From: Phoenix, AZ
Ok well thats interesting, been fallowing this thread and have my own started cause of low end leaness. Took the carbs off today and as it turns out I dont have a jet kit, I do have sloted needles. The rear jets are 175/45 stock right? The fronts are 172/45, stock right? The front is stamped 38 but someone scribed 45 in it. Hmmm, I have a stock 45 ordered from local honda dealer.Cleaning everything now then on to the pilot screws.
Snap, Tap or Nap!!!!
Back Marker
Joined: Feb 2012
Posts: 197
From: Melbourne, FL
The rear was a 175 with a star stamped next to the number, the front is a 172 with "fatory" stamped next to it. For some reason someone tuned this thing for High Altitude. Im bout 25ft above sea level.

Senior Member
Back Marker
Joined: Apr 2010
Posts: 219
From: Prague - Czech
My finished carb set up.
I run Arrow full exhaust with custom baffles, Hiflo paper filter with Burnie Morgan mod, FactoryPro titanium needles, two standard long stacks.
48 pilots, 180 + 182 main jets, rear needle shim in the middle, front needle one slot up, plugged one slide hole in front.
It run just great everywhere, no backfiring, fuel consumption comparable to complete stock bike.
So I can say that Hawk�s basic setup - plugged one hole and rear needle raised by 0.5 mm - is working perfectly and is good way to go. Not sure with 48 pilots and stock cans.
It will be different story with dynojet kit, where are different springs and drilling more holes. Race filter like BMC, KN, DNA will make difference as well, I don�t recommend them with standard carbs, properly setted Dynojet kit could work (what I�ve seen), FactoryPro and stock not.
So thanks for info :-)
Last edited by Stephan; Mar 21, 2012 at 03:26 AM.

been there crashed that
Squid
Squid
Joined: Aug 2010
Posts: 61
From: North west NJ
I just want to thank everyone that has taken the time to share there setup's
I have used this forum as a guideline as I set up my superhawk.
After a week of pulling the required items off to make changes, I have come to a setup that is about 99.9% on the money!!
I have a 98 frame with 2002 motor, a mismash of 02 and 98 parts.
I have set the carbs up as follows
.50 primarys
.180 front main
.182 rear main
Stock needles both .030 shim back.
TPS mod and pair system GONE
Stock paper filter
Both velocity stacks are short,
Bike has carbon two brothers exhaust
Street fighter with ducati monster bars and Risers made in my shop.
The bike runs perfect, no popping on decel, no flat spot, smooth off idle with no backfire or pop through carbs. No carbs farts!
And with the streetfighter style its fast into the turns and easy to ride.
Thanks again to all,
Lol, so here I am a day later... Stuck in a bank parkinglot with my front cyl not firing. She ran so good... And all was spot on, balanced the carbs, argh... I can only assume I was a bit too rich on the front and it finally fouled the front plug. Will find out once I get the plug out.
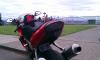
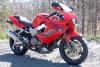
Here is my ride... Wohoo
I have used this forum as a guideline as I set up my superhawk.
After a week of pulling the required items off to make changes, I have come to a setup that is about 99.9% on the money!!
I have a 98 frame with 2002 motor, a mismash of 02 and 98 parts.
I have set the carbs up as follows
.50 primarys
.180 front main
.182 rear main
Stock needles both .030 shim back.
TPS mod and pair system GONE
Stock paper filter
Both velocity stacks are short,
Bike has carbon two brothers exhaust
Street fighter with ducati monster bars and Risers made in my shop.
The bike runs perfect, no popping on decel, no flat spot, smooth off idle with no backfire or pop through carbs. No carbs farts!
And with the streetfighter style its fast into the turns and easy to ride.
Thanks again to all,
Lol, so here I am a day later... Stuck in a bank parkinglot with my front cyl not firing. She ran so good... And all was spot on, balanced the carbs, argh... I can only assume I was a bit too rich on the front and it finally fouled the front plug. Will find out once I get the plug out.
Here is my ride... Wohoo
Last edited by new2thehawk; Apr 8, 2012 at 07:37 AM.

Administrator

World Champion
Joined: Dec 2004
Posts: 105,287
From: Fulton, MO
Try going back to the stock #45 idle jets and go about 2.25 turns out on the mixture screws. That should give you a good idle and won't be rich enough to foul plugs.
By chance, did you lose the front cylinder right after you got gas? If so, it's because you overfilled the tank and gas went into the vent line. That usually causes the front carb to vacuum lock.
By chance, did you lose the front cylinder right after you got gas? If so, it's because you overfilled the tank and gas went into the vent line. That usually causes the front carb to vacuum lock.

Junior Member
Squid
Joined: Apr 2012
Posts: 2
Will this guide work for a UK spec "Firestorm"
Hi guys.
I'm from the UK and this is my first post, but I've been reading this thread and stalking the forums for a few days now. I was linked to it from the UK Firestorm site (vtr100.org). This thread is a great read and is really helping me get to grips with my carbs so keep the info coming.
So on to my question, and, as per the title, will this guide work for a UK spec. machine (1999 version)? I ask this now, but in my haste to improve the fueling, I've actually already started the mods. From what my Haynes manual tells me (and from what I've discovered by dismantling the carbs), the UK spec carbs have different needles, and already have 48 pilot jets (although I bought new ones before starting") ). A previous owner had switched the front and rear needles, so it was worthwhile taking a look anyway. How would this have affected fueling? I've blocked a hole on the front slide and have put everything back together, although I now need new gaskets for the float bowls which probably aren't cheap
). A previous owner had switched the front and rear needles, so it was worthwhile taking a look anyway. How would this have affected fueling? I've blocked a hole on the front slide and have put everything back together, although I now need new gaskets for the float bowls which probably aren't cheap  (alternatives anyone?) Also, should I follow the recommendations for pilot screw settings? Before I changed them to the settings in the guide, they were both set at 1.25 turns out (factory settings are I believe, 1 turn out front, 1.25 turns out rear). I am very new to working on carbs, but the differences between UK and US specs made me wonder. Also, when I was dismantling the carbs, I noticed that one slide closed faster than the other (upon re-assembly, they both close smoothly and at the same rate). What effect would this have had?
The performance of my bike before I started the mods was as follows: Easy to start, but sometimes cut out (then started up again!) and coughed at low revs. Slightly rough cruising at around 30mph in 2nd/3rd. Extreme backfiring when decelerating (it sounds like multiple cannons being fired); I have aftermarket cans on and the backfiring is worse with the baffles out. Apart from that, the bike is stock (as far as I know) and I do not know when the carbs were last balanced (though I will do this when I next fire it up).
I can't see how following this guide will hurt the performance as it isn't great anyway, but if you think I should do anything differently, please let me know.
Regards, Ben.
I'm from the UK and this is my first post, but I've been reading this thread and stalking the forums for a few days now. I was linked to it from the UK Firestorm site (vtr100.org). This thread is a great read and is really helping me get to grips with my carbs so keep the info coming.
So on to my question, and, as per the title, will this guide work for a UK spec. machine (1999 version)? I ask this now, but in my haste to improve the fueling, I've actually already started the mods. From what my Haynes manual tells me (and from what I've discovered by dismantling the carbs), the UK spec carbs have different needles, and already have 48 pilot jets (although I bought new ones before starting
). A previous owner had switched the front and rear needles, so it was worthwhile taking a look anyway. How would this have affected fueling? I've blocked a hole on the front slide and have put everything back together, although I now need new gaskets for the float bowls which probably aren't cheap (alternatives anyone?) Also, should I follow the recommendations for pilot screw settings? Before I changed them to the settings in the guide, they were both set at 1.25 turns out (factory settings are I believe, 1 turn out front, 1.25 turns out rear). I am very new to working on carbs, but the differences between UK and US specs made me wonder. Also, when I was dismantling the carbs, I noticed that one slide closed faster than the other (upon re-assembly, they both close smoothly and at the same rate). What effect would this have had?The performance of my bike before I started the mods was as follows: Easy to start, but sometimes cut out (then started up again!) and coughed at low revs. Slightly rough cruising at around 30mph in 2nd/3rd. Extreme backfiring when decelerating (it sounds like multiple cannons being fired); I have aftermarket cans on and the backfiring is worse with the baffles out. Apart from that, the bike is stock (as far as I know) and I do not know when the carbs were last balanced (though I will do this when I next fire it up).
I can't see how following this guide will hurt the performance as it isn't great anyway, but if you think I should do anything differently, please let me know.
Regards, Ben.
Senior Member
Back Marker
Joined: Apr 2010
Posts: 219
From: Prague - Czech
Hi Ben, my bike is italian and advices from here work, altough US bikes have different setup (don�t know exactly how)
You need to spec your current setup - airfilter, exhausts, main jet numbers, needle positions, to see where can be an improvement.
Imo best way how to setup pilot jets is Idle Drop Procedure described in manual.
You need to spec your current setup - airfilter, exhausts, main jet numbers, needle positions, to see where can be an improvement.
Imo best way how to setup pilot jets is Idle Drop Procedure described in manual.
Thread Starter
Banned
MotoGP
Joined: Aug 2007
Posts: 5,942
From: Lake View Terrace, CA
Hi guys.
I'm from the UK and this is my first post, but I've been reading this thread and stalking the forums for a few days now. I was linked to it from the UK Firestorm site (vtr100.org). This thread is a great read and is really helping me get to grips with my carbs so keep the info coming.
So on to my question, and, as per the title, will this guide work for a UK spec. machine (1999 version)? I ask this now, but in my haste to improve the fueling, I've actually already started the mods. From what my Haynes manual tells me (and from what I've discovered by dismantling the carbs), the UK spec carbs have different needles, and already have 48 pilot jets (although I bought new ones before starting ). A previous owner had switched the front and rear needles, so it was worthwhile taking a look anyway. How would this have affected fueling? I've blocked a hole on the front slide and have put everything back together, although I now need new gaskets for the float bowls which probably aren't cheap (alternatives anyone?) Also, should I follow the recommendations for pilot screw settings? Before I changed them to the settings in the guide, they were both set at 1.25 turns out (factory settings are I believe, 1 turn out front, 1.25 turns out rear). I am very new to working on carbs, but the differences between UK and US specs made me wonder. Also, when I was dismantling the carbs, I noticed that one slide closed faster than the other (upon re-assembly, they both close smoothly and at the same rate). What effect would this have had?
The performance of my bike before I started the mods was as follows: Easy to start, but sometimes cut out (then started up again!) and coughed at low revs. Slightly rough cruising at around 30mph in 2nd/3rd. Extreme backfiring when decelerating (it sounds like multiple cannons being fired); I have aftermarket cans on and the backfiring is worse with the baffles out. Apart from that, the bike is stock (as far as I know) and I do not know when the carbs were last balanced (though I will do this when I next fire it up).
I can't see how following this guide will hurt the performance as it isn't great anyway, but if you think I should do anything differently, please let me know.
Regards, Ben.
I'm from the UK and this is my first post, but I've been reading this thread and stalking the forums for a few days now. I was linked to it from the UK Firestorm site (vtr100.org). This thread is a great read and is really helping me get to grips with my carbs so keep the info coming.
So on to my question, and, as per the title, will this guide work for a UK spec. machine (1999 version)? I ask this now, but in my haste to improve the fueling, I've actually already started the mods. From what my Haynes manual tells me (and from what I've discovered by dismantling the carbs), the UK spec carbs have different needles, and already have 48 pilot jets (although I bought new ones before starting
). A previous owner had switched the front and rear needles, so it was worthwhile taking a look anyway. How would this have affected fueling? I've blocked a hole on the front slide and have put everything back together, although I now need new gaskets for the float bowls which probably aren't cheap (alternatives anyone?) Also, should I follow the recommendations for pilot screw settings? Before I changed them to the settings in the guide, they were both set at 1.25 turns out (factory settings are I believe, 1 turn out front, 1.25 turns out rear). I am very new to working on carbs, but the differences between UK and US specs made me wonder. Also, when I was dismantling the carbs, I noticed that one slide closed faster than the other (upon re-assembly, they both close smoothly and at the same rate). What effect would this have had?The performance of my bike before I started the mods was as follows: Easy to start, but sometimes cut out (then started up again!) and coughed at low revs. Slightly rough cruising at around 30mph in 2nd/3rd. Extreme backfiring when decelerating (it sounds like multiple cannons being fired); I have aftermarket cans on and the backfiring is worse with the baffles out. Apart from that, the bike is stock (as far as I know) and I do not know when the carbs were last balanced (though I will do this when I next fire it up).
I can't see how following this guide will hurt the performance as it isn't great anyway, but if you think I should do anything differently, please let me know.
Regards, Ben.
Just remember it is a "base line" and each bike will require a bit of fine tuning to get it completely dialed in.
Also the main problem you were having was due to the slides closing at different rates. What had happened is that a diaphragm was not seated correctly. You should hear the air moving in the chamber when you push the slides up and let them close. If the slide just falls closed, then it is not seated correctly. With a lift hole plugged, the front slide will close a little slower than the rear but that is normal with this set up.
The settings I list for the pilots are also a base line, for safety I did state a fairly rich starting point, which IMHO is always better than too lean.
You can and should play around with them to see where your bike runs the best but as started in the last post, the idle drop method is the best way to set them.
Seasoned tech
SuperSport
Joined: Apr 2012
Posts: 576
From: Issaquah, WA
Also when filling the holes I'd recomend putting the tape on the outside of the slide then try to fill the hole from the inside. That way the small "head" of epoxy above the hole will further prevent it from ever falling into the intake and going through the engine in the event it should ever come dislodged.
Thread Starter
Banned
MotoGP
Joined: Aug 2007
Posts: 5,942
From: Lake View Terrace, CA
Also when filling the holes I'd recomend putting the tape on the outside of the slide then try to fill the hole from the inside. That way the small "head" of epoxy above the hole will further prevent it from ever falling into the intake and going through the engine in the event it should ever come dislodged.
1) it is very easy to get the epoxy in places it shouldn't be when trying to reach down into the side.
2) there is very little clearance between the Valve Plate (the plastic bit that holds the needle in) which can cause one of two issues. The possibility of not being able the fully seat the Valve Plate and also the possibility of causing a unwanted change in the air flow through the slide.
As for the plug falling out, if it ever did happen the chances are slim to none that any damage or problems would occur due to the temperature of the intake valve, which would melt the small plug almost instantly IMHO
Seasoned tech
SuperSport
Joined: Apr 2012
Posts: 576
From: Issaquah, WA
Agreed. It probably wouldn't hurt anything but in the event the timing was just right so it got caught in the valve seat when the valve closed or something it could cause an issue. And that's only in the slim chance it actually fell out.
I'm not really following you on it affecting the air flow in the slide being the air flow is on the outer side of the slide where you would be placing the tape so that it was perfectly smooth with the slide surface, obviously removing the tape once dried.
I'm not really following you on it affecting the air flow in the slide being the air flow is on the outer side of the slide where you would be placing the tape so that it was perfectly smooth with the slide surface, obviously removing the tape once dried.
Thread Starter
Banned
MotoGP
Joined: Aug 2007
Posts: 5,942
From: Lake View Terrace, CA
Though IMHO there is a greater chance of it coming out while the engine is running and even at idle the valves are opening and closing so fast I just can't see it happening. Though like always YMMV
If one got a little too liberal with the epoxy you could end up with some weird flow paths which might change the speed at which the slide opens and closes.

Senior Member
Superstock
Superstock
Joined: Apr 2007
Posts: 293
It's been years since I have been into the carbs except for slight needle adjustments of the FactoryPro kit that is in there a few years back in an attempt to get slightly better mileage on a long trip. Any leaner on the needles, even one shim's worth (1/2 a needle clip), would make it lean surge annoyingly under steady cruising throttle. So, my experience is that the superhawk is happiest on the slightly rich side of things. That said, I live at sea level, and have noticed that at elevations 5,000ft and up when playing HARD, there is a pronounced step in performance when it gets to certain revs (6-7k, I don't recall exactly). I know the FactoryPro kit comes with different needles, and I believe different springs in addition to the jetting changes.
I was in doing a valve adjustment the other day (rear cylinder's valves finally moved enough to change shims after 53k miles!) and decided after re-reading this thread to pop open the carbs and refresh my memory as to the jetting. I was kind of shocked to see a 185F and 190R! The thing certainly runs well, pulls well at sea level at all revs and is pretty happy over-all, but when followed at elevation, I get comments that it is definitely stinky rich. I am committed to running these same needles and springs, since they are what I currently have, and I don't have the stock items, but I suspect that ordering a few smaller jets is in order to see if I can gain back a few mpg's (I get about 33-34 in travel mode and about 30mpg when playing harder).
Wondering whether:
a: Do ya'll think filling a lift hole on a FactoryPro equipped bike (different needles/springs) is worth the time/effort?
b: with a full morwaki ti system, but no other peformance mods to the engine other than intake porting/cleanup, what would be good baseline jetting to try?
I see Stephan has a similar setup...maybe that's a good place to start. I just hate to screw with what has worked flawlessly for me for 10's of thousands of miles, just to get a mpg or please the nose of the person riding my 6
Seasoned tech
SuperSport
Joined: Apr 2012
Posts: 576
From: Issaquah, WA
I'm not sure how the Moriwaki system compares to my M4 full system but when I got my bike it popped bad on decel and had a stumble around 6 or 7K RPM on a hard roll on. I opened up the carbs and from what I'm told have a Factory Pro kit. It had 50 pilots and 178/180 mains. I plugged one hole in the front carb, put 48 pilots in it, put the mains to 175/178 and set the pilot screws at 2.5 turns out and it ran flawlessly. In an effort to try to get better mileage I then dropped the needles 1/2 a clip position and it seemed to run great on any kind of roll on at any RPM. Then while cruising I found the issue, just as you described it pops back in the carbs and surges at light throttle cruising below about 3K rpm. Going to move the needles back and I think it'll be pretty much spot on.
If a guy knew exactly where the needle was sitting while cruising and poping you could possibly turn them down a slight touch there but I think that'd take a lot of tinkering.
If a guy knew exactly where the needle was sitting while cruising and poping you could possibly turn them down a slight touch there but I think that'd take a lot of tinkering.
Thread Starter
Banned
MotoGP
Joined: Aug 2007
Posts: 5,942
From: Lake View Terrace, CA
What color are your plugs? These bikes are more than happy to run very rich. If you asked me, I would tell you the same thing I said in the first post of this thread. 175\178 mains with 48 pilots or 178\180 mains with 45 pilots as a place to start.
Senior Member
Superstock
Superstock
Joined: Apr 2007
Posts: 293
Yes it will help smooth things out,IMHO
What color are your plugs? These bikes are more than happy to run very rich. If you asked me, I would tell you the same thing I said in the first post of this thread. 175\178 mains with 48 pilots or 178\180 mains with 45 pilots as a place to start.
What color are your plugs? These bikes are more than happy to run very rich. If you asked me, I would tell you the same thing I said in the first post of this thread. 175\178 mains with 48 pilots or 178\180 mains with 45 pilots as a place to start.
-R
Senior Member
Back Marker
Joined: Jan 2009
Posts: 224
From: Hills of Kentucky
Okay folks...here's my .02 for 8541's carb setup on my '05 SH. After pulling the carbs about 10x and having the whole procedure down to about 15 minutes for total removal, I decided I would try it per 8541's recipe. I pm'ed him about an issue and then followed what he prescribes as it is written. It worked like a charm and I was thrilled. My bike is all stock and I've done the de-pair, tps setting, etc. I was wanting to try to get the carbs where I thought they should be and, at least on my 05, 8541's carb setup is the final answer.
For my '01, I followed Hawkrider's prescription and it worked perfect for that particular bike (all stock, also) but that wouldn't work for the '05.
My setup on the '05 is as follows:
#48 slows installed in both carbs (thanks HRCA#1!)
total shim stack on front needle-.040
total shim stack on rear needle-.060
front screw-2.25 turns
rear screw-2.50 turns
one hole plugged on front slide
Couple things I do when removing the carbs that can ease any probs...I connect the two fuel lines together with a piece of tubing after I pull em off the tank to keep gas from going everywhere and I connect the coolant lines the same way after I pull em off the carbs to keep coolant from spilling. Instead of removing the choke cables from the carbs, I take the nut off the choke cable bracket and remove the entire cable with the carbs. The choke **** slides under everything easily and is not difficult to get back in place.
Hope this helps...and thanks to all who participate on this site. It sure has helped me coz I know I can find the answers here.
Thanks to 8541Hawk and Hawkrider for all you do!
Last edited by tbartley; Jun 27, 2012 at 08:18 AM.


