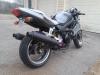
Scottiemann goes streetfighter

Senior Member
SuperBike
Joined: Jul 2011
Posts: 1,461
From: South of Live Free or Die & North of Family Guy

Retired- but not tired!
SuperBike
Joined: Aug 2010
Posts: 1,481
From: Pittsburgh
Thread Starter
Senior Member
SuperBike
Joined: Feb 2007
Posts: 1,252
From: boston
So there should be more pics but I'm wayy too lazy for that **** right now and I keep getting out of work late so horrible lighting... but I do have an update
As far as mechanical(non-electrical) goes I seem to have pretty much everything I need for everything, However I have been trying to get to the hardware store after work but If they're not completely slamming me out the door I'm sent to go help some lazy ******* out... but I need fittings for my res tank and bolts for my handlebar clamps.
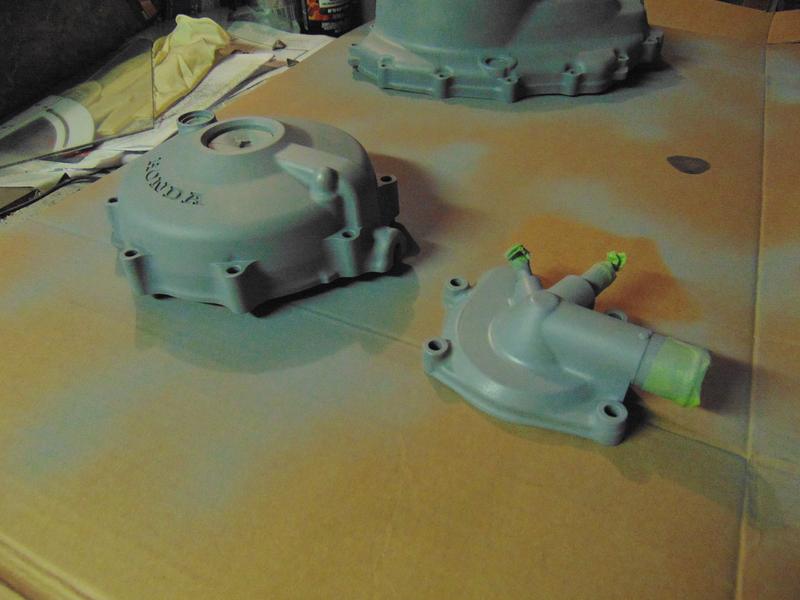
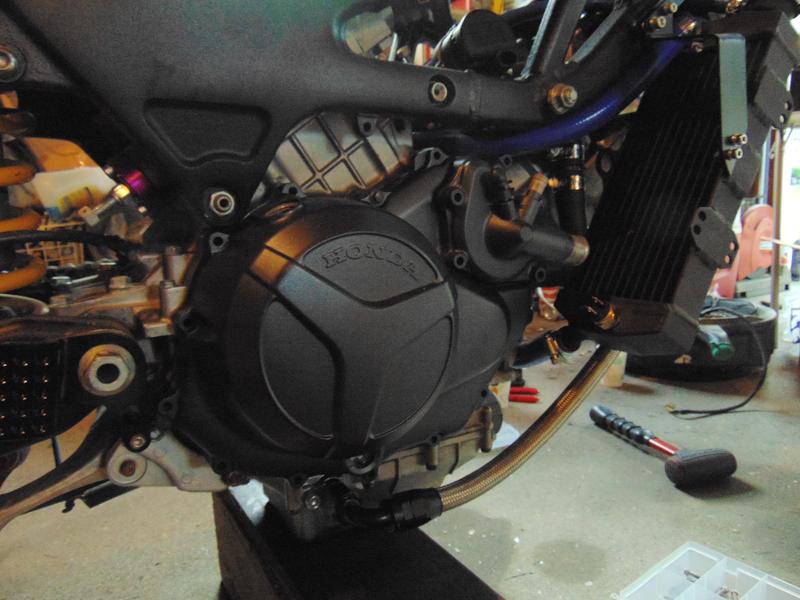
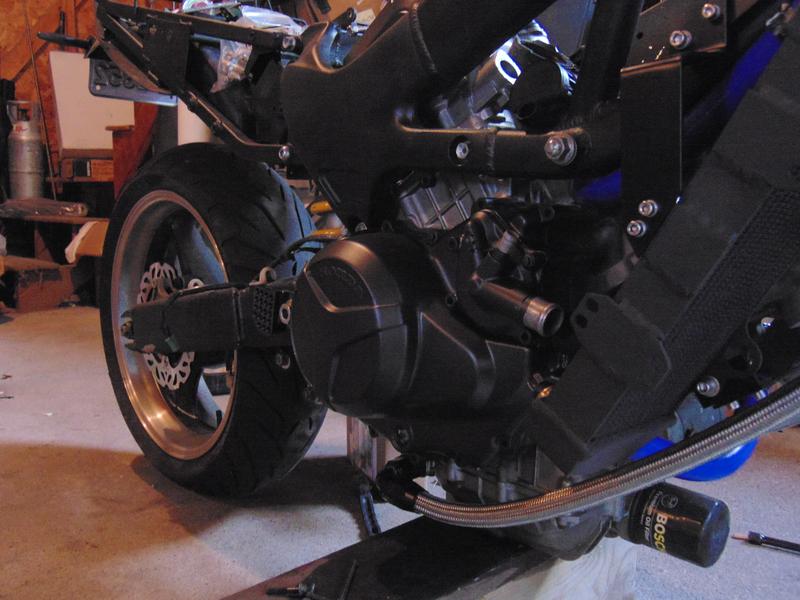
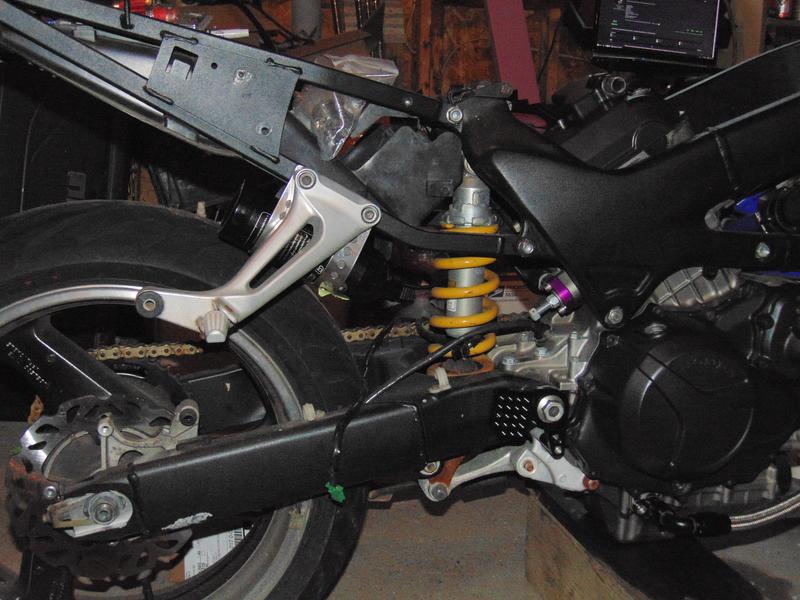
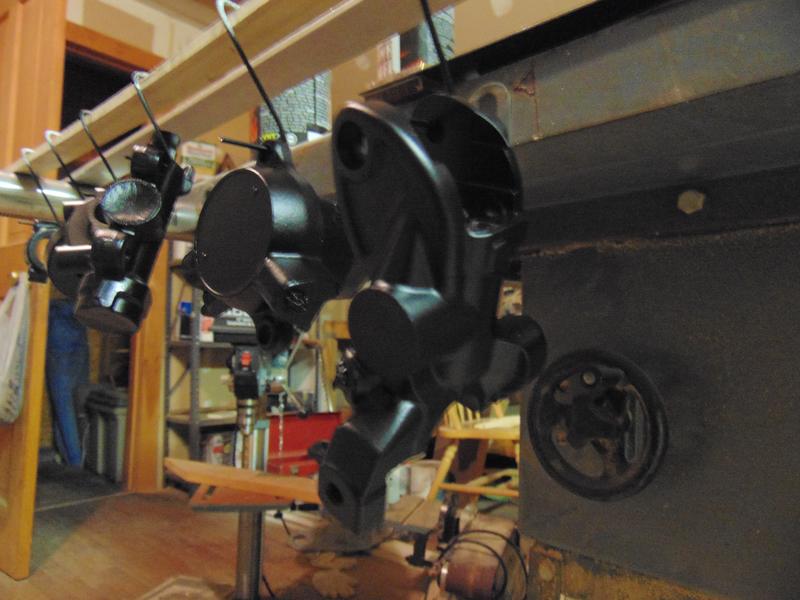
Last night I painted the stator cover, clutch cover and water pump cover, looks awesome, picture the factory valve covers blacker and more metallic... my night time pics dont do it justice (Ruvik can vouch for that one) These are temporarily mounted at the moment just to keep my engine closed up, gonna let them cure a couple days before crankin bolts down on the fresh paint.
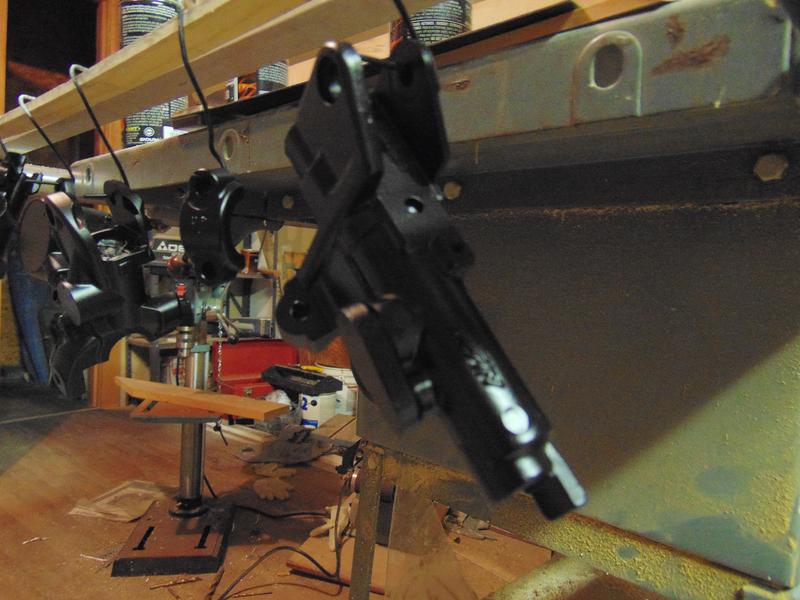
The rear brake master is ready for paint, the front brake master is torn down and needs clean and prep, working on the clutch master and slave now... then come the calipers strip/clean/prep/paint/rebuild
BTW if anyone ever told me I dont need to rebuild my brakes-------your wrong...just sayin
As far as mechanical(non-electrical) goes I seem to have pretty much everything I need for everything, However I have been trying to get to the hardware store after work but If they're not completely slamming me out the door I'm sent to go help some lazy ******* out... but I need fittings for my res tank and bolts for my handlebar clamps.
Last night I painted the stator cover, clutch cover and water pump cover, looks awesome, picture the factory valve covers blacker and more metallic... my night time pics dont do it justice (Ruvik can vouch for that one) These are temporarily mounted at the moment just to keep my engine closed up, gonna let them cure a couple days before crankin bolts down on the fresh paint.
The rear brake master is ready for paint, the front brake master is torn down and needs clean and prep, working on the clutch master and slave now... then come the calipers strip/clean/prep/paint/rebuild
BTW if anyone ever told me I dont need to rebuild my brakes-------your wrong...just sayin
Thread Starter
Senior Member
SuperBike
Joined: Feb 2007
Posts: 1,252
From: boston
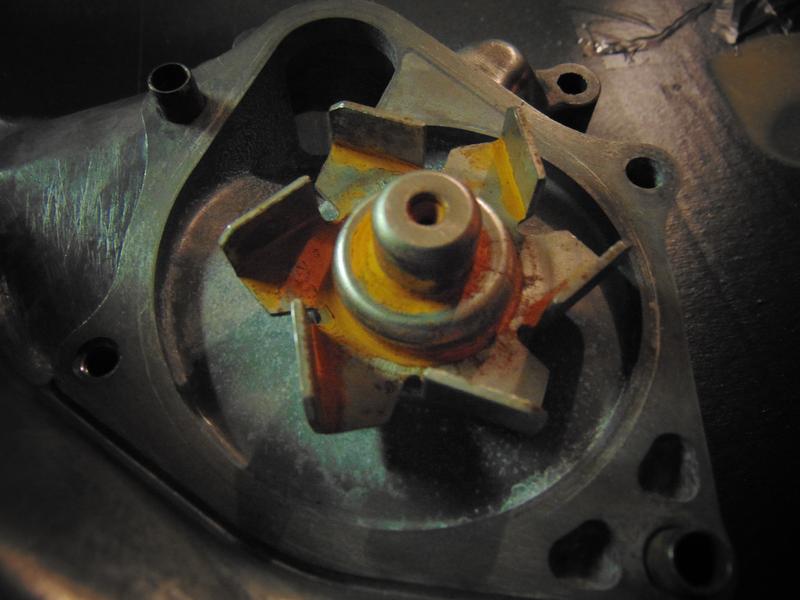
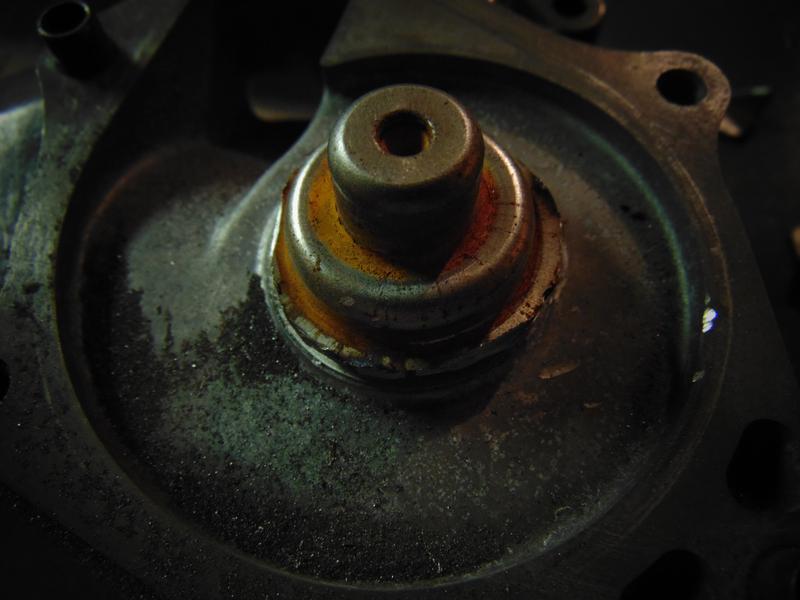
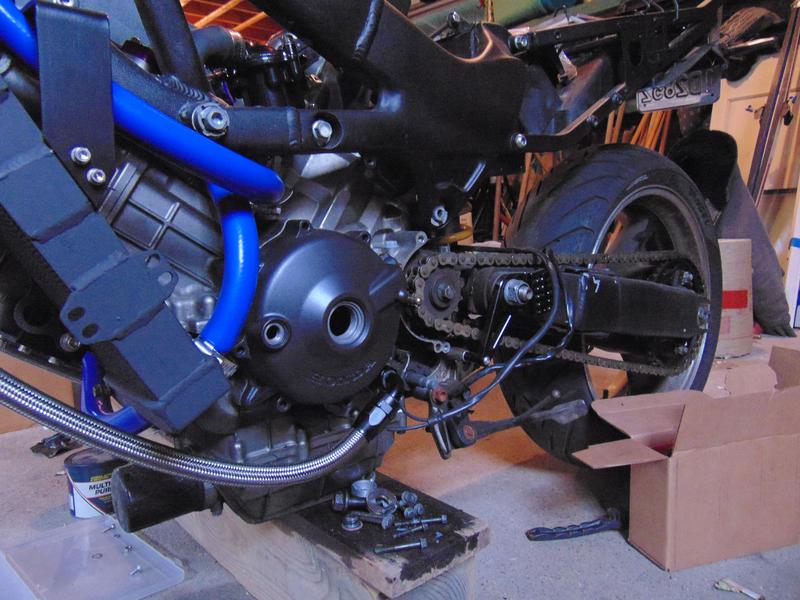
so first things first, I cut off the mechanical water pump fins for now. In the future I'll make up a solid aluminum plug for it. I painted all my engine covers besides the front sprocket cover(havent gotten around to that yet). And they are temporarily mounted for now.

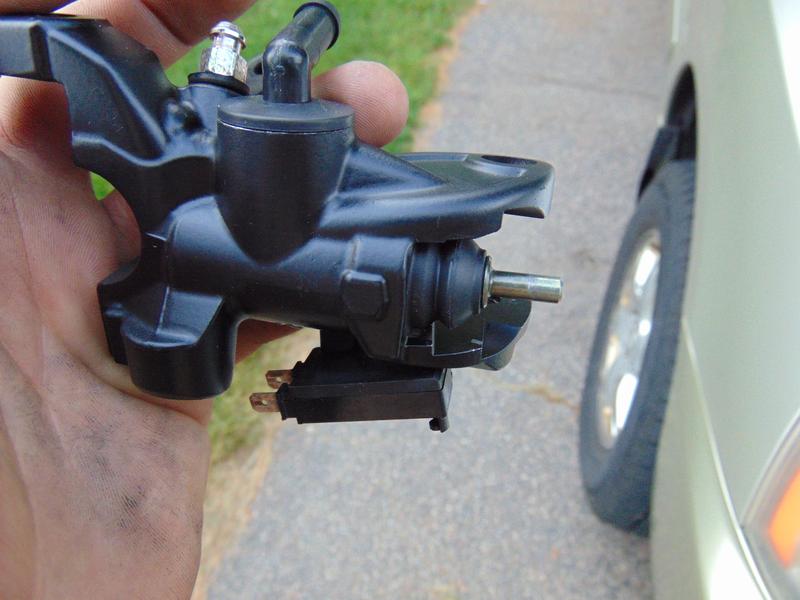
As for my final decision on the res tank and mounting position... I'm going with the CO2 tank mounted to the subframe. As I will be getting better hangers for my exhaust I plan to use the cheap ones from danmoto for the tank. I may have to space out the pegs a little for tire clearance but no big deal. I have read online that the valve is a 3/8" NPT thread but this one is not, it is very close however, the thread pitch is the same and the threads per inch is the same but it is ever so slightly skinnier in diameter. So in that regards I'm just going to run a 3/8"NPT tap through it and shouldnt have any problems.


As for my final decision on the res tank and mounting position... I'm going with the CO2 tank mounted to the subframe. As I will be getting better hangers for my exhaust I plan to use the cheap ones from danmoto for the tank. I may have to space out the pegs a little for tire clearance but no big deal. I have read online that the valve is a 3/8" NPT thread but this one is not, it is very close however, the thread pitch is the same and the threads per inch is the same but it is ever so slightly skinnier in diameter. So in that regards I'm just going to run a 3/8"NPT tap through it and shouldnt have any problems.
Thread Starter
Senior Member
SuperBike
Joined: Feb 2007
Posts: 1,252
From: boston
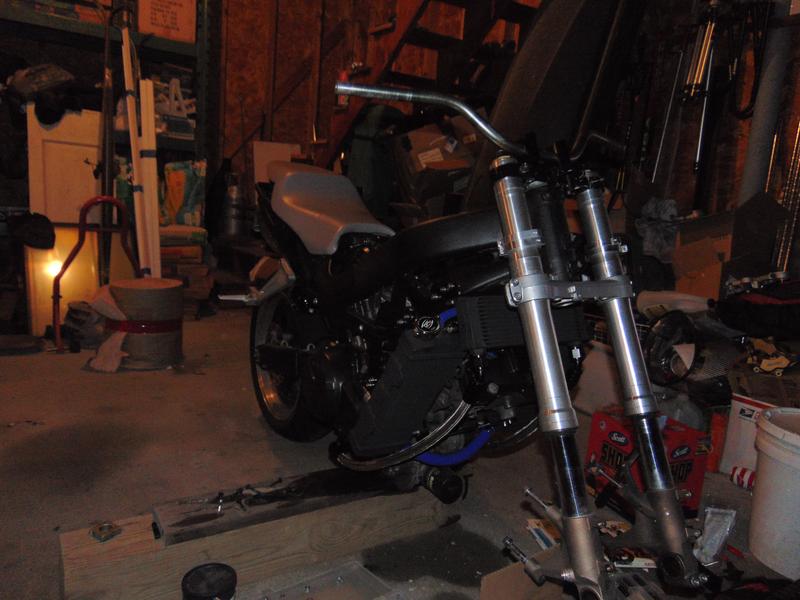
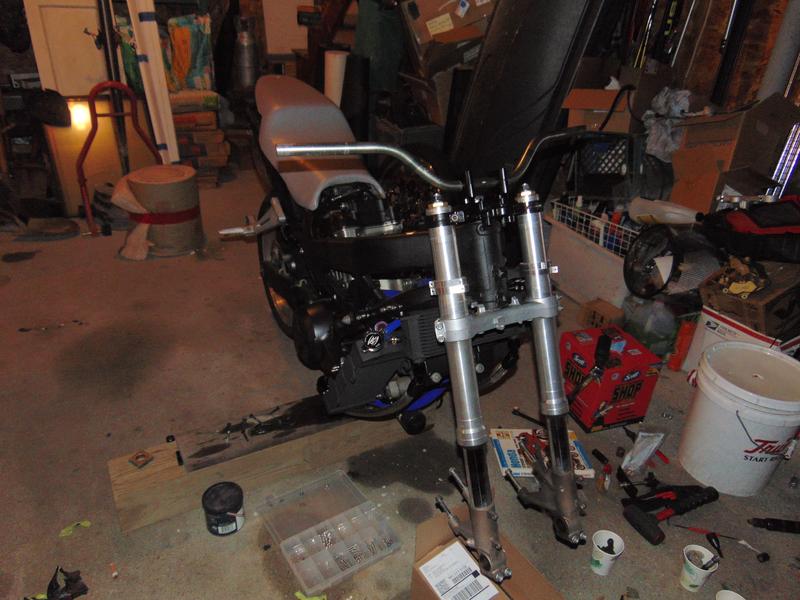
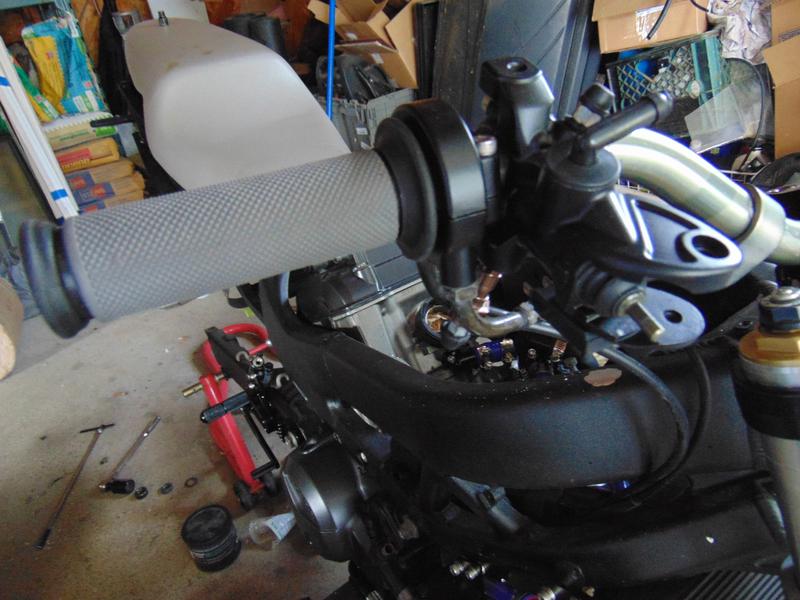
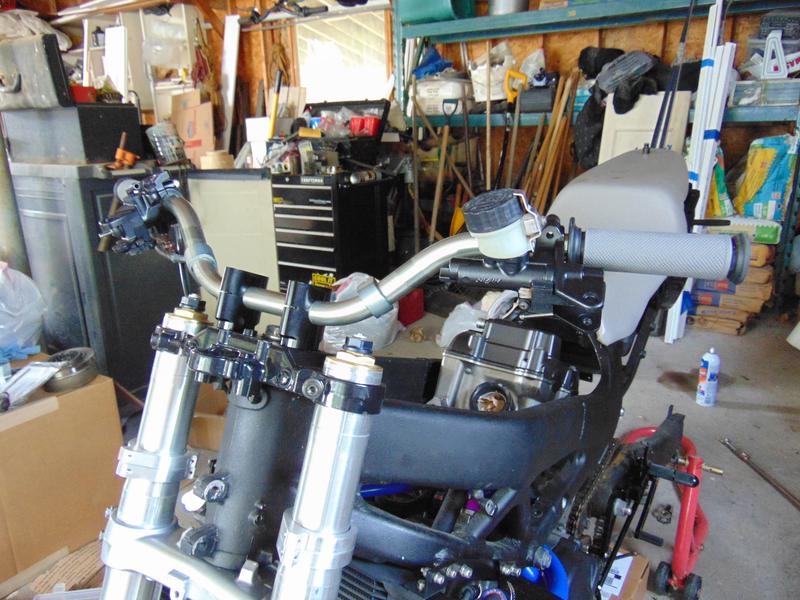
finally got to the hardware store and grabbed bolts and washers for my handlebar mounts. Had to freeze the mounts to get the existing studs out. So the triples are fully installed, the forks are going to be torqued down tonight but the front wheel (hawheel) still has to be prepped and painted...
Thread Starter
Senior Member
SuperBike
Joined: Feb 2007
Posts: 1,252
From: boston
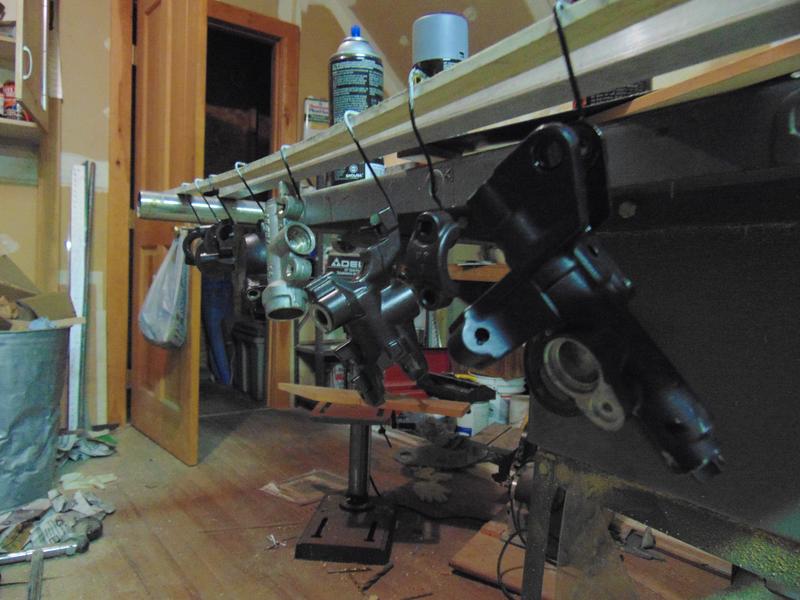
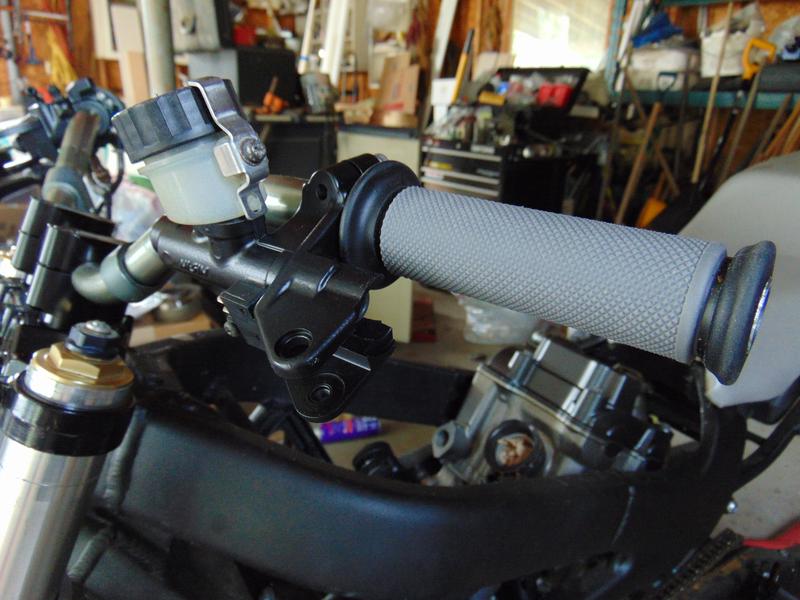
got my front brake M/C, rear brake M/C, clutch M/C, clutch slave and throttle housing painted satin black. Pics tomorrow because I'm too lazy lol
will be painting my light switch housing and kill switch housing to match, just have to disassemble and prep/paint...
will be painting my light switch housing and kill switch housing to match, just have to disassemble and prep/paint...
Thread Starter
Senior Member
SuperBike
Joined: Feb 2007
Posts: 1,252
From: boston
WTF!!!!!!! I'm about to call today a complete loss....
Got the day off from work, Great!
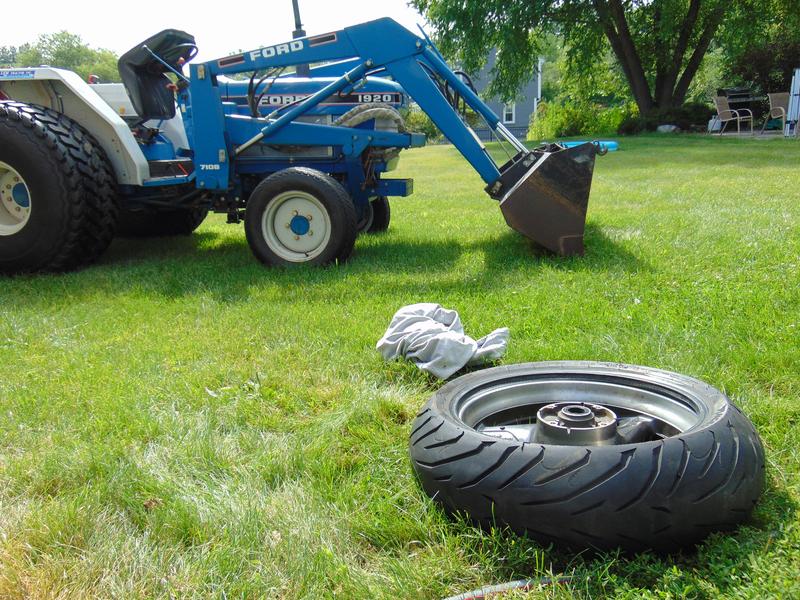
Came home, dismounted the rear rim, removed all the rotors and bullshit from the front and rear rim and put all 3 rims in the car. Get to the local bike shop and ask the guy if he can dismount 1 tire and pop in 2 valve stems, ya know-a 15 minute job, his response "its gonna take a while" me-"thats fine I have to run some errands" him-"no I mean I wont get to it for atleast a week"... I just chuckled and left... whatever
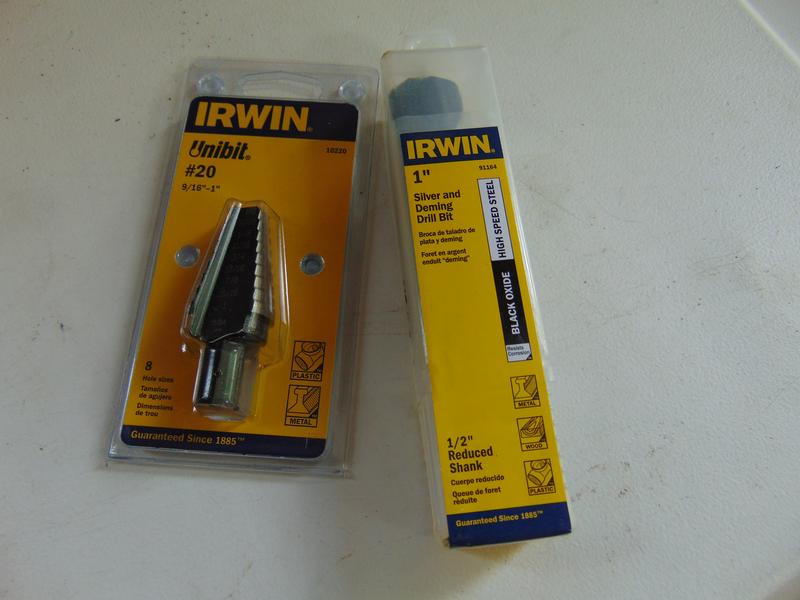
Go to 3 different hardware stores to grab some hardware for my headlight mounts, a stepping reamer that goes up to 1" and a drill bit 1", and a unicorn... whats the unicorn you ask? a 3/8"MIP(NPT) brass fitting with a 5/16" barbed end....yea....doesnt exist... and no one carries a stepping reamer above 7/8" WTF!
Defeated I get home and break out the hardware for the headlight to find out that the machine shop that made these up, that have been making these up for this headlight for years, tapped the clamps with SAE threads...WTF!
So I meddled around for a while and decided to go try a different hardware store... atleast get the right hardware for the headlight mount and the hardware store doesnt even have SS SAE hardware smaller then 1/4"...ok ok be cool....
To make the trip away from the garage worth it I decided to try a different hardware store (remember this is hardware store #5). Finally have the hardware for my headlight! yes! I found a stepping reamer that goes up to 1"! yes! Still cant find the unicorn....whatever, I can piece it or stretch the hose to 3/8"
So I get home and start messing with my headlight mount and yea... I'm going to need a lot more hardware to space these brackets out... WTF!WTF!WTF!
So now it is after 5pm and I have accomplished nothing.... I need more beer...rant over
Got the day off from work, Great!
Came home, dismounted the rear rim, removed all the rotors and bullshit from the front and rear rim and put all 3 rims in the car. Get to the local bike shop and ask the guy if he can dismount 1 tire and pop in 2 valve stems, ya know-a 15 minute job, his response "its gonna take a while" me-"thats fine I have to run some errands" him-"no I mean I wont get to it for atleast a week"... I just chuckled and left... whatever
Go to 3 different hardware stores to grab some hardware for my headlight mounts, a stepping reamer that goes up to 1" and a drill bit 1", and a unicorn... whats the unicorn you ask? a 3/8"MIP(NPT) brass fitting with a 5/16" barbed end....yea....doesnt exist... and no one carries a stepping reamer above 7/8" WTF!
Defeated I get home and break out the hardware for the headlight to find out that the machine shop that made these up, that have been making these up for this headlight for years, tapped the clamps with SAE threads...WTF!
So I meddled around for a while and decided to go try a different hardware store... atleast get the right hardware for the headlight mount and the hardware store doesnt even have SS SAE hardware smaller then 1/4"...ok ok be cool....
To make the trip away from the garage worth it I decided to try a different hardware store (remember this is hardware store #5). Finally have the hardware for my headlight! yes! I found a stepping reamer that goes up to 1"! yes! Still cant find the unicorn....whatever, I can piece it or stretch the hose to 3/8"
So I get home and start messing with my headlight mount and yea... I'm going to need a lot more hardware to space these brackets out... WTF!WTF!WTF!
So now it is after 5pm and I have accomplished nothing.... I need more beer...rant over
Senior Member
SuperBike
Joined: Jul 2011
Posts: 1,461
From: South of Live Free or Die & North of Family Guy
Scottie, sounds allot like Monday to me.
Stay positive bro' and call me, BTW, look under the lower triple tree, should be two threaded unused holes, you can utilize them for a headlight mounting brackets if you want to make something a bit different.
Stay positive bro' and call me, BTW, look under the lower triple tree, should be two threaded unused holes, you can utilize them for a headlight mounting brackets if you want to make something a bit different.
That one guy
Back Marker
Joined: Jun 2015
Posts: 228
From: Broken Arrow
Man I hate to hear the day is a loss. I had one of those days a few weeks back.
Are you planning on trying to hand ream to a 1 inch OD? Sorry if that sounds like a silly question but I don't know what your accessibility to a mil is like.
Are you planning on trying to hand ream to a 1 inch OD? Sorry if that sounds like a silly question but I don't know what your accessibility to a mil is like.
Thread Starter
Senior Member
SuperBike
Joined: Feb 2007
Posts: 1,252
From: boston
Well yesterday wasnt a complete loss, I parked my *** on my beer cooler and reassembled all my master cylinders, only moving to grab parts or beer lol
As for the swing arm, my PLAN is to use a drill with a stepping reamer to make a centered notch the length of the slot then use a 1" bit to go all the way. The stepping reamer will make sure I'm centered and provide me a guide for the drill bit...
I have no access to a mill...
As for the swing arm, my PLAN is to use a drill with a stepping reamer to make a centered notch the length of the slot then use a 1" bit to go all the way. The stepping reamer will make sure I'm centered and provide me a guide for the drill bit...
I have no access to a mill...
That one guy
Back Marker
Joined: Jun 2015
Posts: 228
From: Broken Arrow
That was what I figured you were going to do. Be careful man. I blew the tendons in my wrist a few years ago using a 1" bit and a phnumatic 300 rpm chuck drill to hand drill aviation grade hardened steel. Had it turning around 150 rpms when the bit snagged and the motor rolled my wrist. Tried to take to big of a bite. Finished the hole but had to use the bit as a nibbler.
Hope it goes well.
Also that sounds like the best place to rebuild master cylinders!
Hope it goes well.
Also that sounds like the best place to rebuild master cylinders!
Last edited by Meier Link; Jul 8, 2015 at 05:59 PM.
Thread Starter
Senior Member
SuperBike
Joined: Feb 2007
Posts: 1,252
From: boston
yea I've worked construction for 10+ years, I've had almost every tool catch on something at some point lol
anyone got a spare swinger for when I **** this one up? lol...jk...maybe...
anyone got a spare swinger for when I **** this one up? lol...jk...maybe...

Senior Member
SuperBike
Joined: Mar 2012
Posts: 1,544
From: New South Wales Australia
Scottie,
Just re read your post about the Dans mate.
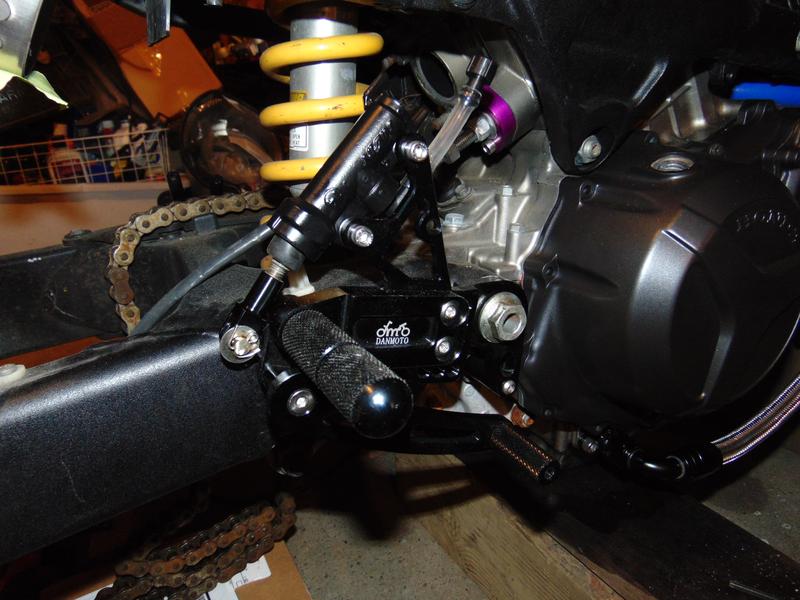
If you can replace the fasteners provided with some longer ones for the foot pegs and Loctite them. The originals are crap, I used 316 Stainless and to date have not had any problems. If you think the shifter is a pain wait until you ride it and the back brake drags because of the way the M/C is mounted !
Do a search and you will see what I mean!
Any more Pics?
Just re read your post about the Dans mate.
If you can replace the fasteners provided with some longer ones for the foot pegs and Loctite them. The originals are crap, I used 316 Stainless and to date have not had any problems. If you think the shifter is a pain wait until you ride it and the back brake drags because of the way the M/C is mounted !
Do a search and you will see what I mean!
Any more Pics?
Last edited by kenmoore; Jul 9, 2015 at 04:13 AM. Reason: Spelling
Thread Starter
Senior Member
SuperBike
Joined: Feb 2007
Posts: 1,252
From: boston
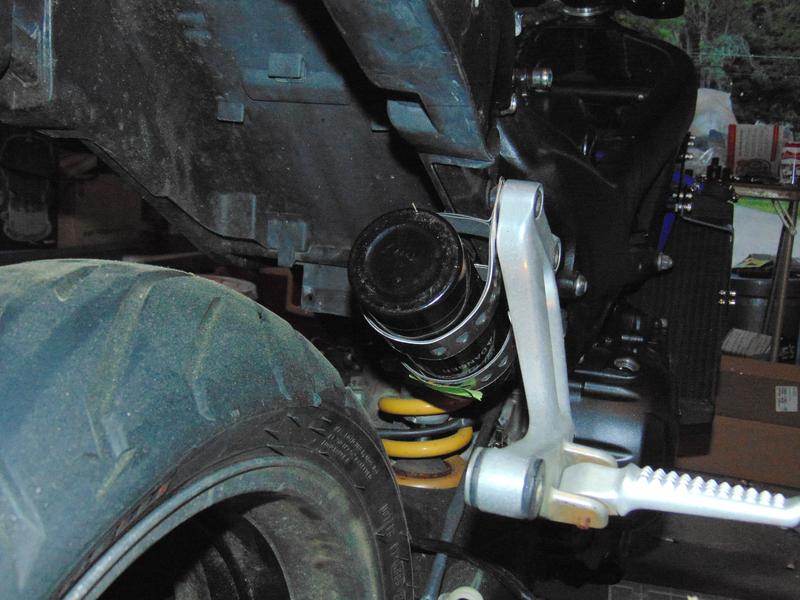
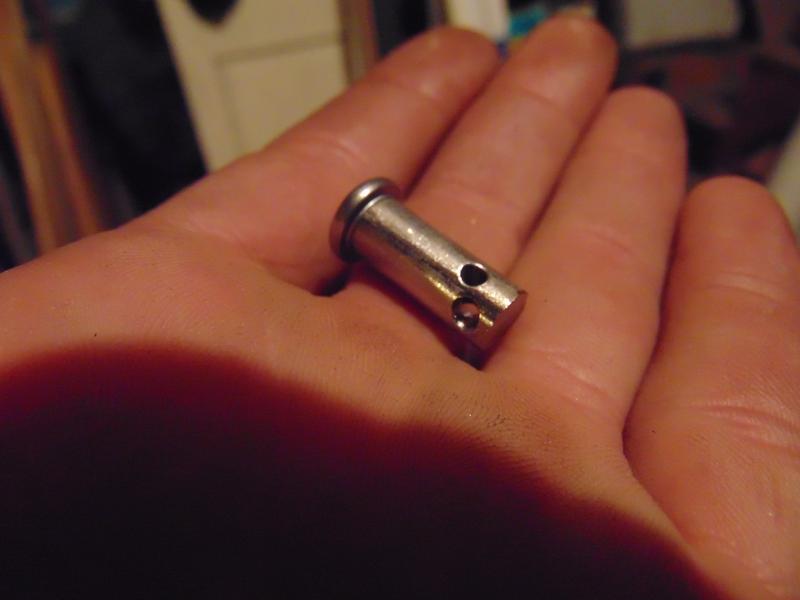
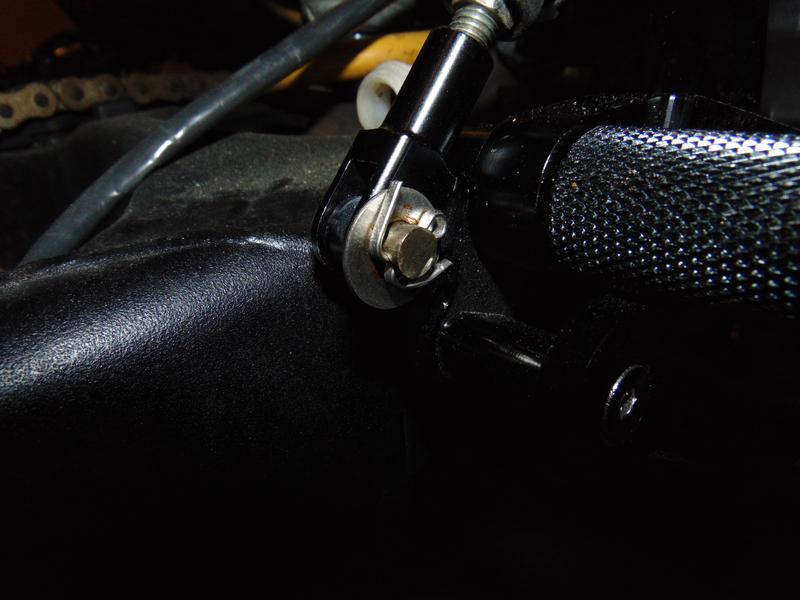
Yes I have read about the brake pivot, and last night I drilled out the threaded side to accept a universal SS pin, so the rear brake master is officially mounted, I will post pictures when I get home tonight.
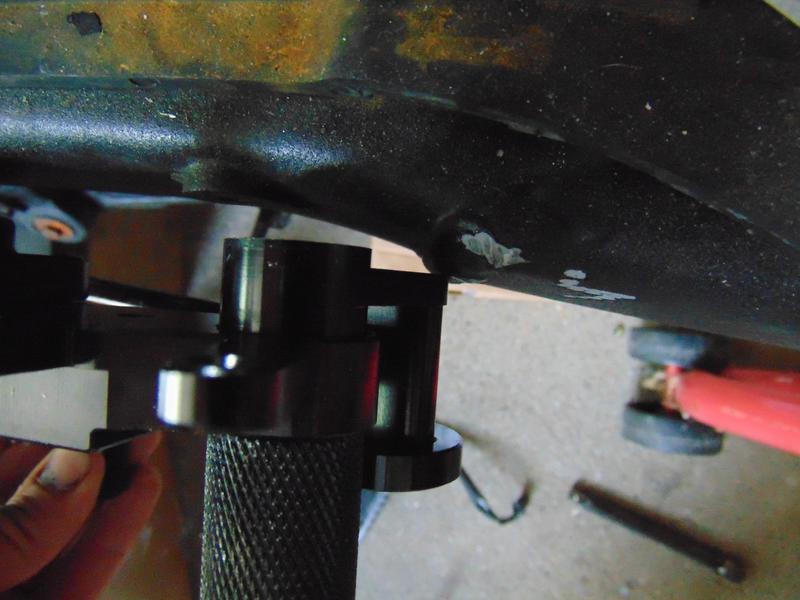
As for the shifter side, my plan is to make an aluminum spacer plate to go in between the peg mount and the swingarm side... basically when you push the shifter down its barely hitting the welds on the swingarm but adjusting it any farther forward and its hitting the peg mount.
I feel like Im speaking jibberish right now and pictures can better express what Im trying to say, so expect an *** ton of pictures when I get home lol

Thread Starter
Senior Member
SuperBike
Joined: Feb 2007
Posts: 1,252
From: boston
So remember my rant with the guy who couldnt take 15 minutes out of his day to dismount a tire?
Who needs a tire machine or a bead breaker when you got a Ford model 1920 lol
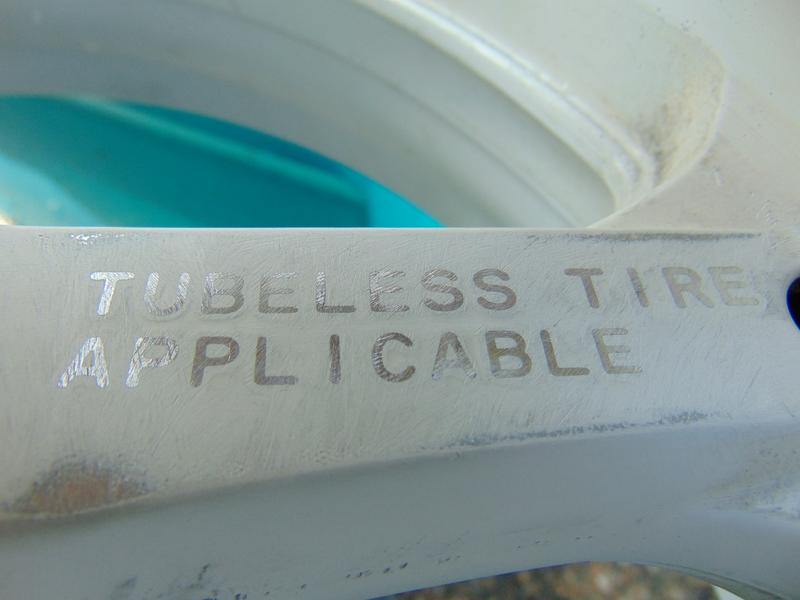
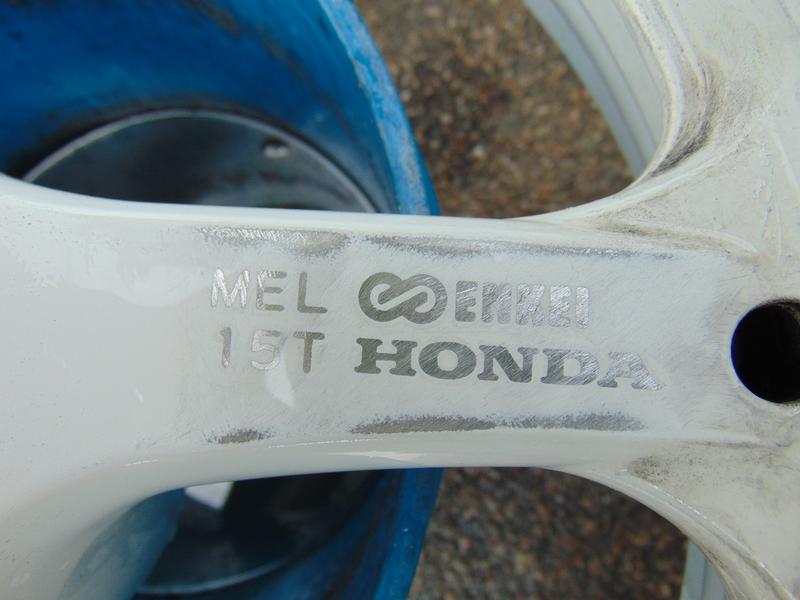
So I had the day off again, amazing I know, and today was definitely not a loss but I did spend the ENTIRE day getting the rear wheel prepped for paint. I dont know if I posted pics of this wheel when I recieved it but it had caked up grease everywhere over white powder coat. So I cleaned it, sanded most of it, HAND FILED down the casting marks FML... Atleast the front wheel was polished by the PO so all I need to do is sand it down. sanded down the rest of it and spent about an hour cleaning it up again ready for paint.
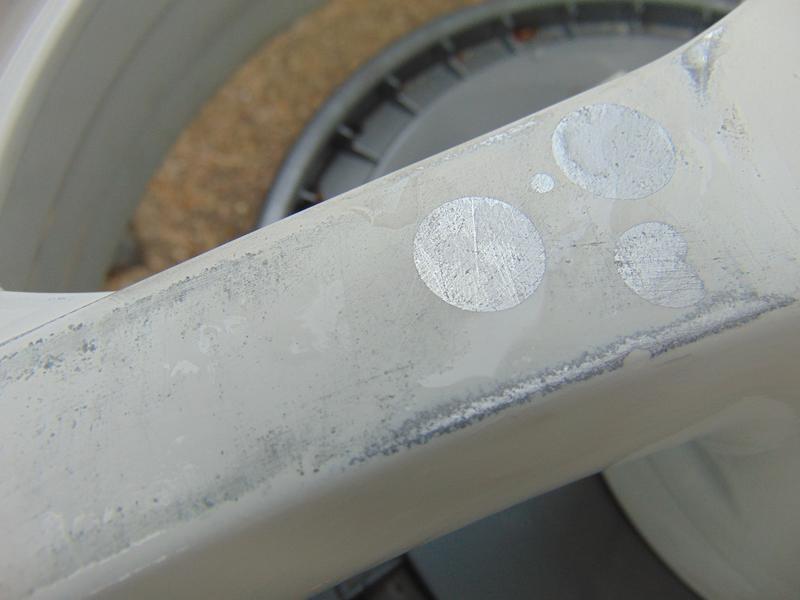
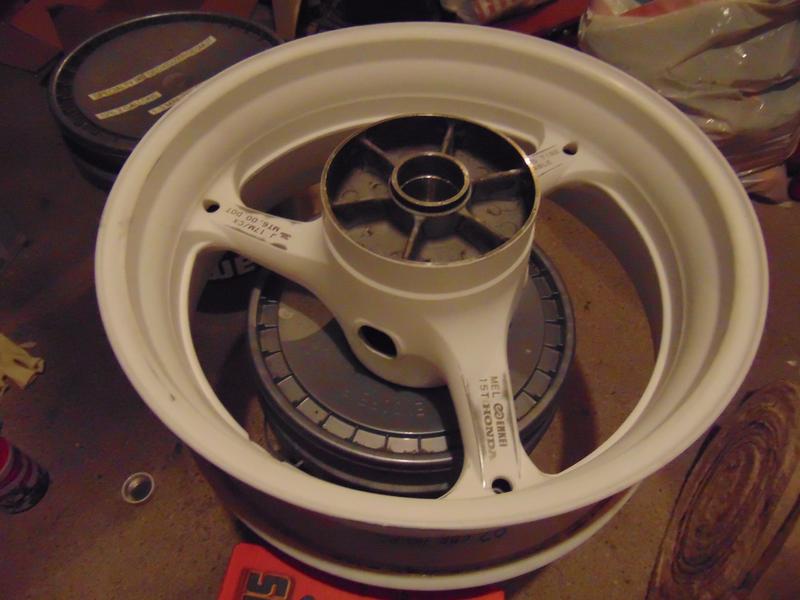
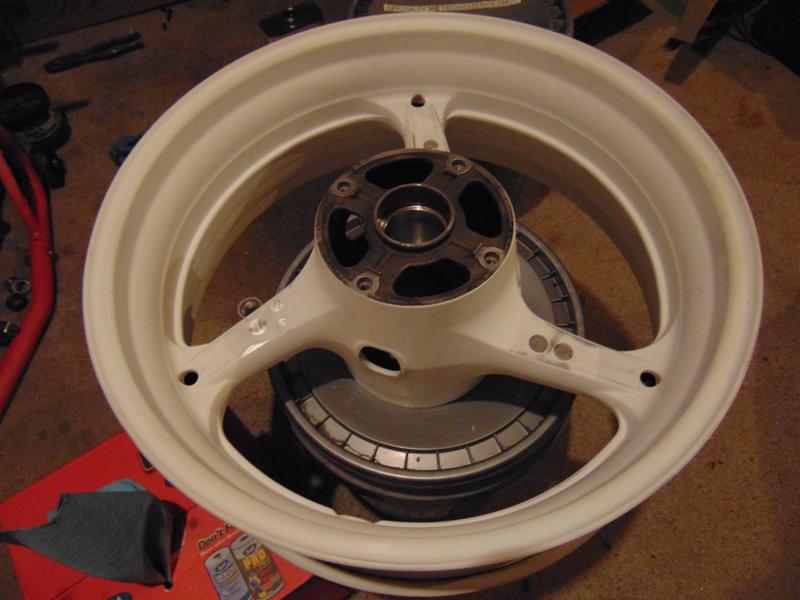
Damn white wheels on a black and white bike look sexy as **** but I am far too lazy to keep up with white wheels lol so they are going gloss black
Who needs a tire machine or a bead breaker when you got a Ford model 1920 lol
So I had the day off again, amazing I know, and today was definitely not a loss but I did spend the ENTIRE day getting the rear wheel prepped for paint. I dont know if I posted pics of this wheel when I recieved it but it had caked up grease everywhere over white powder coat. So I cleaned it, sanded most of it, HAND FILED down the casting marks FML... Atleast the front wheel was polished by the PO so all I need to do is sand it down. sanded down the rest of it and spent about an hour cleaning it up again ready for paint.
Damn white wheels on a black and white bike look sexy as **** but I am far too lazy to keep up with white wheels lol so they are going gloss black