
How to build fork attachments


Thread Starter
Senior Member
SuperBike
Joined: Oct 2008
Posts: 1,033

How to build fork attachments
So I just built a steering stabilizer fork mount. Ive decided to do a writeup on it.
The first step is always to make a pattern of the part to be made.

My forks are 41mm, so I made the hole the appropriate size.
then you transfer the part to the appropriate piece of material.
In my case thats a piece of 3/4 aluminum. I could have gone thinner but I want this mount to be extra strong.
There will be one pinch bolt. To aid drilling for the pinch bolt make a perpendicular surface. In this picture its the surface the piece is sitting on.

This helps you drill a straight and true hole. It helps if you punch where you want the hole, This will keep the bit from walking.
Drill the appropriate undersized hole for the tap you will use.

next I used a bandsaw to cut out the hole. The circle I drew was the size I needed. I cut to the inside of the pencil line to make the hole a little smaller.
Then I use a flap wheel to smooth out the saw marks and enlarge the hole slightly until it snugly fits the fork tube.

Do a little at a time until it fits snug. I made it fit very tight because this mount will have alot of force applied to it.

Part 2 coming as soon as pics upload
The first step is always to make a pattern of the part to be made.
My forks are 41mm, so I made the hole the appropriate size.
then you transfer the part to the appropriate piece of material.
In my case thats a piece of 3/4 aluminum. I could have gone thinner but I want this mount to be extra strong.
There will be one pinch bolt. To aid drilling for the pinch bolt make a perpendicular surface. In this picture its the surface the piece is sitting on.
This helps you drill a straight and true hole. It helps if you punch where you want the hole, This will keep the bit from walking.
Drill the appropriate undersized hole for the tap you will use.
next I used a bandsaw to cut out the hole. The circle I drew was the size I needed. I cut to the inside of the pencil line to make the hole a little smaller.
Then I use a flap wheel to smooth out the saw marks and enlarge the hole slightly until it snugly fits the fork tube.
Do a little at a time until it fits snug. I made it fit very tight because this mount will have alot of force applied to it.
Part 2 coming as soon as pics upload
Thread Starter
Senior Member
SuperBike
Joined: Oct 2008
Posts: 1,033
Now you find out your bolt size, and drill it out untill the pinch bolt cut. This lets the bolt only thread into the other side of the piece, pinching the clamp closed on to the fork.

now you can cut off the perpendicular surface

now I re copy the pattern on to the piece since I handled it so much the lines disappeared.
Now you can cut out your full shape.

and compare to your pattern

now you can cut off the perpendicular surface
now I re copy the pattern on to the piece since I handled it so much the lines disappeared.
Now you can cut out your full shape.
and compare to your pattern
Thread Starter
Senior Member
SuperBike
Joined: Oct 2008
Posts: 1,033
center punch where the bolt will mount.

then find your bolt size again, and drill it out.

and you get this.

anyone see the problem yet?

ok well here it is

so I did some more bandsaw work and ended up with this.

then find your bolt size again, and drill it out.
and you get this.
anyone see the problem yet?
ok well here it is
so I did some more bandsaw work and ended up with this.


Thread Starter
Senior Member
SuperBike
Joined: Oct 2008
Posts: 1,033
Next Ill sandblast the part and paint it black.
You can take the principals here and make headlight brackets, or anything you want to mount to the fork tubes.
The tools needed to make these are a bandsaw, drill and a hand file.
You can take the principals here and make headlight brackets, or anything you want to mount to the fork tubes.
The tools needed to make these are a bandsaw, drill and a hand file.

Thread Starter
Senior Member
SuperBike
Joined: Oct 2008
Posts: 1,033


Senior Member
SuperBike
Joined: Dec 2005
Posts: 1,689
From: South Lake Tahoe, CA, USA

that's good old-school fabrication.
I cringe at the thought of a saw-cut flapper-wheel hole for the clamp bore. In my mind, it should be a bit more precise.
But there I go, thinking again. It'll probably work just fine.
Good use of the tools you have available.
I cringe at the thought of a saw-cut flapper-wheel hole for the clamp bore. In my mind, it should be a bit more precise.
But there I go, thinking again. It'll probably work just fine.
Good use of the tools you have available.
Senior Member
SuperSport
Joined: Jun 2004
Posts: 818
From: Thornwood, NY
Can't wait to see this bike Truck!!!
Thread Starter
Senior Member
SuperBike
Joined: Oct 2008
Posts: 1,033
Hard like Rhinoliner but smoother
I used my calipers t see how round the hole was, surprisingly to you maybe, but not me, its very round. Plenty good for a clamp. Now I wouldnt suggest making triples this way.
That was my first thought as well... as I would have spent like crazy on a hole saw or cutter to make the thing... would have cost me 8x more than just buying a part... and this kid did the same thing with basic tools... guts and skills pay off sometimes!!!
Can't wait to see this bike Truck!!!
Can't wait to see this bike Truck!!!

Thread Starter
Senior Member
SuperBike
Joined: Oct 2008
Posts: 1,033
I just might do that.
Ill take both the triples, some brackets, and some other stuff to work on saturday and sand blast it all.
I did a little more work on the bracket and made it look better. Pics uploading
Ill take both the triples, some brackets, and some other stuff to work on saturday and sand blast it all.
I did a little more work on the bracket and made it look better. Pics uploading

Senior Member
SuperBike
Joined: Mar 2007
Posts: 1,611
From: Belgium, WI
what was the width on the bandsaw blade that you used? That is a pretty tight curve! And, my final question, why don't you have a cnc at home in the garage. That would have been so much easier.
Senior Member
SuperBike
Joined: Mar 2007
Posts: 1,611
From: Belgium, WI
I imagine that even if the blade could go tighter, it probably got pretty warm. 1928, not bad. But, i gotcha beat, we have a lathe that has almost a 24"x8' capacity. its useless for almost every project. the other lathes are pretty small but could do your project easily. The problem is the two hours that you put into getting the 4 jaw setup. I had a half hour into truing my clutch basket prior to machining.


Senior Member
SuperBike
Joined: Mar 2007
Posts: 1,611
From: Belgium, WI
After 15k miles, I did mine. I missed my first 1-2 shift it came up so fast. I also hade the same thing happen when I corrected an air-fuel ratio problem that was causing a "pause" at 6500rpm. The thing that you will notice with the hawk (if you go radical on the amount you cut off) is that it isn't fun to putter around at lower rpms. you will get over if you are interested in "fun" riding.
Thread Starter
Senior Member
SuperBike
Joined: Oct 2008
Posts: 1,033
Ya thats the same deal with the monster.
You will loose some of the inertia for putting around town, but everything is a tradeoff.
Ill probably end up taking about half the weight off that the most radical ones do.
I need to look at the flywheel closer since I have it out. See if I can remove some of the outer most material.
That lathe I mentioned above, it will be the one turning every CCT I sell.
Senior Member
SuperBike
Joined: Mar 2007
Posts: 1,611
From: Belgium, WI
You will want to leave the basket alone, even if you are tempted to cut the outer edge. The timing marks are located on that edge. The weight portion can be drastically reduced, but I wouldn't remove it all the way up to the starting sprague. I kept a .2-.25 inches of it for "centering" the sprague. I just felt that there could be some loads help by that lip. You will know what I am talking about when you see it. good luck,
Bill
Bill
Senior Member
SuperBike
Joined: Dec 2005
Posts: 1,689
From: South Lake Tahoe, CA, USA
Ya I know what you mean, and I didnt feel like getting out the 4 jaw chuck for the lathe, that things a bitch and a half.
I used my calipers t see how round the hole was, surprisingly to you maybe, but not me, its very round. Plenty good for a clamp. Now I wouldnt suggest making triples this way.
Thanks man.
I used my calipers t see how round the hole was, surprisingly to you maybe, but not me, its very round. Plenty good for a clamp. Now I wouldnt suggest making triples this way.
Thanks man.
I spent several years making one-off parts for racing yachts, on a Bridgeport mill.
We would saw and sand, where appropriate, but if I needed a big, round hole, I'd bore it.
I miss those days, long as they were.
I think what you ended up with is perfectly adequate for what it is and for clamping on a thick-walled steel tube
Senior Member
MotoGP
Joined: Aug 2006
Posts: 2,934
From: altoona, pa
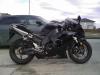
is that a gsxr SS cause I have one and it looks like the one in the pic?
I tried to mount it on the right front of the frame, but it wasn't nearly long enough.
did you ride it yet?
did you weld a tab on the triple clamp?
are you selling the clamps?
thanks, Nathan
Thread Starter
Senior Member
SuperBike
Joined: Oct 2008
Posts: 1,033
nice job on the SS mount duc!
is that a gsxr SS cause I have one and it looks like the one in the pic?
I tried to mount it on the right front of the frame, but it wasn't nearly long enough.
did you ride it yet?
did you weld a tab on the triple clamp?
are you selling the clamps?
thanks, Nathan
is that a gsxr SS cause I have one and it looks like the one in the pic?
I tried to mount it on the right front of the frame, but it wasn't nearly long enough.
did you ride it yet?
did you weld a tab on the triple clamp?
are you selling the clamps?
thanks, Nathan
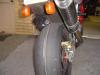
Havent ridden the bike yet, or cranked it.
I welded a mounting tab on the neck or the frame, me piece I made is what attaches the damper to the fork.
Im not selling the clamps, just thought Id post a how to thread.
Senior Member
MotoGP
Joined: Aug 2006
Posts: 2,934
From: altoona, pa
that's what I thought. looks just like mine. Mine is about about 3" closed and 6" open if I remember(a few weeks ago)
i bought the SS for my xr650l because it's more squirrly the faster you go, and the mefo tires seem to ecaserbate the wiggles. maybe I can borrow your idea for the xr, I don't know.
apersheate the gitbak
nathan
i bought the SS for my xr650l because it's more squirrly the faster you go, and the mefo tires seem to ecaserbate the wiggles. maybe I can borrow your idea for the xr, I don't know.
apersheate the gitbak
nathan

Thread
Thread Starter
Forum
Replies
Last Post
inderocker
Classifieds
6
Jun 7, 2010 12:22 AM
AngryOlaf
Knowledge Base
3
May 25, 2010 09:39 AM
HawkRider98
General Discussion
2
Sep 10, 2008 09:07 AM


