
easy diy rearsets link????


Senior Member
SuperBike
Joined: Aug 2009
Posts: 1,978
From: thorold ontario

I dunno about you... But the loosening and tightening there puts me in "Uh-oh" mode... There was no spacer to remove, so instead you have now made the rearset sit slightly angled... Yeah, it's a very, very small angle, but it's in a position on the bike that takes a large load on evey movement the bike makes, and if it fails will without a single doubt spit you off into the scenery... That's bad for several reasons...
One, you are putting a load on the sides of the bearings, since you are pressing things together not completely flat...
Two, the plate for the rearsets acts as part of a mechanical seal for the bearings, preventing crap from getting to the bearings, this is now not that tight...
Three, that piece is cast aluminium... It's very strong in some ways and scarily brittle in other... With that somewhat uneven load on it, it's entirely possible that it will snap och crack pretty easily... And the danger is that it's not the footpeg, it's the mount for the swingarm...
My suggestion is to dismount it, file the permanent spacer down, and if you ever feel like going back to stock, stick a shim there instead... That's just them mechanical engineer in me that's talking... No need to listen if you don't want too...
do you suggest i file the engine casing portion or that i file the rear set portion? i figured rear set portion in my head when i looked at it last night only because it seemed to have the available meet to remove and wasnt threaded. also if i remove the long bolt that holds the swing arm in place, will the swing arm pop off or is it in there tight enough that i can remove it yank the rear set grind off a bit and put it back in? last thing i want is working alone in the garage to have that bolt removed and have the swing arm pop off and have the bike fall or something.
Senior Member
SuperBike
Joined: Aug 2009
Posts: 1,978
From: thorold ontario
im gonna do some searching on this but what if i just use my motorcycle jack with a block of wood and put it under the oil pan to support it while its in the front wheel chock? i know jacking under the pan is always a big no no but im not sure what other way to do it

Out of my mind, back in 5
MotoGP
Joined: Nov 2006
Posts: 6,109
From: Skurup, Sweden
Well... Put it up on the front stand and a jack like you describe and then a few blocks of wood and something heavy behind the rear wheel and you can remove the bolt...
Like the last instruction though... Don't wiggle the bike around, because then things move out of alignment... Not a big problem, the suspension and stuff keep it in place, but it's a PITA to get all of it aligned and needs atleast 2.5 hands to get the bolt back in again...
Oh, and once you have removed the footpeg assembly, stick the bolt in there again... No need to tighten it or anything, just stick it back in...
The other way is a cargo sling to an overhead rafter or similar and connected to the rear subframe...
The way I look at things when attacking them with a file is simple... The engine cases are more expensive and more work to replace... Ie I'd put the file to the cheaper and easier part to remove...
Second tip... Stick a junk bolt through the hole like to bolt it to the bike... Mark the edge of the fixed spacer all the way around (Id use a metal file, since pens just get smudged, hence junk bolt)...
The reason is that there are no easy references for measuring... This way you just pop the bolt in, check the markings against your alu spacer and file until the markings match up... Also, if you mark it all the way around, checking that you get it flat becomes easier as well...

Senior Member
SuperBike
Joined: Apr 2010
Posts: 1,090
From: Big Lick
Hey Tweety, for reference, when I did mine, I loosely attached all the spacers and bolts, but then tightened the axle down per torque specs, then I tightened the spacer bolts. I've not had problems with the axle nor the spacers since doing so.
Thread Starter
Senior Member
MotoGP
Joined: Aug 2006
Posts: 2,934
From: altoona, pa
As far as jacking, I use a rolling car jack under the oil pan, with a thick piece hard rubber for protection. First, put a shim under the sidestand so the bike is almost straight up. Go around the other side and roll your jack under the oil pan toward the rear if you want to take weight off the rear and opp for the front. Jack up enough to slide another shim under the sidestand and place a shim under the exhaust to balance to prevent sway. The bike sits firmly on the jack and sidestand mostly straight up.
Out of my mind, back in 5
MotoGP
Joined: Nov 2006
Posts: 6,109
From: Skurup, Sweden
Well... With the front on a stand, and the rear barely touching, working on the swingarm becomes easier than your option... That way the angle of the bike puts some weight along the swingarm, holding it in place as long as you have something behind the wheel...
But it's a very good option for other operations... The thing is, if you completely unweight either the front or rear, when you slide the bolt out you get big problems...
But it's a very good option for other operations... The thing is, if you completely unweight either the front or rear, when you slide the bolt out you get big problems...
Senior Member
SuperBike
Joined: Aug 2009
Posts: 1,978
From: thorold ontario
All good info thanks guys. I did the same thing old yeller did. I loosely attached the spacer bolts and then tightened the swing arm bolt. also the shifter side spacer I used a big drill bit to countersink some holes to allow it to turn a little. regardless I'm gonna yank that side and file down the rear set and I like tweetys idea of the bolt and making a mark. thanks again. new pic to follow today :-)
Out of my mind, back in 5
MotoGP
Joined: Nov 2006
Posts: 6,109
From: Skurup, Sweden
Two opposite and exacly aligned forces cancel each other out completely or partially... Move the alignment ever so slightly and you get a dozen or so forces doing god knows what to calculate...
My teacher had a less polite word for it, but the polite word used in class after one PC bastard complained was "Uh-oh"...
And seeing how easy it is to fix it so that you aren't messing with the forces involved in clamping the swingarm pivot point at all, well I think it's worth it...
Senior Member
SuperBike
Joined: Aug 2009
Posts: 1,978
From: thorold ontario
ok, so i just came back from the garage, got some pictures too. the rear set sits completely flush with the swing arm. there are no gaps and without getting my vernier out and getting covered in chain grease she looks to be sitting perfectly. the bracket i made sits on an angle, i drilled holes big enough for the bolts and then drilled a big counter sink hole on top of it to allow me to swivel it to adjust for the angle it has to sit on. but when i put it on i cranked down the swingarm bolt first and then the bracket i made. take a look at the pictures tweety and let me know what your thoughts are on it, if i should go and remove the rear set and shave it down and make a new piece or if its fine the way it is.
top down shot
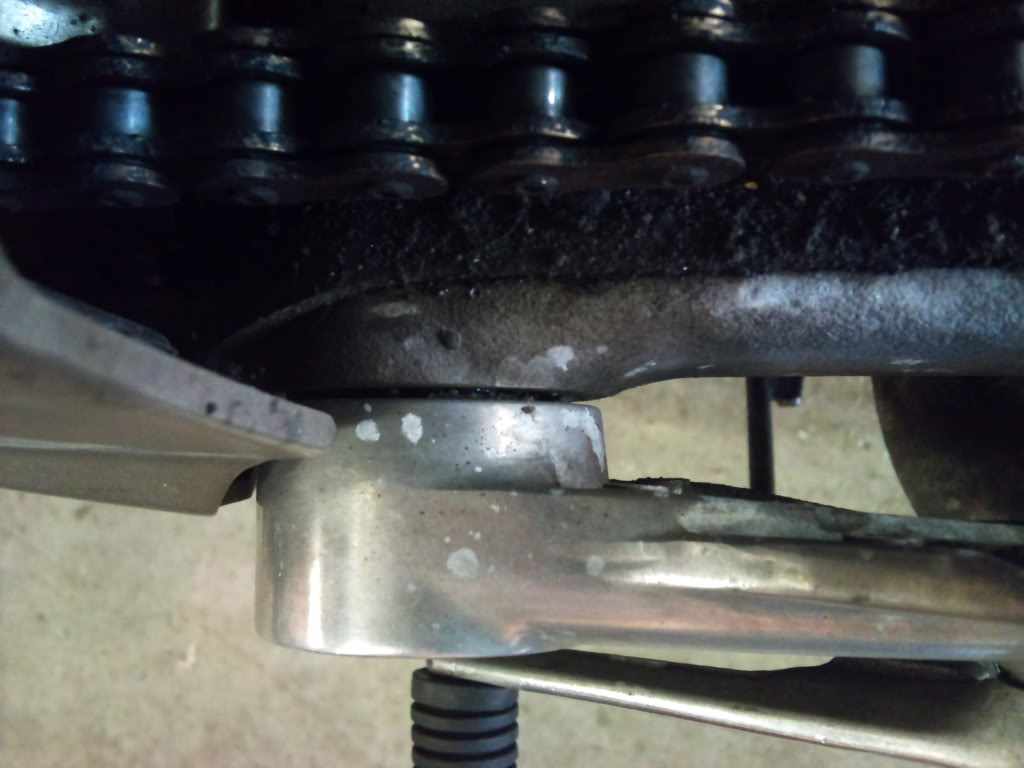
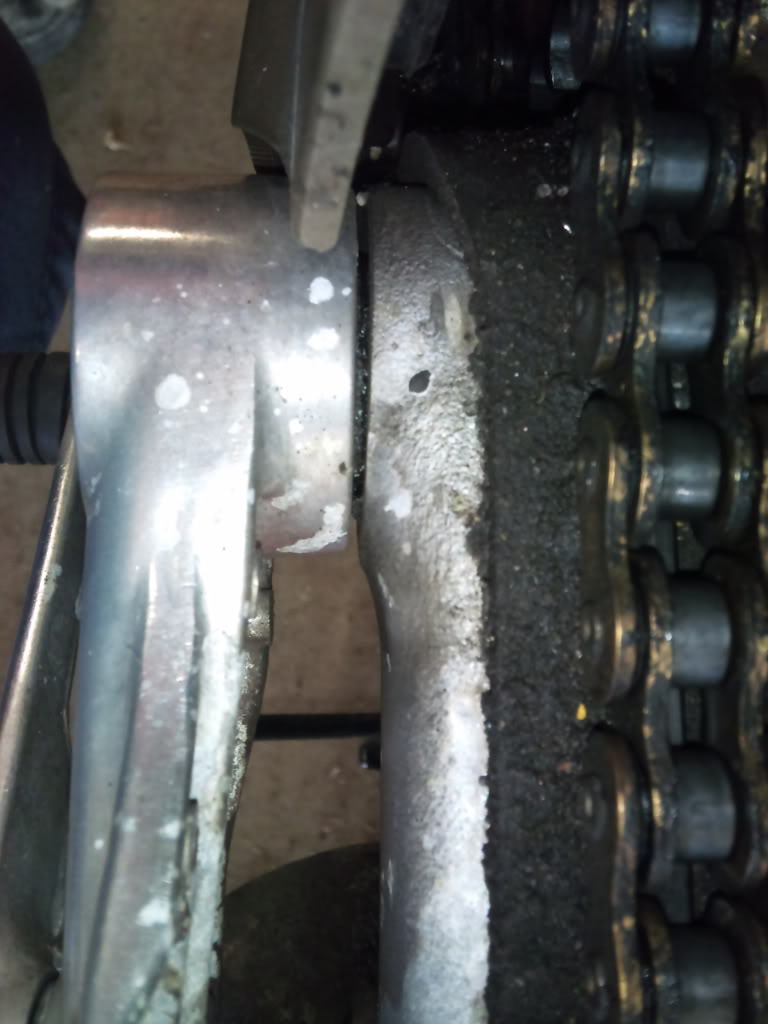
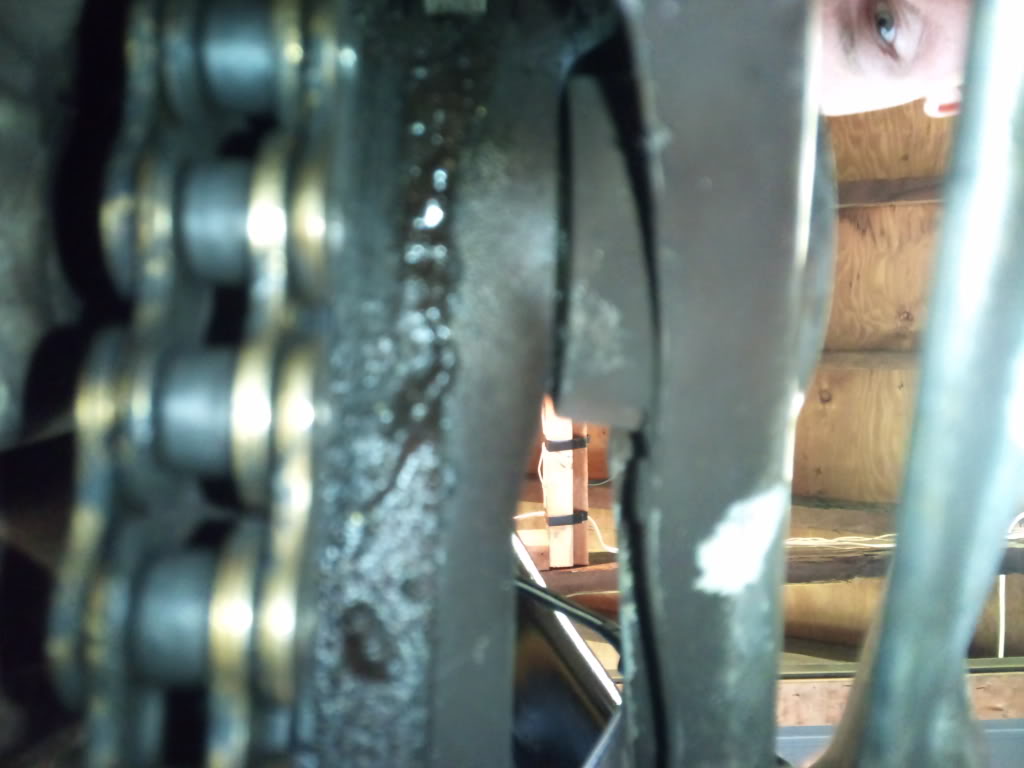
and the rest are from the bottom. tried to get a different angle and what not so some wont be great but im gonna put them up anyway incase you see something i missed

top down shot
and the rest are from the bottom. tried to get a different angle and what not so some wont be great but im gonna put them up anyway incase you see something i missed
Out of my mind, back in 5
MotoGP
Joined: Nov 2006
Posts: 6,109
From: Skurup, Sweden

Senior Member
SuperBike
Joined: Aug 2009
Posts: 1,978
From: thorold ontario
Damn you. Lol. Now I may have to take it apart again. God damn guilt trip giving Swedes lol.
The last time I used the wifes tooth brush to clean my chain she wasn't impressed. Plus I have no kerosene. Can I use some wd 40?
The last time I used the wifes tooth brush to clean my chain she wasn't impressed. Plus I have no kerosene. Can I use some wd 40?
Out of my mind, back in 5
MotoGP
Joined: Nov 2006
Posts: 6,109
From: Skurup, Sweden
Not my recommended choice as it usually makes it very hard for the chain wax to stick afterwards... There are stuff in there that's upposed to stay and help... But it's no substitute for chain wax so...
Kerosene works, simple green I think is a brand of some US based degreaser... And any good environomentally friendly degreaser works good for the chain and rims and the lot... The reason for the "green" profile is more for you than nature... It works just as good but stinks much less... I just bought a cheap spraybottle at the gas station...
Kerosene works, simple green I think is a brand of some US based degreaser... And any good environomentally friendly degreaser works good for the chain and rims and the lot... The reason for the "green" profile is more for you than nature... It works just as good but stinks much less... I just bought a cheap spraybottle at the gas station...
Thread Starter
Senior Member
MotoGP
Joined: Aug 2006
Posts: 2,934
From: altoona, pa
I use silicon spray, my wife's toothbrush and a rag to clean. The rubber o-rings love silicone. Then a little gear oil on a rag and wipe it on sparingly.
Out of my mind, back in 5
MotoGP
Joined: Nov 2006
Posts: 6,109
From: Skurup, Sweden
Senior Member
SuperBike
Joined: Aug 2009
Posts: 1,978
From: thorold ontario
thts the problem, it was cleaner when i brought it back. you should see how mad she got when she caught me cleaning the toilet with it. **** me its not like i wasnt using "green" chemicals in there, but no, women just dont get it.
would s100 work aswell? its a degreaser that you can clean everything with. plastic metal chrome painted surfaces everything and it degreases the **** out of everything. ive got some silicone spray lube in the garage somewhere. ill get around to it, i really should take care of it its an expensive chain
would s100 work aswell? its a degreaser that you can clean everything with. plastic metal chrome painted surfaces everything and it degreases the **** out of everything. ive got some silicone spray lube in the garage somewhere. ill get around to it, i really should take care of it its an expensive chain
Senior Member
SuperBike
Joined: Aug 2009
Posts: 1,978
From: thorold ontario
already clean. i used some s100 first to get rid of the heavy **** and the wifes toothbrush, then some silicone spray on a rag, some more s100 and washed it off and ill use the repsol oil i have once its nice and dry
holy crap my chain was gold. i have picture proof too. lol
holy crap my chain was gold. i have picture proof too. lol
Thread Starter
Senior Member
MotoGP
Joined: Aug 2006
Posts: 2,934
From: altoona, pa
change rearset position for speigler low superbike bars
made a spacer like this with 1/2" separation between the wholes. purpose is to avoid putting a bind on the bottom rearset arm which should be in the same plane as the mount. As noted by tweety, if you merely put a spacer brace between, you put a bind on the rearset where it mounts to the swing arm, and he's correct again. This solution alleviates that issue while still offering significant strength.


The rear brake side is different so i bent an aluminum strip to account for the space between the arm and the mounting point while allowing for a 1/2" rearward placement. And, as with the other side, this requires and a spacer with 1" hole to hole centers for the exhaust bracket.


The rear brake side is different so i bent an aluminum strip to account for the space between the arm and the mounting point while allowing for a 1/2" rearward placement. And, as with the other side, this requires and a spacer with 1" hole to hole centers for the exhaust bracket.

�ber-n00b
Superstock
Joined: Dec 2011
Posts: 257
From: S. WI
I haven't dragged a peg yet, jswisc.
If you are dragging pegs, you may be running out of tire as well.
I hit my toe a couple times when I know I wasn't off the bike enough for a turn, but leaned the bike into the turn.
Work on getting off the bike, keeping the bike more upright = more clearance.
imho
If you are dragging pegs, you may be running out of tire as well.
I hit my toe a couple times when I know I wasn't off the bike enough for a turn, but leaned the bike into the turn.
Work on getting off the bike, keeping the bike more upright = more clearance.
imho


Thread
Thread Starter
Forum
Replies
Last Post


