
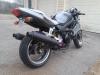
Custom, Fairing mounted Auxiliary lights


Thread Starter
Senior Member
Superstock
Joined: Jan 2012
Posts: 423
From: ABE PA

Darkness is just the upper angle I took it from...I got more 
And I thought about signals too...I googled them, the image came up an looked sweet. But I thought since I hardly use mine, I wanna try the light thing. The headlight on our bikes makes you ride the speed limit and other options woulda left me broke and with pod like things hanging off the bike. I wanted it to be sleek and blend in.
And I thought about signals too...I googled them, the image came up an looked sweet. But I thought since I hardly use mine, I wanna try the light thing. The headlight on our bikes makes you ride the speed limit


Administrator
MotoGP
Joined: Apr 2006
Posts: 4,402
From: Kempner, TX

I just did as I'm thinking about insetting lights there as well...the vent appears to not do anything... it might do something, but it's not evident.


Far as I can tell..... it's just for looks


Administrator
MotoGP
Joined: Apr 2006
Posts: 4,402
From: Kempner, TX
[threadjack]
750HP and holding very well thank you
Yellow thing is a Suzuki DRZ485, 97mm Bore, +4mm stroked 13.5:1 CR SuperMotard
Bronco78's Trail bike to SM build.. what a trip it has been - DR-Z 400 - ThumperTalk
[/threadjack]
Thanks
Back to the topic

My potential lights
Last edited by E.Marquez; Apr 29, 2013 at 07:18 PM.


Out of my mind, back in 5
MotoGP
Joined: Nov 2006
Posts: 6,109
From: Skurup, Sweden
The air intake isn't really doing much for cooling or otherwise... Their only function is to allow air through to reduce the bikes drag, by "filling" the low pressure bubble behind the rider slightly... Ie, they might actually impact your fuel mileage, even with how odd that sounds...

Senior Member
Superstock
Joined: Oct 2009
Posts: 325
From: MN
i always want more light on my bike since deer and moose are a big issue driving in northern mn...however, after installing the HID projector from the group buy last year.... i dont think it is possible! i went for a ride yesterday with a buddy who has hid lights as well (no projector) and my light was at LEAST 2x brighter and illuminated further and that was on low beam!
those driving lights look pretty slick though!
those driving lights look pretty slick though!
Senior Member
Back Marker
Joined: Sep 2012
Posts: 133
From: California
LOL.
[threadjack]
750HP and holding very well thank you
Yellow thing is a Suzuki DRZ485, 97mm Bore, +4mm stroked 13.5:1 CR SuperMotard
Bronco78's Trail bike to SM build.. what a trip it has been - DR-Z 400 - ThumperTalk
[/threadjack]
Thanks
Back to the topic

My potential lights
[threadjack]
750HP and holding very well thank you
Yellow thing is a Suzuki DRZ485, 97mm Bore, +4mm stroked 13.5:1 CR SuperMotard
Bronco78's Trail bike to SM build.. what a trip it has been - DR-Z 400 - ThumperTalk
[/threadjack]
Thanks
Back to the topic
My potential lights
 (No rudeness intended......Is that a two headed dog....CERBERUS!!!!!!!!!!!!!!!!!!!!!!!!)
Last edited by WhOrD; Apr 30, 2013 at 03:20 PM.
Thread Starter
Senior Member
Superstock
Joined: Jan 2012
Posts: 423
From: ABE PA
Thanks guys...
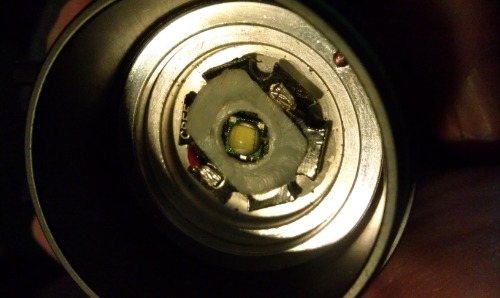
Marquez, those are some bright lights! What exactly are they? The only ones I could find small enough to fit in there were THESE (and they were cheaper, wtf?). They use a Cree XML-T6 LED...which you can buy separate if you burn it out during testing like me LOL
The driver I used is THIS. Really cheap, but you gotta wait like a month for shipping, then replace the dinky wires they come with and encase it in epoxy and...duct tape!
The first one I used was a 3V, 3 amp one, just like the mfg spec said was optimum to power the LED...but with such high amperage, it melted the leads off in @ 20 seconds...I ended up smoking it anyway, so that was 15 bucks down the drain
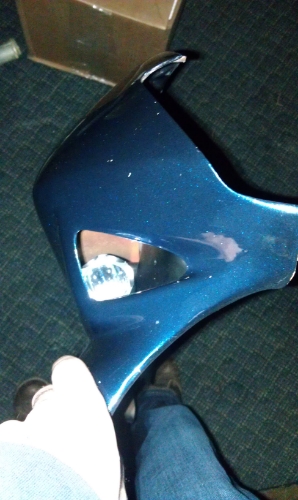
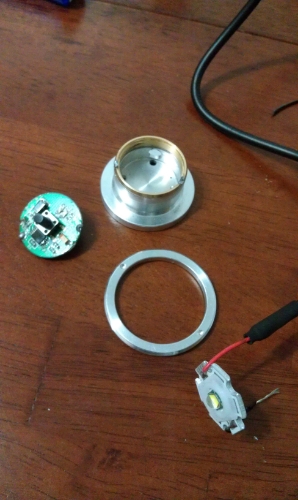
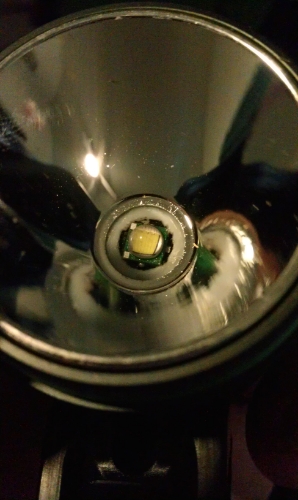
Then you just open the bike light up from the front, unscrew the locking ring, and flip the lamp assembly out. Break off the goofy pushbutton blinky BS and twist on new wires using the battery female plug, and the male charging plug. (cause you gotta take your fairings off at some point in the future, right?)
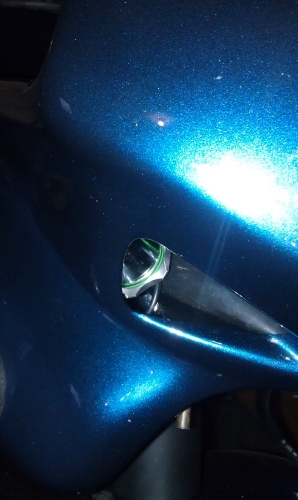
To mount, use the cord hole and mount hole both, with locking hardware. I used 8-32 and 6-32, 1/2" screws inserted from the inside of the housing facing out using tweezers...a PIA but it makes two nice posts with which to mount to the inside plastic piece.
Aiming was a bitch too, cause you cant exactly adjust it...just guess, drill, and pray. Then repeat and finally settle on something that works LOL. if you screw it beyond repair, I found those plastics on fleabay for like ten bucks.
The actually finished brightness isn't so satisfying (with high beam on) sorry to say (i'll try an get some pics up)...something about lumens vs. usable spectrum or something...intensity maybe. But they DO add to it, while looking cool as hell doing it so I'm happy. Like I say the biggest hurdle is finding a light bright enough and under @1-1/2" diameter...not easy...but to those with ***** enough to try this like Marquez, post up your results and supplies used!
OH, forgot to add that to control it all, I used a moose? racing on/off engine kill switch and wired it in series with +pwr into the parallel LED driver circuit. All right to the battery...in hindsight kinda stupid cause I could kill the battery accidentally...but kinda nice too if I need light and don't wanna drain the battery using the headlight, cause they don't draw much power, comparatively speaking.
Marquez, those are some bright lights! What exactly are they? The only ones I could find small enough to fit in there were THESE (and they were cheaper, wtf?). They use a Cree XML-T6 LED...which you can buy separate if you burn it out during testing like me LOL
The driver I used is THIS. Really cheap, but you gotta wait like a month for shipping, then replace the dinky wires they come with and encase it in epoxy and...duct tape!
The first one I used was a 3V, 3 amp one, just like the mfg spec said was optimum to power the LED...but with such high amperage, it melted the leads off in @ 20 seconds...I ended up smoking it anyway, so that was 15 bucks down the drain
Then you just open the bike light up from the front, unscrew the locking ring, and flip the lamp assembly out. Break off the goofy pushbutton blinky BS and twist on new wires using the battery female plug, and the male charging plug. (cause you gotta take your fairings off at some point in the future, right?)
To mount, use the cord hole and mount hole both, with locking hardware. I used 8-32 and 6-32, 1/2" screws inserted from the inside of the housing facing out using tweezers...a PIA but it makes two nice posts with which to mount to the inside plastic piece.
Aiming was a bitch too, cause you cant exactly adjust it...just guess, drill, and pray. Then repeat and finally settle on something that works LOL. if you screw it beyond repair, I found those plastics on fleabay for like ten bucks.
The actually finished brightness isn't so satisfying (with high beam on) sorry to say (i'll try an get some pics up)...something about lumens vs. usable spectrum or something...intensity maybe. But they DO add to it, while looking cool as hell doing it so I'm happy. Like I say the biggest hurdle is finding a light bright enough and under @1-1/2" diameter...not easy...but to those with ***** enough to try this like Marquez, post up your results and supplies used!
OH, forgot to add that to control it all, I used a moose? racing on/off engine kill switch and wired it in series with +pwr into the parallel LED driver circuit. All right to the battery...in hindsight kinda stupid cause I could kill the battery accidentally...but kinda nice too if I need light and don't wanna drain the battery using the headlight, cause they don't draw much power, comparatively speaking.
Last edited by Bandit400man; Apr 30, 2013 at 05:50 PM.
Thread Starter
Senior Member
Superstock
Joined: Jan 2012
Posts: 423
From: ABE PA
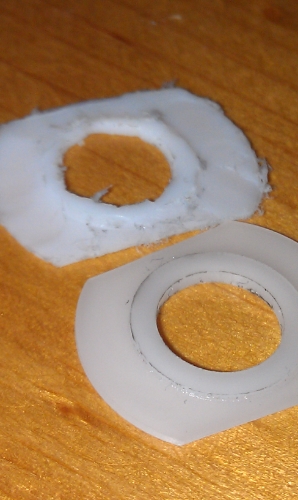
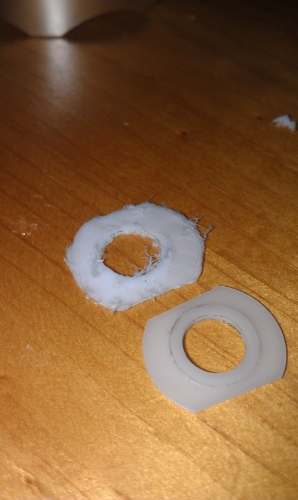
Oh and DONT loose those little plastic white things around the LED...they insulate the unused pads from the metal reflector jumping the connection...AND they focus the light around the LED properly...I lost one and HAD to figure out a solution. I got some sheet silicone from work and stamped a few out. then took a dremel with a routing bit to it and worked really slow LOL:
Last edited by Bandit400man; Apr 30, 2013 at 05:50 PM.
Thread Starter
Senior Member
Superstock
Joined: Jan 2012
Posts: 423
From: ABE PA
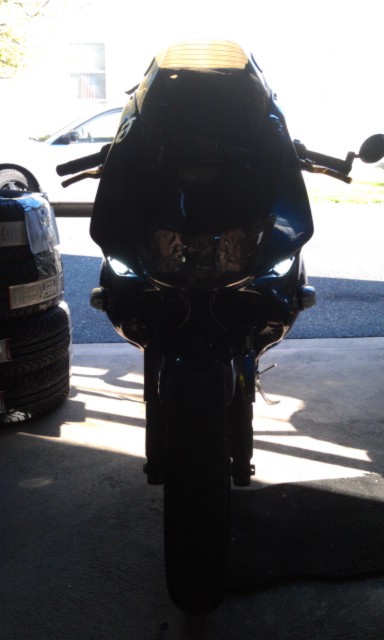
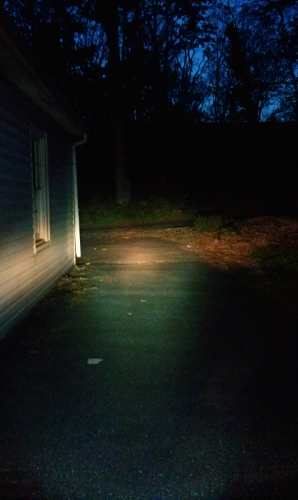
Here are some quick pics showing brightness.
This is just the low beam, outside:
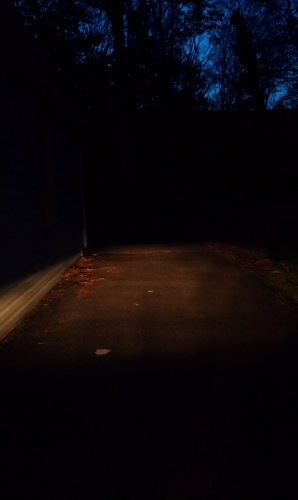
Crappy, right? Here is the low beam + aux lights:
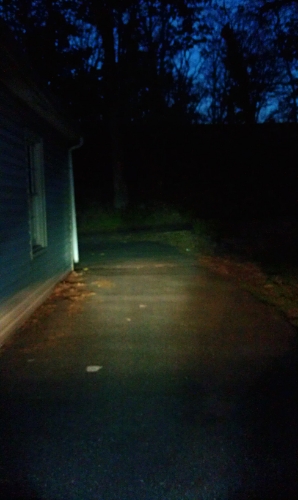
Better, no?! Here is a pic with the high beam + aux lights...not as great as I hoped, but it does have a more illuminating whiteness to it:
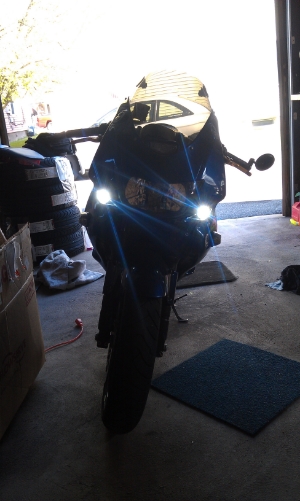
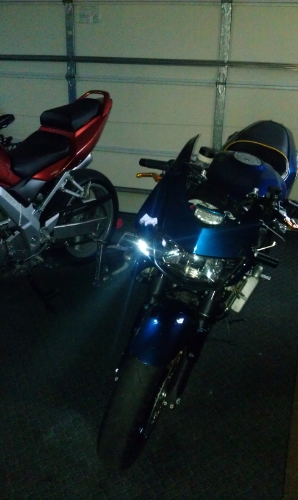
Figured inside my garage it'd be darker, an maybe better to showcase the lights. This ones just the low beam:
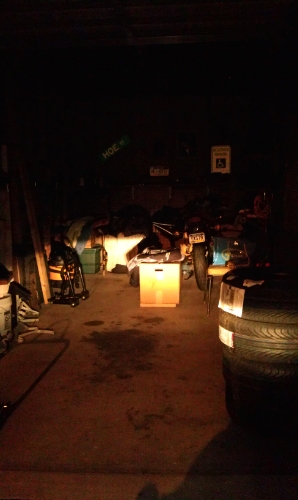
This i low beam + aux lights:
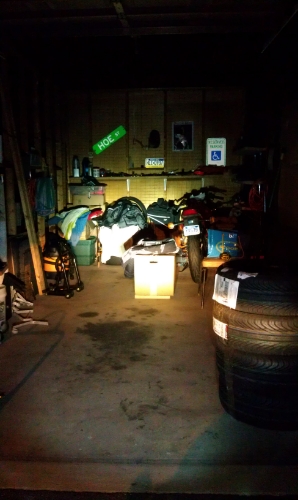
This ones just high beam, no aux:
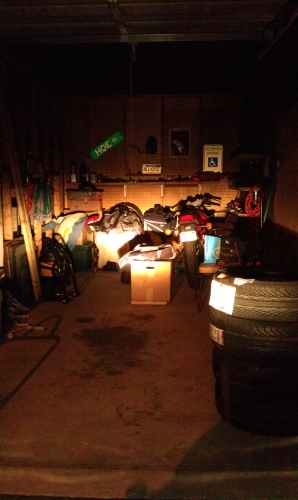
And finally, high beam + aux:
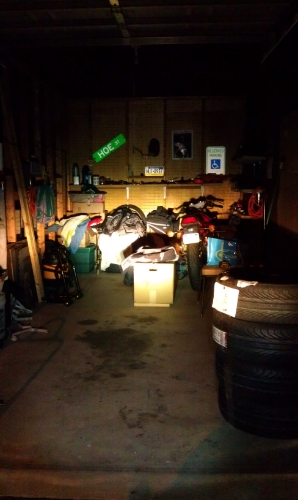
Definitely more white and illuminating. But if I paid $300+ for PIAA's an they looked like this? I'd be pissed LOL
This is just the low beam, outside:
Crappy, right? Here is the low beam + aux lights:
Better, no?! Here is a pic with the high beam + aux lights...not as great as I hoped, but it does have a more illuminating whiteness to it:
Figured inside my garage it'd be darker, an maybe better to showcase the lights. This ones just the low beam:
This i low beam + aux lights:
This ones just high beam, no aux:
And finally, high beam + aux:
Definitely more white and illuminating. But if I paid $300+ for PIAA's an they looked like this? I'd be pissed LOL

Thread
Thread Starter
Forum
Replies
Last Post
rafbo
Modifications - Cosmetic
113
Jan 3, 2019 02:38 PM
Rebirth98
Modifications - Cosmetic
6
Jun 4, 2014 06:57 AM


