
My Cafe Build

aka sirch345. vtr1000.org
Back Marker
Joined: May 2006
Posts: 100
From: UK

I've really enjoyed following this. You certainly have some very useful skills there. Keep up the high standards, that tail unit and tank mods look awesome!
Well done to your Dad for his part in this build too.
Well done to your Dad for his part in this build too.
Senior Member
Back Marker
Joined: Jul 2008
Posts: 243
From: Toronto, Ontario
I would need enough to coat most of inside. Today I ran a little pre paint cleaner inside and there are a few pin wholes. Would the aircraft stuff seal it up? It is a small tank and even if I had enough to seal around the inside of the cut outs that would work too. The rest of the tank was sealed even before I started cutting it. Thanks.
lemme see how much i can get ya and i'll msg you.

Junior Member
Squid
Joined: Oct 2009
Posts: 4
Hey man your project really inspired me for some cafe racer modifications to my bike. But since I got no good enough mechanical and engineering knowledge  , I've just settled on doing it only on a photo editing program
  . Here it is hope you enjoy it.
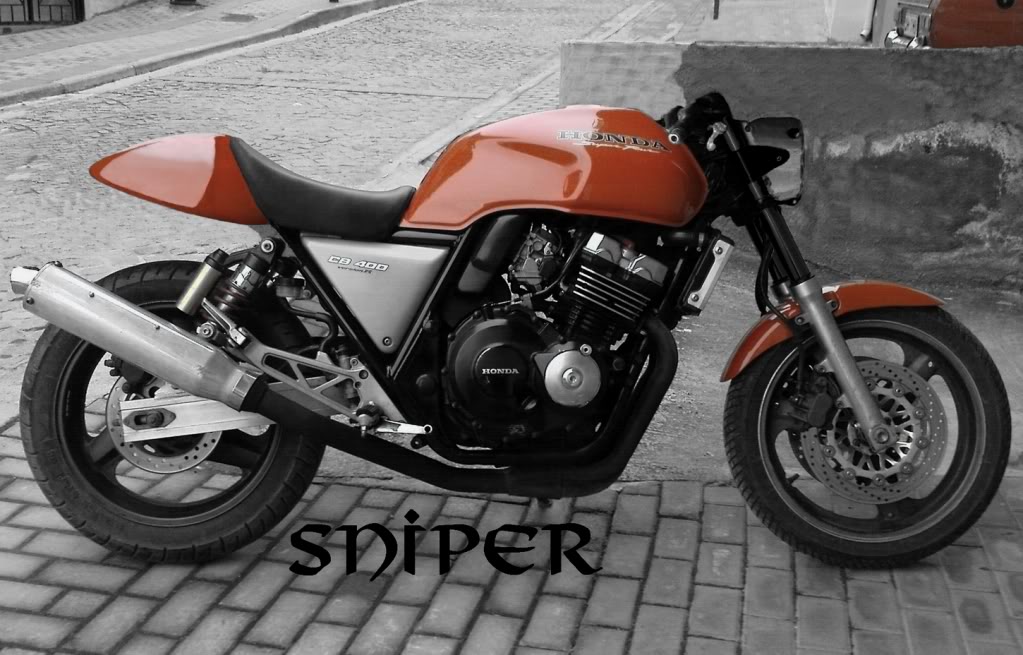
and here is the link http://www.go4it.gr/smf/index.php?topic=2248.0 to some other creations and modifications all made by me in photo editing programs or by drawing
, I've just settled on doing it only on a photo editing program and here is the link http://www.go4it.gr/smf/index.php?topic=2248.0 to some other creations and modifications all made by me in photo editing programs or by drawing
Last edited by snipereps; May 8, 2012 at 02:56 AM.
Thread Starter
2nd mouse gets the cheese
SuperBike
Joined: Jan 2008
Posts: 1,697
From: Beaverton, OR
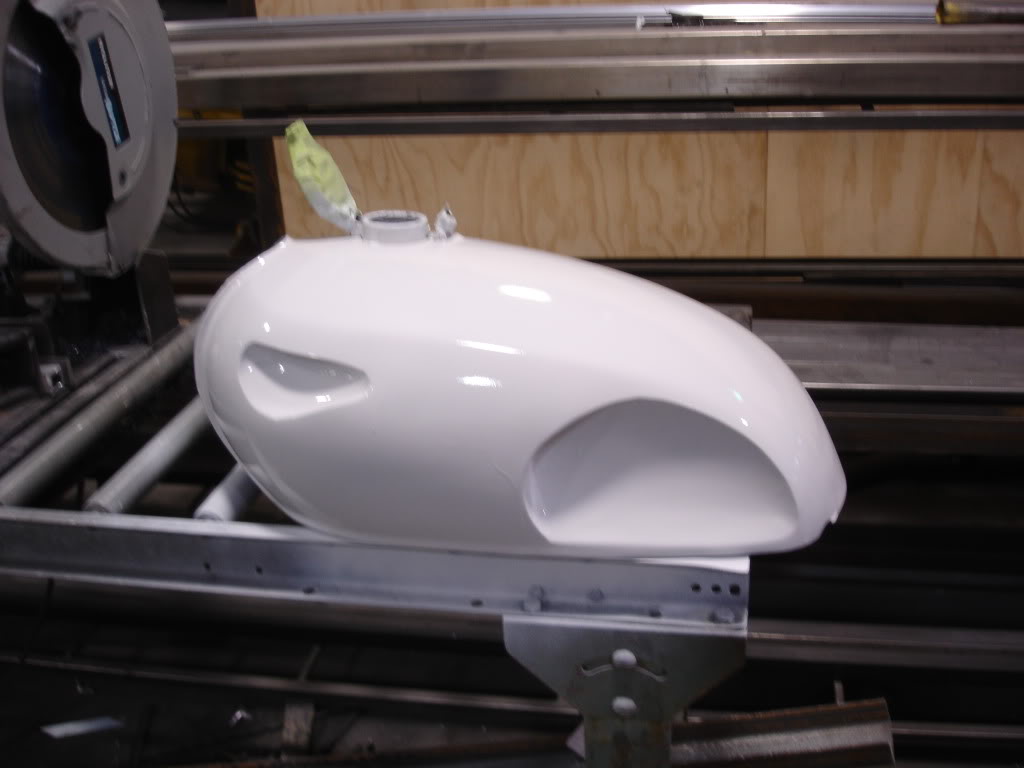
So I was successfull at sealing the tank. The Kreem stuff seems to have worked great, and there is enough left over to easily do another tank that is the same size, which by the way is almost exactly 3.5 gallons. So I figure about 150 miles before reserve. Maybe better, I still don't know for sure what mpg these old 500's got. I am assuming about 50. I started the body work and within the next day or two I should have a picture up of it primered. Within the next month hopefully painted as well.

Senior Member
SuperBike
Joined: Mar 2007
Posts: 1,611
From: Belgium, WI
the fuel mileage will depend on how you tune it and how you run it. We have a customer that is running a cb550 twin cam with a 4-1 straight pipe. It runs STRONG, good for 90+mph. When we do trips, he is always in the top rpms, and he gets 30-35mpg. If he slowed down, it would be better, but not by much.
Thread Starter
2nd mouse gets the cheese
SuperBike
Joined: Jan 2008
Posts: 1,697
From: Beaverton, OR
well that is a bit less then I expected. Although my tuning may be more mild. I am trying to gain power be weight loss. A high flow exhaust and air filters and mild rejet. Auto, do you have any idea what kind of mileage they got stock?
Thread Starter
2nd mouse gets the cheese
SuperBike
Joined: Jan 2008
Posts: 1,697
From: Beaverton, OR
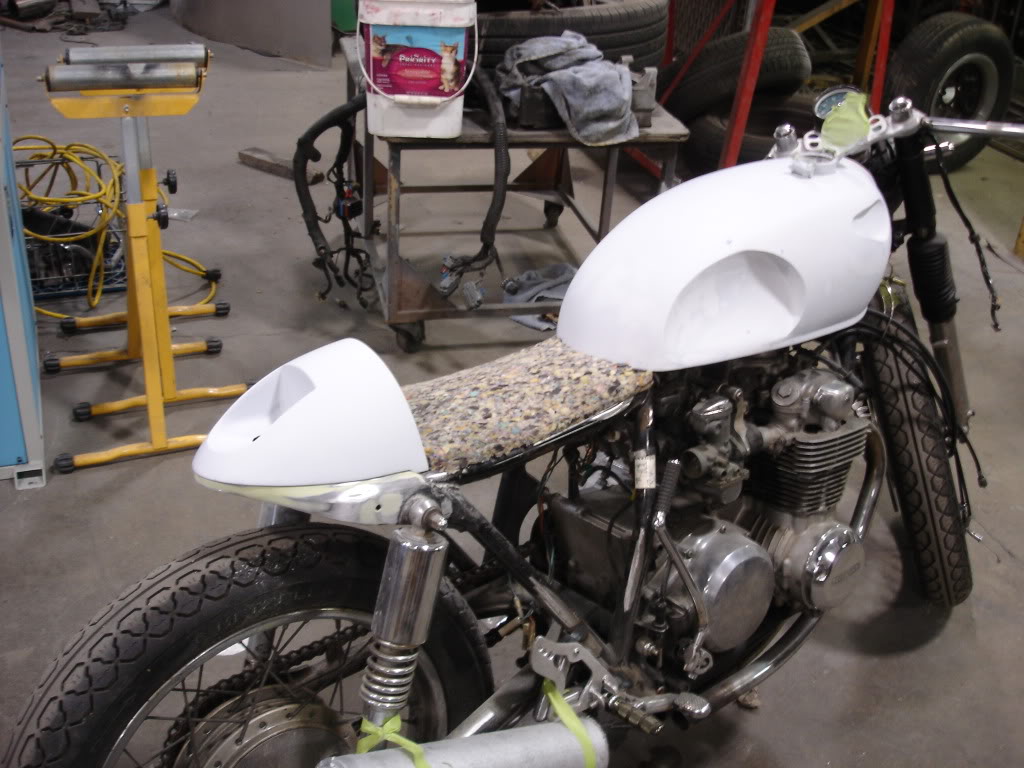
So here are a few shot with everything primered. It brought out a few things I missed though so more sanding and a little bit of filler will take care of those.
Senior Member
SuperBike
Joined: Mar 2007
Posts: 1,611
From: Belgium, WI
That bike runs awesome on top, but I am sure that they originally got better than 45mpg. I would encourage limiting changes to minimize fuel mileage loss, if that is your thing.
Thread Starter
2nd mouse gets the cheese
SuperBike
Joined: Jan 2008
Posts: 1,697
From: Beaverton, OR
Well my dad's 750 gets around 50 mpg, it has a stock filter and aftermarket pipes. Stock jetting though. Well for now then I will just tune it for high flow pipes and filters. Stock they produced around 55 hp so hopefully with the mods I am planning I can get an even 60 hp. I am hoping to also have the dry weight around 350 pounds so it should accelerate pretty well even though it won't have a super high top speed. Maybe 100 mph.
Thread Starter
2nd mouse gets the cheese
SuperBike
Joined: Jan 2008
Posts: 1,697
From: Beaverton, OR
I tore the carbs off yesterday. My work is cut out for me for sure. Two carbs had not been drained and the stale green gas barely dribbled out when I took off the drain screws. I have the yamaha carb cleaner concentrate that I will fill a five gallon bucket up with so I can just set the bank of carbs in and let soak for a few days. Then I will tear them down blow out all the openings and determine if I need rebuild kits. I still haven't had any luck finding off brand tappered air pods that are the right length. K and N has them but it is $120 for a set, ouch.
Thread Starter
2nd mouse gets the cheese
SuperBike
Joined: Jan 2008
Posts: 1,697
From: Beaverton, OR
So I began the tear down process on the carbs and already found a couple of problems with whoever tore it apart before me. The first one was the float valve was upside down in carb number one also the float bowl gasket was pinched in between the bowl and carb body. I still need to tear down the next two carbs and inspect everything in there.
Senior Member
Back Marker
Joined: Dec 2008
Posts: 116
From: Lunenburg, MA
Andrew, haven't been here for a while. Man, am I envious of your skills! I'm about 3/4 of the way through "Shopcraft as Soul Craft." It would be very affirming for you to read. I'm working on my retirement trade - gonna call myself "Happy *** Bike Seats." Was a leather craftsman and am customizing my stock VTR seat as my first attempt. I'm leaving the back of it as stock to use your rack on it. Then I have an Aprilia to build a new seat for. When I'm ready, I'll have you send me an *** mold for your VTR seat.
Senior Member
SuperBike
Joined: Mar 2007
Posts: 1,611
From: Belgium, WI
i had some carb dip do some weird crap before. We use Yamaha combustion chamber cleaner. You should be able to turn those around in a few hours, and you won't have to worry about it eating the carbs.
Thread Starter
2nd mouse gets the cheese
SuperBike
Joined: Jan 2008
Posts: 1,697
From: Beaverton, OR
Autoteach, so far no weirdness with the yamaha cleaner. and as a side not it softened all the old clear coat that can be such a pain to clean off the float bowls and needle covers. Saved me alot of time. I tore each carb bottom end apart and blew every thing out, also wiped off the residue in the bowl chambers. Made sure that fuel would flow through the valve. Put everything back together then test for leaking or overflow issues and everything looks good for now.
Blustreak, I may need advice/help I am not sure where to start with covering my seat. I could probably on my own make a cover that functions but I am not sure I can pull off somethin that looks really nice. Problem is its not just a simple covering job. It has to match the cowl and the tank. So at the tank it is curved and slops toward the back. I made holes in the pan so I could rivet the cover down. Any tips?
Blustreak, I may need advice/help I am not sure where to start with covering my seat. I could probably on my own make a cover that functions but I am not sure I can pull off somethin that looks really nice. Problem is its not just a simple covering job. It has to match the cowl and the tank. So at the tank it is curved and slops toward the back. I made holes in the pan so I could rivet the cover down. Any tips?
Thread Starter
2nd mouse gets the cheese
SuperBike
Joined: Jan 2008
Posts: 1,697
From: Beaverton, OR
STARTED!
Great news, today I hooked up the electrical put the cabs back on. Filled the carb bowls with fuel . Turned on the bike kicked it a few times, and bam she started! New plugs would probably make starting a once or twice kinda kick ordeal instead of 10. I am just happy she runs!
Last edited by Little_Horse; Nov 23, 2009 at 07:33 PM.

Senior Member
Back Marker
Joined: Dec 2008
Posts: 116
From: Lunenburg, MA
Blustreak, I may need advice/help I am not sure where to start with covering my seat. I could probably on my own make a cover that functions but I am not sure I can pull off somethin that looks really nice. Problem is its not just a simple covering job. It has to match the cowl and the tank. So at the tank it is curved and slops toward the back. I made holes in the pan so I could rivet the cover down. Any tips?[/quote]
Andrew, it looks like you already laid a layer of rebond foam on the pan. There's a couple of issues and I'm guessing given the style of the bike, your priority is looks, not comfort. First of all, you would normally add another layer of less dense poly-urethane foam (1/2" or 1") on top of the rebond. You can add foam with spray upholstery glue and trip back where you need to with a drill and disc sand mount (5 or 6"). You can shape the seat however you like with foam, glue and a sander. In a perfect world, you'd build up the back to support the back of your ***, shape out the seat with the sander, add the less dense foam and then cover it w/ leather. Given the pan is sheet metal, I would think you would attach the leather (no vinyl after all that gorgeous work, please) with short sheet metal screws and maybe washers. Check out this website. "Black jewel" stingray leather would look devastating, with the "eye" strategically placed on the seat. I'd have a professional upholsterer put the leather on. See this website for "how to."
DIYMotorcycleSeat.com Also, see this website for stingray hides - www.rojeleather.com.
Last edited by BluStreak; Nov 24, 2009 at 05:57 PM.
Thread Starter
2nd mouse gets the cheese
SuperBike
Joined: Jan 2008
Posts: 1,697
From: Beaverton, OR
I have two layers of rebound foam, I was also planning on putting another 1/2 thick piece of softer foam then possibly stitching in a 1/4 in piece of very soft foam to pronounce the stitched sections. We will see. I want to keep the overall height very slim.
Thread Starter
2nd mouse gets the cheese
SuperBike
Joined: Jan 2008
Posts: 1,697
From: Beaverton, OR
A few small things to report back on.
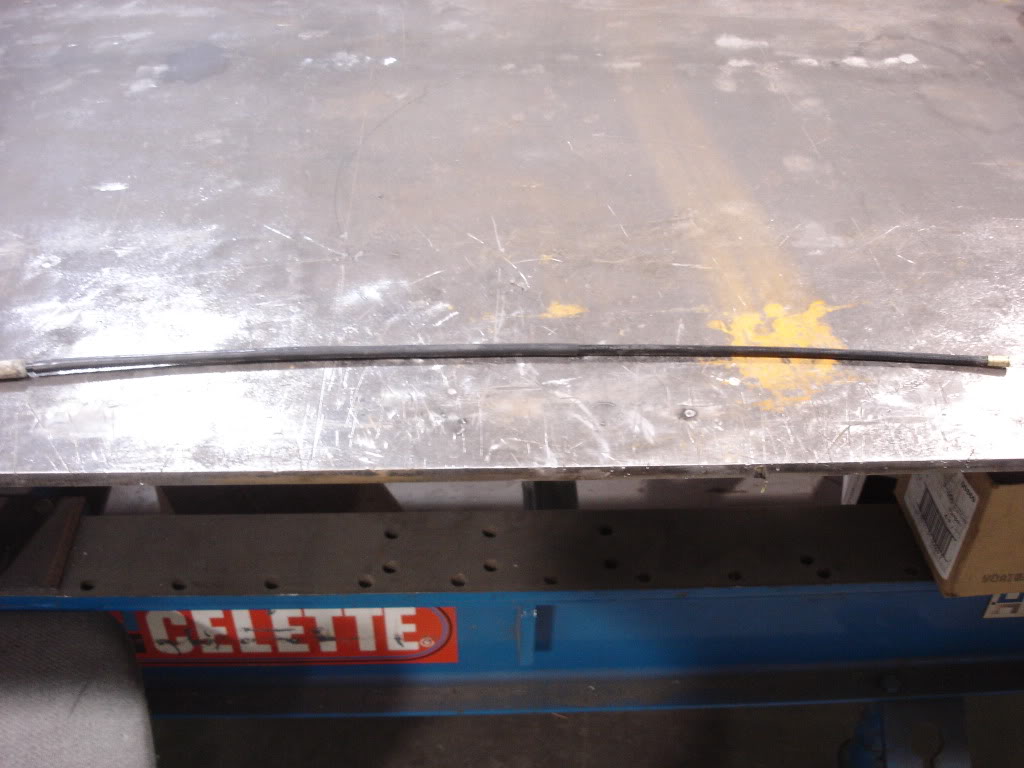
The clutch cable as seen much earlier in the thread is way too long, being cheap and lazy I decided to make an attempt shortening the cable. I melted off the cable end that connects to the lever with a torch. It was just soldered on. Melted the metal end off the cable housing, it ended up that the end was not reusable so I began my quest for a suitable replacement part. I then stumble across a unspent bullet and case. The case was just about the right size so I pulled the bullet out popped the cap and drilled the case for the cable. You can see it in the picture below, it became a very nice housing end. Then I put it all back together soldering the end back on and now I have a clutch cable that is 13 in shorter.
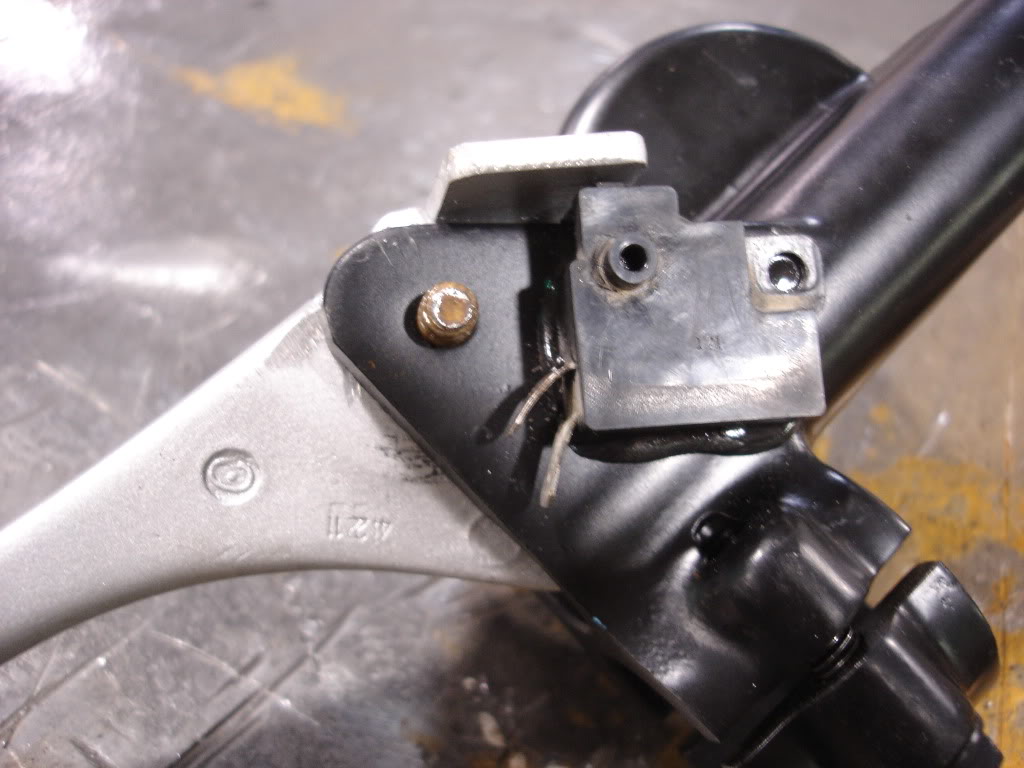
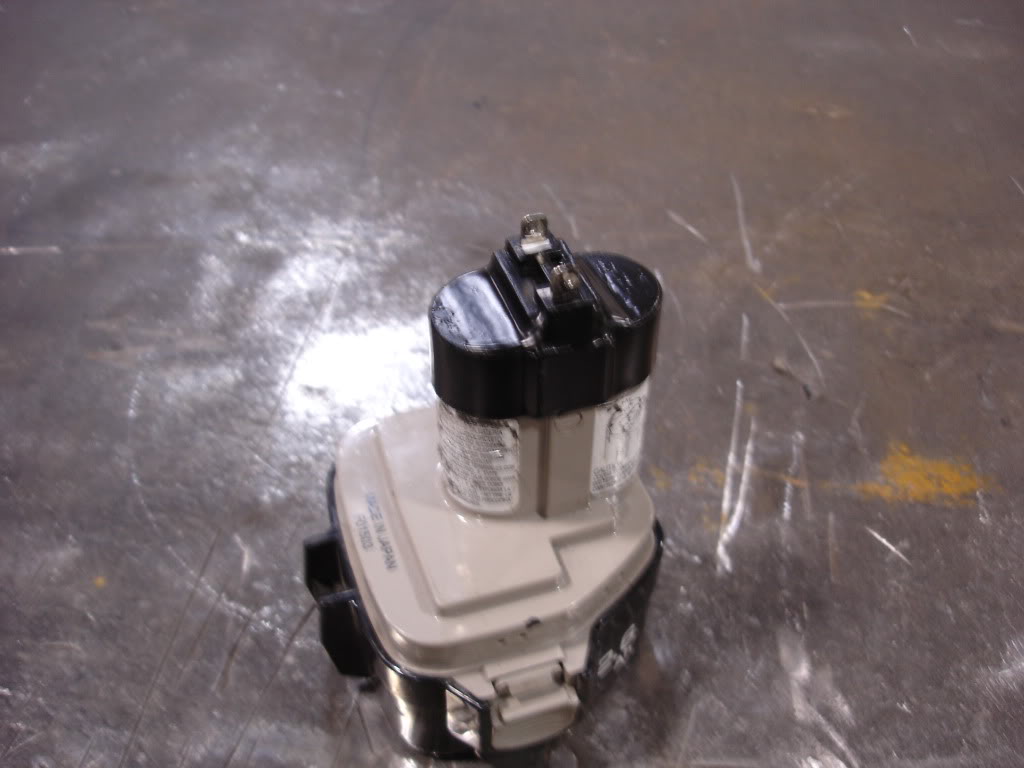
Also in this picture I glued a newer style clicker switch on to the modified master cylinder and lever assembly. This was to avoid using the inline pressure sensor that originally came with the bike.
Here is my battery quick connector end. I scavenged a broken flashlight that used a similar battery for the internal pins. I will the solder heavier duty wiring that will connect it to the existing harness.
The clutch cable as seen much earlier in the thread is way too long, being cheap and lazy I decided to make an attempt shortening the cable. I melted off the cable end that connects to the lever with a torch. It was just soldered on. Melted the metal end off the cable housing, it ended up that the end was not reusable so I began my quest for a suitable replacement part. I then stumble across a unspent bullet and case. The case was just about the right size so I pulled the bullet out popped the cap and drilled the case for the cable. You can see it in the picture below, it became a very nice housing end. Then I put it all back together soldering the end back on and now I have a clutch cable that is 13 in shorter.
Also in this picture I glued a newer style clicker switch on to the modified master cylinder and lever assembly. This was to avoid using the inline pressure sensor that originally came with the bike.
Here is my battery quick connector end. I scavenged a broken flashlight that used a similar battery for the internal pins. I will the solder heavier duty wiring that will connect it to the existing harness.
Uhhhhh..huh.huh..Member..
Superstock
Joined: Apr 2008
Posts: 269
From: Vancouver, WA
Great news, today I hooked up the electrical put the cabs back on. Filled the carb bowls with fuel . Turned on the bike kicked it a few times, and bam she started! New plugs would probably make starting a once or twice kinda kick ordeal instead of 10. I am just happy she runs!
Senior Member
Back Marker
Joined: Dec 2008
Posts: 116
From: Lunenburg, MA
Checkout that stingray leather I sent you the link for before you get committed to the stitching idea. It would be simpler, and (I think) far slicker looking. Also, you might wanna test fit your *** into the seat before you finalize the shape. You can shape it just a bit for your sitz-bones and it would then be much more comfortable, as opposed to bearable. You're on the right track with your foam layers, don't forget the glue.
Thread Starter
2nd mouse gets the cheese
SuperBike
Joined: Jan 2008
Posts: 1,697
From: Beaverton, OR
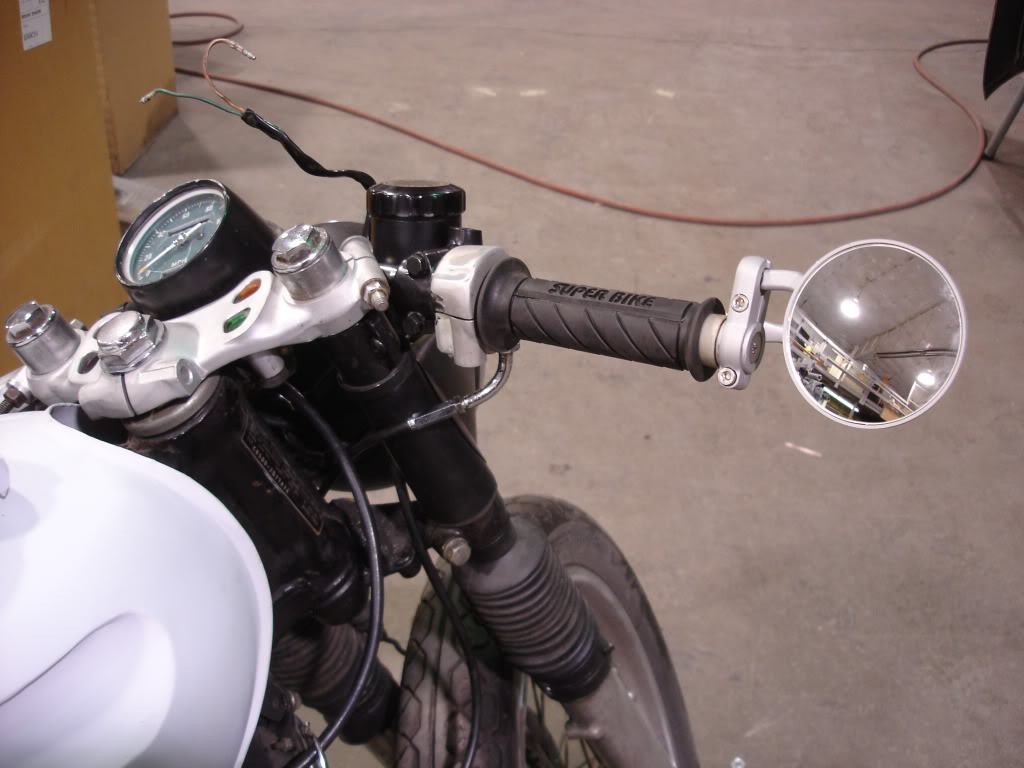
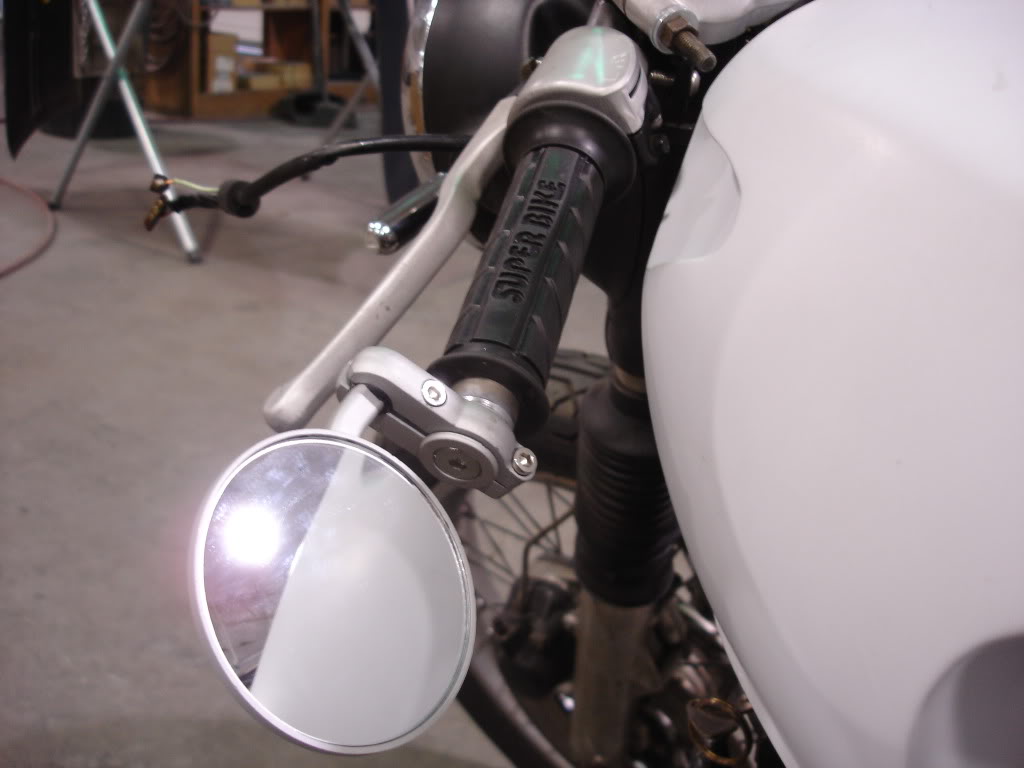
I ordered myself a set of bar end mirrors from ebay. $25 for two. Can't wait until they get here.
I hate the way the speedo cable looks. I also like the idea of just a tack, in appearance at least. I ordered a bicycle speedometer that I will try to imbed in the new tack face I am making. Hopefully there is enough space to do this. If not I will mount it somewhere else. The cool thing is that the bike computer has odometer, trip A and B, average speed, time riding, time of day, and abient air temp. The speed is displayed about 3/4 of an inch in height. Should be here in a couple of days.
Also I have been doing some research on what tires to run. Not alot of options out there, but it was between the Dunlop GT501 tires or the Pirelli sport Demon Tires. I think I will try the Demon tires. I ran GT501's on my old 450 and loved them, but I am alot better rider now and supposedly according to the reviews I read the Pirellis are a bit more sticky. The Dunlops cost a little less but its not enough to make me swing back to the Dunlop.
Next I need to research a chain.
Also I am still looking for a left over aluminum can if anybody has one. I don't mind some rash on it. Thanks.
Thread Starter
2nd mouse gets the cheese
SuperBike
Joined: Jan 2008
Posts: 1,697
From: Beaverton, OR
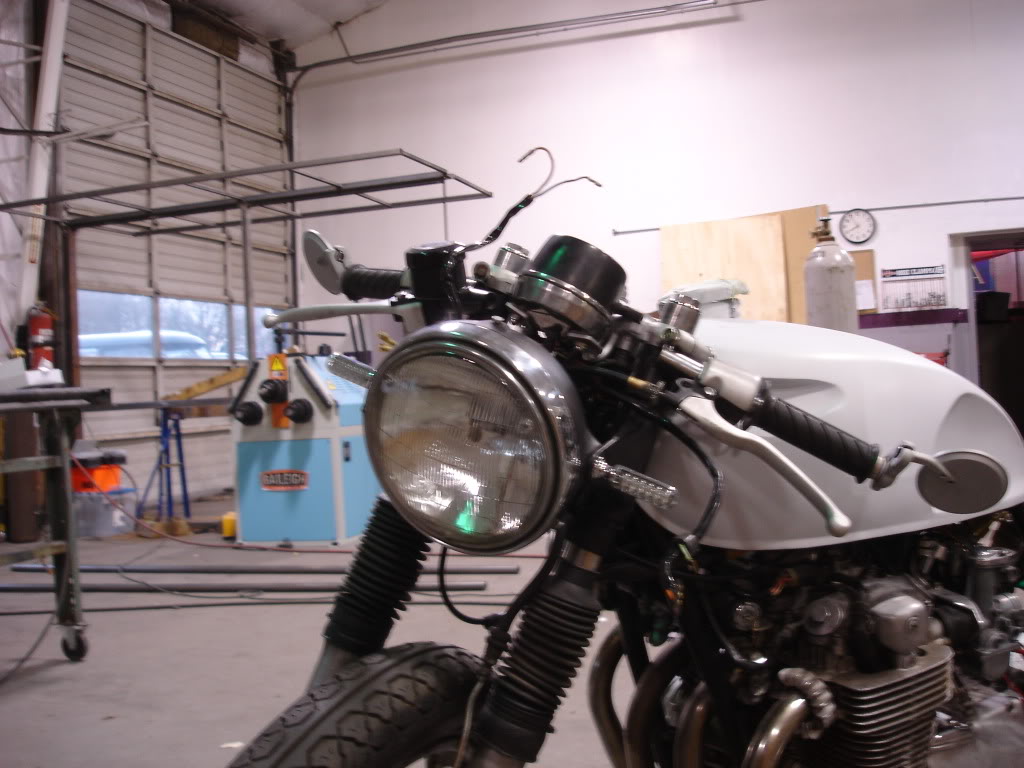
My bar end mirrors arrived today. I will have pics of them installed for you all tomorrow. I also shortened my throttle cables. One of them too much though so I changed the setup to a single cable. I have never understood why honda had two cables One seems to be plenty and work smoothly.

New boy
Squid
Joined: Nov 2009
Posts: 25
From: Birmingham UK
My bar end mirrors arrived today. I will have pics of them installed for you all tomorrow. I also shortened my throttle cables. One of them too much though so I changed the setup to a single cable. I have never understood why honda had two cables One seems to be plenty and work smoothly.
The double throttle cable [one opens, one closes] is needed on Slide carbs on a 4 stroke as the engineers have calculated that under worst case vacumm [and other factors like temperature, etc etc] there is a risk that the slides will not close under the spring force alone. So although it feels ok in the workshop, you need to beware on the road that the slides may hang up for a moment.
Last edited by AMCQ46; Dec 1, 2009 at 08:27 AM.
Thread Starter
2nd mouse gets the cheese
SuperBike
Joined: Jan 2008
Posts: 1,697
From: Beaverton, OR
These are mechanical slide not vacuum slide, thus no force being applied to the slide other than throttle use. Your information is good though, sounds like a good reason for two cables. I can always run the second one later if need be. I would just have to buy a new one.
New boy
Squid
Joined: Nov 2009
Posts: 25
From: Birmingham UK
Sounds like my wording could confuse [as the saying goes, we are seperated by a common language!! , and I am Scottish, so I dont even speak English very well].
When I use the term slide carbs that is what you would call the manual slide carb, the vacuum type I would call a CV carb and they use a butterfly to vary the vacuum and lift the slide.
So in your carbs when you shut the throttle at high rpm, the engine generates a vacuum on the overrun. This sucks the slide against the carb body and is what may stop the slides closing fully if they only have the return spring, but as I said, it may only happen in worst case conditions.
2 strokes with slide carbs only have 1 cable, as they dont build up the same vacuum as a 4 Stroke, and the spring will ensure it closes ok.
EDIT............PS, I am loving this thread and I think the bike looks great. cant wait for the next instalment.
Last edited by AMCQ46; Dec 1, 2009 at 10:44 AM.


