
My Cafe Build


Senior Member
MotoGP
Joined: Mar 2007
Posts: 3,132
From: Phoenix, AZ

For my taste: The diameter is good, you might shorten them (from the front, using longer headers) but not a lot.
Thread Starter
2nd mouse gets the cheese
SuperBike
Joined: Jan 2008
Posts: 1,697
From: Beaverton, OR
So here is what I decided for exhaust placement, length of can angle of tip, and diameter.
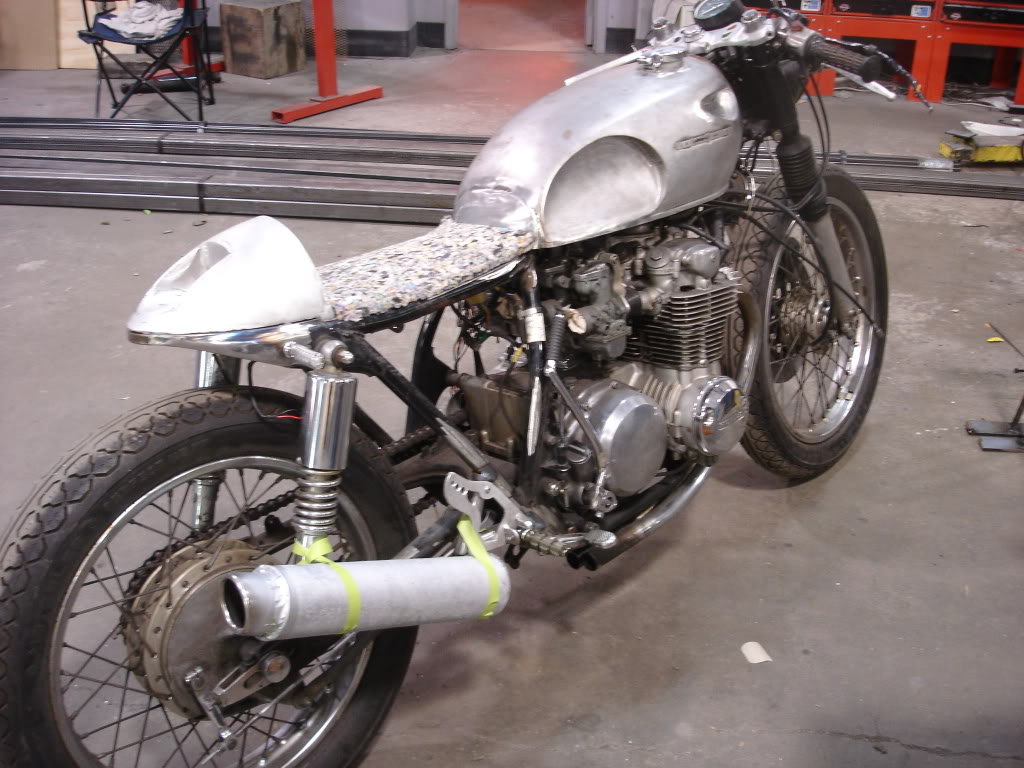
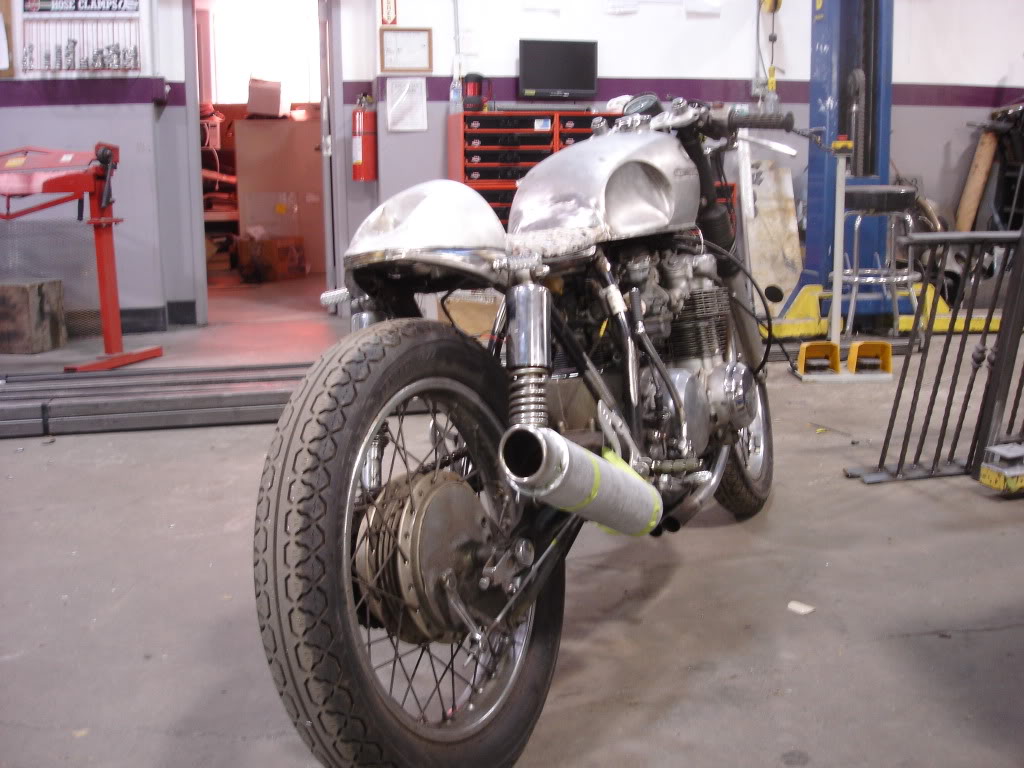
I moved the can back another 4 in and angled it up more. I am going to stick with a single can design.
I moved the can back another 4 in and angled it up more. I am going to stick with a single can design.
Senior Member
Back Marker
Joined: Dec 2008
Posts: 116
From: Lunenburg, MA
Andrew, love your creation! I like longish on the pipe with elongated increasing diameter cone, front to rear. What material are you considering making it with? Stainless would look awesome and work great with polished wheels and powdercoated frame. God....how about polished tank too? Can you clear coat polished metal to minimize the upkeep?
Thread Starter
2nd mouse gets the cheese
SuperBike
Joined: Jan 2008
Posts: 1,697
From: Beaverton, OR
yes you can, but the metal needs to be perfect for you to make it look good. As far as the can I am thinking of polished aluminum it is light, and easy to maintain. I probably will keep the design simple. The complicated part will be the collector 4 into 1.
Senior Member
Superstock
Joined: Jul 2004
Posts: 442
From: Little Rock, AR

I had a 550K from 78-82. New shocks and good rubber will make it handle better. If you haven't done rearsets yet, the ones from a CB400F will bolt straight on.
Drilling the disc shouldn't be a problem, just don't go crazy with the patterns (you need the swept area with that caliper).
Drilling the disc shouldn't be a problem, just don't go crazy with the patterns (you need the swept area with that caliper).
Thread Starter
2nd mouse gets the cheese
SuperBike
Joined: Jan 2008
Posts: 1,697
From: Beaverton, OR
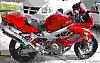
Some before and after stuff
Not much time to fiddle lately so all I have gotten done is a few clean up things with the controls.
Here is the master cylinder before blasting and paint.
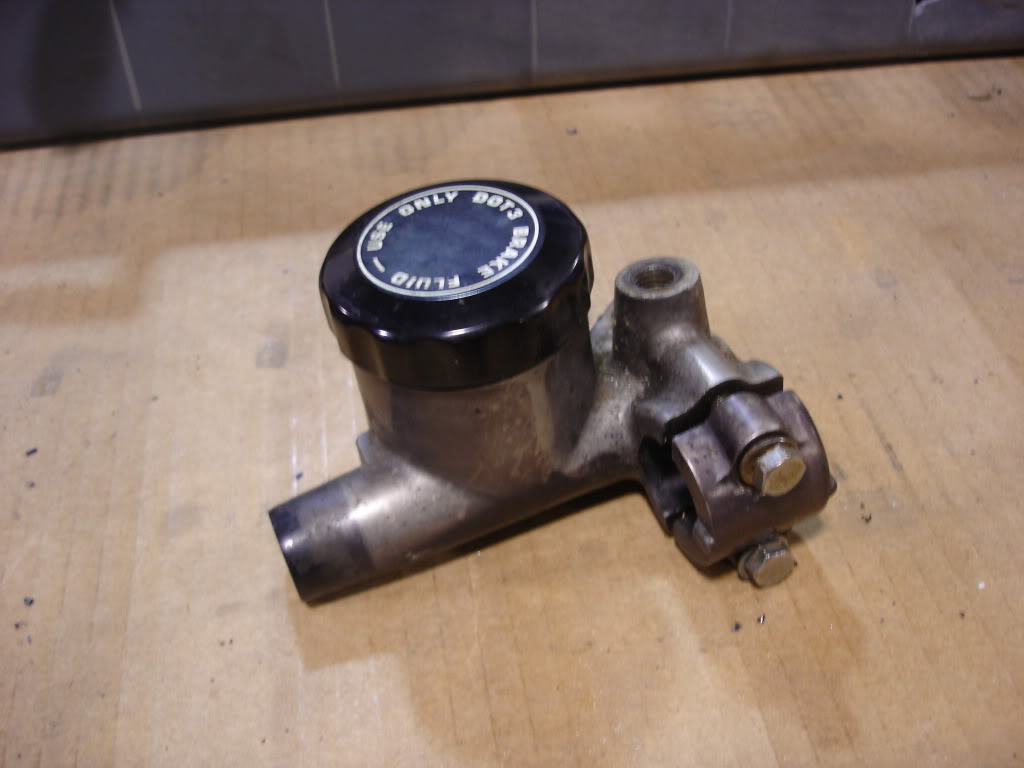
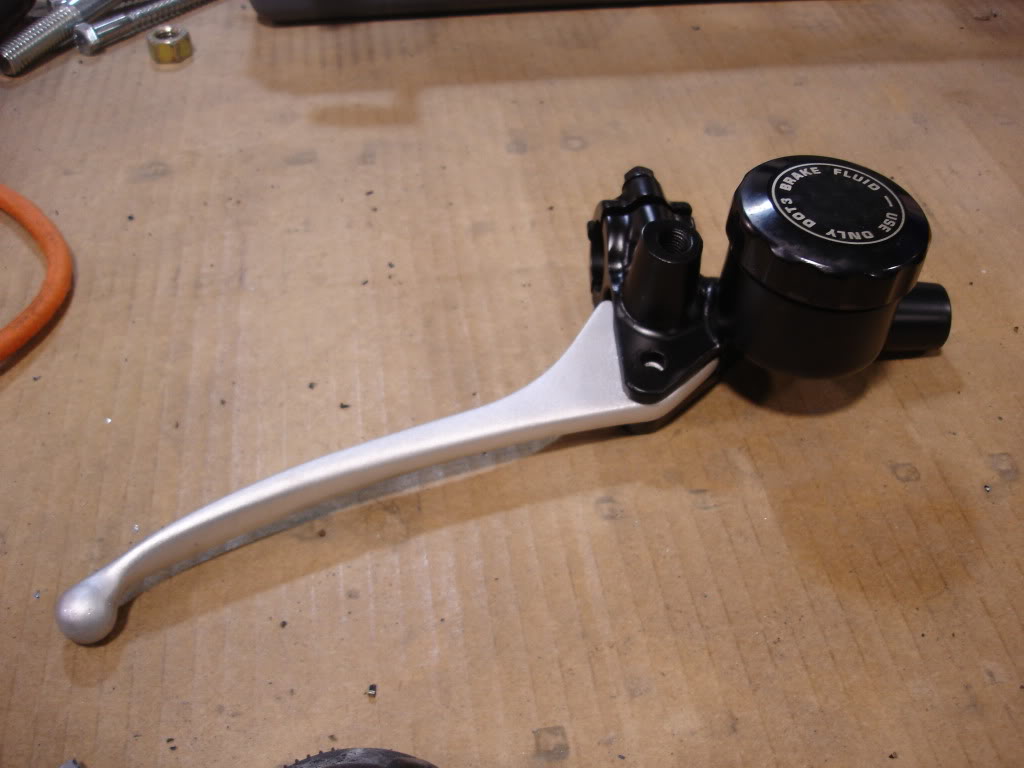
Also had to modify the brake lever so it will trip the new switch I will mount to the master.
Finished the other side as well.
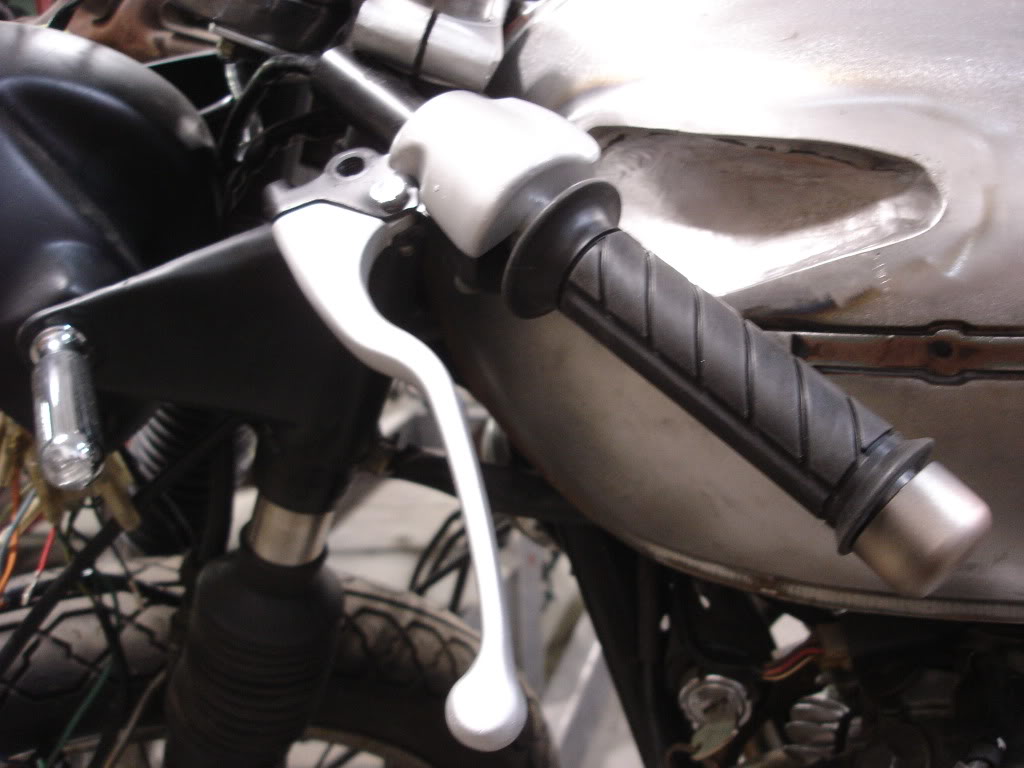
I know the levers don't match, maybe I will hunt down a fix for that.
Here is the master cylinder before blasting and paint.
Also had to modify the brake lever so it will trip the new switch I will mount to the master.
Finished the other side as well.
I know the levers don't match, maybe I will hunt down a fix for that.
COBB Member
Superstock
Joined: Jul 2009
Posts: 292
From: NorthEast Connecticut
You do realize chief, that you have an addiction or a compulsive obsesive disorder, that even though you're on vacation, you feel the need to furtively work on your most efen excellent project and then visit the forum and post.
Now, I think that this affliction may be curable, however painful it may seem at the time.
If, as soon as you finish this bad boy, you deliver it to me, that sweet sorrow you feel will slowly subside to a mellow happiness that only "giving" can provide for those affected with this horrible malady.
Please post plenty of pic's so I can estimate when the extra space will be needed in my stable for this fabulous creation.
Remember, I'm just trying to help you in your time of need... whew, gettin kinda deep here.
Excellent work, can't wait to see what else ya have in store for us to drool over.
Thread Starter
2nd mouse gets the cheese
SuperBike
Joined: Jan 2008
Posts: 1,697
From: Beaverton, OR
Shift Linky
Eh-lo everyone, so I am back from my trip to the great Palm Springs. The friday before I left I received in the mail the CBR600rr shift linkage I bought off of ebay.
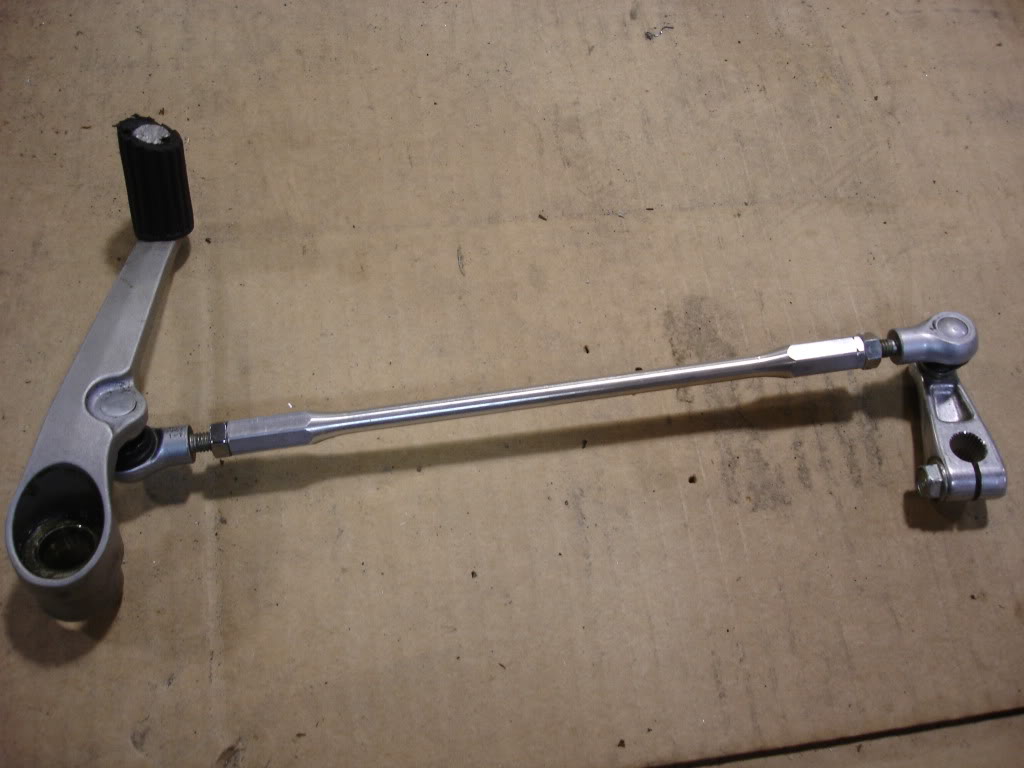
It wasn't quite the right length so I had to cut the link down. Notice its shorter.
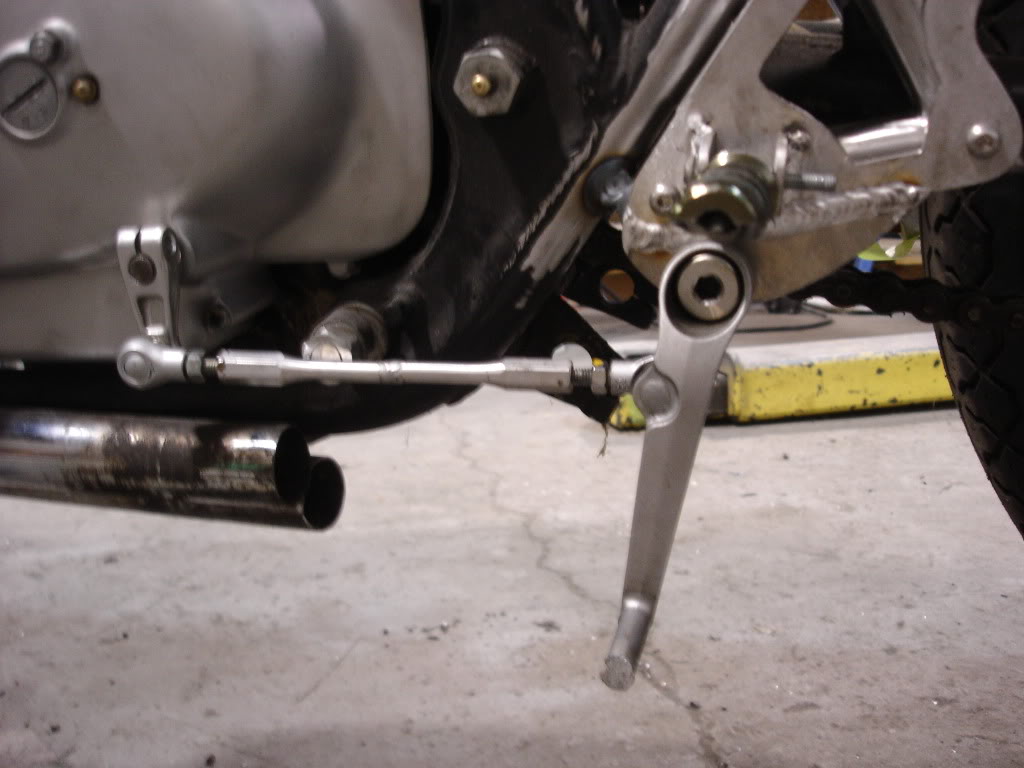
After this you will notice that the shift arm is at a weird angle. I had to get the angle of the ball joint right so that it would actually shift the bike instead of slipping. More chopping was needed on the arm.
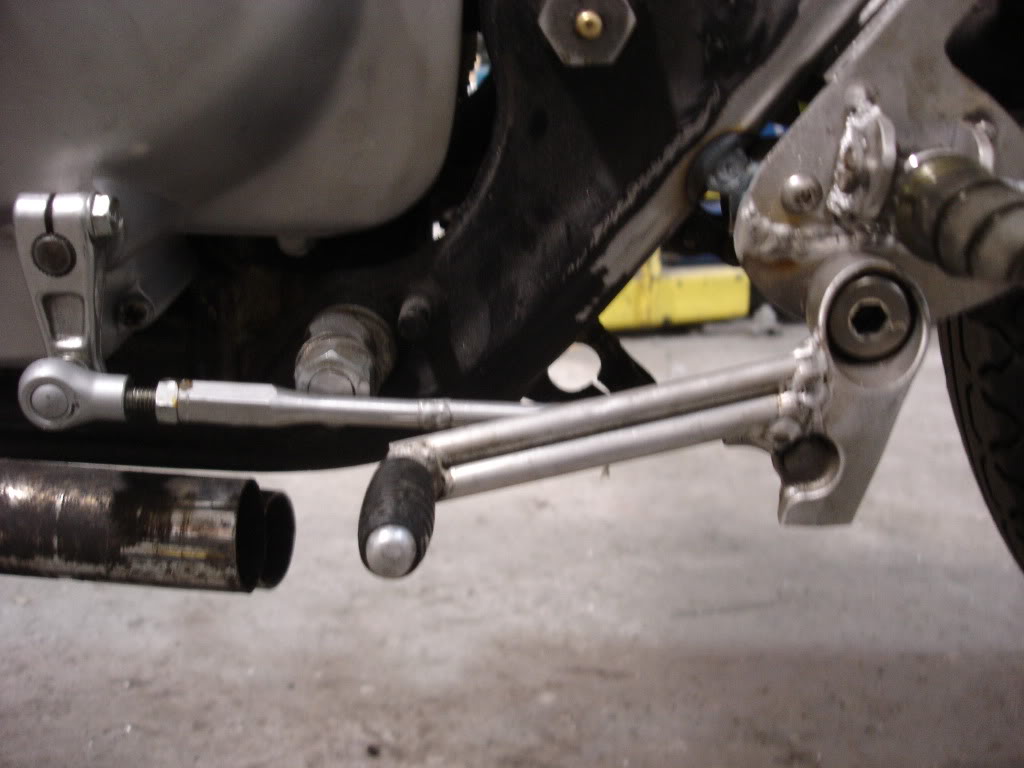
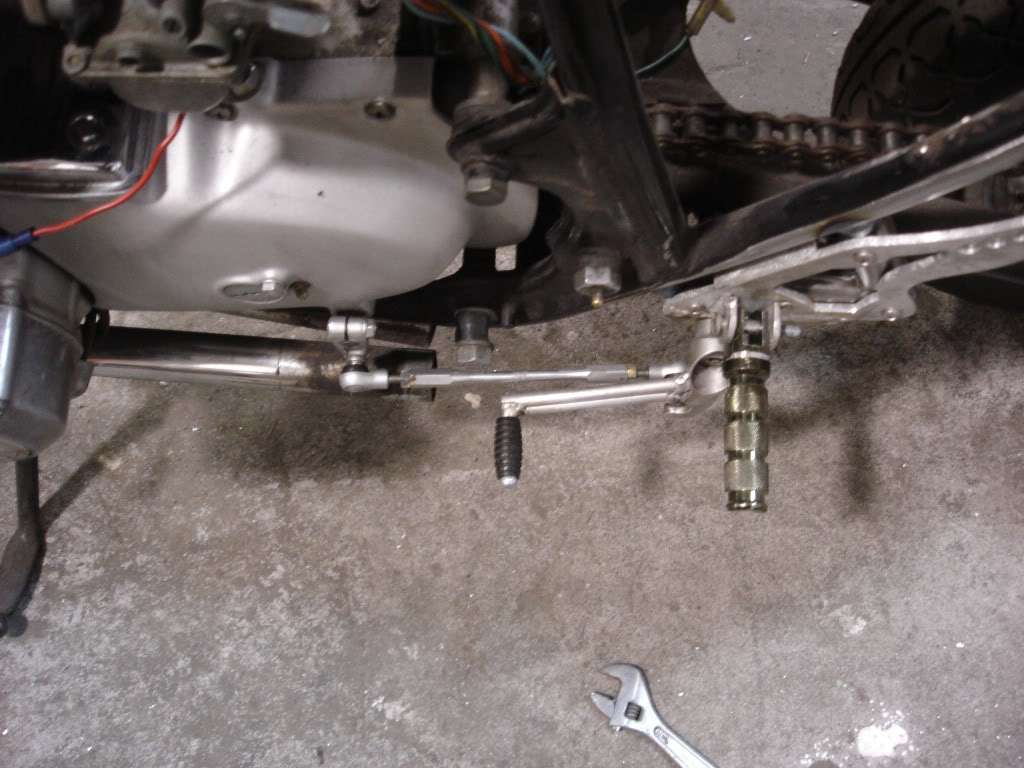
This is what I ended up with, a little more polishing and grinding to make it all look factory and I am done, the bike now will shift yee hah.
It wasn't quite the right length so I had to cut the link down. Notice its shorter.
After this you will notice that the shift arm is at a weird angle. I had to get the angle of the ball joint right so that it would actually shift the bike instead of slipping. More chopping was needed on the arm.
This is what I ended up with, a little more polishing and grinding to make it all look factory and I am done, the bike now will shift yee hah.
Thread Starter
2nd mouse gets the cheese
SuperBike
Joined: Jan 2008
Posts: 1,697
From: Beaverton, OR
Thread Starter
2nd mouse gets the cheese
SuperBike
Joined: Jan 2008
Posts: 1,697
From: Beaverton, OR
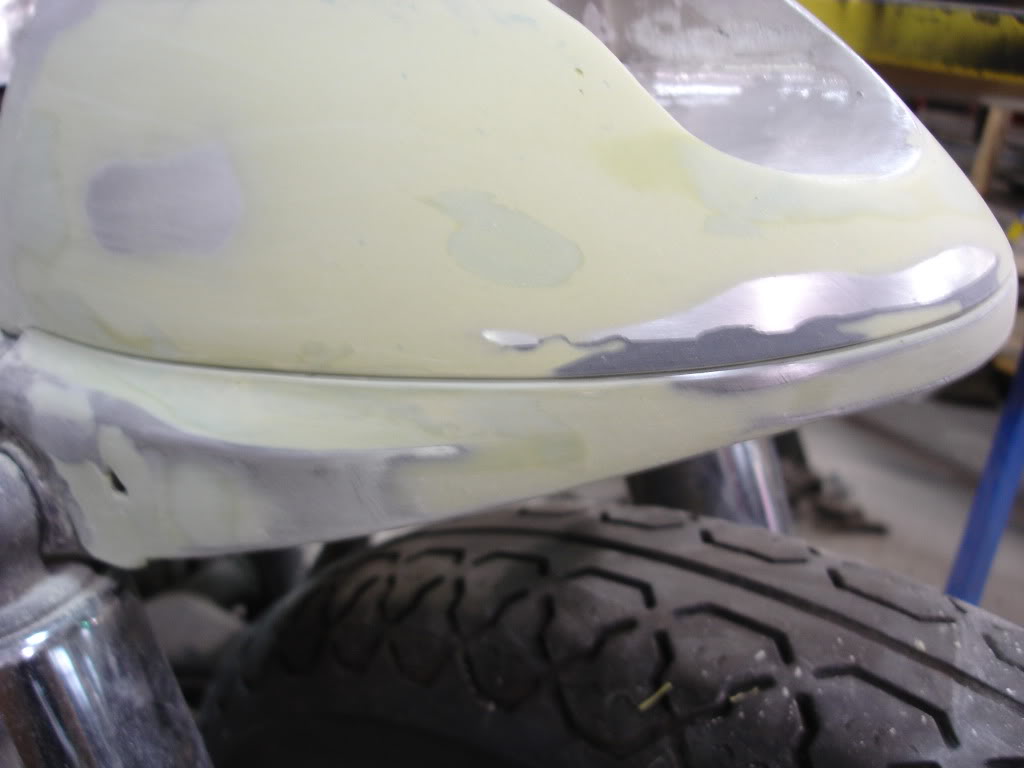
Bodywork
So I started the body work on the rear cowl. I needed to make the frame and the cowl match. Remember I made boxed section of the rear frame to match the lines of both the frame and the cowl. So in continuation I added filler to make be able to blend it in, now it looks very clean and all the lines are correct. Notice in the pictures the clean lines between the frame and cowl. In the first pic there are still a few little edges I need to fix, but you get the idea. Some of you might have a little trouble envisioning it with paint, but I don't this thing is going to look good.


Senior Member
MotoGP
Joined: Sep 2006
Posts: 4,138
From: Austin, Tx
This is really coming along nicely. I have always had a problem being patient enough to do the thorough prep work for an outstanding paint job. Those that know, and I know but I can't do it, will tell you the paint job is in the prep job. When you're sanding for hours with an 800 grit paper keep telling yourself that it's worth it.
Not that your metal work has been anything less than wonderful. To make it look like a production bike from here is going to take some serious time. Your metal work deserves it. You have spent hundreds of hours on the difficult part now you have to spend twice that to make it look good.
I remember a old body man's response to me when I was building my '35 Ford Coupe. I told him my sanding was perfect. "You think it's perfect? Paint it and find out." That old **** still rings in my ears everytime I paint something.
Last edited by nuhawk; Oct 30, 2009 at 04:47 PM.

Junior Member
Squid
Joined: Oct 2009
Posts: 4
Hello there, I am from greece and I've been watching your project. You have done hell of a progress and you deserve many many congratulations. Keep the good work pall. Looking forward to see it 100%
coffee racers R O C K ! ! !
coffee racers R O C K ! ! !
Thread Starter
2nd mouse gets the cheese
SuperBike
Joined: Jan 2008
Posts: 1,697
From: Beaverton, OR
Need aftermaket can
Been a little while I know. Anyways lots of a small things to do so not as many pics. I am however looking for an aftermarket can to use so if anyone has a mismatch laying around that the would be willing to let me have that would be nice. I can build one but it would be easier to just bolt one on.
I have been working at getting the tail finished, the light needs to be mounted and blended, that is what I am working on now. I will get some pics up soon. Thanks guys for the compliments.
Cheers
I have been working at getting the tail finished, the light needs to be mounted and blended, that is what I am working on now. I will get some pics up soon. Thanks guys for the compliments.
Cheers
Thread Starter
2nd mouse gets the cheese
SuperBike
Joined: Jan 2008
Posts: 1,697
From: Beaverton, OR
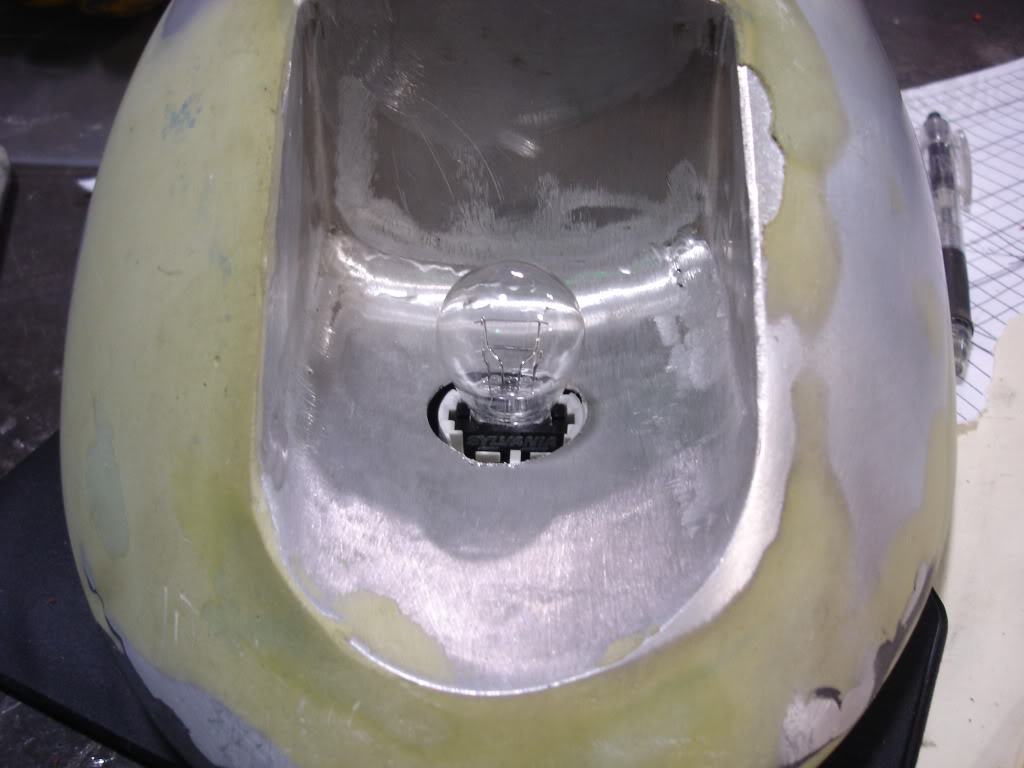
The light
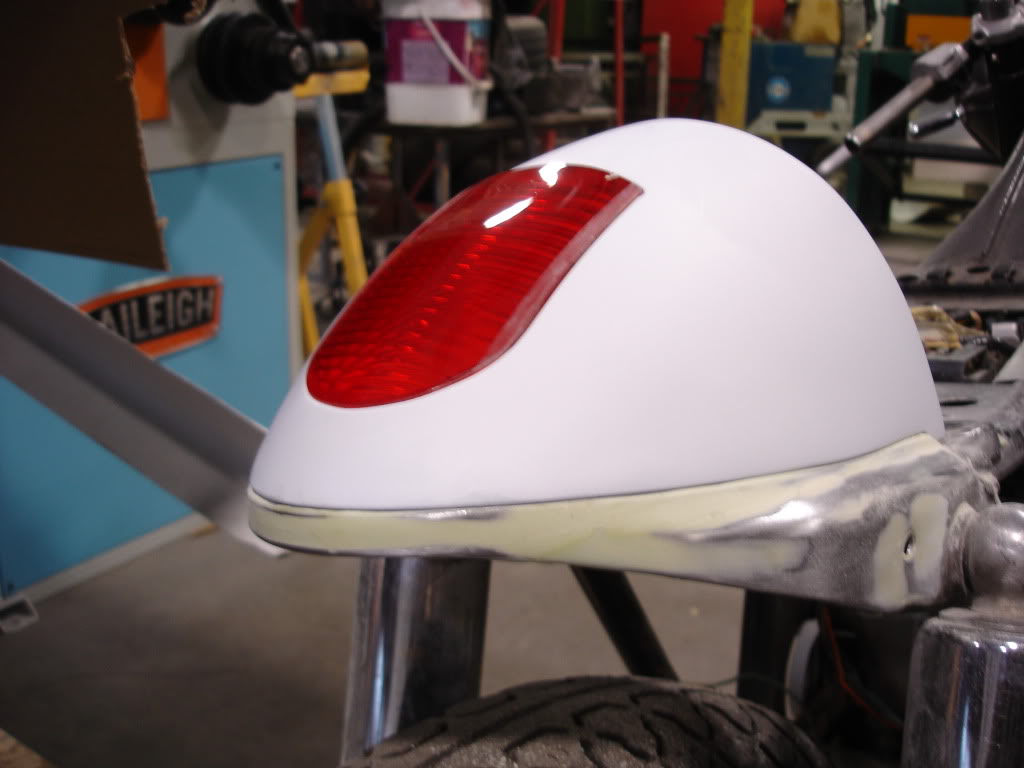
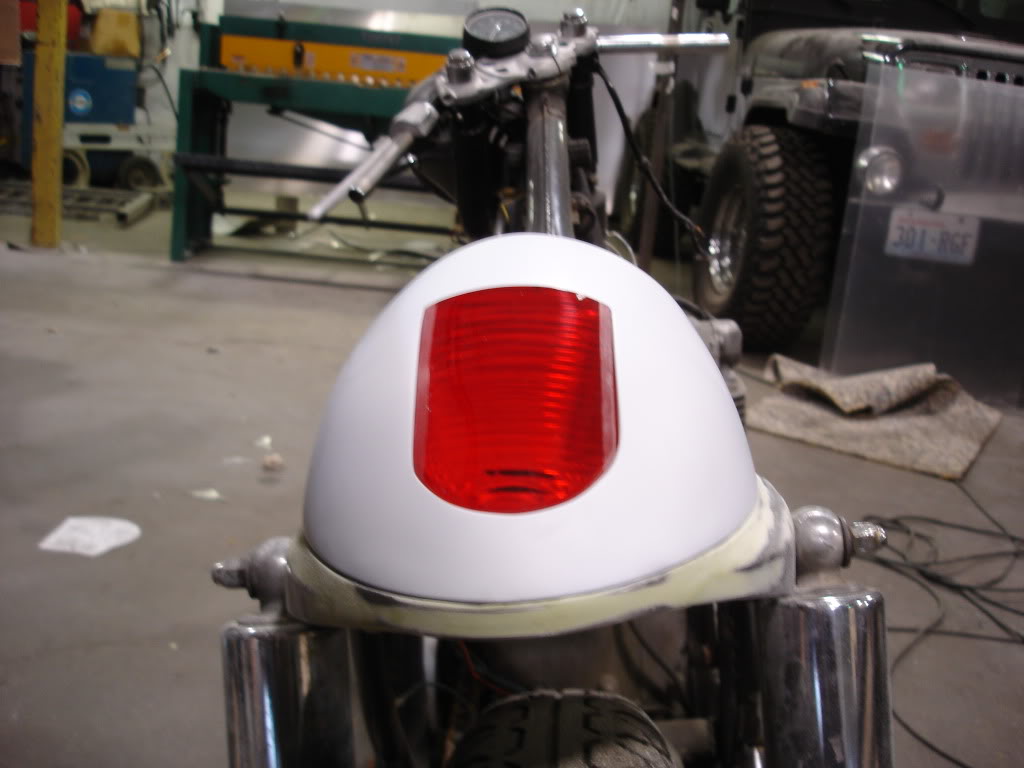
So I am scrapping the LED tail light. It is too much work and if things go wrong because of the design of the cowl it would be a disaster. So I am opting for a more standard bulb. Here's what I came up with.
Then I made a red cover
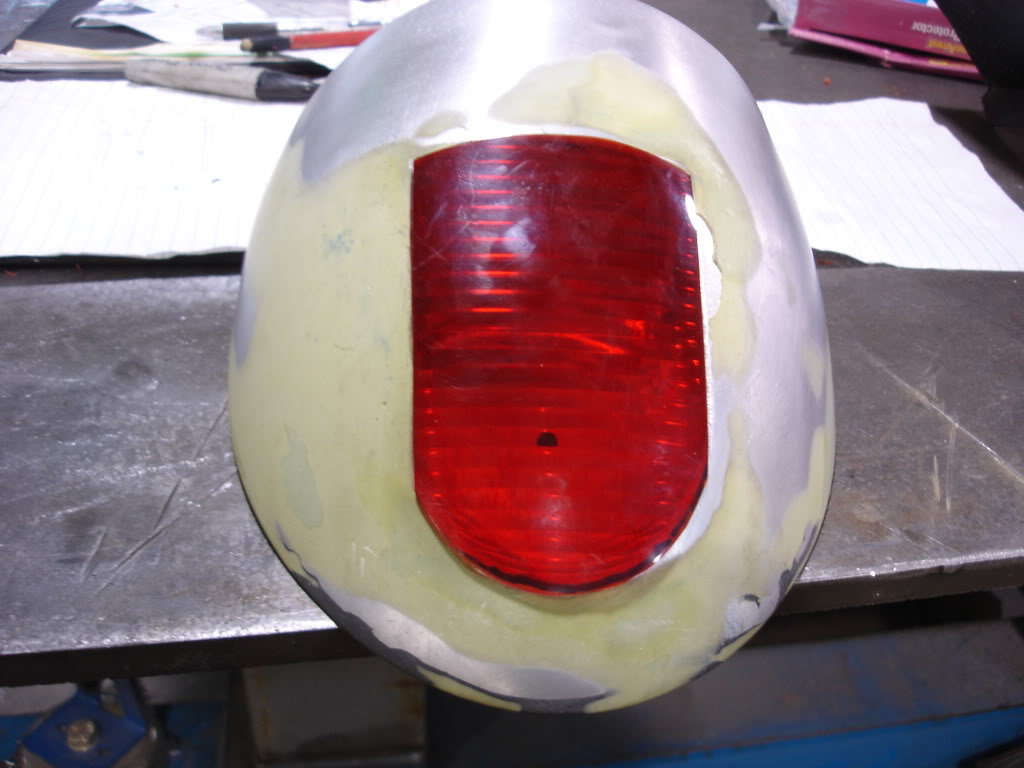
This is what it looks like lit.
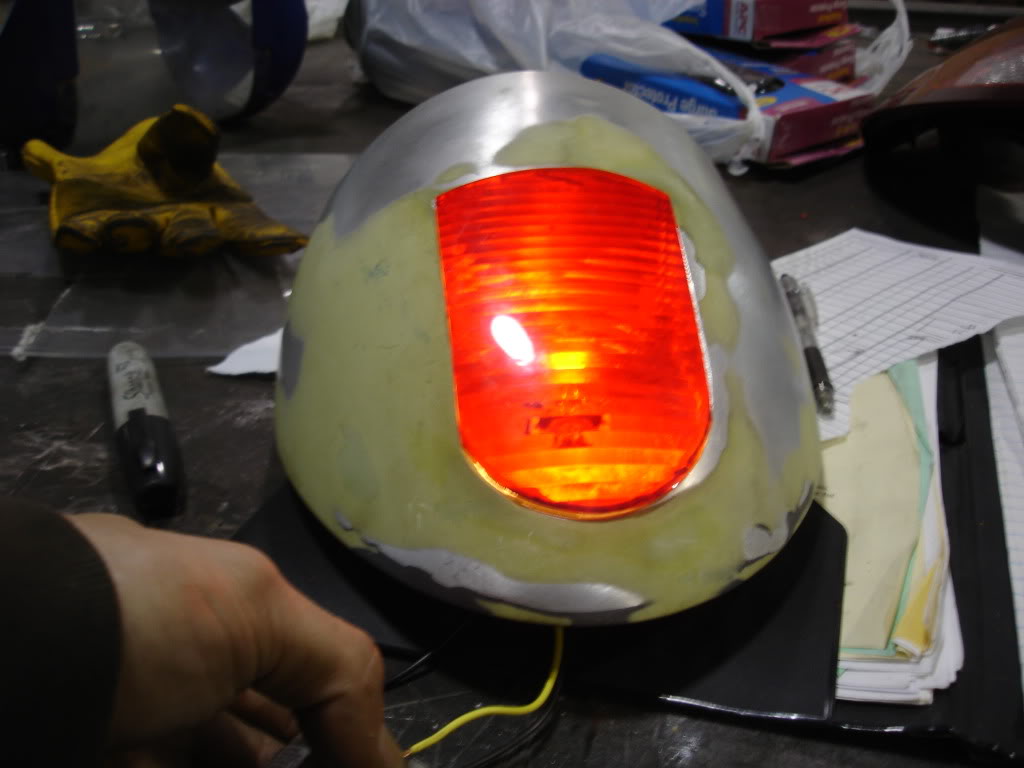
Then I made a red cover
This is what it looks like lit.
Senior Member
SuperSport
Joined: Oct 2009
Posts: 617
From: In a van down by the river (I wish!)
That rear cowling is going to rock.
Neat GBs, Stebbdt. The one with the drum front brake is way tough. I had one of those bikes a few years back. I had a big-bore kit installed and it went pretty well in the mountains. One of the best cult Honda's, IMHO.
I took it to a Hawk meet and it kept up fine with the 650s, too. I actually miss that bike than the ones I got to replace it...
Randy
Thread Starter
2nd mouse gets the cheese
SuperBike
Joined: Jan 2008
Posts: 1,697
From: Beaverton, OR
Progress
Hi,
So for those who have trouble seeing the beauty before the paint, here is the cowl with its first coat of primer. I will then have wet sand the primer with 400 grit, and apply another coat of primer, sand again. Then it will be ready for the painter to begin the process of spraying pearl white. Look good?
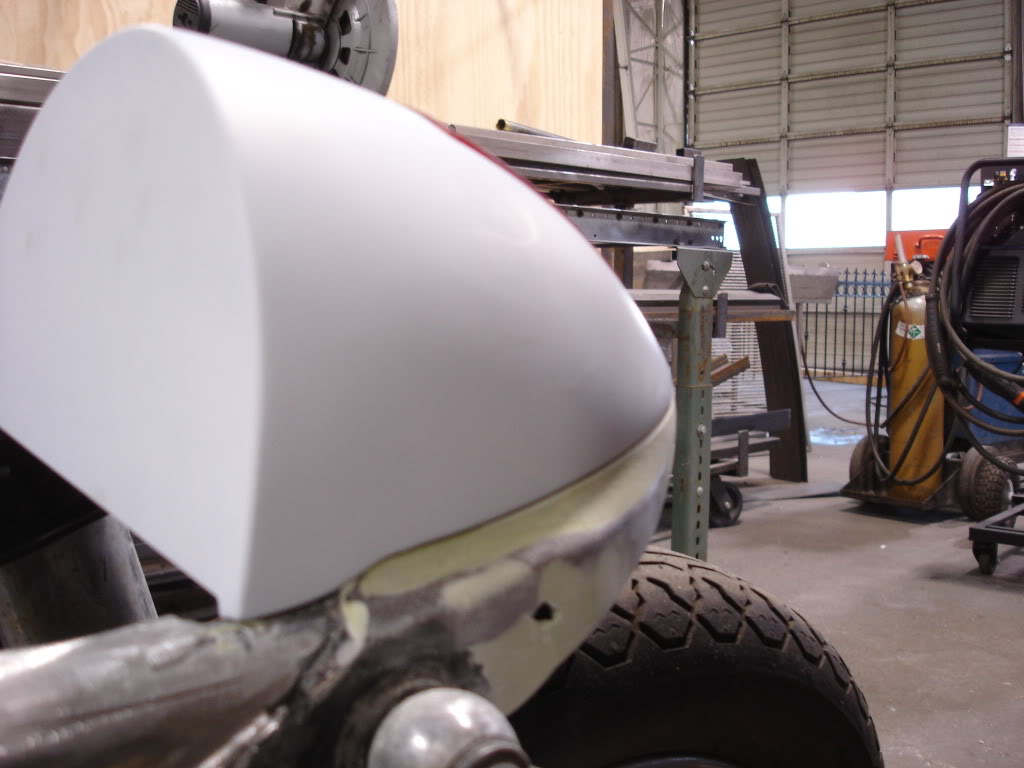
So for those who have trouble seeing the beauty before the paint, here is the cowl with its first coat of primer. I will then have wet sand the primer with 400 grit, and apply another coat of primer, sand again. Then it will be ready for the painter to begin the process of spraying pearl white. Look good?
Thread Starter
2nd mouse gets the cheese
SuperBike
Joined: Jan 2008
Posts: 1,697
From: Beaverton, OR
So I am going to be starting the body work on the tank tomorow. I am so excited. Things are coming together. After the tank is done I will have it painted then I will make an attempt to make my own seat cover. More stuff to come.

Cigar Officianado
Squid
Joined: Sep 2009
Posts: 22
From: Bothell, WA
Thread Starter
2nd mouse gets the cheese
SuperBike
Joined: Jan 2008
Posts: 1,697
From: Beaverton, OR
It does look quite a bit different with the first coat of primer and some sanding done to it. I am getting excited as well. Now what is the rest of the time looking like for completion? When are you going to tear everything off, clean, and reassemble? I'm getting anxious.
Once the exhaust is built then the tear down begins so I can paint the frame, I may send you a few covers and things so you can help with the polishing.
Senior Member
Back Marker
Joined: Jul 2008
Posts: 243
From: Toronto, Ontario
nice build...i was never into cafe racers, but i can def appreciate yours.
a bit dissapointed you scrapped the LED thing....
regarding your sealing the tank....i work in aircraft industry and have access to PRC. its the sealant used to seal aircraft fuel tanks along body panels, rivets, bolts etc etc. if you're interested i can let u have some....how much would u need? just along the edges or the entire inside of the tank?
Thread Starter
2nd mouse gets the cheese
SuperBike
Joined: Jan 2008
Posts: 1,697
From: Beaverton, OR
I would need enough to coat most of inside. Today I ran a little pre paint cleaner inside and there are a few pin wholes. Would the aircraft stuff seal it up? It is a small tank and even if I had enough to seal around the inside of the cut outs that would work too. The rest of the tank was sealed even before I started cutting it. Thanks.


