When you click on links to various merchants on this site and make a purchase, this can result in this site earning a commission. Affiliate programs and affiliations include, but are not limited to, the eBay Partner Network.
These carbs
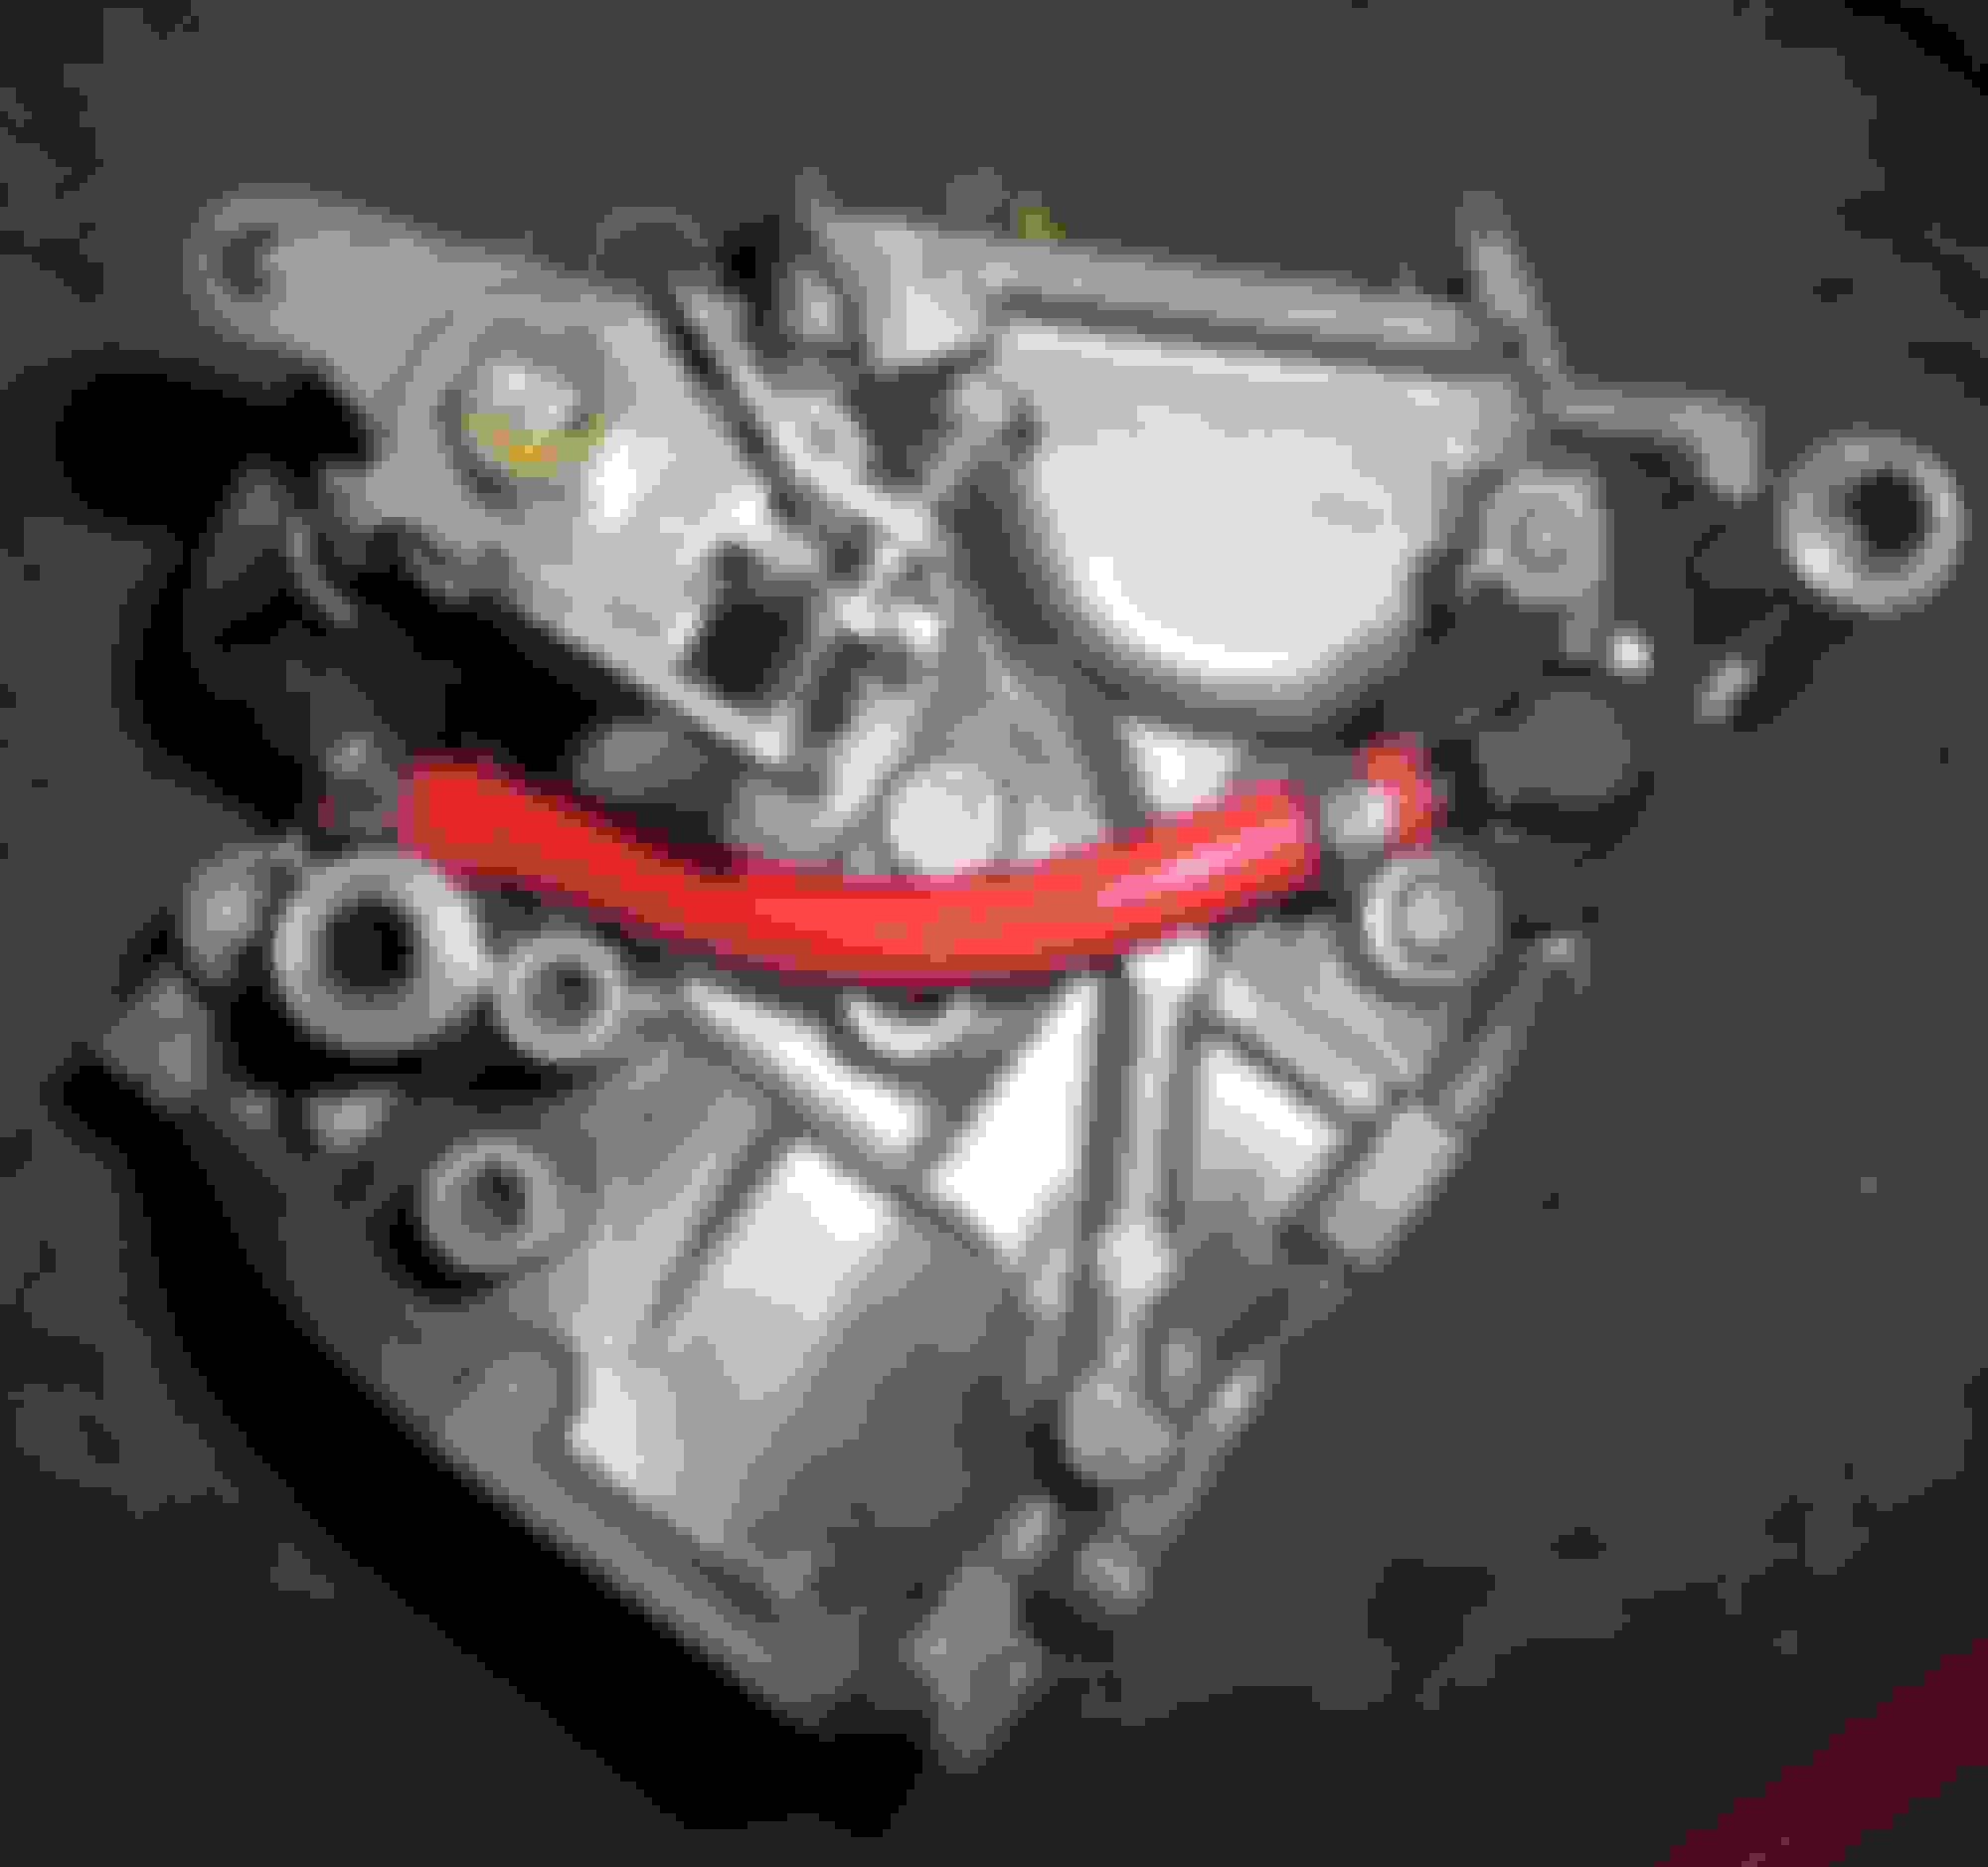
Yesterday I had a slight stumble at idle and also occasional on rolling on the throttle. More than 2 years since last cleaned and 5 weeks sitting as i had other bikes to ride allowed the pilot circuit build up some blockage. Decided instead of just a quick fix for that, Id do a total refresh on them.
Full dissemble, inspection, dip in the sonic tank, inspection then reassembly using all new O rings, Silicone hose and Oetiker clamps for the Air cut off valves. Silicone hose for the rest of the vac lines using a mix of Oetiker clamps on the ends that do not see normal removal and embossed full circle clamps made for Silicone hose.. Silicone hose for all the carb coolant, vent and fuel lines more Oetiker clamps, some Gates PowerGrip SB Heat Shrinkable Hose Clamps and a few zip ties...
Disassembly went as normal, what some may not know about are the small and likely hardened and leaking
And there are more..... each one a potential leak, each one potentially damaged when you use "Carb Cleaner" And only Penney's to replace.
Do it right
Do it once
Initial inspection looked good, no wear in the needle jets a part technically non replaceable, though I have a source for them and new ones can be made then fit in the carb bodies.
Off to the Sonic tank for 30 min bath
And all clean, inside and out.
Parts you say? Why yes parts, here is a list of all normal rubber service parts. Specific to the carb set being worked on others may need some hard parts... fuel screw, float needle, jets, ect...
For full rebuild, you will need 2 O ring sets for each carb.
16041-MZ5-600
note this number is different then what is showing on parts sites right now, it is a superseded number and commonly list out for applications other then the VTR..But My Honda parts guy confirms the number is right and I have personally used this set on 4 VTR carbs now..they are the correct O rings.
So 2 of these
And 2 of these
2 Each O rings for the fuel screw Which are not available as a single service item for this carb, but can be had in same size (same part) in other bike models or bought bulk as I do.
The OEM part is SCREW SET 16028-MY5-890 which gets you a fuel screw, spring, steel asher and rubber O ring.
Consider replacing the carb to head rubber manifold. after only a few yeasr they get hard as a rock, nicked if you R&R carbs a lot, and may not seal well
1 Each
NOTE there are different front and rearINSULATOR, RR. CARB
16220-MBB-950INSULATOR, FR. CARB
16210-MBB-950
And then Silicone hose for everything you wish to replace... for thats every MM of black rubber hose in use now.
Post cleaning second inspection reviled this set of carbs is in very good condition with almost no visible or measurable wear. So other than being 18 years old and a bit dirty they are prime for full refresh as no machine work is needed, throttle shaft seals are good.
Off I go to service training bikes, perhaps more on this project tonight
Last edited by E.Marquez; Nov 3, 2018 at 11:35 AM.
Reason: Edit and added parts list
Decided to replace the intake manifolds as they were getting a bit hard. I thought I had replaced them already but they appear to be the originals.
So things are on hold while those come in as well as a second set of GASKET SET 16040-MBB-640 (all item #6 come in one set, per carb, so you need 2 each sets for full build)
Why you might ask do I need another gasket set???????? because one of my dogs ate the paper bag and both sets of O rings I had in them..... Of our 5 dogs, He is the only one that truly likes to hand out in the shop with me...but the damn beast occasionally decides to eat paper tows of other "trash" he can reach. And the bike lift the parts were on was at floor level....lol,,,,I know better then that.
So while I wait to go pick up parts that came in this morning I did some basic clean up and refurbishment
Metal work was a bit corroded form yeasr of being in the air and general environment
So it got a quick polish careful to not burn through the the zinc plating which does provide rust protection
All rubber hoses (and O rings, gaskets and packings) are being replaced.
Hoses are being replaced with HPS silicone hose, the spring clamps replaced with either perfect circle oetiker clamps like this
Or Gates silicone hose clamps on the coolant lines
They are designed so that they have no cutting edges to damage soft (silicone) hoses
Redid the vacuum lines as well for petcock and carb balancing
The vacuum valves (slides) were looking a bit rough even though only about 1 and 2 years old (rear is older, front replaced last year when the diaphragm was found with a hole in it)
That was the "better" of the two in the carbs and better than all 5 I had on hand.
Three stages of plastic polish and they are clean and smooth again. They slide in the carb body noticeably easier, though that may diminish as the polish wears off.
Considering having some new ones coated with a hard wearing coating that is also a lube.
The rest of the O rings and the new carb manifold boots are in, I just have to take a 60 mile trip and go get them... Friday i think
Where do you a good port to tap off of would be for balancing. I would like to leave a permanent tap for adjusting AF screws and balancing, it seems having the carb off would be a good time to do it. BTW...the carbs look great. Nice work.
Where do you a good port to tap off of would be for balancing. I would like to leave a permanent tap for adjusting AF screws and balancing, it seems having the carb off would be a good time to do it. BTW...the carbs look great. Nice work.
The current line from the rear head to the fuel petcock gets a Y adapter, one end to the head, one end to the petcock, one end is plugged and then used as needed for carb balancing.
That is the line in the pic
I use a few cable clamps and zip ties to keep the lines in place.
The plugs for my lines are made on my lathe
but you can use a 5mm x 5mm barb and then put a cap on it. The down side of that is, you have another failure point and all of the commonly available rubber caps i have used over the years, weather and crack in short order. so if you cap that way, check the caps often.
Well, after posting that response I noticed the plug as a bit beat up and the small end was a pain to grab and remove from the silicone hose, came right out of the rubber vac line.
So off to the lathe I went..
There thats better, an end to grab slightly larger then hose ID and a bit of knurling to assist
screw in the idle adjuster
10 sec max......until the black plastic **** breaks
in two
so take a chance on one of the other 10-20 year old adjusters I have on hamd
order a new one and wait 3-5 days knowing the part was made 5-8-20 years ago
Get on the lathe and make one....
well ya I made one
I considered making a mold and pouring a new **** from Epoxy, but that seemed more work then I wanted to do tonight, and really did not need an adjuster **** with insulation properties...just a darn thing to grab onto and turn the screw.
So a hunk of 7071 3/4" rod I had on hand got tapped for duty.
Turn to size, knurl the end
Chamfer the end
Drill the through hole .003 undersized to the screw shank, pocket bore the **** undersized .003 for the head of the screw, Start the part, then chamfer the lower edge.
Finish parting the **** from the stock and press in the adjuster screw.
and there you are, a 10 second task that took me an hour...........
Last edited by E.Marquez; May 8, 2019 at 08:02 AM.
Stole some shop time while waiting on something in the sonic tank to cook
Got a little farther, cleaned the linkage up, picked though the available plastic washers and chose the best ones...
Installed the linkage
Dont forget there are two different style plastic washers on each pin plus a steel one.
The plastic washer that is split and convex shape goes on first, it helps space the linkage bar away from the link arm, it acts as a "spring" as sorts for lateral play, and reduces friction surface area..
Then the link goes on, then flat plastic washer, steel washer and cotter pin.
NO oil or grease... this link uses a bronze bushing so no lube is needed and lube like that will make things worse as it would attract dirt and other abrasives. If you want a dry lubricant can be used, but still not really needed so if you don't have some Teflon or moly dry lube, no lube is better (don't hear that often now do you....)
Setting the TPS is fast and easy if you have a test cable made up.. Nothing more then a piece of the OEM harness sectioned out..I had an old harness on hand so made the cable... Otherwise meter test leads with clips on the end to hold on to the TPS pins works as well.
As stock, this TPS was set to 787 Ohms and the lowest the TPS could be adjusted to was 656 ohms
With just the steel bushing removed it could be adjusted to 526 ohms
I removed 2 mm of material from the TPS and tested, it was 398 ohms... showing that very little material need be removed...about 1mm or so
With the TPS set at 500.4 ohms you can see here how little more travel is needed in the adjustment travel
You can remove the steel bushing, file out about 1mm of plastic and put new screws in without the bushing.. The bushing is there so you do not damage the TPS when tightening. So, don't over tighten the screws, just snug them up....and use a drop of medium strength thread lock to keep the "under" tightened screws from vibrating out. I have a few dozen bikes with 10's of thousands of miles running that way no issue at all.
But lately I have started retaining a part of the bushing... Simply because Im not the only one that might be wrenching on the bike after me (not this one specifically, but in general)
So trim the TPS as needed to get your preferred setting, then trim just one end of the bushing that covers the needed additional adjustment range,,,Only a corner of the bushing needs to be trimmed..retain as much as you can.
I do not believe there is an perfect setting, but an ideal range ..someplace between 490 and 600.
My 98 ran best at just below 500, the 2001 right at 500, but others have reported best for their bike at 520, 520, 560.
So pick a number say 500, set it, and test on a fully warmed machine try a few other settings and see what your bike likes best.
Button head SS socket screws with a drop of Loctite 222 light thread lock
And all done, think I got close to my target 500 ohms
Last edited by E.Marquez; Nov 5, 2018 at 02:45 PM.