
Time for Stage I

Thread Starter
Fastest Color
SuperBike
Joined: Jul 2007
Posts: 2,091
From: Lithia, FL

")
Thread Starter
Fastest Color
SuperBike
Joined: Jul 2007
Posts: 2,091
From: Lithia, FL
Here's the Morwi STG 1 cam timing card:
Open Close
IN 22 BTDC 53 ABDC
EX 53 BBDC 16 ATDC
Can anybody tell me for sure if those were taken at 1.0mm = 0.04in of lift on the dial indicator?
Open Close
IN 22 BTDC 53 ABDC
EX 53 BBDC 16 ATDC
Can anybody tell me for sure if those were taken at 1.0mm = 0.04in of lift on the dial indicator?
Thread Starter
Fastest Color
SuperBike
Joined: Jul 2007
Posts: 2,091
From: Lithia, FL
I'm consider not using lobe center calc and instead just relying on the 1mm lift timing angles given, which I figure could be more accurate then the centerline calc if the lobes are asymmetrical at all...
Last edited by FL02SupaHawk996; Apr 22, 2010 at 02:01 PM. Reason: spell

Senior Member
SuperBike
Joined: Dec 2005
Posts: 1,689
From: South Lake Tahoe, CA, USA

The cam timing spec sheet from Moriwaki had the lift specified, since the timing numbers are irrelevant with out them.
I'm 99% sure it is 1.0mm, and .040" is close enough.
The lobes are symmetrical. I like the lobe center calculation, but in reality, any difference should be insignificant - some would argue that the whole exercise is unnecessary, since you have only removed ~.010 from the heads, but since you are tuning, you might as well not skip it. Besides, he who has the most tools and never uses them has the most tools, but gets disqualified from the competition.
Thread Starter
Fastest Color
SuperBike
Joined: Jul 2007
Posts: 2,091
From: Lithia, FL
I'm sure you're right and it's 0.04", but I'll ask Bill at Hpower since he sold the cams to me and provided the spec sheet.
Roger said I could skim 38 thou off the heads if I were using Moriw pistons, but since I used JE I chickened out and didn't take anything off...
Roger said I could skim 38 thou off the heads if I were using Moriw pistons, but since I used JE I chickened out and didn't take anything off...
Thread Starter
Fastest Color
SuperBike
Joined: Jul 2007
Posts: 2,091
From: Lithia, FL


Senior Member
SuperBike
Joined: Jul 2005
Posts: 1,548
From: MN
mine came with the spec card and it did specify 1mm lift. I think the lobe center method has some real advantages. Your clearances, unless exactly the same as the clearances specified on the card will give you slight different opening and closing and you could chase your tail correcting when its not needed, nor possible. the lobe center method makes the differences in gap set irrelevant.
Thread Starter
Fastest Color
SuperBike
Joined: Jul 2007
Posts: 2,091
From: Lithia, FL
mine came with the spec card and it did specify 1mm lift. I think the lobe center method has some real advantages. Your clearances, unless exactly the same as the clearances specified on the card will give you slight different opening and closing and you could chase your tail correcting when its not needed, nor possible. the lobe center method makes the differences in gap set irrelevant.
Senior Member
SuperBike
Joined: Dec 2005
Posts: 1,689
From: South Lake Tahoe, CA, USA
Mounting on the cam lobe won't work. It needs to measure movement of the lifter bucket.
My setup was similar and I was able to set the indicator point on the lifter. It's tight, but you can get it in.
My setup was similar and I was able to set the indicator point on the lifter. It's tight, but you can get it in.
Thread Starter
Fastest Color
SuperBike
Joined: Jul 2007
Posts: 2,091
From: Lithia, FL

Senior Member
SuperBike
Joined: Jul 2005
Posts: 1,548
From: MN
you can definitely get the indicator on the bucket. hard to get it lined up and you may have to rearrange how the mounting plate is set but you can. and must. the dial gauge should have some different length tips that you can screw into it - you can even put a slight S curve into it if it helps get you into the right plane.
Thread Starter
Fastest Color
SuperBike
Joined: Jul 2007
Posts: 2,091
From: Lithia, FL
Received the 2" dial indicator today that I bought offa flebay for $20 delivered and it looks like a nice toy I mean tool to use to measure lift at the bucket.
However, I have a new keg of Stone IPA being delivered today, so I may not get much done this weekend
However, I have a new keg of Stone IPA being delivered today, so I may not get much done this weekend
Senior Member
Superstock
Joined: Sep 2009
Posts: 421
From: Woodland Hills, CA
Thread Starter
Fastest Color
SuperBike
Joined: Jul 2007
Posts: 2,091
From: Lithia, FL

Thread Starter
Fastest Color
SuperBike
Joined: Jul 2007
Posts: 2,091
From: Lithia, FL
Made my own caster nut/frame tools since paying $100 each boarders on insanity!
Using a 4" grinder it was actually easy and took less than an hour to make both. For the 22mm I used an old 12-pt 7/8" socket and for the 20mm I used a 12-pt 3/4" socket.
Using a 4" grinder it was actually easy and took less than an hour to make both. For the 22mm I used an old 12-pt 7/8" socket and for the 20mm I used a 12-pt 3/4" socket.
Thread Starter
Fastest Color
SuperBike
Joined: Jul 2007
Posts: 2,091
From: Lithia, FL
Cam timing questions:
I started with the rear cylinder and had to do begin from scratch cuz the new adjustable cam sprockets don't have marks that work and the flywheel is off so no marks there to look at either....kinda like doing it in the dark
I'm close to having the rear cams dialed in, but I have a few questions:
1- It's my understanding that the engine fires with every revolution of the crank, so does it matter which cylinder goes boom 1st?
2- Once the combustion cycle starts, what is the order of valve events for the 4 sets of valves (both IN & EX) or in other words how many degrees should the front and rear cam events be separated so they are in the correct phase with each other?
3- Anybody wanna come over and do this for me...LOL!
Thanks,
RC
Thread Starter
Fastest Color
SuperBike
Joined: Jul 2007
Posts: 2,091
From: Lithia, FL
Okay, I think I've got it.
Once you know which compression stroke you've got coming 1st (either FR or RR) then everything should degree out accordingly...
There's a lot of math for a simple minded mechanic like me! Anybody know any short cuts to get the same results or do I need to continue degreeing each event?
Once you know which compression stroke you've got coming 1st (either FR or RR) then everything should degree out accordingly...
There's a lot of math for a simple minded mechanic like me! Anybody know any short cuts to get the same results or do I need to continue degreeing each event?
Thread Starter
Fastest Color
SuperBike
Joined: Jul 2007
Posts: 2,091
From: Lithia, FL
By my calcs the EX valve should be at full lift at 161.5 degrees and the intake valve at 443.5 degrees in the 720 degree cycle. Now the question is where to bring in the other cylinder?
Senior Member
SuperBike
Joined: Jul 2005
Posts: 1,548
From: MN
you can use the original sprockets as guides to get you started in right directions. Simply transfer marks over to new adjustable sprockets and use as reference starting points. I forget which stage 1 cams you are using but moriwaki are simply drop in items so you should be very close using stabndard marks, then timing to perfection.
Cam timing questions:
I started with the rear cylinder and had to do begin from scratch cuz the new adjustable cam sprockets don't have marks that work and the flywheel is off so no marks there to look at either....kinda like doing it in the dark
I'm close to having the rear cams dialed in, but I have a few questions:
1- It's my understanding that the engine fires with every revolution of the crank, so does it matter which cylinder goes boom 1st?
2- Once the combustion cycle starts, what is the order of valve events for the 4 sets of valves (both IN & EX) or in other words how many degrees should the front and rear cam events be separated so they are in the correct phase with each other?
3- Anybody wanna come over and do this for me...LOL!
Thanks,
RC
I started with the rear cylinder and had to do begin from scratch cuz the new adjustable cam sprockets don't have marks that work and the flywheel is off so no marks there to look at either....kinda like doing it in the dark
I'm close to having the rear cams dialed in, but I have a few questions:
1- It's my understanding that the engine fires with every revolution of the crank, so does it matter which cylinder goes boom 1st?
2- Once the combustion cycle starts, what is the order of valve events for the 4 sets of valves (both IN & EX) or in other words how many degrees should the front and rear cam events be separated so they are in the correct phase with each other?
3- Anybody wanna come over and do this for me...LOL!
Thanks,
RC
Senior Member
SuperBike
Joined: Jul 2005
Posts: 1,548
From: MN
they look nice but how are you going to hold the inner part steady as you tighten down the outer nut? That is the hard part about simply making one out of a socket - you need to find another way to hold the socket so you can thread a wrench down the center of it.

Out of my mind, back in 5
MotoGP
Joined: Nov 2006
Posts: 6,109
From: Skurup, Sweden
Put the handle on the other socket and you have the hole free to stick things through... I did it this way, works nicely...
Thread Starter
Fastest Color
SuperBike
Joined: Jul 2007
Posts: 2,091
From: Lithia, FL
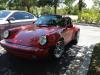
And that would be the reason for this... http://www.ablett.jp/bikes/vtr/red_vtr.htm
Put the handle on the other socket and you have the hole free to stick things through... I did it this way, works nicely...
Put the handle on the other socket and you have the hole free to stick things through... I did it this way, works nicely...


