My Cafe Build
 03-01-2010, 12:54 PM
#481
Senior Member
MotoGP
Join Date: Aug 2006
Location: altoona, pa
Posts: 2,934

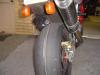
I don't have any idea what to even try concerning the oil leak. I know I could leave it but it drips on my shoe when riding. There is nothing I hate more then a problem I have no idea how to fix.
The tank is a pretty simple fix, re seal it... again...wait for leaks then repaint after I am confident it isn't leaking any more.
Oh and there is still a vibration which I am beginning to think is because the rear shocks are no longer functioning anymore.
The tank is a pretty simple fix, re seal it... again...wait for leaks then repaint after I am confident it isn't leaking any more.
Oh and there is still a vibration which I am beginning to think is because the rear shocks are no longer functioning anymore.
These are the times that try mens souls, huh. But these are to be expected when you are in the initial stages running it. Actually, if everything worked perfectly, it would be extraordinary.
you can tell exactly where the oil is coming from right, so you can't be too far away from the source. Something missing, wrong size o ring, surfaces not mating. I'll be up to fix it out this evening. Make sure you have some beer chilled.
Be cool, you went thru the really hard part, and you'll work through these little PIAs. Have a beer, sit back and look at til you get bored and then tear into again.


 03-01-2010, 03:44 PM
#484
2nd mouse gets the cheese
SuperBike
Thread Starter
Join Date: Jan 2008
Location: Beaverton, OR
Posts: 1,697
well here is the plan for the oil leak. I think it is leaking from one of the orings nearby the end of cylinder. It is new but I think for one reason or another it is not quite large enough to seal. Thats the plan we shall see if it works.
03-01-2010, 04:27 PM
#485
Senior Member
MotoGP
Join Date: Aug 2006
Location: altoona, pa
Posts: 2,934
great build corn!
03-01-2010, 05:40 PM
#486
2nd mouse gets the cheese
SuperBike
Thread Starter
Join Date: Jan 2008
Location: Beaverton, OR
Posts: 1,697
Thanks nath, it helps, the reason I post about it is for some perspective that includes humor.
The frustration comes from having to do it twice, thats all I knew there was going to be issues getting this all sorted. On a side note I am considering polishing the ports while the head is off.
The frustration comes from having to do it twice, thats all I knew there was going to be issues getting this all sorted. On a side note I am considering polishing the ports while the head is off.
03-01-2010, 06:10 PM
#487
Senior Member
MotoGP
Join Date: Aug 2006
Location: altoona, pa
Posts: 2,934
Thanks nath, it helps, the reason I post about it is for some perspective that includes humor.
The frustration comes from having to do it twice, thats all I knew there was going to be issues getting this all sorted. On a side note I am considering polishing the ports while the head is off.
The frustration comes from having to do it twice, thats all I knew there was going to be issues getting this all sorted. On a side note I am considering polishing the ports while the head is off.
") ...
03-01-2010, 08:21 PM
...
03-01-2010, 08:21 PM
#489
Senior Member
MotoGP
Join Date: Aug 2006
Location: altoona, pa
Posts: 2,934
sounds right to me.hahaha
If you're going to polish ports, you may want to also sand that head on glass or other straight surface. It doesn't take too much time. Now quit BS-ing and get er done!
If you're going to polish ports, you may want to also sand that head on glass or other straight surface. It doesn't take too much time. Now quit BS-ing and get er done!
03-02-2010, 03:38 PM
#491
Administrator

World Champion

Join Date: Dec 2004
Location: Fulton, MO
Posts: 105,287
Ha, a project like this is never complete. I just got K&N pods in the mail yesterday for my YamaCafe. I've been running just a layer of window screen to keep the big stuff out for the last year.
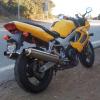
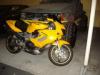
Great job on yours though. Your paint looks a lot better than my rattle can flat black. I will be resolving that issue this spring as soon as it's warm enough to paint again. I'll probably go with a yellow or red...whatever's available in Duplicolor Paint Shop quarts.
I'll be practicing on the Superchicken track skins first to perfect my skillz! hehehe
Have you thought about pressure testing the tank before you paint it again?
03-02-2010, 03:57 PM
#492
2nd mouse gets the cheese
SuperBike
Thread Starter
Join Date: Jan 2008
Location: Beaverton, OR
Posts: 1,697
yeah, I thought about it, but right now the spots are small enough the painter can touch them up seamlessly but if I ran pressure I am afraid it would spread the bubbles even more. I should have pressure tested it before it had anything on it. But I figured between checking for leaks when full and then sealing it with the kreem product I thought it would be ok. Sucks when you are wrong though huh. I guess since it is my first custom build, a couple of lessons learned the hard way.
03-04-2010, 11:11 AM
#493
2nd mouse gets the cheese
SuperBike
Thread Starter
Join Date: Jan 2008
Location: Beaverton, OR
Posts: 1,697
so the oil leak is not leaking right now fingers crossed it will stay that way. I had take the head off again and change the stock o-ring out for a larger one. It was both thicker and larger in diameter. This made a problem too I had to drill the head gasket out for clearance then I took the same drill bit spun it in reverse on the head where the dished section was for the original o-ring that way it put a small chamfer around the edge to give something for the larger o-ring to set to. Kinda in new territory that is why I am still waiting to announce it is fixed for sure.
Also synced the carbs today. They were a little out so hopefully that will go a long way to help in getting rolling since the bottom end is pretty flat.
Waiting to see if my tank is really sealed but that could take a while to see so I will keep you guys updated.
I am in BOTM on the sohc forum we shall see what happens lots of great competition.
03-09-2010, 07:11 PM
#494
2nd mouse gets the cheese
SuperBike
Thread Starter
Join Date: Jan 2008
Location: Beaverton, OR
Posts: 1,697
So I know I said I was "done" but I keep finding things to do. Like the fork brace I am making. So shoot bummer (sarcasm) I guess I am still not done . I will have pics tomorrow.
 03-09-2010, 08:06 PM
#496
Senior Member
MotoGP

Join Date: May 2008
Location: San Clemente, CA
Posts: 3,451
Up until 25 years ago (and a divorce) I had a 1959 Porsche 356A coupe for 9 years. There was something to do on that car almost every week. Adjusting the idle mixture on the twin Zeniths was a monthly duty. But it sure was fun.
03-10-2010, 08:18 AM
#497
2nd mouse gets the cheese
SuperBike
Thread Starter
Join Date: Jan 2008
Location: Beaverton, OR
Posts: 1,697
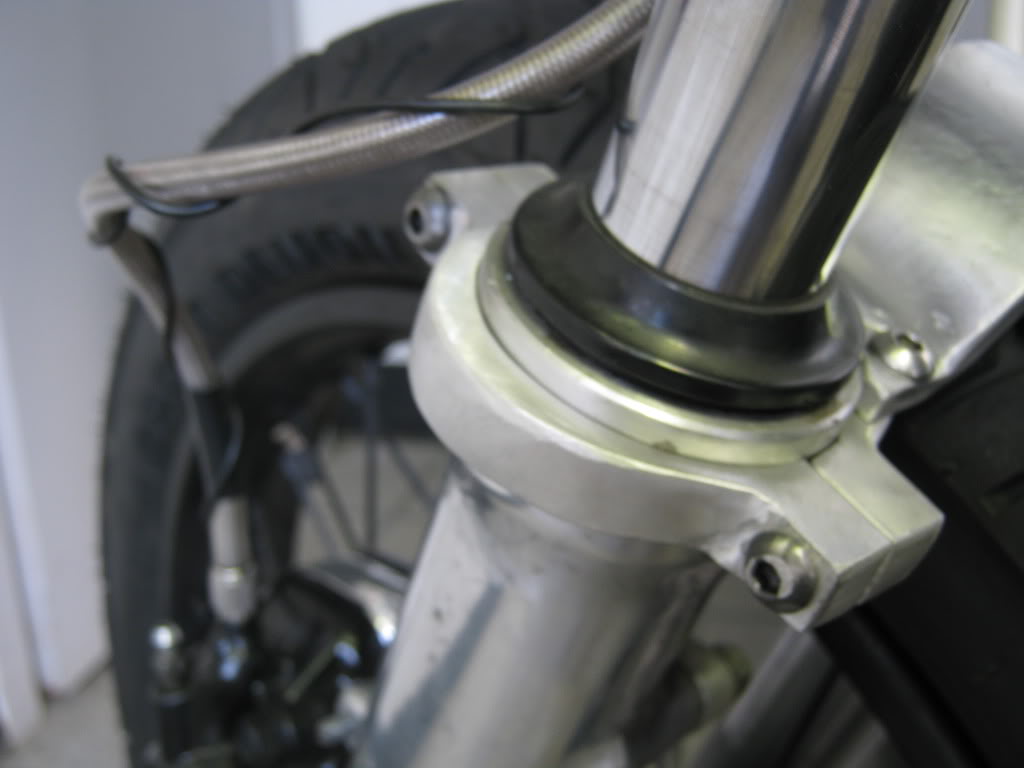
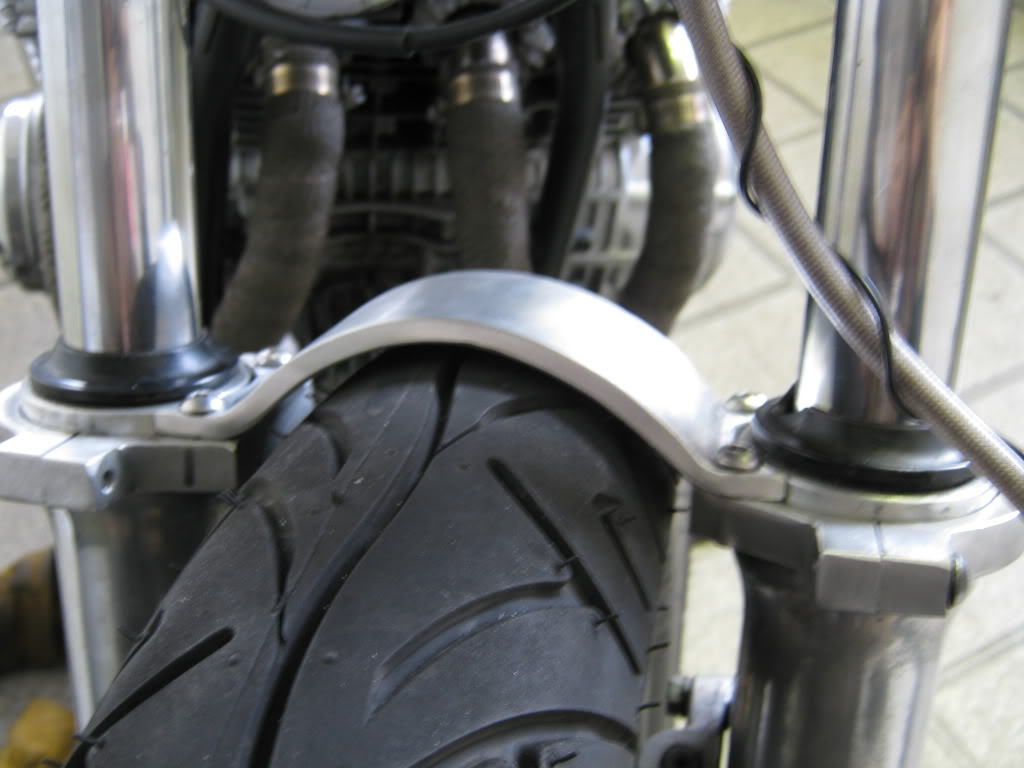
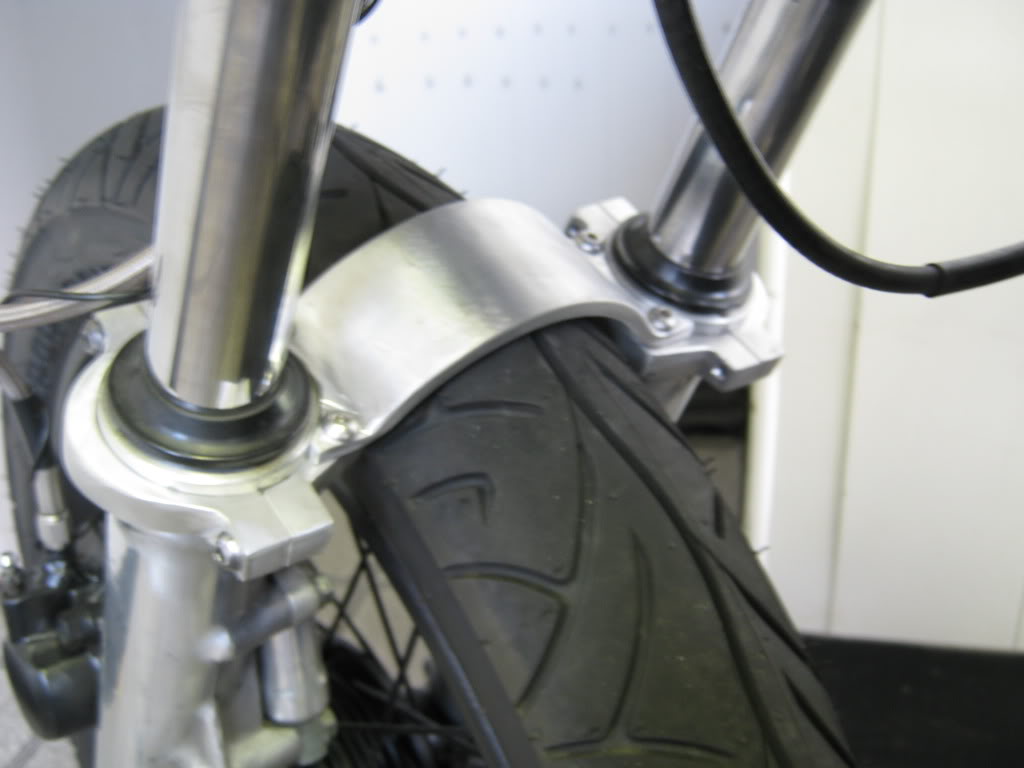
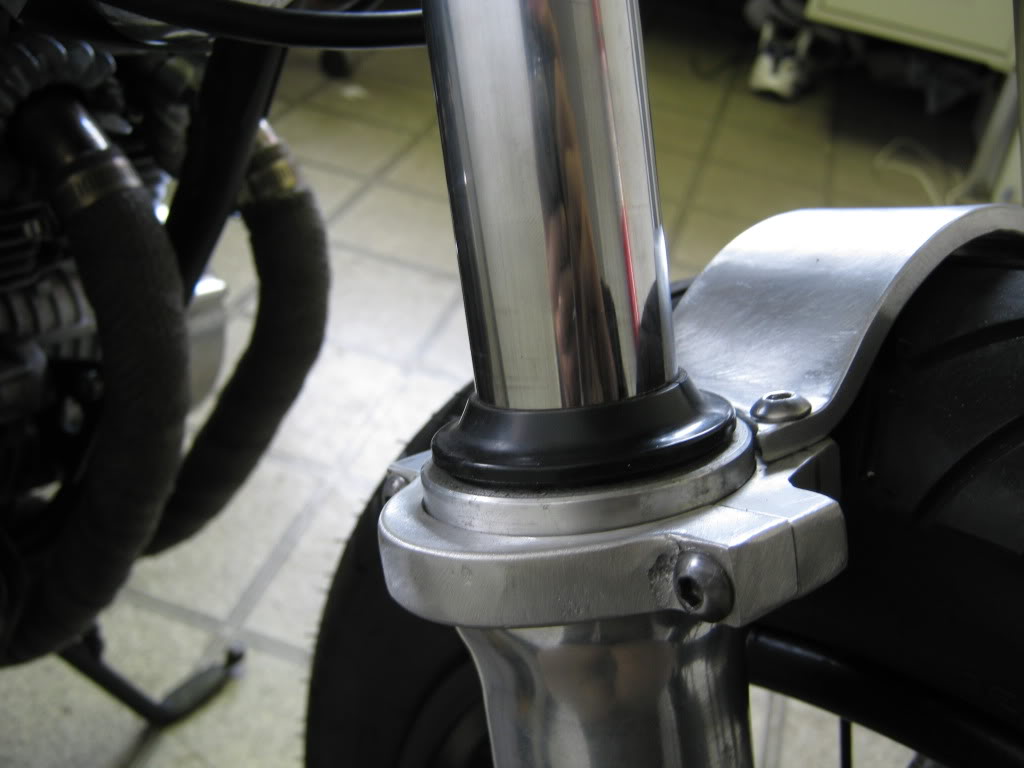
Fork Brace
So it was a real pain to build with the tools I have. a mill would have made this job a breeze. Anyways it turned out nicely I think, a little sanding and polish and it would look perfect. It really strengthened the forks, now I can't get them to twist like I could before.
03-16-2010, 09:01 AM
#499
2nd mouse gets the cheese
SuperBike
Thread Starter
Join Date: Jan 2008
Location: Beaverton, OR
Posts: 1,697
help?
alrighty so I am looking to bounce a few ideas off of the perverbial brain. I have a weird vibration in my chassis still. It feels very much as if a tire was oval an up and down type movement that seems to manifest the most at speeds above 50 mph.
So my thoughts on the matter is that it may be steering bearings. I have serviced them when I took everything apart and they seemed fine. I tried tightening them and it made little to no difference. There seems to me to be a possibility of play in the front but strangly in corners it feels really solid which also makes me think it isn't steering bearings. Yesterday I used the string method to make sure the rear wheel was aligned, and found it was off a bit so I fixed that then rode the bike around the block. First impression was that it was not as bad, but it was still there. I haven't checked the rear wheel yet to make sure it is round and not oval. I guess that is next. Any ideas or clever ways for me to start checking possibilities off of my list?
So my thoughts on the matter is that it may be steering bearings. I have serviced them when I took everything apart and they seemed fine. I tried tightening them and it made little to no difference. There seems to me to be a possibility of play in the front but strangly in corners it feels really solid which also makes me think it isn't steering bearings. Yesterday I used the string method to make sure the rear wheel was aligned, and found it was off a bit so I fixed that then rode the bike around the block. First impression was that it was not as bad, but it was still there. I haven't checked the rear wheel yet to make sure it is round and not oval. I guess that is next. Any ideas or clever ways for me to start checking possibilities off of my list?
 03-16-2010, 11:05 AM
#501
Fastest Color
SuperBike
Join Date: Jul 2007
Location: Lithia, FL
Posts: 2,091
03-16-2010, 12:07 PM
#502
Senior Member
MotoGP
Join Date: Aug 2006
Location: altoona, pa
Posts: 2,934
you definitely should check the wheels to see if they're true. Of course this should have been done pre-tires, but it can be done rather easily by making a jig with a pointer, high enough that you can look at mid point from top to bottom(measure mid-point). Then just turn it around and use it for front. Check the up and down alignment first(out of round) and then the side to side. If a wheel is out a little. you may be able to tighten some spokes/loosen others, but deflate the tires before adjusting spokes. I did this to my dual sport enough and got it pretty close, enough to eliminate most of the vibs. But when it's time to change tires, both are going into the vice for alignment before mounting new tires.
I assume you had the vibs before the brace install.
I assume you had the vibs before the brace install.
03-16-2010, 01:12 PM
#503
2nd mouse gets the cheese
SuperBike
Thread Starter
Join Date: Jan 2008
Location: Beaverton, OR
Posts: 1,697
I checked a few more things and found the rear tire was oval with an overall deflection of about 3/16 to a 1/4r in  . Funny the rim was not oval though. I messed with the spokes for a little bit and that made no change. Then I beat the tire with a rubber mallet for a few rotations and directly on the high spot, bam right away it was within less then an 1/8 some more hammering and then only a few high spots. Back to the spokes and an hour and a half later I have worked the tire into less then a 1/16 in deflection in diameter overall. I haven't tested it yet. Both wheels are true side to side, or where at least before I started messing with the rear wheel. Think this was my problem?
. Funny the rim was not oval though. I messed with the spokes for a little bit and that made no change. Then I beat the tire with a rubber mallet for a few rotations and directly on the high spot, bam right away it was within less then an 1/8 some more hammering and then only a few high spots. Back to the spokes and an hour and a half later I have worked the tire into less then a 1/16 in deflection in diameter overall. I haven't tested it yet. Both wheels are true side to side, or where at least before I started messing with the rear wheel. Think this was my problem?
03-16-2010, 01:59 PM
#504
Senior Member
MotoGP
Join Date: Aug 2006
Location: altoona, pa
Posts: 2,934
I checked a few more things and found the rear tire was oval with an overall deflection of about 3/16 to a 1/4r in . Funny the rim was not oval though. I messed with the spokes for a little bit and that made no change. Then I beat the tire with a rubber mallet for a few rotations and directly on the high spot, bam right away it was within less then an 1/8 some more hammering and then only a few high spots. Back to the spokes and an hour and a half later I have worked the tire into less then a 1/16 in deflection in diameter overall. I haven't tested it yet. Both wheels are true side to side, or where at least before I started messing with the rear wheel. Think this was my problem?
. Funny the rim was not oval though. I messed with the spokes for a little bit and that made no change. Then I beat the tire with a rubber mallet for a few rotations and directly on the high spot, bam right away it was within less then an 1/8 some more hammering and then only a few high spots. Back to the spokes and an hour and a half later I have worked the tire into less then a 1/16 in deflection in diameter overall. I haven't tested it yet. Both wheels are true side to side, or where at least before I started messing with the rear wheel. Think this was my problem?
03-16-2010, 02:06 PM
#505
2nd mouse gets the cheese
SuperBike
Thread Starter
Join Date: Jan 2008
Location: Beaverton, OR
Posts: 1,697
yes you did
03-16-2010, 07:47 PM
#506
Senior Member
MotoGP
Join Date: Aug 2006
Location: altoona, pa
Posts: 2,934
yes you did , seems I need to be told things at least twice. Tomorrow is supposed to be nice so hopefully I can test things out again. I may have misread what you meant before. I had checked the rim for how true it was both ways also at first I was looking at the front being the problem so forgive my slowness. "It feels like an ovaled wheel...duuuurrrr....it is an ovaled wheel."
03-18-2010, 07:15 AM
#507
2nd mouse gets the cheese
SuperBike
Thread Starter
Join Date: Jan 2008
Location: Beaverton, OR
Posts: 1,697
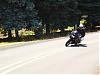
Tests confirmed that it was/is the problem. At least there is no vibes up to 55 mph which was the sweets spot for it before. I wasn't able to get the tire perfect but I think it is close enough. At least if t comes back I know where to start. So I think I can move on to the girls and bike photo shoot .
03-18-2010, 11:11 AM
#508
Senior Member
MotoGP
Join Date: Aug 2006
Location: altoona, pa
Posts: 2,934
Tests confirmed that it was/is the problem. At least there is no vibes up to 55 mph which was the sweets spot for it before. I wasn't able to get the tire perfect but I think it is close enough. At least if t comes back I know where to start. So I think I can move on to the girls and bike photo shoot .
03-18-2010, 06:16 PM
#510
Senior Member
MotoGP
Join Date: Aug 2006
Location: altoona, pa
Posts: 2,934
not the valve stem but the valve gut. sorry for the mistake. If you don't get everything loose and lubed and turn the wheel so that the tire/tube is not drooping, and watch it as you air it up. They can be a bitch sometimes if you don't do everthing right/


