
CruxGNZ's '98 Superhawk


Administrator

World Champion
Joined: Dec 2004
Posts: 105,287
From: Fulton, MO

Just throwing it out there, but couldn't you dampen vibration AND increase strength by adding bracing instead of filling with lead? Not to mention the extra weight....
It appears you have the necessary skills and tools to do such a thing.
It appears you have the necessary skills and tools to do such a thing.

Administrator
MotoGP
Joined: Apr 2006
Posts: 4,402
From: Kempner, TX
Fairing comes off in minutes to access that front stay..
Me, I'd install and ride, see what you find.
No need to add mass up that high unless you find a need.
I have some vibrations right now in my Apex bars running no bar ends.
I started turning some stainless steel ends and tungsten inserts for them this morning.
In my case,,, I tried it without the extra weight,, and it vibrates, so Im fixing the issue now.

Thread Starter
Rex Kramer-Thrill Seeker
SuperBike
Joined: Jan 2011
Posts: 2,312
From: Brookfield, WI
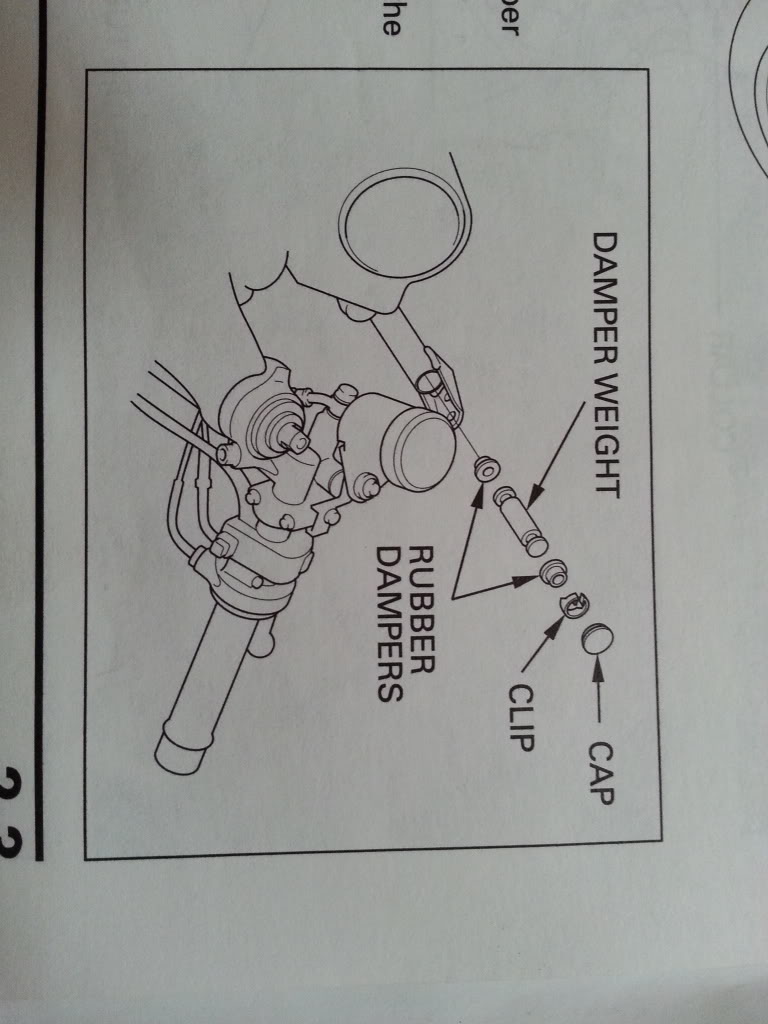
I was just trying to put it back to stock (see picture. Sorry it's off 90 degrees). Honda put the weight there for a reason. But now I'm curious what kind of vibrations I'll get without the weight in there.
You're right, wouldn't some sort of bracing do the same thing as weight in the end? I've seen other sport bikes with bracing that goes from the mirrors over the handle bars, to in front of the gas tank. Very easy to do.
Or possibly just a gusset. That would be less noticable and less intrusive.
I'm just going to run it as is and see what happens.
Thread Starter
Rex Kramer-Thrill Seeker
SuperBike
Joined: Jan 2011
Posts: 2,312
From: Brookfield, WI
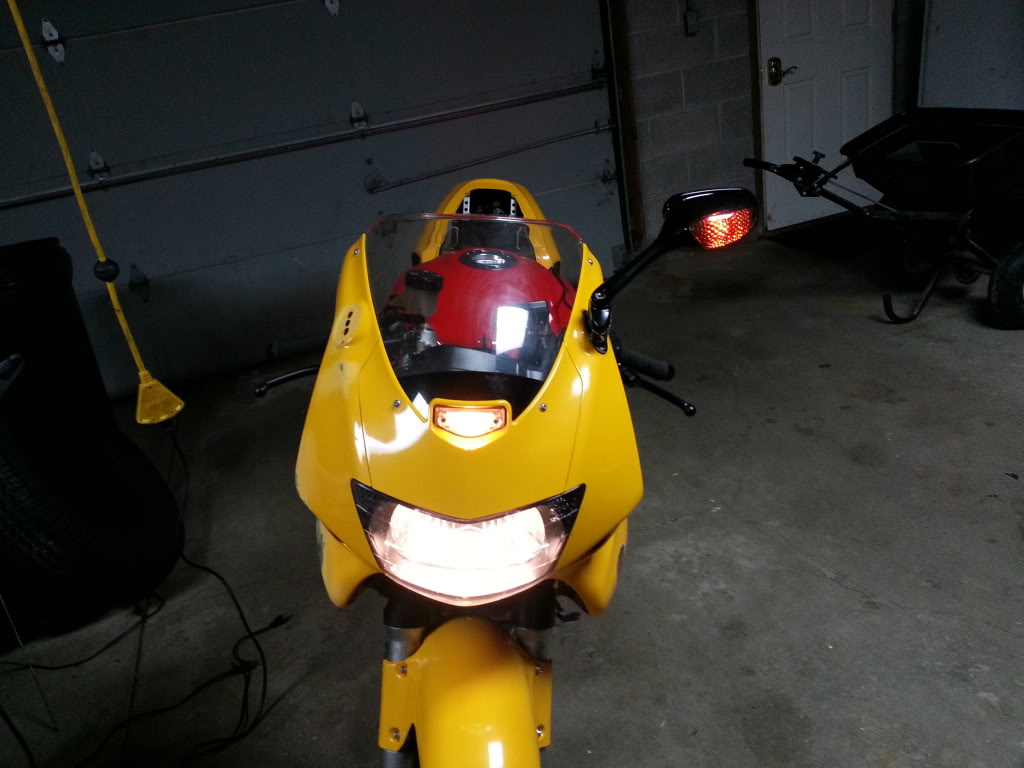
Stupid Hong Kong craptastic LED turn signal mirrors. One of 'em freakin' stopped working! Took the mirror off, and while trying to get inside to see what went bad, I busted the glass.
The weather is going to be PERFECT this weekend, and I want to get out and ride (hopefully my electrical gremlin has been fixed). However, I can't do that if I don't have a front/right turn signal and no right side mirror. So, I decided to make some of my own mirrors with LED turn signals.
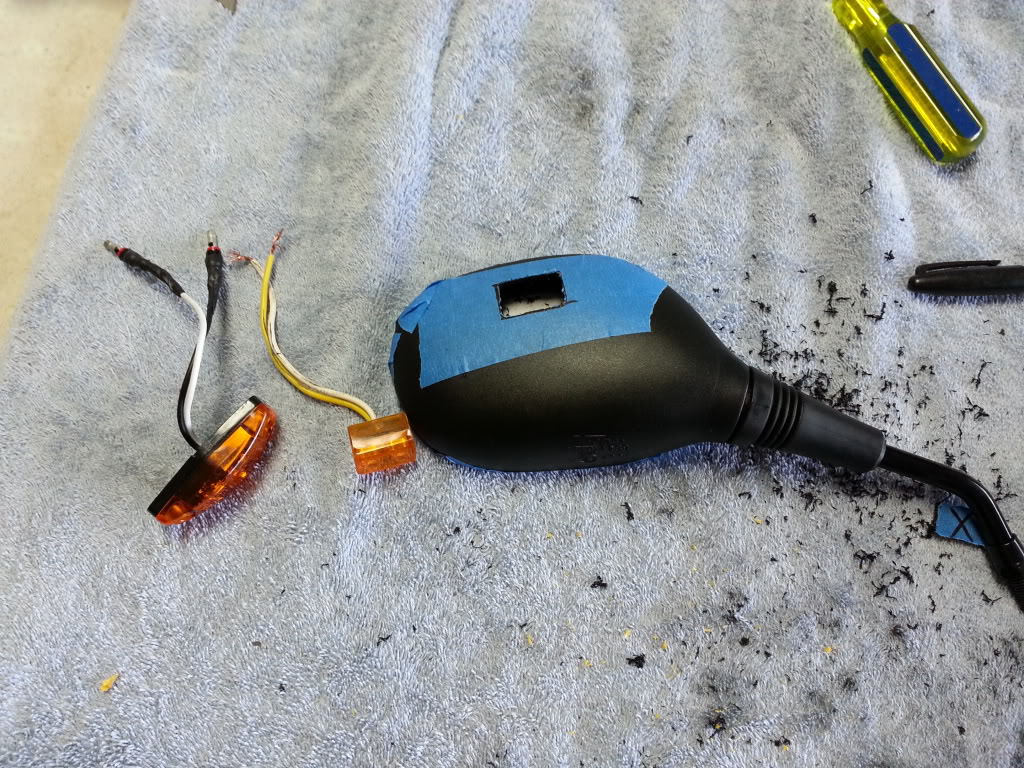
I had a old set of mirrors that were barely used and decent looking. The glass was perfectly flat and you can actually see whats behind you, unlike the Hong Kong mirrors that were pretty damn distorted. I also had a few sets of LED side markers layin' around. So, I dedided to put them together. The pictures will explain.
 m
m
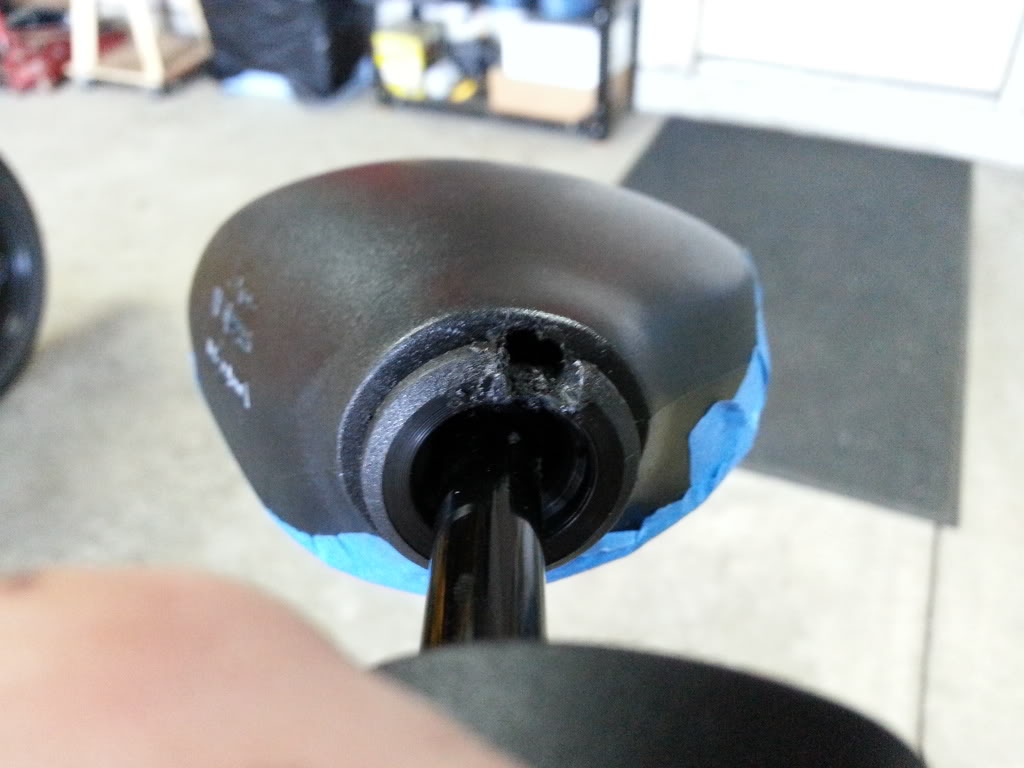
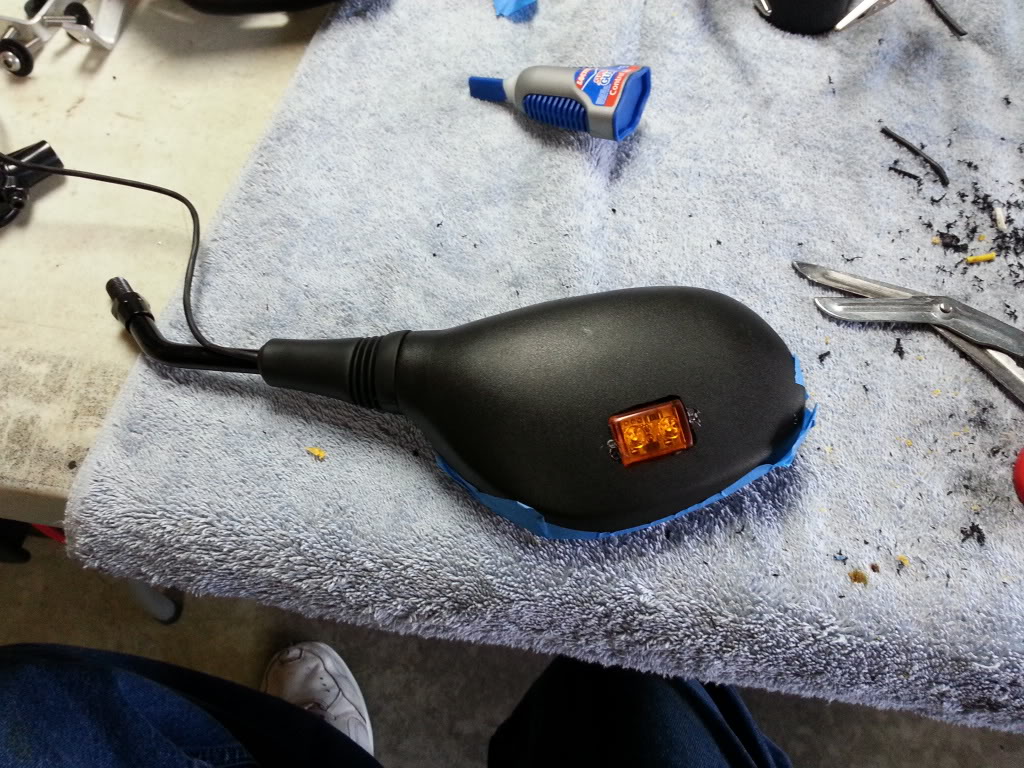
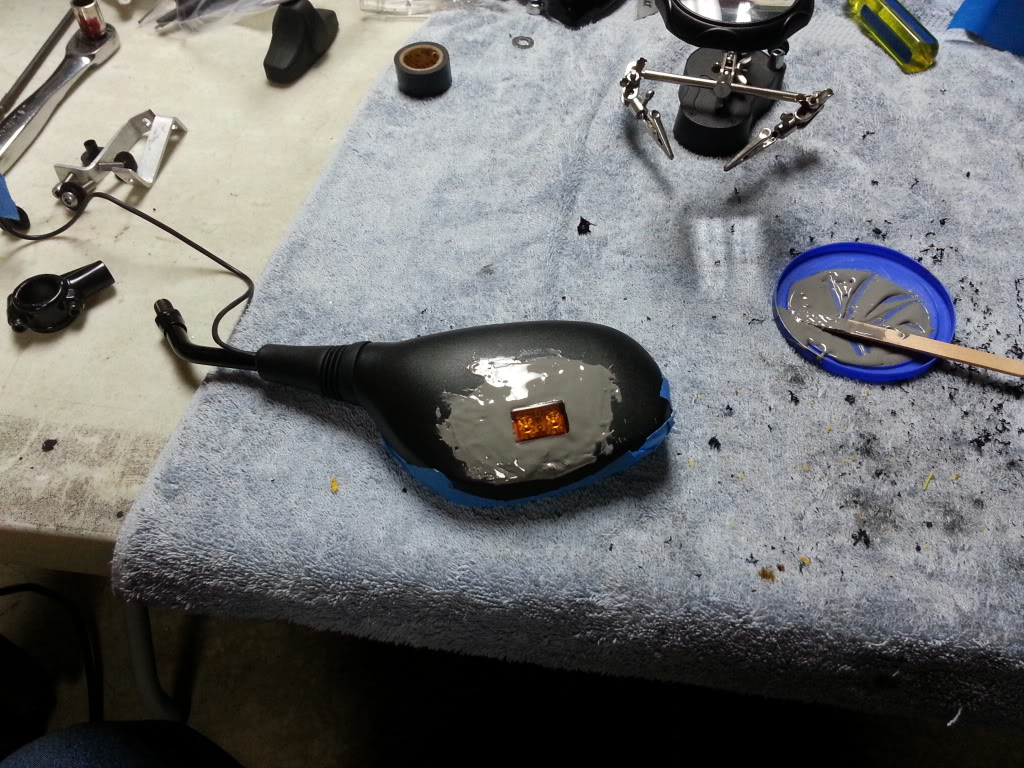
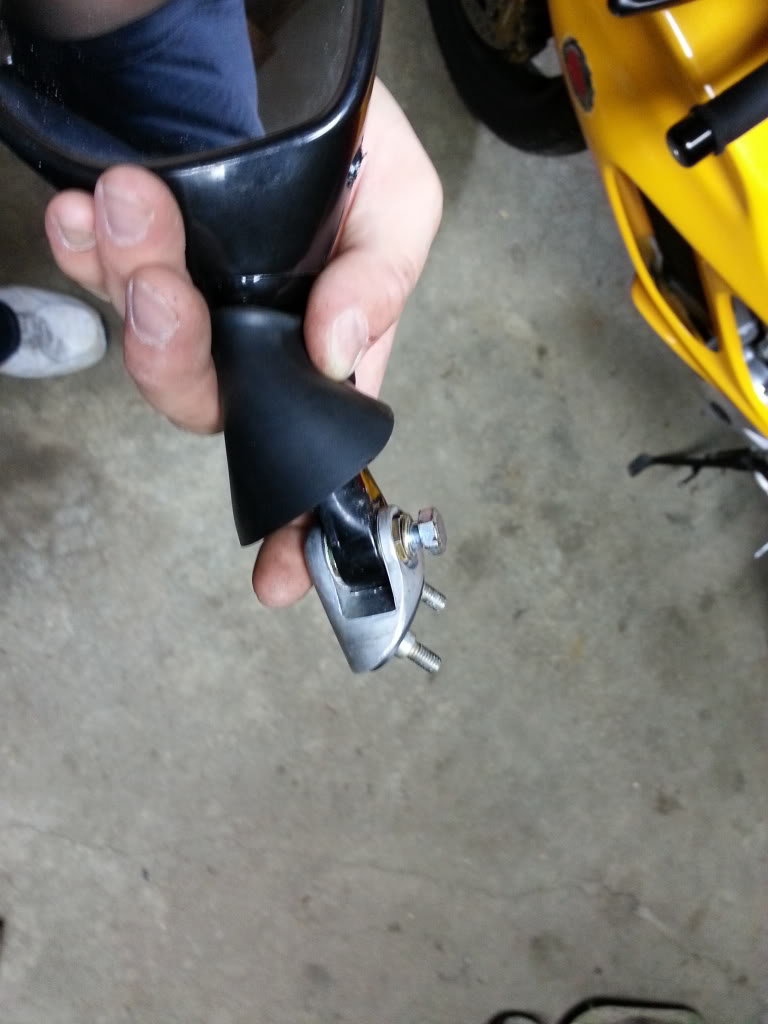
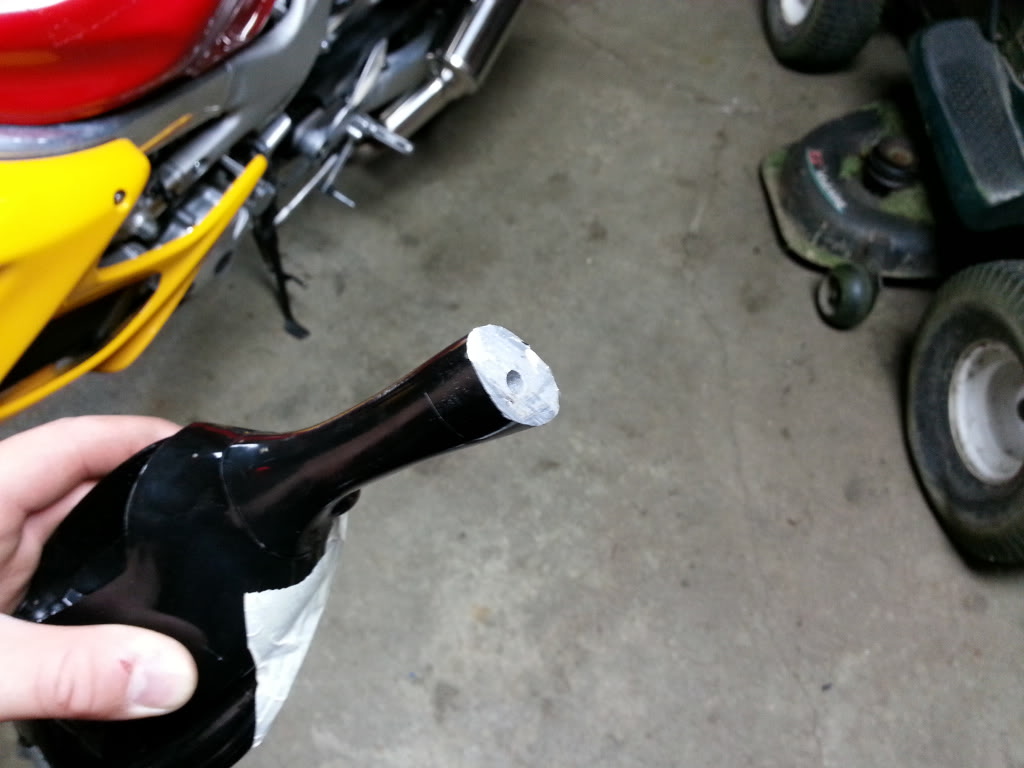
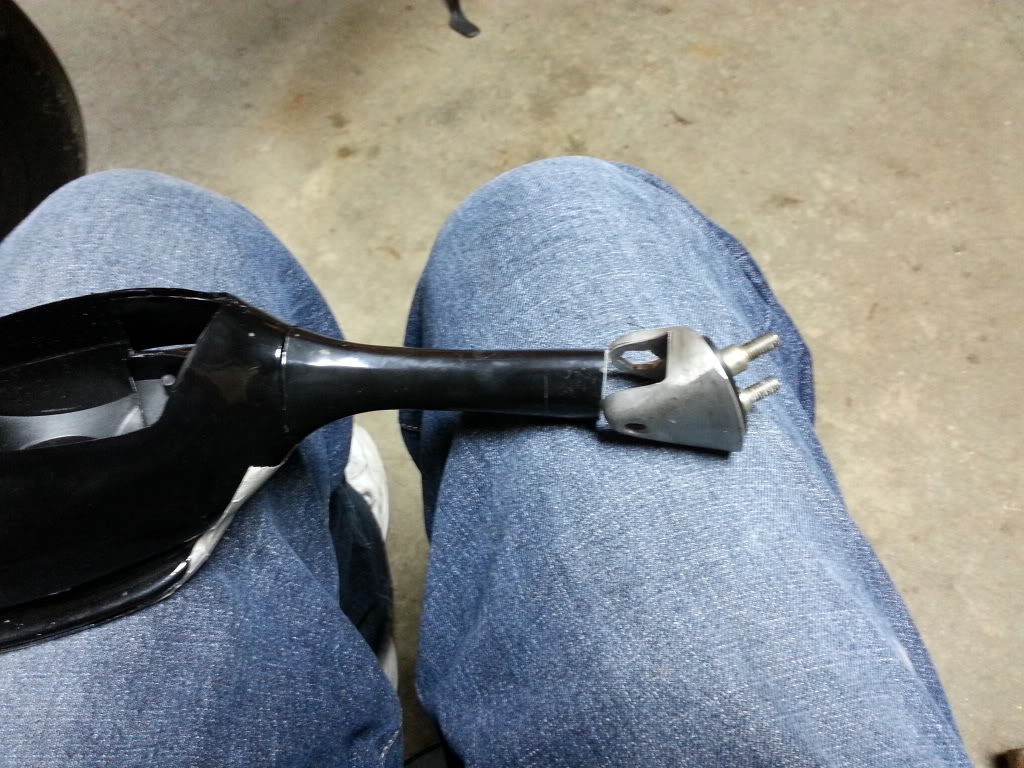
I put JB weld on it to hold the LED marker light in place. After it has dried, I can apply some filler, and paint it either semi-gloss or matte black. I'm going to paint the rectangle amber marker light as well, so it won't just look like I cut a hole and plopped it in.
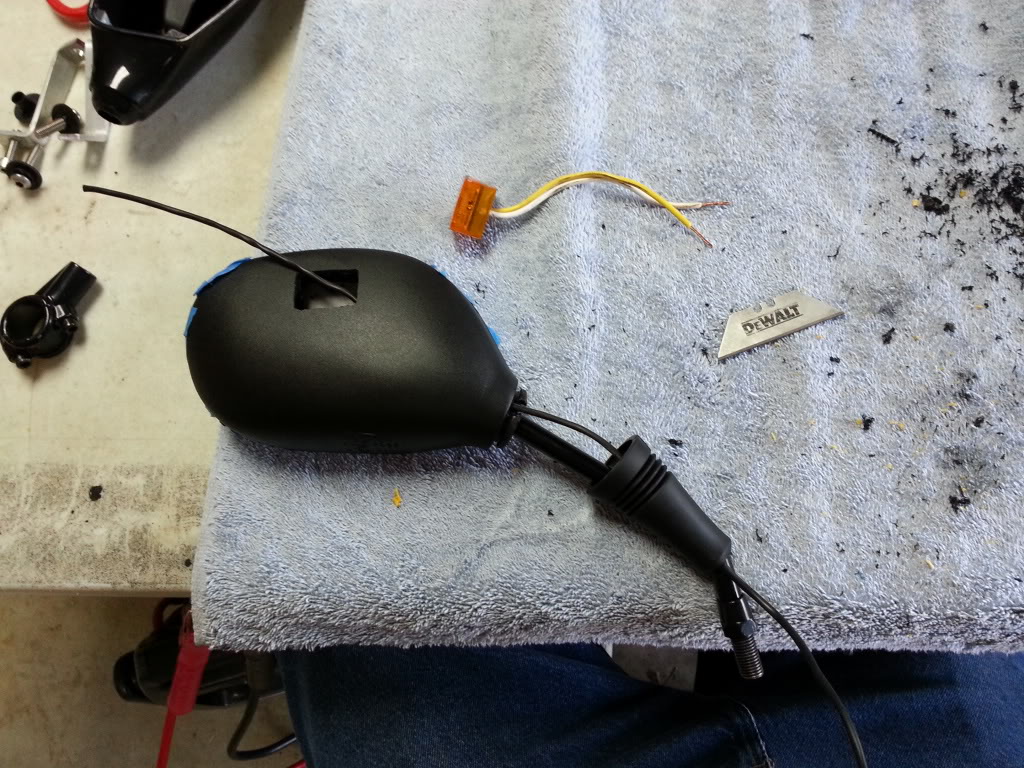
The wire coming down the stalk will be shrink wrapped to the stalk, so it looks like it's part of everything and hard to notice.
I welded up a small plate that bolts to the mirror mount on the bike and drilled and tapped it for this mirror.
Took a night, but at least I can ride this weekend. All I have to do tomorrow, is smooth out the mirror case, paint, install and take the bike for a spin to dry the paint.
Piece 'a cake.
Oh yeah, also, these mirrors are a couple inches longer, so I can actually see what's behind me, unlike the Hong Kong mirrors, where you just see your damn elbows. Seriously, don't buy these cheap *** Hong Kong mirrors. Spend the money on better ones.
The weather is going to be PERFECT this weekend, and I want to get out and ride (hopefully my electrical gremlin has been fixed). However, I can't do that if I don't have a front/right turn signal and no right side mirror. So, I decided to make some of my own mirrors with LED turn signals.
I had a old set of mirrors that were barely used and decent looking. The glass was perfectly flat and you can actually see whats behind you, unlike the Hong Kong mirrors that were pretty damn distorted. I also had a few sets of LED side markers layin' around. So, I dedided to put them together. The pictures will explain.
mI put JB weld on it to hold the LED marker light in place. After it has dried, I can apply some filler, and paint it either semi-gloss or matte black. I'm going to paint the rectangle amber marker light as well, so it won't just look like I cut a hole and plopped it in.
The wire coming down the stalk will be shrink wrapped to the stalk, so it looks like it's part of everything and hard to notice.
I welded up a small plate that bolts to the mirror mount on the bike and drilled and tapped it for this mirror.
Took a night, but at least I can ride this weekend. All I have to do tomorrow, is smooth out the mirror case, paint, install and take the bike for a spin to dry the paint.
Piece 'a cake.
Oh yeah, also, these mirrors are a couple inches longer, so I can actually see what's behind me, unlike the Hong Kong mirrors, where you just see your damn elbows. Seriously, don't buy these cheap *** Hong Kong mirrors. Spend the money on better ones.
Thread Starter
Rex Kramer-Thrill Seeker
SuperBike
Joined: Jan 2011
Posts: 2,312
From: Brookfield, WI
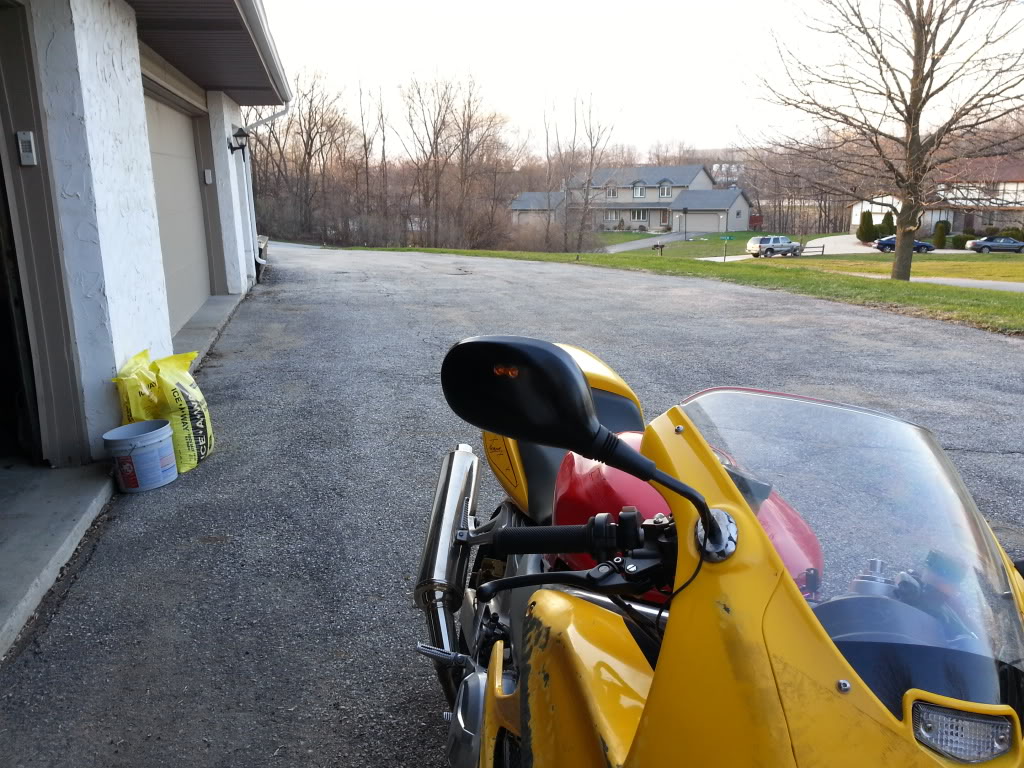
Turned out decent. Could have done a better job painting, but it works for now. Got about 120 miles on 'em, and the ones I made are hands down better than the Hong Kong mirrors. Only issue I'm having, is the mirrors slightly vibrate at speed. Looks like I'll be adding bracing to the mirror mounts.
Still need to fill and paint the mirror mounts, then drill a hole to let the wires go through the mounting plate, so they are pretty much hidden.

Still need to fill and paint the mirror mounts, then drill a hole to let the wires go through the mounting plate, so they are pretty much hidden.
Last edited by CruxGNZ; Apr 28, 2013 at 05:56 PM.
Thread Starter
Rex Kramer-Thrill Seeker
SuperBike
Joined: Jan 2011
Posts: 2,312
From: Brookfield, WI
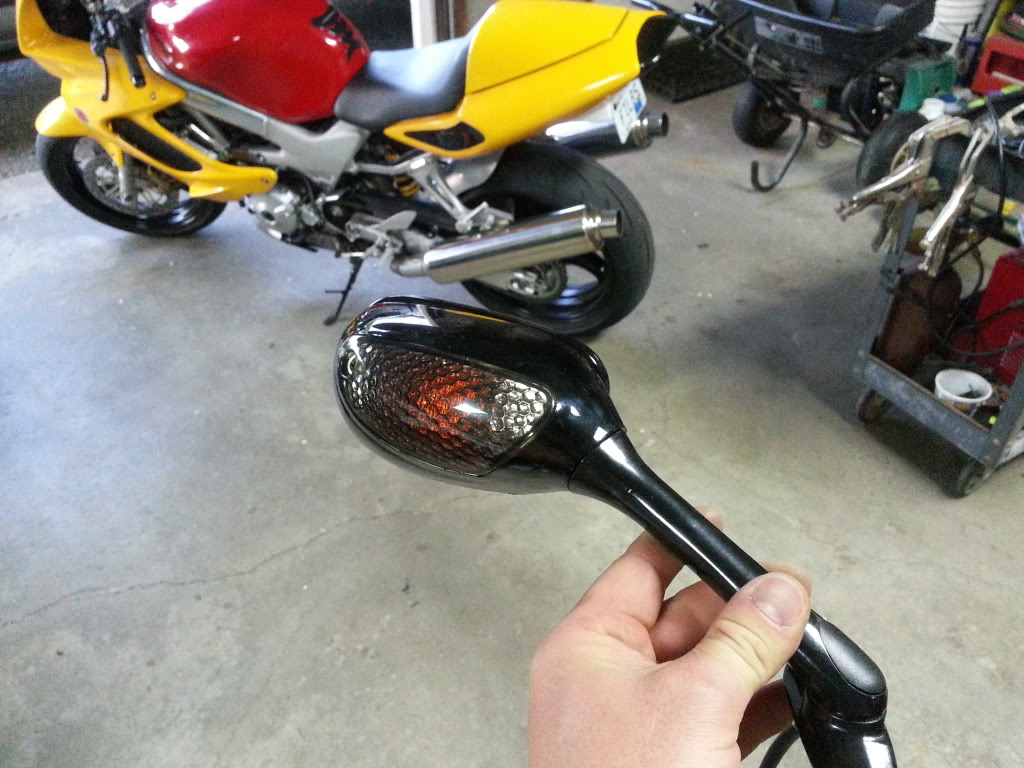
Wanted to fix my mirror situation, so I bought new mirrors with integrated LED turn signals. After a bunch of looking on eBay, Amazon, and several U.K. websites, I came across some decent mirrors for a Suzuki GSXR. They are long enough, so I'm not staring at my damn elbows and they really look nice. I have my fingers crossed that I don't get dissapointed upon seeing these new mirrors like I did with the previous ones.
While I was at it, I purchased a new LED tailight. My Dad was riding behind me and said that the running lights and turn signals were bright, but the brake lights sucked. So, I bought auxilary red LED lights to install inside the undertail. Should make me a hell of a lot more visable to others.
Looking at purchasing new wheel bearings as well. The front wheel has a very slight play in it. Didn't expect this with a bike having 18k miles on it. Looks easy to replace though.
Since the front wheel bearings are shot, I may as well replace the rear bearings as long as I'm at it.
I'll have pictures up next week of the new parts and also the body work. She's getting painted SOON!
Thread Starter
Rex Kramer-Thrill Seeker
SuperBike
Joined: Jan 2011
Posts: 2,312
From: Brookfield, WI
I got the new integrated turn signal mirrors finally. They're from a GSX-R 750 (I believe...or it was a 600). The fitment isn't anywhere near the stock Superhawks, so I have to do some fabrication. I made a plate that bolts to the windshield and another plate that bolts to the mirror. Tomorrow I'm picking up some 3/16" or 1/4" round bar and cut that and weld them in as a spacer. After it's welded, I'll either leave it and paint it, or I'll wrap sheet metal around the round bar and make it look like a solid piece.

I got a new smoked tailight as well. Underneath the tailight, just for added security, I installed 10 auxilary red LED's that are hooked up to the brake lights. They are pretty damn bright! I love it!
The Veypor gauges have been shipped and I'll be installing it this weekend. Can't wait for that!
The paint job is put on hold untill I get all this other stuff done. Oh yeah, I installed wieghted bar ends too.
I need to play with the carbs next. It has a high idle and if I try to get it to idle under 1k RPM's, she will sputter and quit. No big deal, just gotta mess around with it a bit.

Banned
MotoGP
Joined: Aug 2007
Posts: 5,942
From: Lake View Terrace, CA

Thread Starter
Rex Kramer-Thrill Seeker
SuperBike
Joined: Jan 2011
Posts: 2,312
From: Brookfield, WI
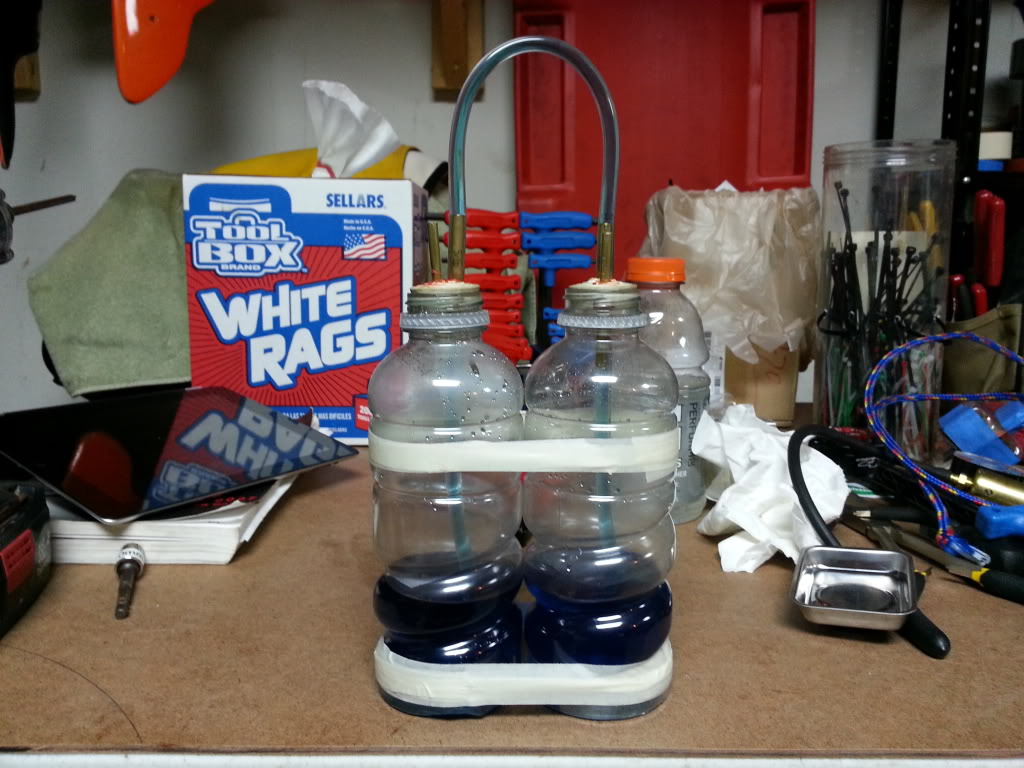
The bike hasn't been tuned since I put it together. I need to sync the carbs. I have the parts together for the two bottle method.
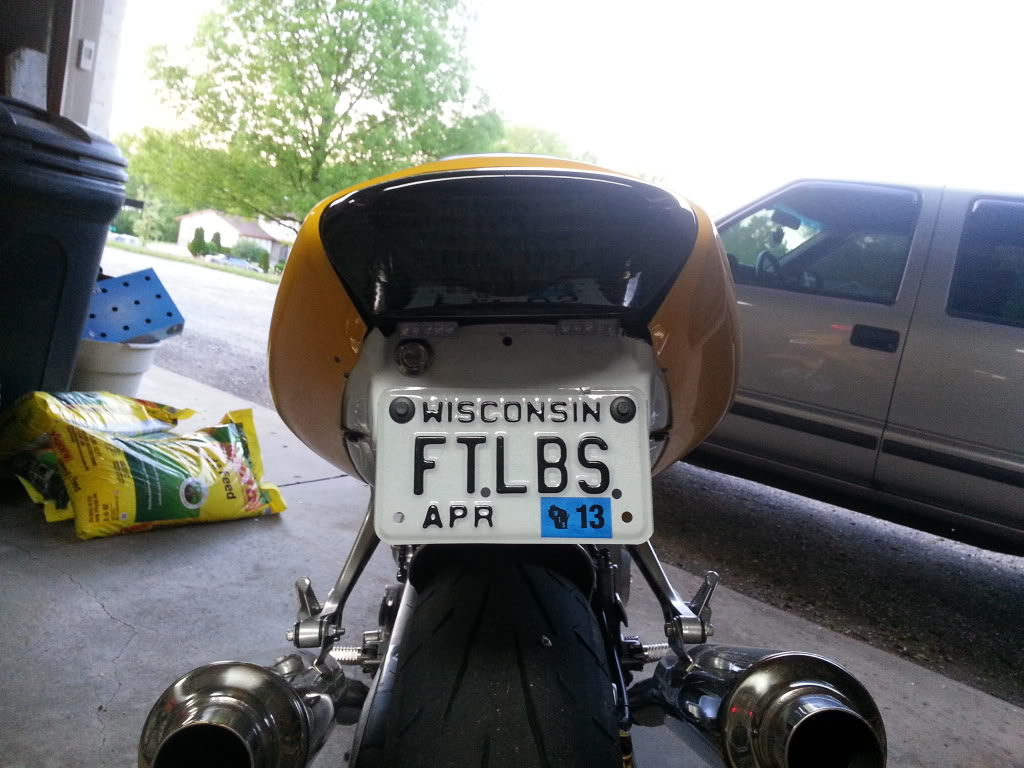
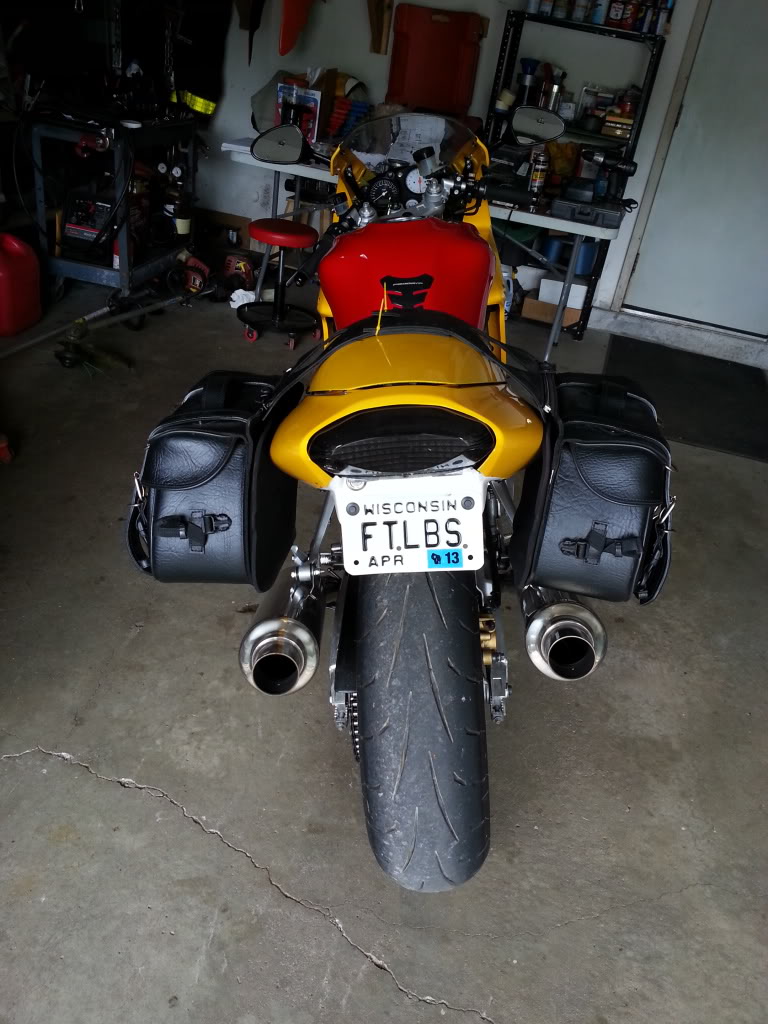
Thanks for the compliment on the plate. I can't believe it hasn't been taken already, since I'm in the Harley capital. The other day, I actually had some dude stop me in a Ace Hardware and tell me cool plate. I guess it fits the loud pipes.
Thread Starter
Rex Kramer-Thrill Seeker
SuperBike
Joined: Jan 2011
Posts: 2,312
From: Brookfield, WI
I got a chance to work on the mirrors again tonight. Got both mount structures done. I just need to make them look pretty, by welding sheet metal around them, then sand, filler, sand again and paint.
Thread Starter
Rex Kramer-Thrill Seeker
SuperBike
Joined: Jan 2011
Posts: 2,312
From: Brookfield, WI
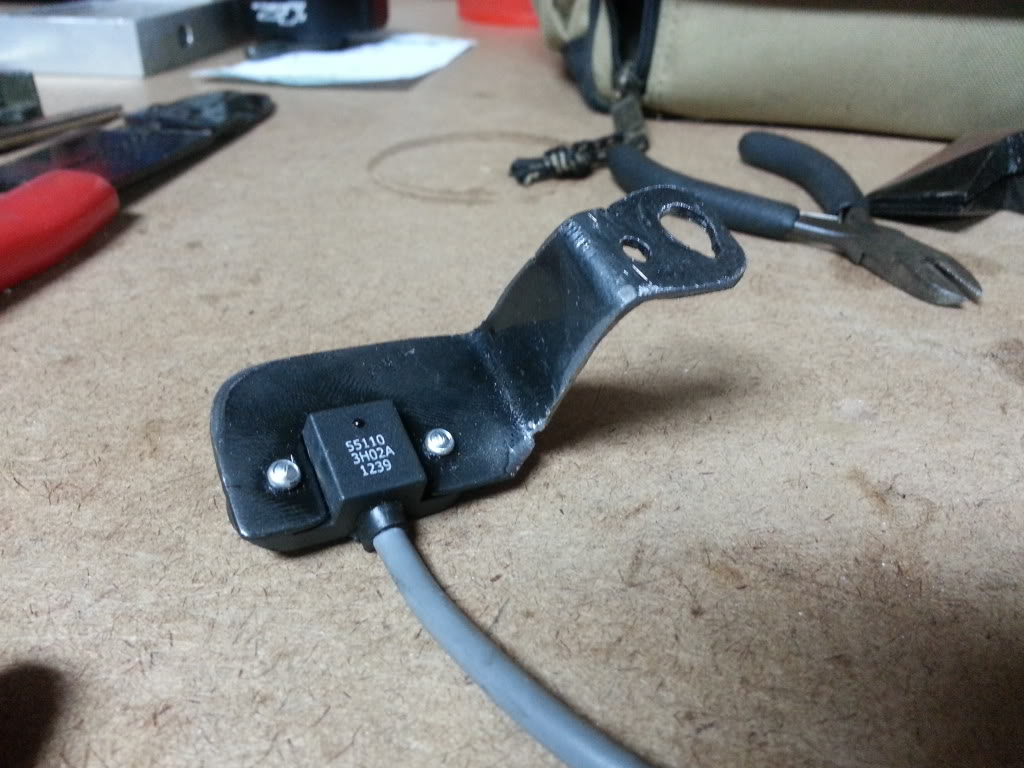
Got both mirrors on. But that wasn't the exciting part. I got something in the mail today!
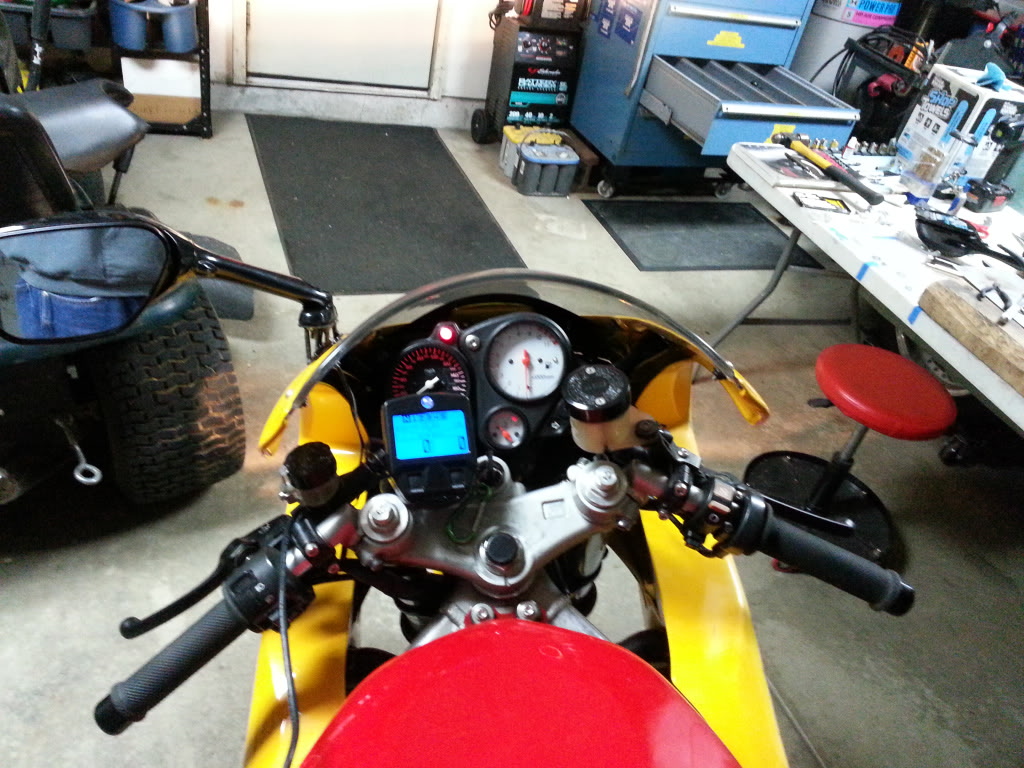
I just mounted it and plugged it in real quick to take a picture. Can't wait to ride tomorrow!
I just mounted it and plugged it in real quick to take a picture. Can't wait to ride tomorrow!
Thread Starter
Rex Kramer-Thrill Seeker
SuperBike
Joined: Jan 2011
Posts: 2,312
From: Brookfield, WI
Got the control module temporarily mounted for the Veypor Gauge. I need to put it somewhere that it will be out of the elements.
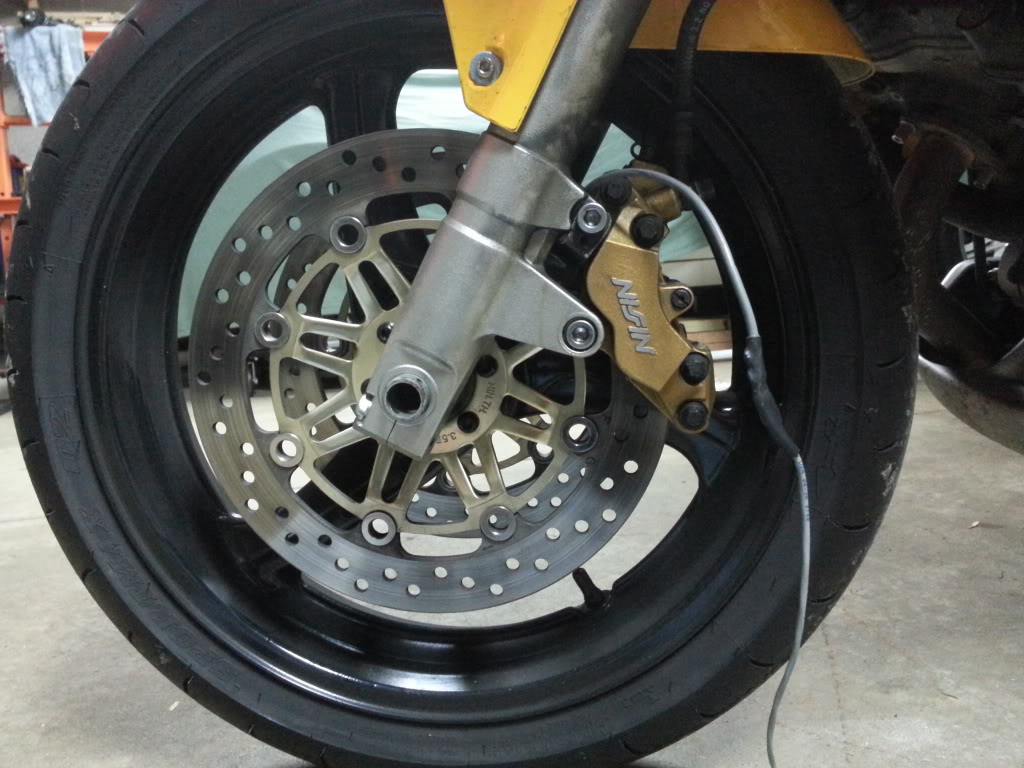
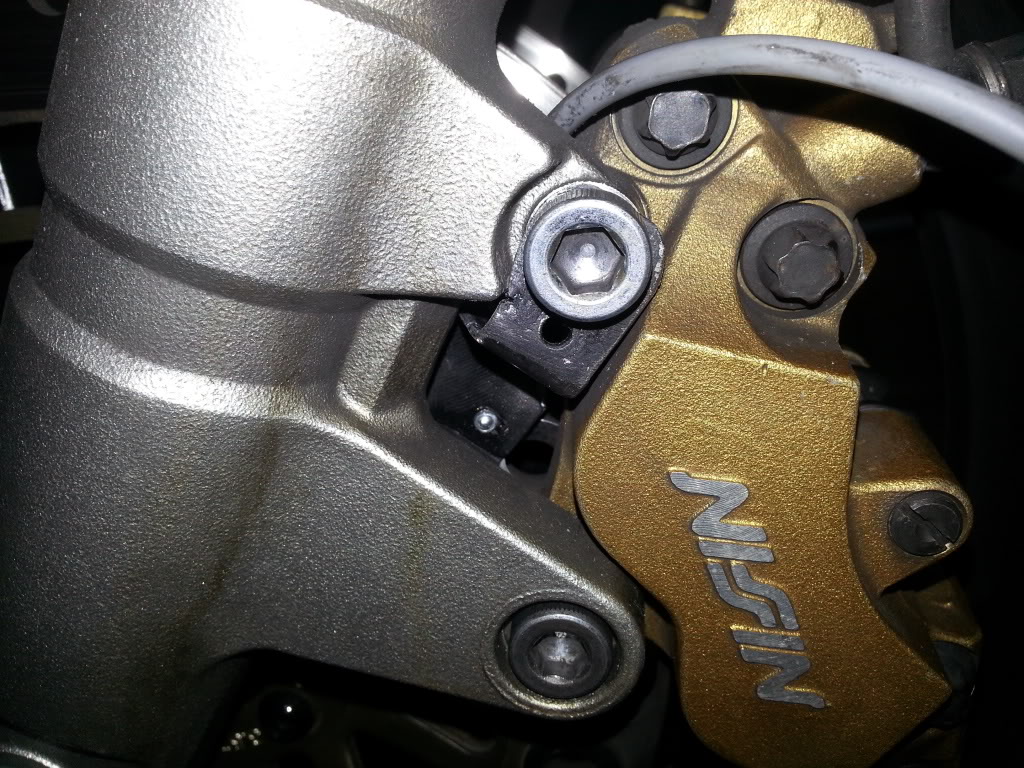
Made a mounting bracket for the wheel speed sensor and mounted it to the bottom of the swing arm. I mounted a large magnet inside one of the holes of the rear rotor (6 o'clock in the picture). The small magnets that come with the Veypor need to be about a 1/16" away from the speed sensor, even though the instructions say that it can be a little more than 3/4" away. So I had to use a magnet that's roughly 9/16" dia. and a crap load stronger. Even with the very strong magnet, it can't be more than 3/16" away from the sensor or it won't work.
The tach pickup didn't work when hooked up to the rear coil, but works pefect when hooked up to the front. Not sure why, but just glad it works.
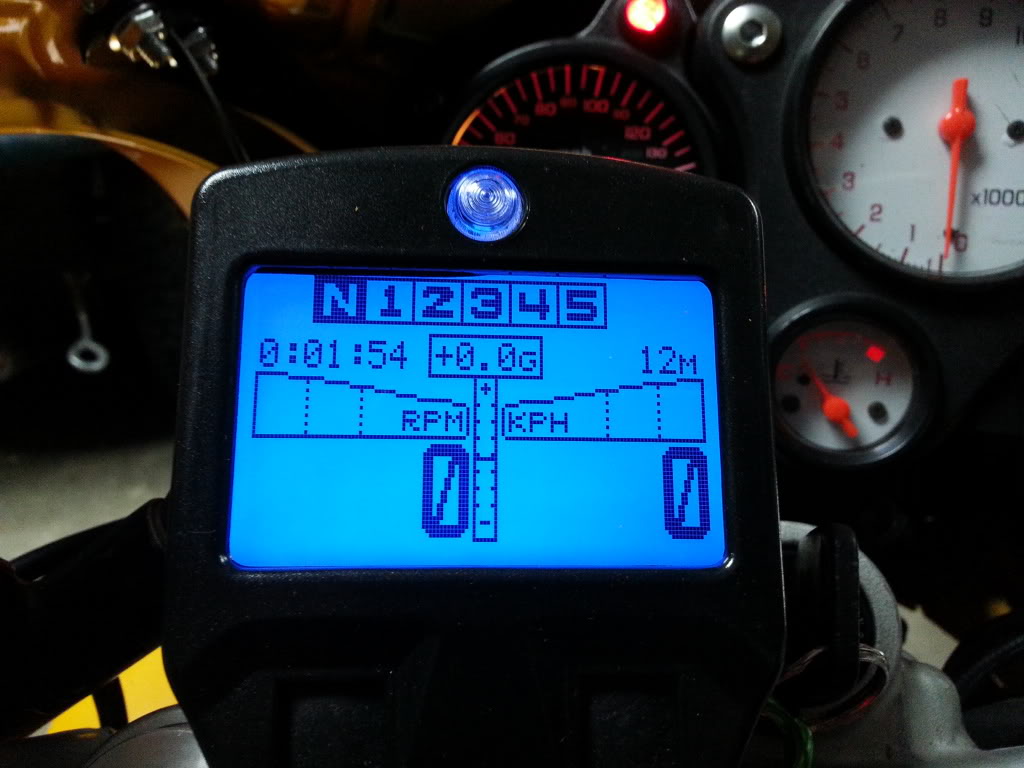
This gauge works freakin' awesome! So many features! I have a fuel gauge now, along with a gear indicator, clock, temp, dyno, all kinds of ****.

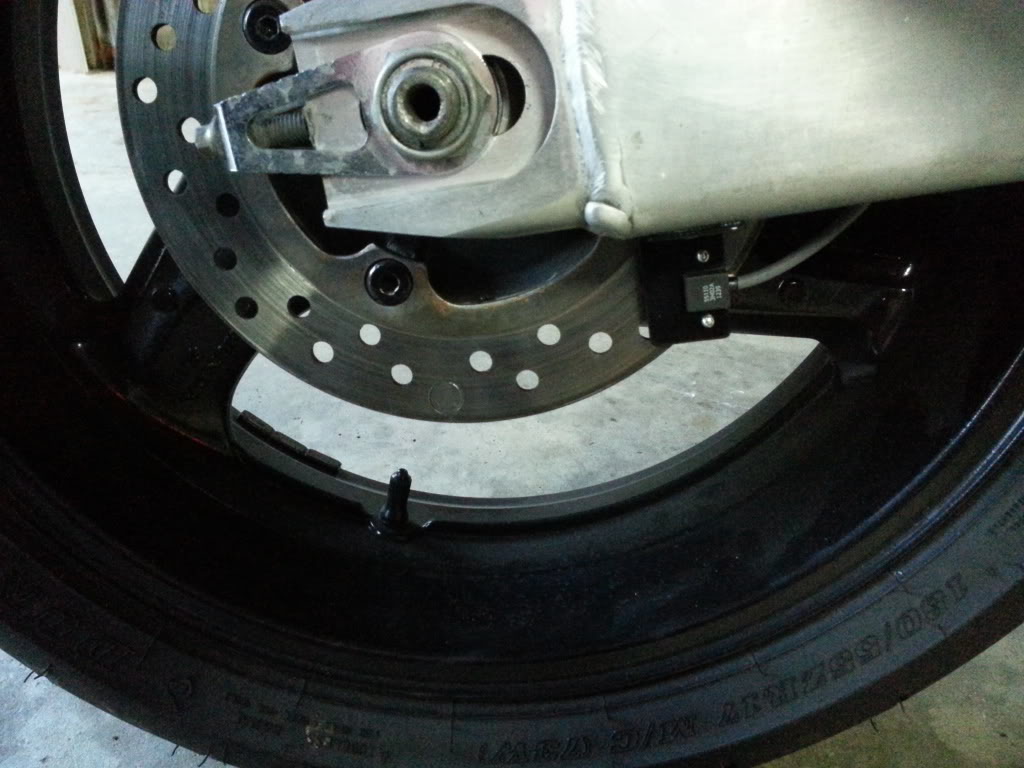
Made a mounting bracket for the wheel speed sensor and mounted it to the bottom of the swing arm. I mounted a large magnet inside one of the holes of the rear rotor (6 o'clock in the picture). The small magnets that come with the Veypor need to be about a 1/16" away from the speed sensor, even though the instructions say that it can be a little more than 3/4" away. So I had to use a magnet that's roughly 9/16" dia. and a crap load stronger. Even with the very strong magnet, it can't be more than 3/16" away from the sensor or it won't work.
The tach pickup didn't work when hooked up to the rear coil, but works pefect when hooked up to the front. Not sure why, but just glad it works.
This gauge works freakin' awesome! So many features! I have a fuel gauge now, along with a gear indicator, clock, temp, dyno, all kinds of ****.
Thread Starter
Rex Kramer-Thrill Seeker
SuperBike
Joined: Jan 2011
Posts: 2,312
From: Brookfield, WI
Concerning the above picture, if anyone else wants to mount there magnet inside the drilled hole of the rotor, don't. I saw someone else do it (might have been on this sight even) and thought that it was a great idea. However, the magnetism diminishes down to nothing with the brake pad going over the rotor, which means the sensor won't work. So, I need to look for a new place to mount the magnet and sensor. Might start looking at the front wheel.
Also, my Veypor gauge worked for about 60 miles or so, then the tach reading went to zero and the backlight has been flashing. Also, the LCD display has been showing lines where there weren't any lines when I bought it. So, I'm assuming this gauge has to be returned. I shouldn't be having to deal with this after only owning the gauge for a month. I am NOT happy with Veypor at the moment.
I am redoing the mirror mounts too. After living with them for a little while, I hate the way the mounts look. So, I am buying stock mirror stalks and boots and attaching the GSX-R mirrors to the Superhawk stalks. Make it look like factory.
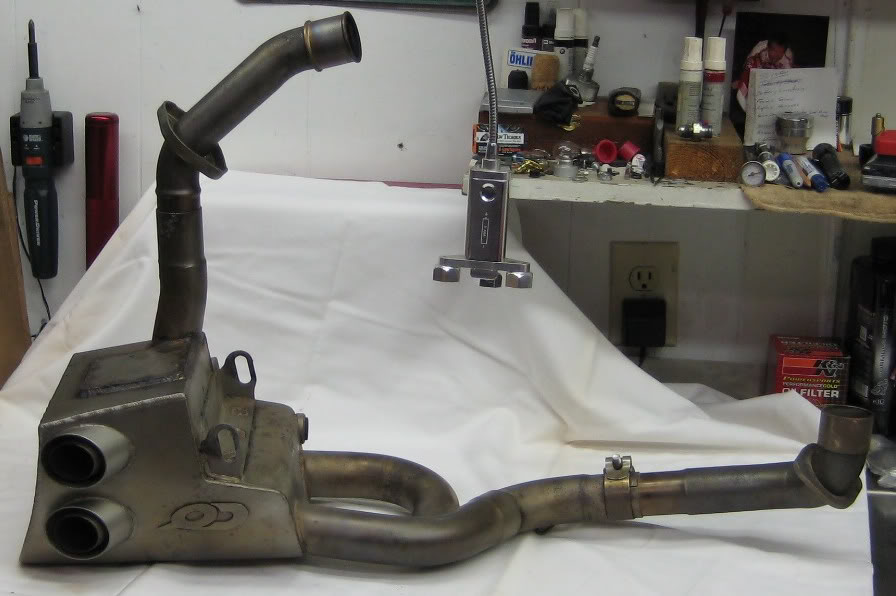
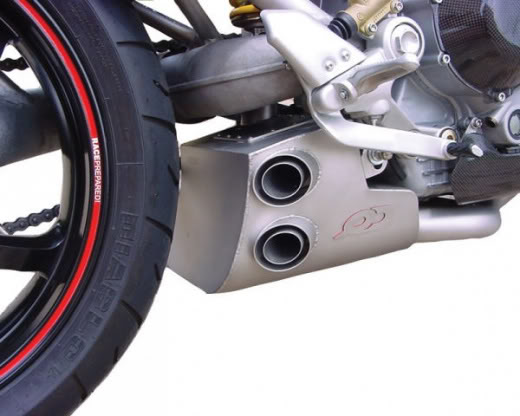
I have been toying with another exhaust system in my head. I have another header system from when I bought the bike and I can hack that up. The muffler will kind of look like a Buell's with everything under the engine. The muffler itself will be located inside of a metal "lower fairing" of sorts. Make it look nice amd not hacked together. I already have the metal and all the parts, so why the heck not? Should be fun. And if I don't like it, I can just put the stock system back on pretty quickly.
I purchased a used GPR V4 steering stabilizer and am adapting this to the bike. After contacting GPR via email, it's been over a week and still no word on the parts I need to make this a bolt on affair. I'll trying calling them on Monday. Once I have the parts, I will post a "How To" for the GPR and Superhawk.
Also, my Veypor gauge worked for about 60 miles or so, then the tach reading went to zero and the backlight has been flashing. Also, the LCD display has been showing lines where there weren't any lines when I bought it. So, I'm assuming this gauge has to be returned. I shouldn't be having to deal with this after only owning the gauge for a month. I am NOT happy with Veypor at the moment.
I am redoing the mirror mounts too. After living with them for a little while, I hate the way the mounts look. So, I am buying stock mirror stalks and boots and attaching the GSX-R mirrors to the Superhawk stalks. Make it look like factory.
I have been toying with another exhaust system in my head. I have another header system from when I bought the bike and I can hack that up. The muffler will kind of look like a Buell's with everything under the engine. The muffler itself will be located inside of a metal "lower fairing" of sorts. Make it look nice amd not hacked together. I already have the metal and all the parts, so why the heck not? Should be fun. And if I don't like it, I can just put the stock system back on pretty quickly.
I purchased a used GPR V4 steering stabilizer and am adapting this to the bike. After contacting GPR via email, it's been over a week and still no word on the parts I need to make this a bolt on affair. I'll trying calling them on Monday. Once I have the parts, I will post a "How To" for the GPR and Superhawk.
Thread Starter
Rex Kramer-Thrill Seeker
SuperBike
Joined: Jan 2011
Posts: 2,312
From: Brookfield, WI
This is similar to the exhaust I want to build. However, mine will have an integrated metal lower fairing. Mine will have a slightly tilted oval exhaust tip on the left side and the right side. Should be a fun build today.
Thread Starter
Rex Kramer-Thrill Seeker
SuperBike
Joined: Jan 2011
Posts: 2,312
From: Brookfield, WI
Yes! I got a set of mirrors from supermarto (by the way, he's an awesome person to deal with), and they should be here by Friday 7/5. Once I get them into my hands, I'll make a build thread for those that want to update thier Superhawk to GSX-R mirrors with integrated turn signals.
Also, captainchaos sent me a Superhawk seat pan. I'll do a "make your own comfortable seat" thread. I've done some upholstery work in the past, so it should be a fun project.
One more thing, Sept. 21st through the 28th, I'll be riding to South Dakota. Just found out about this trip tonight. I'll be staying in a big *** cabin 15 miles from Deadwood. Should be a fun ride, being that 15+ people in the group ride will be from my family (aunts, uncles, cousins). So that being said, I'm glad that I'm making a more comfortable seat. I'll need to read up on what you guys did for long distance rides.
Lots to come in the next few weeks!
Last edited by CruxGNZ; Jul 2, 2013 at 10:13 PM.

Escape Reality
SuperSport
Joined: Jun 2006
Posts: 612
From: KANATA, KANADA
Concerning the above picture, if anyone else wants to mount there magnet inside the drilled hole of the rotor, don't. I saw someone else do it (might have been on this sight even) and thought that it was a great idea. However, the magnetism diminishes down to nothing with the brake pad going over the rotor, which means the sensor won't work. So, I need to look for a new place to mount the magnet and sensor. Might start looking at the front wheel.
Thread Starter
Rex Kramer-Thrill Seeker
SuperBike
Joined: Jan 2011
Posts: 2,312
From: Brookfield, WI
I found three other spots to mount the magnet and pickup. If these other spots don't work, I will pull the rear wheel and drill a hole in the rear rotor more inboard. This would give me an excuse to replace the rear bearings too, which have been sitting for while now anyways.


Member
Superstock
Joined: Jul 2009
Posts: 285
From: Snohomish, WA.
CruxGNZ,
For your Vapor Gauge feedback....If interested, this is how I mounted my pick-up for my Sigma 8.12 computer....
Thanks to SmokinJoe for the 1880mm wheel size
1. Approx. 10mm longer left axle stainless pinch bolt
2. Jam nut
3. Made a aluminum bracket for pick-up
4. Epoxied pick-up to inside bracket.
5. Epoxied magnet to one of the rotor bolt heads
6. Approx. 1-2mm distance from pick-up to magnet
7. Ran wire along brake line to Sigma
8. Aluminum bracket for Sigma
9. Done
At 70mph indicated- GPS reads 65mph, Sigma reads 65.4mph (with stock gearing)

Thread Starter
Rex Kramer-Thrill Seeker
SuperBike
Joined: Jan 2011
Posts: 2,312
From: Brookfield, WI
Upland, thanks for the idea! I took it and went one step further. I personally don't like seeing the pickup or bracket, so I hid them. Worked out perfectly. I was even able to reuse the bracket I made for the swing arm. Piece of cake 
I am epoxying the magnet inside the circle thingy (for lack of better words) that floats the rotor.
Modified swingarm bracket (still have to paint it)
Where's the bracket and sensor? haha
Oh, there it is.
I am epoxying the magnet inside the circle thingy (for lack of better words) that floats the rotor.
Modified swingarm bracket (still have to paint it)
Where's the bracket and sensor? haha
Oh, there it is.
Last edited by CruxGNZ; Aug 6, 2013 at 11:01 PM.
Thread Starter
Rex Kramer-Thrill Seeker
SuperBike
Joined: Jan 2011
Posts: 2,312
From: Brookfield, WI
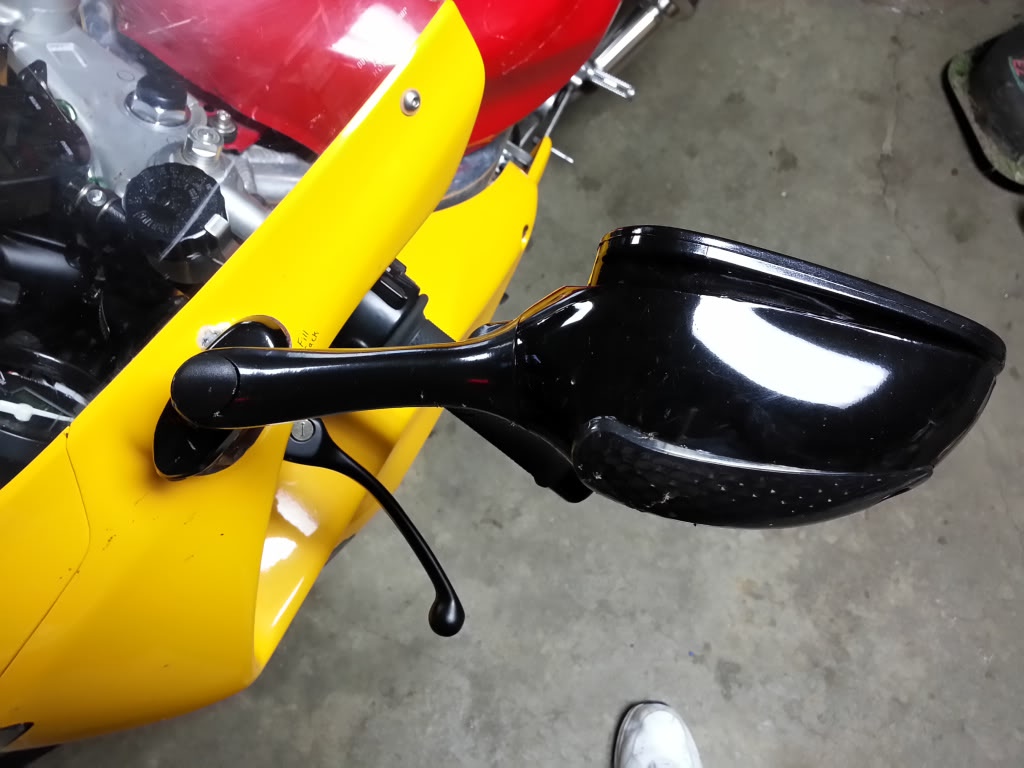
I got my stock Superhawk mirrors today! I put the aftermarket and stock mirrors next to each other and it looks to be super easy to mate the two together. Stock mirror mounts with aftermarket mirror & turn signals. I think this will update the look of the bike a little bit, plus I got rid of the ugly stock front turn signals.
I couldn't modify the Superhawk mirror stalk to accept the aftermarket mirror, so I cut the aftermarket stalk to accept the Superhawk mount. Very easy actually. Now I can get rid of those crappy *** mounts I made. Make it look factory
This is what I have now.
Seperate the aftermarket mount.
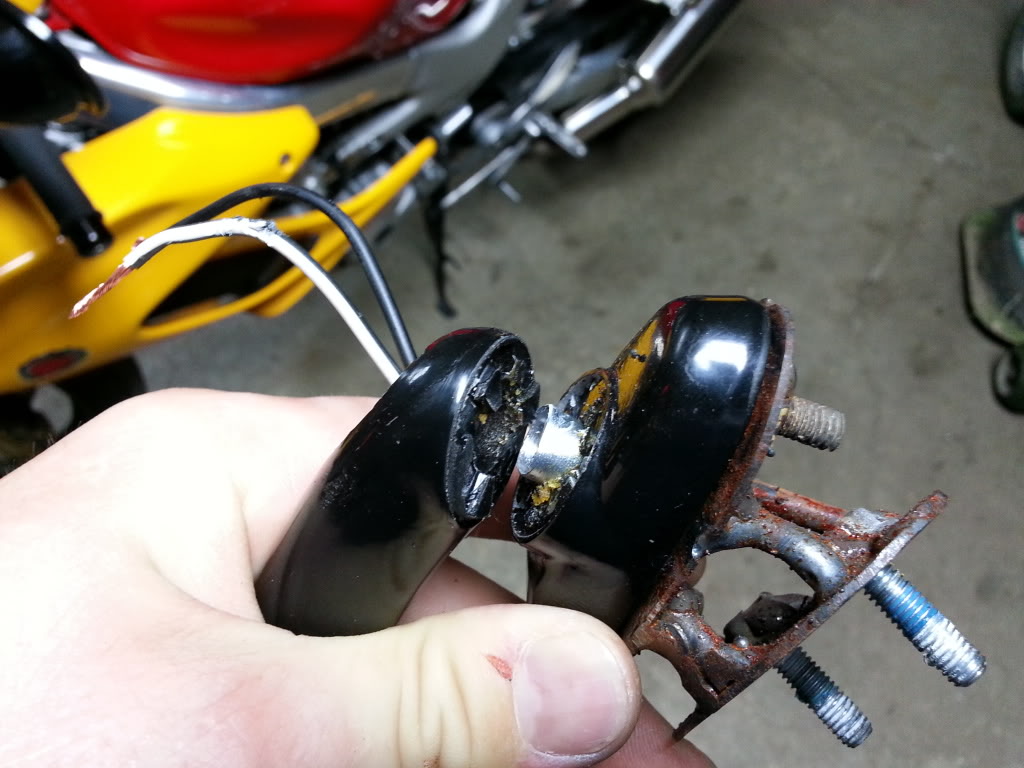
And this is what will mount to the Superhawk stock mirror mounts.
Here's the stock mirror mount.
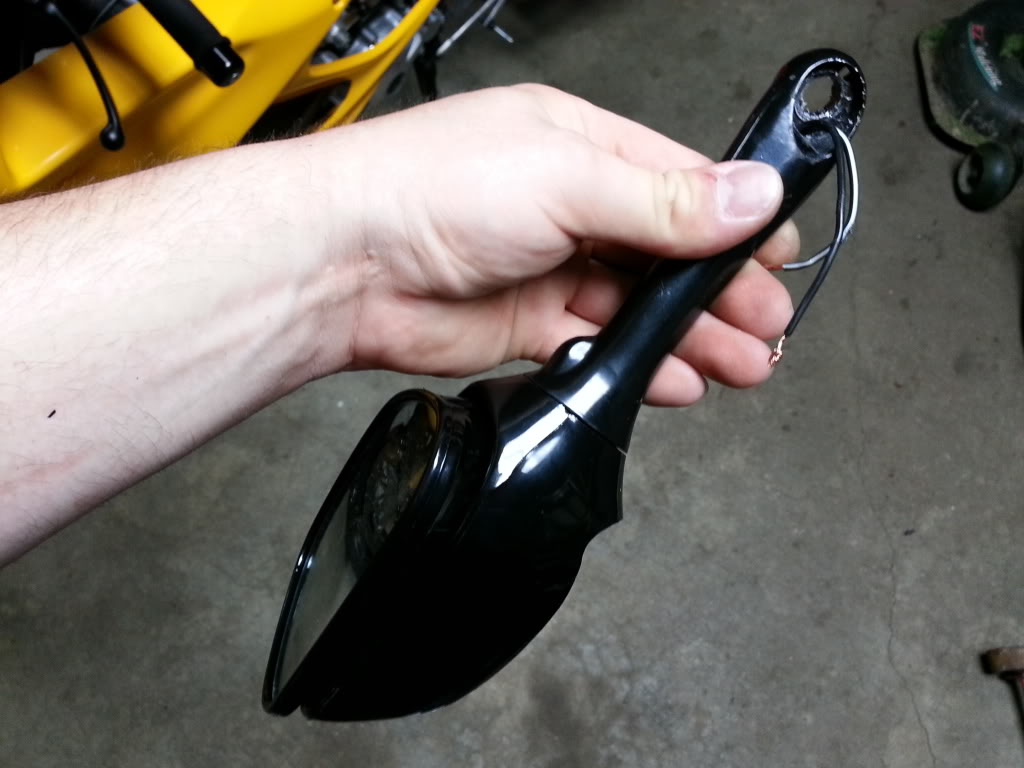
I cut off the end of the aftermarket mirror stalk.
And this is where I called it a night. Pretty simple to do! Pictures of the finished, painted, and installed mirrors tomorrow.
I couldn't modify the Superhawk mirror stalk to accept the aftermarket mirror, so I cut the aftermarket stalk to accept the Superhawk mount. Very easy actually. Now I can get rid of those crappy *** mounts I made. Make it look factory
This is what I have now.
Seperate the aftermarket mount.
And this is what will mount to the Superhawk stock mirror mounts.
Here's the stock mirror mount.
I cut off the end of the aftermarket mirror stalk.
And this is where I called it a night. Pretty simple to do! Pictures of the finished, painted, and installed mirrors tomorrow.
Thread Starter
Rex Kramer-Thrill Seeker
SuperBike
Joined: Jan 2011
Posts: 2,312
From: Brookfield, WI
Mirror project was put on the side burner for just a little bit. In the mean time, I have a long ride coming up and need to focus on other things I need to finish first.
First item to do is sync the carbs with what's pictured below. I decided to go the 2 bottle method, because I knew my carbs were way off and didn't want any fluid getting sucked in. Glad I did it this way too, because when I hooked up the bottles, one bottle got sucked dry within a couple seconds. They were WAY off. Got it figured out and both carbs sync'd. The bike runs A LOT better! Less popping under deceleration (although, I kinda liked that sound) and what seems like more torque on the bottom end. I don't have my Veypor gauge right now (more on that later), so I can't prove or disprove my *** dyno results.
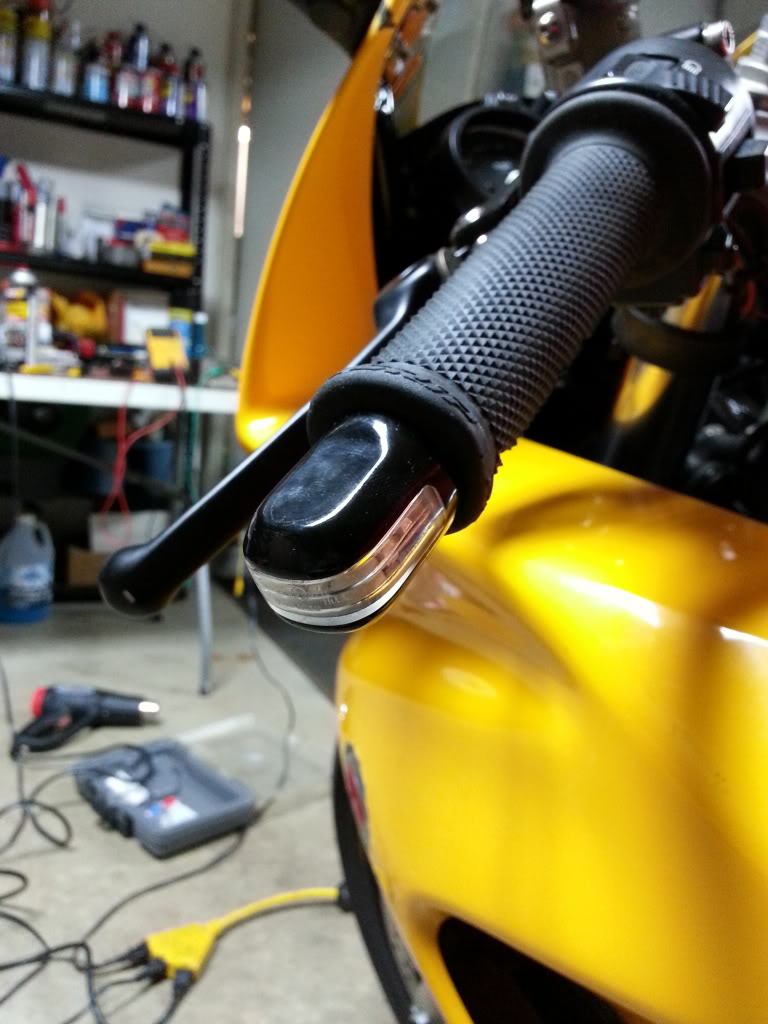
Got these beauties shipped in from the U.K. and at first glance they're very well made. They weigh the same as my other aftermarket bar end weights, are made from aluminum and have decent LED's installed. Craftmanship is 9 out of 10. However, when installing them, the hollow bolts collapsed and/or stripped out. So, they are semi-permanently glued in at the moment. There was no way to install them without taking the clipon off and modifying the clipon to accept the new LED bar ends. Kinda a pain in the ***, but now I got another set of turn signals and running lights! I like it a lot.

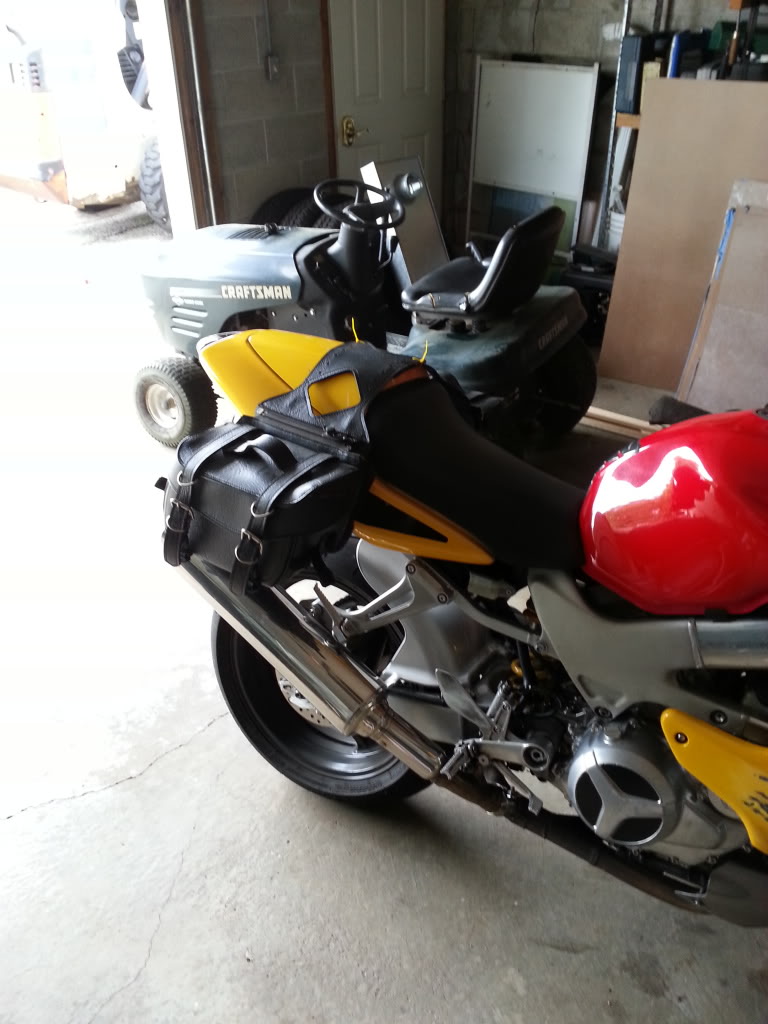
I was given a set of leather sadle bags for free. They're just sitting on the back seat. Not sure how I feel about them yet. They would be very easy to attatch to the subframe. They, in my opinion, don't belong on a sport bike, or at least mine anyways. But, with a long ride coming up, having the extra room would be awesome. What are your guys thoughts?
Now about the Veypor gauge, it kinda took a **** on me. The RPM's stopped working and then the MPH stopped working and then the backlighting on the screen was having issues. I had to send it back to Non-Linear Engineering in Canada for repairs. I guess the issues were due to a cracked resistor. Thier customer service is fantastic! I should be getting my gauge back the end of next week or so, and then be able to recalibrate everything again. I can't wait to have again a gear indicator, fuel gauge, dyno, and some other cool **** this guage has. I'm planning on removing the stock guage cluster and fabricating a metal panel that houses the Veypor gauge, a digital coolant temp. guage and very bright LED's for the idiot lights. Should look pretty cool when finished.
First item to do is sync the carbs with what's pictured below. I decided to go the 2 bottle method, because I knew my carbs were way off and didn't want any fluid getting sucked in. Glad I did it this way too, because when I hooked up the bottles, one bottle got sucked dry within a couple seconds. They were WAY off. Got it figured out and both carbs sync'd. The bike runs A LOT better! Less popping under deceleration (although, I kinda liked that sound) and what seems like more torque on the bottom end. I don't have my Veypor gauge right now (more on that later), so I can't prove or disprove my *** dyno results.
Got these beauties shipped in from the U.K. and at first glance they're very well made. They weigh the same as my other aftermarket bar end weights, are made from aluminum and have decent LED's installed. Craftmanship is 9 out of 10. However, when installing them, the hollow bolts collapsed and/or stripped out. So, they are semi-permanently glued in at the moment. There was no way to install them without taking the clipon off and modifying the clipon to accept the new LED bar ends. Kinda a pain in the ***, but now I got another set of turn signals and running lights! I like it a lot.
I was given a set of leather sadle bags for free. They're just sitting on the back seat. Not sure how I feel about them yet. They would be very easy to attatch to the subframe. They, in my opinion, don't belong on a sport bike, or at least mine anyways. But, with a long ride coming up, having the extra room would be awesome. What are your guys thoughts?
Now about the Veypor gauge, it kinda took a **** on me. The RPM's stopped working and then the MPH stopped working and then the backlighting on the screen was having issues. I had to send it back to Non-Linear Engineering in Canada for repairs. I guess the issues were due to a cracked resistor. Thier customer service is fantastic! I should be getting my gauge back the end of next week or so, and then be able to recalibrate everything again. I can't wait to have again a gear indicator, fuel gauge, dyno, and some other cool **** this guage has. I'm planning on removing the stock guage cluster and fabricating a metal panel that houses the Veypor gauge, a digital coolant temp. guage and very bright LED's for the idiot lights. Should look pretty cool when finished.
Thread Starter
Rex Kramer-Thrill Seeker
SuperBike
Joined: Jan 2011
Posts: 2,312
From: Brookfield, WI
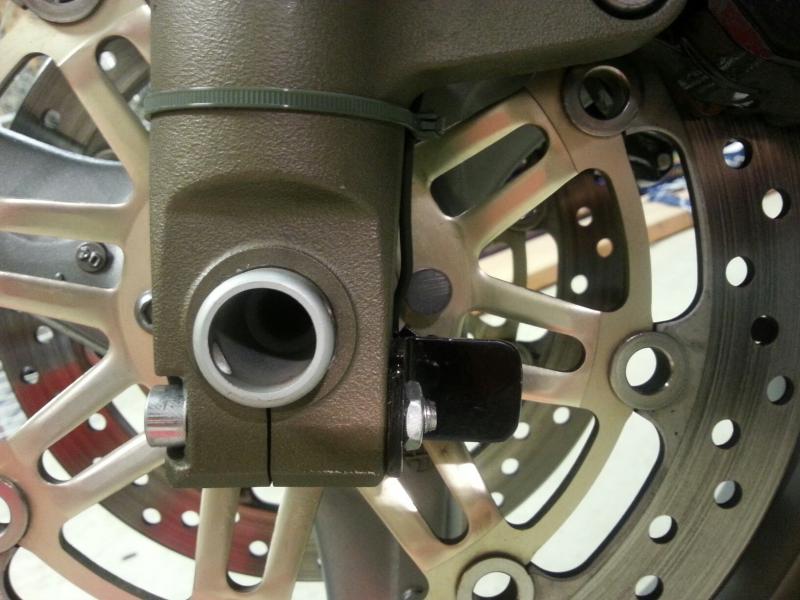
Score! While perusing eBay, I found two items. The first item was a HRC throttle tube that the seller thought was a stock VTR part and I scooped it up for a mere nine bucks! They are usually $45-$65.
The second item, was GPR hardware to install my GPR V4 onto the Superhawk for half of GPR's retail price. I was milling down a chunk of aluminum to use for installing the GPR V4. However, you cannot go wrong with everything you need for ~$85. Now, the hard part, waiting for the parts...haha
Edit: Now ain't that some ****...I just got an email from the seller of the HRC throttle tube. He saw some "damage" and refunded my money. While writing this I got another email from the seller saying that it just has some chips on the end of it, but can still be used. For some reason, he still sent me the throttle tube! So, I just got a FREE HRC throttle tube! My current throttle tube has some chips off the end of it too (previous owner dropped the bike), and the grip covers it, so no big deal. How cool was that!? Why couldn't this happen to ALL of my eBay transactions?
Last edited by CruxGNZ; Aug 6, 2013 at 08:09 PM.
Thread Starter
Rex Kramer-Thrill Seeker
SuperBike
Joined: Jan 2011
Posts: 2,312
From: Brookfield, WI
I have a ~1800 mile trip coming up with my family to South Dakota real soon, so I have some maintenance to take care of. Today I replaced the rear wheel bearings (front bearings were replaced roughly a month ago) only to find out that there was only two bearings in the box I ordered. They have been sitting way to long to say something to the seller on eBay, so I need to buy another bearing and another seal that I'm sure to destroy whenever I get the third bearing. Oh well.
I found the right wheel bearing completely shot with only 18k+ miles on them (assuming they are original). I felt a lot of slop in the driveline and can only imagine that the bearing was part of it.
After cleaning everything up, installing the bearings I had (right side wheel bearing & cush drive bearing) and popping in the new seals, I placed the cush drive in place on the wheel and noticed that the cush drive could be rotated alost a quarter of an inch (measured at the teeth of the sprocket). So, to tighten things up, I cut little strips of rubber and placed them in the concave part of the rubber cush things. Worked great. The sprocket movement was under an eighth inch at the sprocket teeth.
My thinking is that when the strips of new rubber are compressed, the bigger cush things will do thier job. With the torque of the engine, I didn't want stress put where it wasn't designed to be. The test drive will tell...
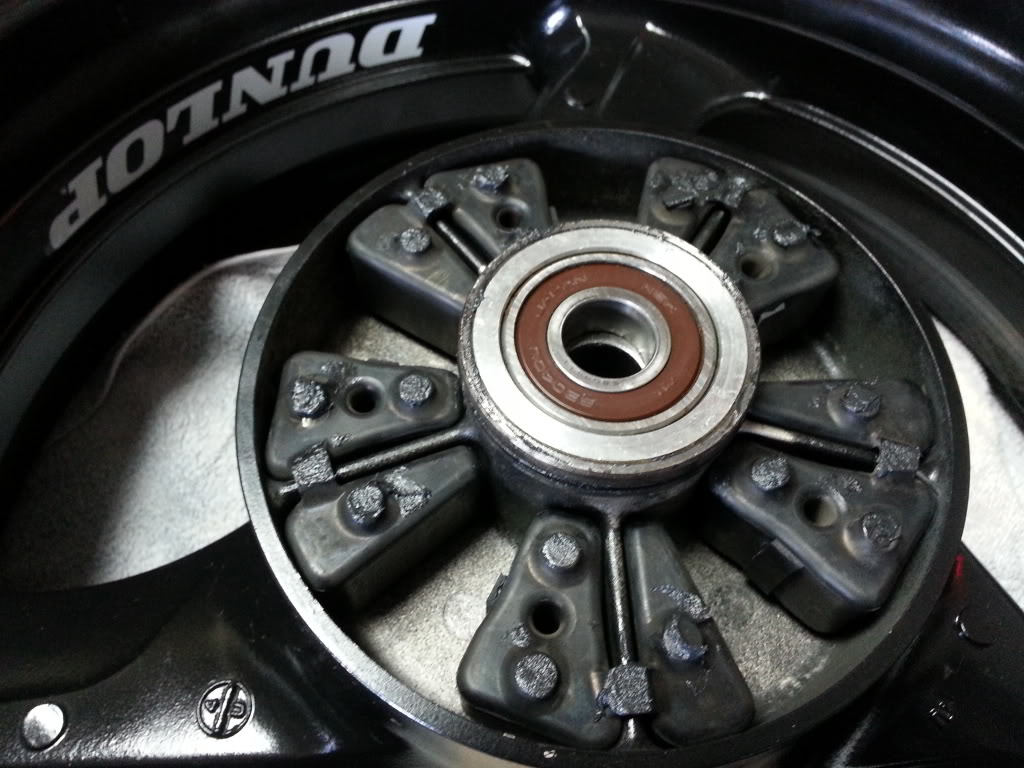
(picture is of the stupid bearing I need to replace still, along with some grease on the cush drive, because they were wearing down, and those little strips of rubber)
I also installed new front and rear sprockets and a new DID 530 chain. Took it for a test drive and WOW! What a freakin' difference! The chain makes almost no noise at all and there is NO slop in the driveline! Rev matching is flawless now. Before, I would be hearing the chain snap every now and then when the R's were off just a hair. Makes for a much better riding experience! I'm really lovin' this bike now more than ever
I found the right wheel bearing completely shot with only 18k+ miles on them (assuming they are original). I felt a lot of slop in the driveline and can only imagine that the bearing was part of it.
After cleaning everything up, installing the bearings I had (right side wheel bearing & cush drive bearing) and popping in the new seals, I placed the cush drive in place on the wheel and noticed that the cush drive could be rotated alost a quarter of an inch (measured at the teeth of the sprocket). So, to tighten things up, I cut little strips of rubber and placed them in the concave part of the rubber cush things. Worked great. The sprocket movement was under an eighth inch at the sprocket teeth.
My thinking is that when the strips of new rubber are compressed, the bigger cush things will do thier job. With the torque of the engine, I didn't want stress put where it wasn't designed to be. The test drive will tell...
(picture is of the stupid bearing I need to replace still, along with some grease on the cush drive, because they were wearing down, and those little strips of rubber)
I also installed new front and rear sprockets and a new DID 530 chain. Took it for a test drive and WOW! What a freakin' difference! The chain makes almost no noise at all and there is NO slop in the driveline! Rev matching is flawless now. Before, I would be hearing the chain snap every now and then when the R's were off just a hair. Makes for a much better riding experience! I'm really lovin' this bike now more than ever
Last edited by CruxGNZ; Aug 22, 2013 at 10:43 PM.
Thread Starter
Rex Kramer-Thrill Seeker
SuperBike
Joined: Jan 2011
Posts: 2,312
From: Brookfield, WI
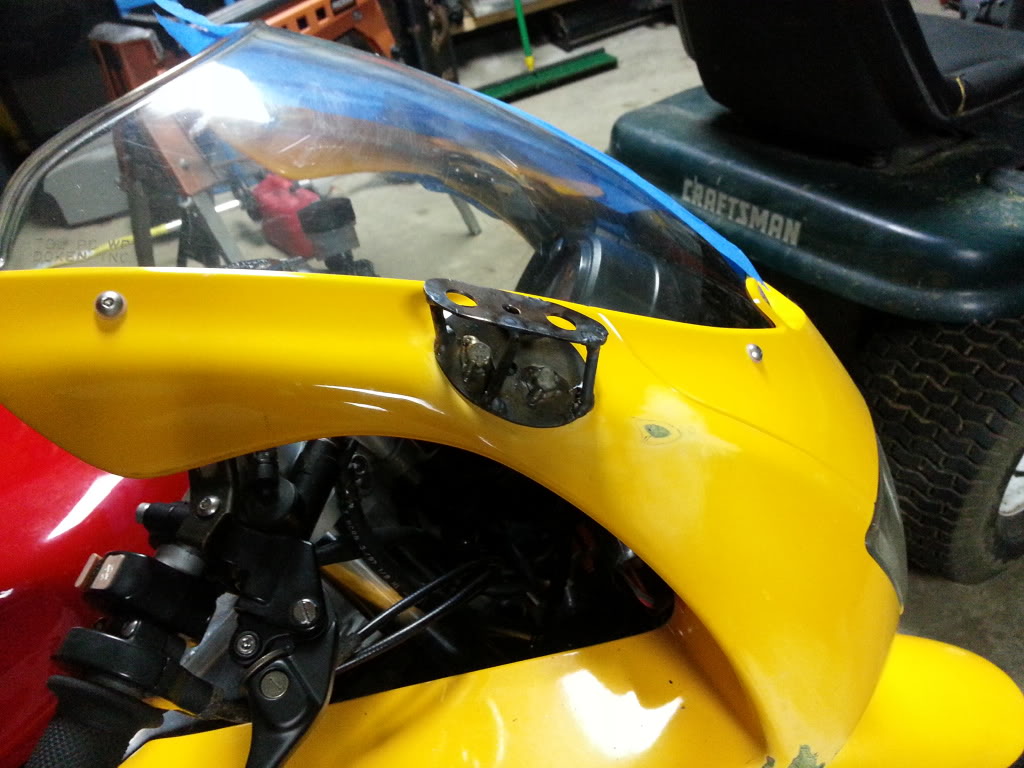
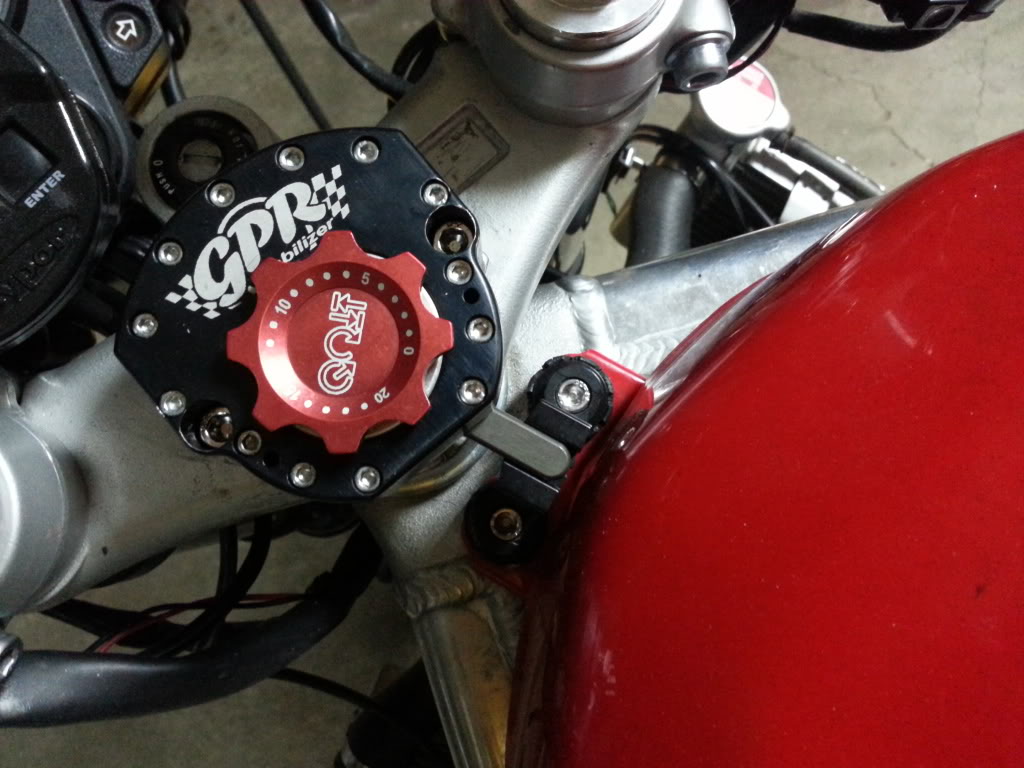
Took the fairings off last night and started some bodywork. While it was off, I reinforced the front fairing stay, because the mirrors were vibrating at speed (P.O. hacked it up. I had to rebuild it and apparently needed some gussets for the mirror mounts). The paint is being sprayed in the next few days and I'm using water based, which will be completely new to me. Should be a fun project. Just in time for riding around with all the Harleys for the 110th.
Oh, also got around to installing the GPR V4
Oh, also got around to installing the GPR V4
Last edited by CruxGNZ; Aug 26, 2013 at 09:29 PM.
Thread Starter
Rex Kramer-Thrill Seeker
SuperBike
Joined: Jan 2011
Posts: 2,312
From: Brookfield, WI
While clicking along to post to my build thread, I noticed somebody gave me 5 stars? Not sure who, but thanks man :-)
Stuff coming up, building my own seat, painting the plastics, RFID ignition, and...well, a whole lot of other ideas too. I mean, who's ever done, right? Over the winter there will be another build thread for my Superhawk Chopper. I have 85% of the stuff for that project right now.
I just wanted to update the thread. My frankenstien compressor had an issue. The cheap regulator and water seperator I got at Harbor freight crapped out on me. So, I couldn't paint the plastics over Labor Day weekend. Looking at decent dessicant/regulator setup costs about $150-$250. For my 80 gallon 19 CFM @ 90 psi that I built, I may as well treat it to some good parts. I mean, I built it to last, so may as well buy more good parts and not cheap out, like I did for the one that crapped out on me.
I am having a blast with my Veypor gauge! Once calibrated, you can make adjustments to the carbs and see how your run was affected. The gauge will graph it all out for you. So, you can see where there are low spots in the RPM range and adjust the carbs if you need to. Same goes for braking. Pretty neat, hey? For the price, I'm not sure why others haven't went this route.
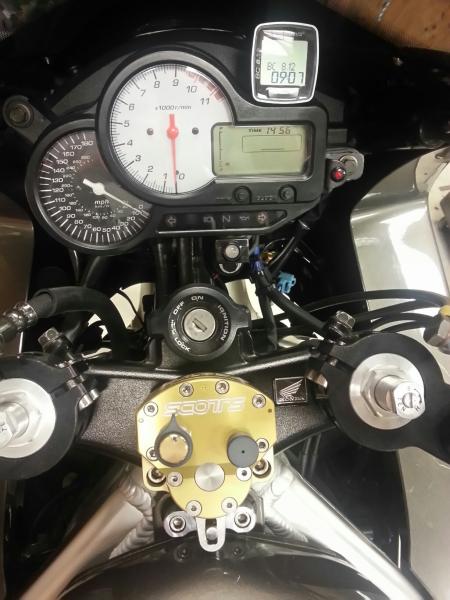
I have now removed my stock gauge cluster. After many miles with both the Veypor and stock gauge cluster, I just don't need the stock gauge anymore. I know the Veypor is very accurate. The gear indicator is so dang nice! No more forgetting what gear you're in. Also, being that I have a '98, the gauge gives me a very accurate indication of how much fuel I have in the tank, based on how big the tank is, RPM's and MPH. I learned I don't need the low fuel light anymore.
Stay tuned for paint and the seat build in the next couple weeks. My trip to South Dakota is rapidly approaching!
Stuff coming up, building my own seat, painting the plastics, RFID ignition, and...well, a whole lot of other ideas too. I mean, who's ever done, right? Over the winter there will be another build thread for my Superhawk Chopper. I have 85% of the stuff for that project right now.
I just wanted to update the thread. My frankenstien compressor had an issue. The cheap regulator and water seperator I got at Harbor freight crapped out on me. So, I couldn't paint the plastics over Labor Day weekend. Looking at decent dessicant/regulator setup costs about $150-$250. For my 80 gallon 19 CFM @ 90 psi that I built, I may as well treat it to some good parts. I mean, I built it to last, so may as well buy more good parts and not cheap out, like I did for the one that crapped out on me.
I am having a blast with my Veypor gauge! Once calibrated, you can make adjustments to the carbs and see how your run was affected. The gauge will graph it all out for you. So, you can see where there are low spots in the RPM range and adjust the carbs if you need to. Same goes for braking. Pretty neat, hey? For the price, I'm not sure why others haven't went this route.
I have now removed my stock gauge cluster. After many miles with both the Veypor and stock gauge cluster, I just don't need the stock gauge anymore. I know the Veypor is very accurate. The gear indicator is so dang nice! No more forgetting what gear you're in. Also, being that I have a '98, the gauge gives me a very accurate indication of how much fuel I have in the tank, based on how big the tank is, RPM's and MPH. I learned I don't need the low fuel light anymore.
Stay tuned for paint and the seat build in the next couple weeks. My trip to South Dakota is rapidly approaching!
Last edited by CruxGNZ; Sep 1, 2013 at 12:11 AM.

Senior Member
SuperSport
Joined: Apr 2013
Posts: 972
While clicking along to post to my build thread, I noticed somebody gave me 5 stars? Not sure who, but thanks man :-)
Stuff coming up, building my own seat, painting the plastics, RFID ignition, and...well, a whole lot of other ideas too. I mean, who's ever done, right? Over the winter there will be another build thread for my Superhawk Chopper. I have 85% of the stuff for that project right now.
I just wanted to update the thread. My frankenstien compressor had an issue. The cheap regulator and water seperator I got at Harbor freight crapped out on me. So, I couldn't paint the plastics over Labor Day weekend. Looking at decent dessicant/regulator setup costs about $150-$250. For my 80 gallon 19 CFM @ 90 psi that I built, I may as well treat it to some good parts. I mean, I built it to last, so may as well buy more good parts and not cheap out, like I did for the one that crapped out on me.
I am having a blast with my Veypor gauge! Once calibrated, you can make adjustments to the carbs and see how your run was affected. The gauge will graph it all out for you. So, you can see where there are low spots in the RPM range and adjust the carbs if you need to. Same goes for braking. Pretty neat, hey? For the price, I'm not sure why others haven't went this route.
I have now removed my stock gauge cluster. After many miles with both the Veypor and stock gauge cluster, I just don't need the stock gauge anymore. I know the Veypor is very accurate. The gear indicator is so dang nice! No more forgetting what gear you're in. Also, being that I have a '98, the gauge gives me a very accurate indication of how much fuel I have in the tank, based on how big the tank is, RPM's and MPH. I learned I don't need the low fuel light anymore.
Stay tuned for paint and the seat build in the next couple weeks. My trip to South Dakota is rapidly approaching!
Thread Starter
Rex Kramer-Thrill Seeker
SuperBike
Joined: Jan 2011
Posts: 2,312
From: Brookfield, WI
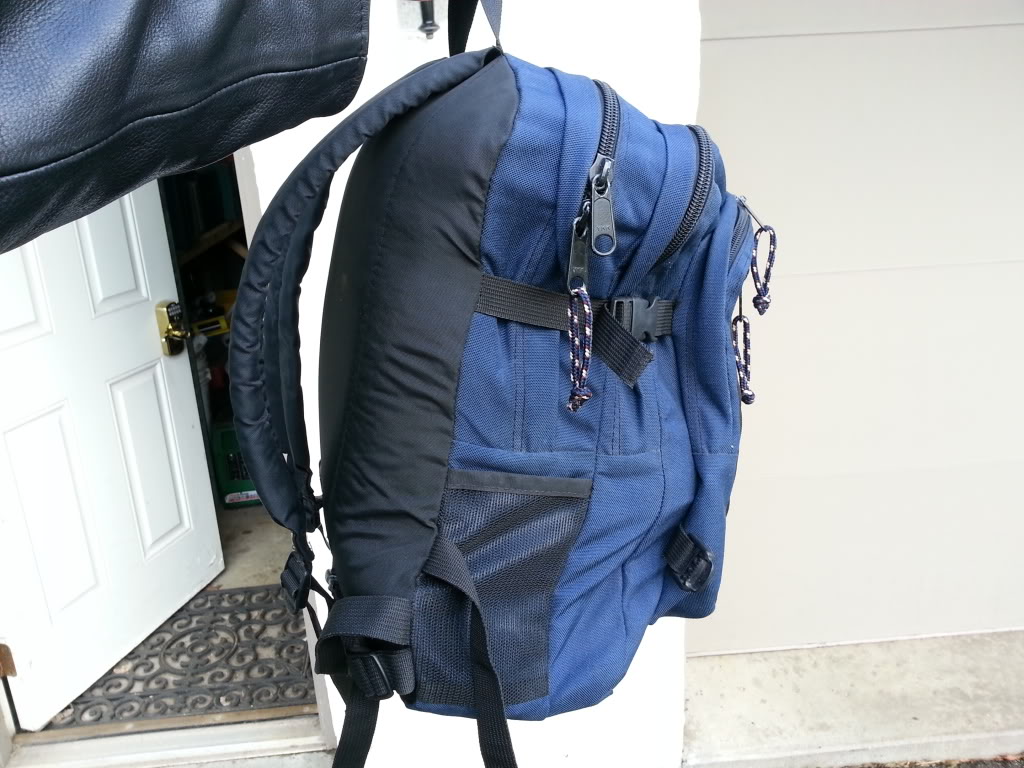
Guess what I fit inside this backpack? I took a trip to Kendor Marine and got some stuff. Pictures tomorrow to see what I'm up to 
Oh, and I got all my LED's from Super Bright LEDs for the new Superhawk dash. So that is being fabricated as well.
I am leaving for my South Dakota trip this coming Friday, so I have less than a week to get all of the work done. Getting close!
Edit: Oh yeah! Thanks to davidka, I was able to buy a tinted Zero Gravity DB windshield. Took a ride to meet up with him. Seems like a down to earth, cool guy. Thanks again man!
Last edited by CruxGNZ; Sep 13, 2013 at 09:52 PM.


