
CruxGNZ's '98 Superhawk


Thread Starter
Rex Kramer-Thrill Seeker
SuperBike
Joined: Jan 2011
Posts: 2,312
From: Brookfield, WI

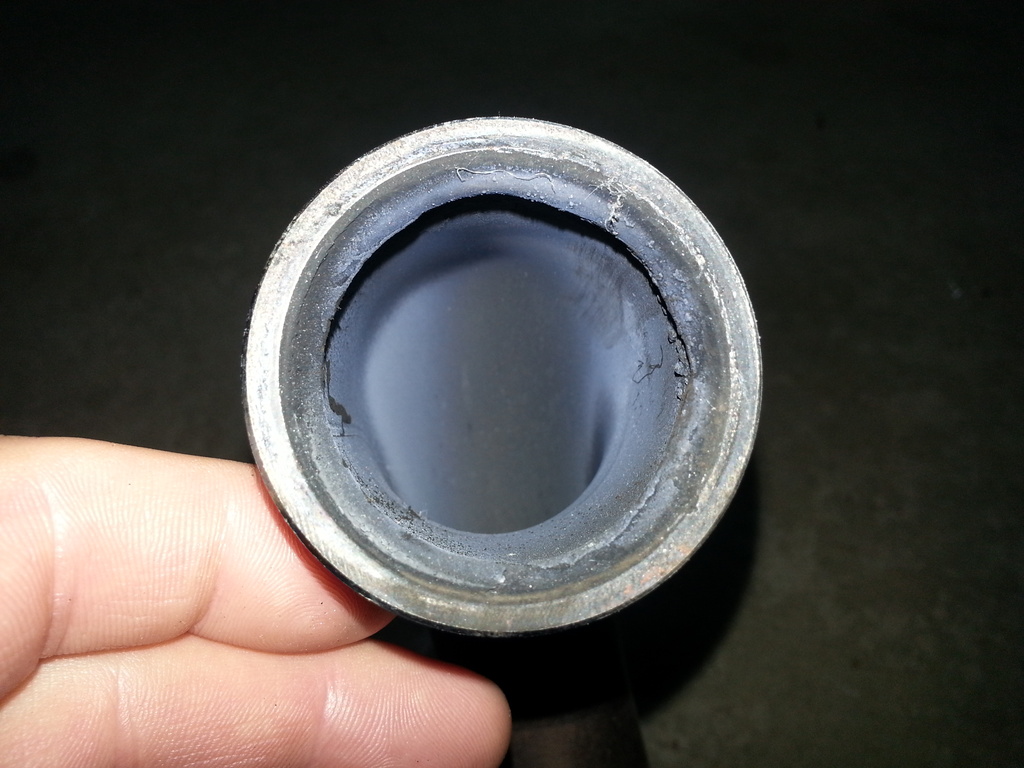
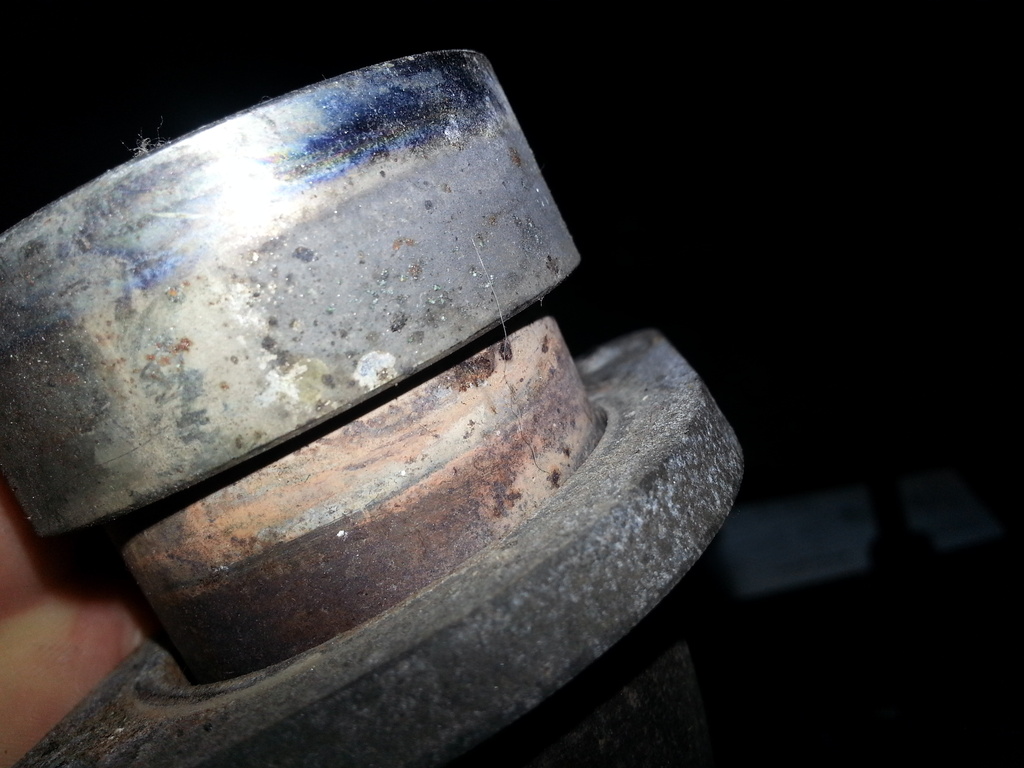
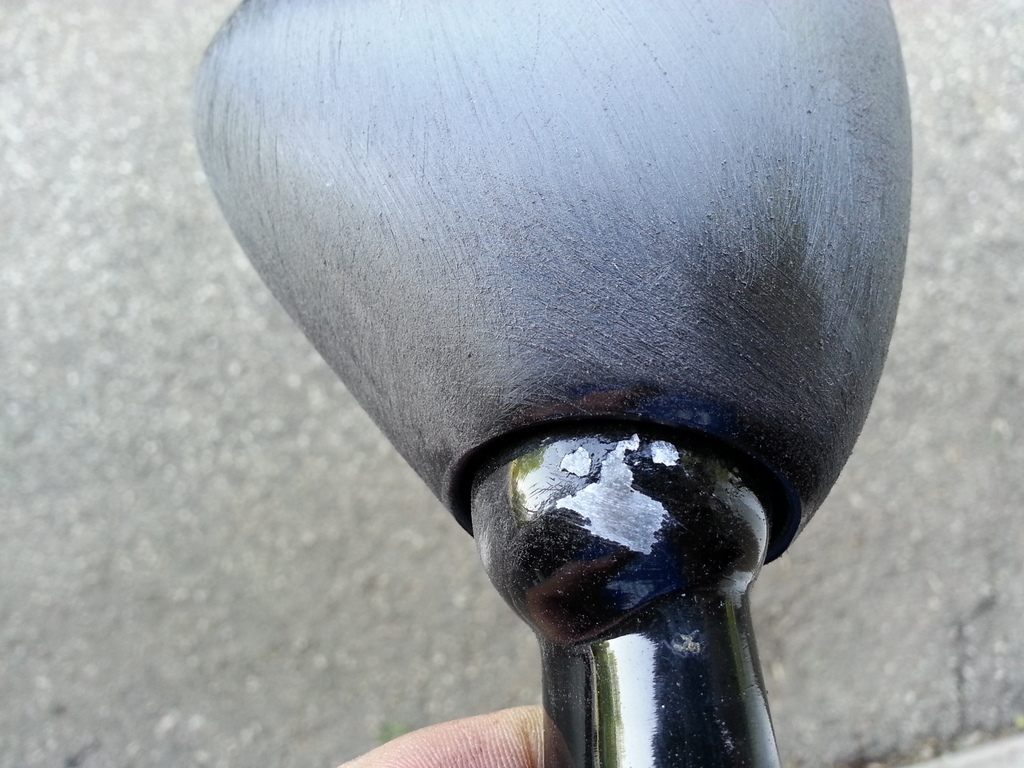
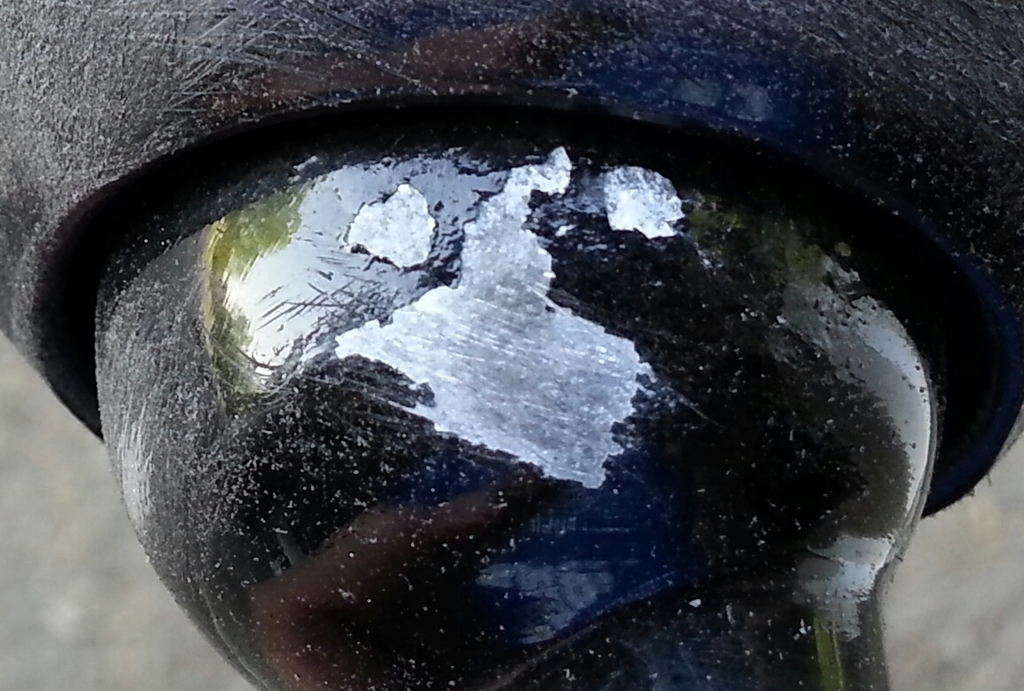
I am working the exhaust today. I thought I would take a look at the weld that restricts exhaust flow. I took a measurement of the inside diameter of the exhaust pipe and an average of the inside diameter of the weld. There is a .126" difference. That's almost exactly 1/8" difference.
Here is what I want to do:
-Grind the stock weld on the inside down to nothing, so I can pull off the ring and slide off the holder.
-Chamfer the inside edge of the holder to make room for a weld.
-Slide the holder back on.
-Slide on the ring and weld it on the outside.
I just removed a 1/8" restriction from the exhaust.
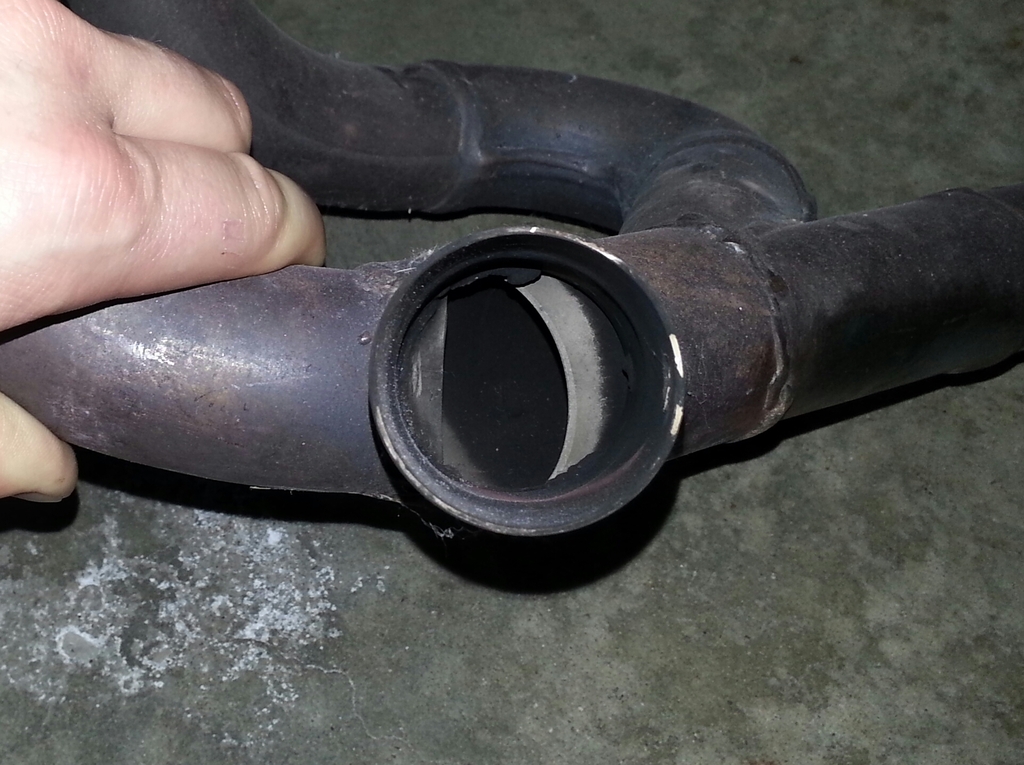
I am wondering if this is worth doing? It seems like it is worthwhile. I can't be the only one that noticed the restriction and did this. I'll also be opening the area where the right exhaust pipe hooks up to the rest of the exhaust.


Here is what I want to do:
-Grind the stock weld on the inside down to nothing, so I can pull off the ring and slide off the holder.
-Chamfer the inside edge of the holder to make room for a weld.
-Slide the holder back on.
-Slide on the ring and weld it on the outside.
I just removed a 1/8" restriction from the exhaust.
I am wondering if this is worth doing? It seems like it is worthwhile. I can't be the only one that noticed the restriction and did this. I'll also be opening the area where the right exhaust pipe hooks up to the rest of the exhaust.


Thread Killer
SuperBike
Joined: Apr 2013
Posts: 2,098
From: Geneseo, IL
What size is the outlet on the head? Is the weld truly causing a restriction?
I'm pretty sure I've read on this forum or the "other" forum that removing the downstream restriction is a mistake.
I'm pretty sure I've read on this forum or the "other" forum that removing the downstream restriction is a mistake.
Senior Member
SuperBike
Joined: Feb 2007
Posts: 1,252
From: boston
A few things about the exhaust.
First I do think it's worthwhile to get rid of the welds where the headers meet the heads, especially with a port and polish it will reduce turbulence...
Second I'm not sure if it's been concluded whether or not there is a performance gain from removing the "extra" pipe on the right side outlet HOWEVER, I do believe it has been concluded that it is there by design, not laziness. I believe it's there to help the right side closer match the left side in terms of back pressure and exhaust pulses given the left side after the junction is significantly longer than the right side. I forget who made it but some company at one point made a header for the SH and if you look at it, they put an extra curve or two on the right side outlet to create equal length headers and, from what I remember, two crossover pipes...
Don't take this as fact, it's just what I remember from when I was considering making my own complete exhaust...
Thread Starter
Rex Kramer-Thrill Seeker
SuperBike
Joined: Jan 2011
Posts: 2,312
From: Brookfield, WI
Here is a link showing that the weld can be sanded down without compromising the weld itself. Going to try that first. If I sand to far, then I'll do what I originally planned.
www.vtr1000.org ? View topic - Getting the most out of your stock header
As for that restriction in the right pipe, 8541Hawk had a great theory and it totally made sense. He said, "Me personally, as I have stated before, I think it is there to trick the system into thinking it is variable length due to the flow path changing as the internal pressures rise." But, on the vtr1000.org site, there was a post about someone that knew a welder or someone at Honda (I think that is what it was) that made the headers, and it turns out that restriction was not done on purpose. It was just crappy manufacturing. I remember reading it there, but finding it might be a pain. I just spent 45 minutes looking for that post and can't find it. If any of you guys from the vtr1000.org site are reading this and remember that post, please chime in.
There was also someone that dyno'd thier bike before and after removing that restriction and lost power after removing it. But this was with a new, stock bike back in '97 or '98 I believe.
Then, there is a post like this one, that shows people having good results from removing the restriction.
www.vtr1000.org ? View topic - Header pipe mods
From all the searching, I have found that if you have high comp. pistons, port & polished heads, and cams, then removing the restriction would benefit the performance. So, I'm removing it.
As for the weld at the entrance to each end of the header, on my bike it is restricting exhaust gasses since I opened up the exhaust ports.
Last edited by CruxGNZ; May 14, 2016 at 01:48 PM.
Thread Starter
Rex Kramer-Thrill Seeker
SuperBike
Joined: Jan 2011
Posts: 2,312
From: Brookfield, WI
It scared me, because it looks identical to the bolts that hold the oil pump in place. But it is a different length and it also has some black rattle can overspray on the head. That leads me to believe it is from the engine cover on my spare engine. I replaced those with stainless steel fasteners, so that one bolt must have escaped when I was going through my parts containers recently.
Thread Starter
Rex Kramer-Thrill Seeker
SuperBike
Joined: Jan 2011
Posts: 2,312
From: Brookfield, WI
I started with my hands, but gave the RIDGID oscillating tool a shot and man, did that make a heck of a difference. Made things go a lot faster. If I was single, I could have got those pipes done in no time haha
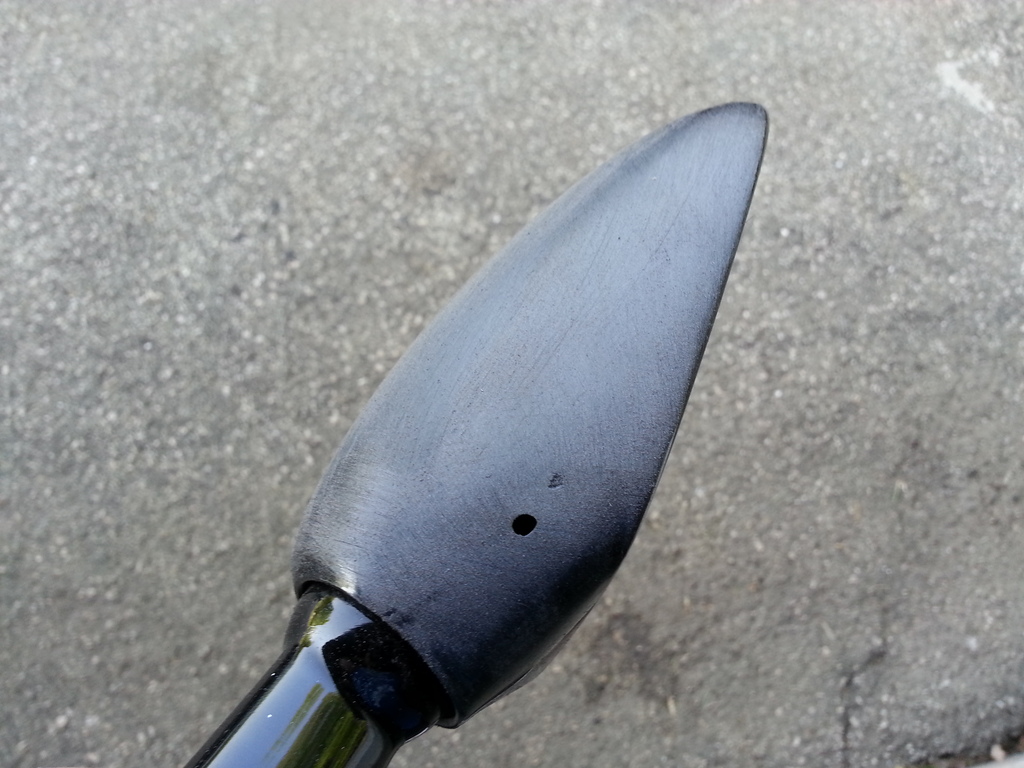
Decided on a brushed or satin finish.
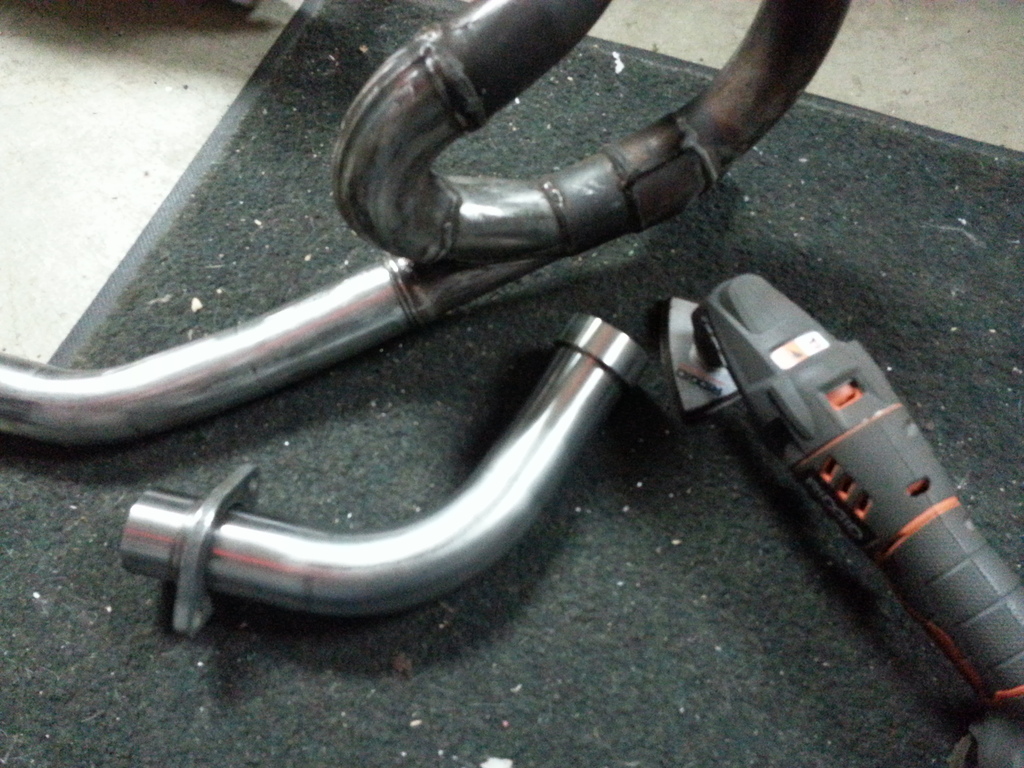
I'll finish them up, clean the inside and then spray the Eastwood product on the inside tomorrow.
Decided on a brushed or satin finish.

I'll finish them up, clean the inside and then spray the Eastwood product on the inside tomorrow.
Last edited by CruxGNZ; May 17, 2016 at 09:37 AM. Reason: Not wrapping or rapping or other 'ings

Senior Member
SuperBike
Joined: Mar 2012
Posts: 1,544
From: New South Wales Australia
Crux,
I have removed the restriction in my exhaust ages ago and if it has caused an issue I am not aware of it. What I did notice when I did it is that both cans now run at the same temperature whereas before one was hot and one was cold.
It sounded different as well, better in my opinion.
As for the rest of your bike I can't wait to see it finished.
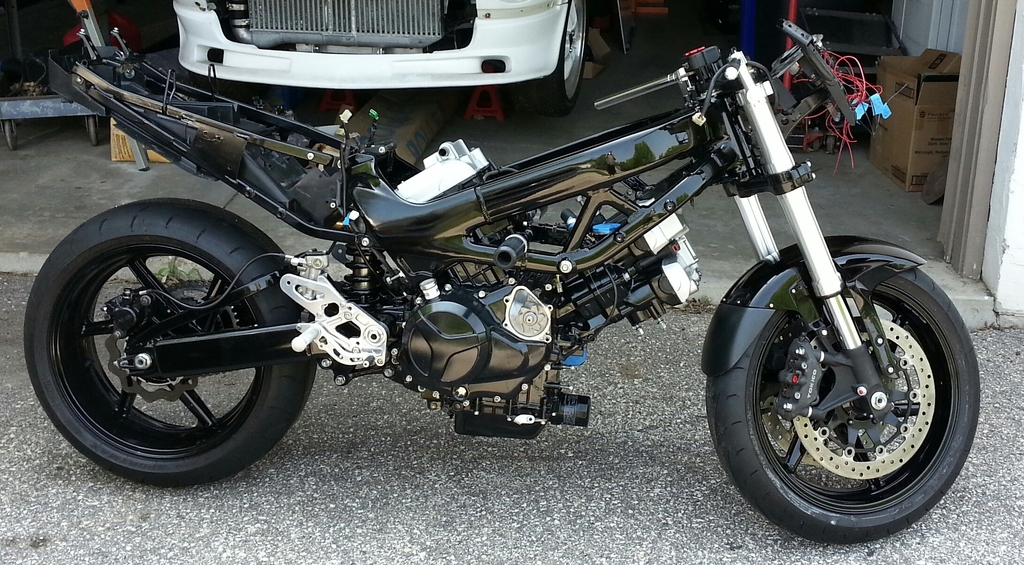
When I look at the bike when you first got it , to where it is now, it is hard to believe .
Kudos to you, can't imagine how good it will be.
I might have to stop tinkering with other bikes and show my VTR some attention.
I have removed the restriction in my exhaust ages ago and if it has caused an issue I am not aware of it. What I did notice when I did it is that both cans now run at the same temperature whereas before one was hot and one was cold.
It sounded different as well, better in my opinion.
As for the rest of your bike I can't wait to see it finished.
When I look at the bike when you first got it , to where it is now, it is hard to believe .
Kudos to you, can't imagine how good it will be.
I might have to stop tinkering with other bikes and show my VTR some attention.
Thread Starter
Rex Kramer-Thrill Seeker
SuperBike
Joined: Jan 2011
Posts: 2,312
From: Brookfield, WI
Crux,
I have removed the restriction in my exhaust ages ago and if it has caused an issue I am not aware of it. What I did notice when I did it is that both cans now run at the same temperature whereas before one was hot and one was cold.
It sounded different as well, better in my opinion.
As for the rest of your bike I can't wait to see it finished.
When I look at the bike when you first got it , to where it is now, it is hard to believe .
Kudos to you, can't imagine how good it will be.
I might have to stop tinkering with other bikes and show my VTR some attention.
Thats good to know about the exhaust, because I removed all restrictions in mine!
Last edited by CruxGNZ; May 14, 2016 at 09:43 PM.

Moderator
MotoGP
Joined: Jul 2007
Posts: 5,225
From: Gettysburg, Pa
Thread Starter
Rex Kramer-Thrill Seeker
SuperBike
Joined: Jan 2011
Posts: 2,312
From: Brookfield, WI
About the "restriction"... did you see that vid I posted a while ago?
https://youtu.be/azPKIjxmmdU
Makes ya wonder...
Eager to follow your progress with the Eastwood stuff. Bike's looking
https://youtu.be/azPKIjxmmdU
Makes ya wonder...
Eager to follow your progress with the Eastwood stuff. Bike's looking
Actually, I posted that video too!
It's funny they went that far to show a loss in power. It's more funny that small dents (restrictions) showed more power.
Last edited by CruxGNZ; May 15, 2016 at 10:12 AM.
Thread Starter
Rex Kramer-Thrill Seeker
SuperBike
Joined: Jan 2011
Posts: 2,312
From: Brookfield, WI
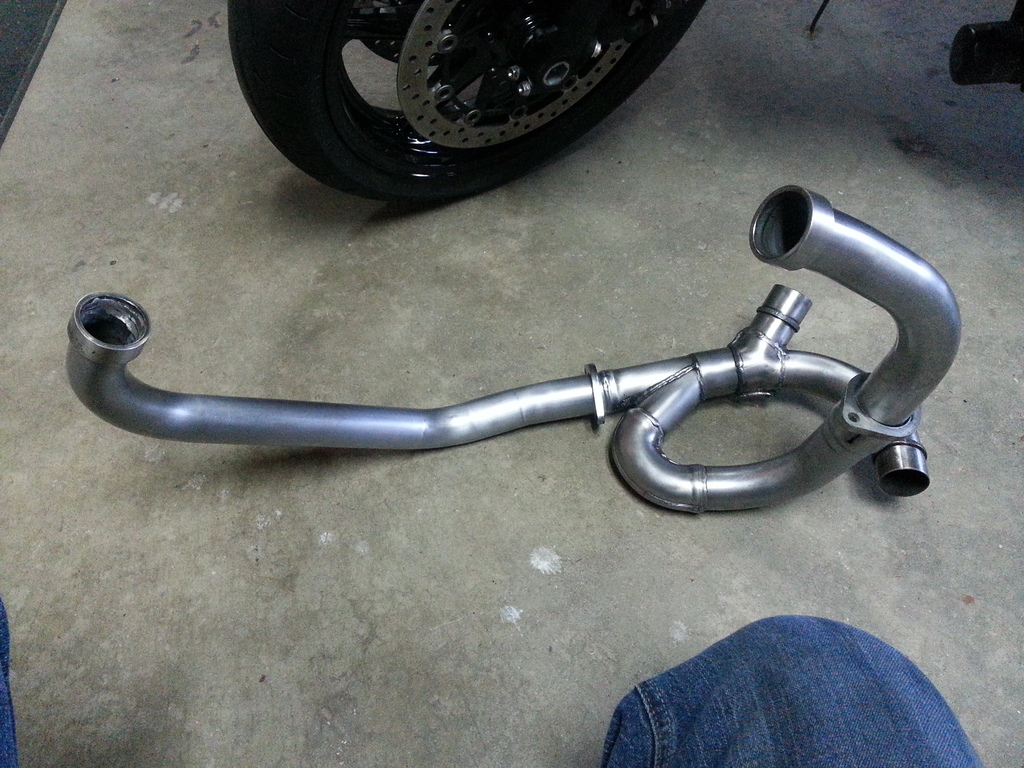
Got the header exterior done. The satin finish turned out fantastic. Took a while, but totally worth it. I know it will discolor down the road, but a quick rub down with a 3M pad and it will bring it back. I removed the restrictions inside the header, but completely forgot to do that to the weld inside the small piece next to the rear shock. I'll hit that tomorrow. I have carb cleaner sitting inside the header overnight. We'll see how that works.
I tried mounting my Ohlins resevoir, but the line is at the wrong angle. I'm assuming that since this shock is under pressure, I can't loosen that banjo fitting and swivel it 90 degrees, then tighten it. So, I temporarily zip tied the resevoir to the sub frame. The place that rebuilt and dyno'd this Ohlins shock is 45 minutes from me. I hope I can ride there, move that fitting, and then have them recharge the shock. I sure hope they can recharge the shock while on the bike. What a hassle.
Speaking of hassle, I pulled out my Danmotto adjustable clipons and what do you know, one of the clamps go on the fork underneath the top tripple. One step forward, two steps back.


Senior Member
SuperBike
Joined: Feb 2007
Posts: 1,252
From: boston
If I may offer a suggestion...
Those headers look great and I know you plan on wrapping them and then coating them with the header wrap coating spray, however I did this years ago and I realized once I cleaned them up that good, they rusted 10 times faster. So I suggest you throw some exhaust paint on prior to wrapping as well to keep any trapped moisture underneath the wrap from immediately attacking that steal...
just a suggestion...
Thread Starter
Rex Kramer-Thrill Seeker
SuperBike
Joined: Jan 2011
Posts: 2,312
From: Brookfield, WI
I'm not wrapping the header. I'm using a product from Eastwood that coats the inside of the header and keeps temps down. It got good reviews, so I'm giving it a shot. It's an aerosol can with a two foot hose with a tip that disperses the product in a nice mist. I just need to clean the inside very good before applying the stuff.
EDIT: Here's the stuff from Eastwood
http://www.eastwood.com/ew-hi-temp-i...ension-tu.html
EDIT: Here's the stuff from Eastwood
http://www.eastwood.com/ew-hi-temp-i...ension-tu.html
Last edited by CruxGNZ; May 15, 2016 at 11:13 PM. Reason: Addin' schtuff
Senior Member
Superstock
Joined: Nov 2014
Posts: 416
From: Middletown, CT
Shock mount
Crux
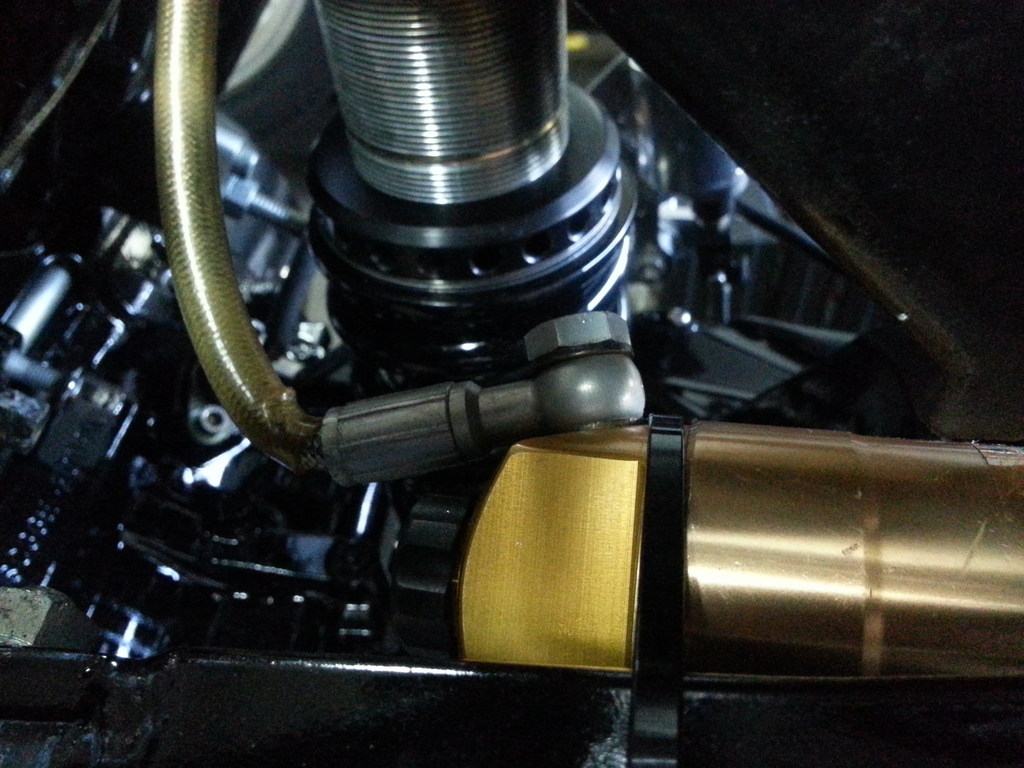
Your hose on the bottle end looks to be at the factory Ohlins angle. Here are some closeup pix of how my shock mount came out!
Ps the pipe looks killer!
Your hose on the bottle end looks to be at the factory Ohlins angle. Here are some closeup pix of how my shock mount came out!
Ps the pipe looks killer!
Last edited by Fastguy59; May 17, 2016 at 03:54 PM.
Senior Member
Superstock
Joined: Nov 2014
Posts: 416
From: Middletown, CT
Thanks! I can't believe how far it has come either. I was just thinking about that today actually. When I got the pile of parts, I seriously had no clue how to assemble this bike since I never owned one before. That was an adventure, but I eventually put it together, made it my own and had fun riding it and tuning it. Then the clutch disintegrated and wrecked my engine. This gave me the opportunity to make the bike how I envisioned it. However, at the moment I am wavering between painting the plastics black with a satin clear or gun metal grey with a satin clear. Maybe someone with Photoshop skills can help me decide?
Thats good to know about the exhaust, because I removed all restrictions in mine!
Thats good to know about the exhaust, because I removed all restrictions in mine!
Thread Starter
Rex Kramer-Thrill Seeker
SuperBike
Joined: Jan 2011
Posts: 2,312
From: Brookfield, WI
Thanks!
I now think the same about the fairing color. Much thought was put into it, but after talking with my wife in the garage in front of the bike, we came to the conclusion as you. It needs to be grey with matte clear! It will match the silver/grey on several parts of the bike and my wife says, "Oh! It will totally match the silver piping on your riding jacket!" Women! Hey? Haha.
I'm going to pick up the paint and clear tomorrow and hopefully paint the fairing and tank this week yet. I just don't have enough time to farm it out to a professional with how many days are left before the Memorial Day weekend ride. I have a buddy who used to paint Corvettes for a living, so he can help me with the prep & painting.
Thread Starter
Rex Kramer-Thrill Seeker
SuperBike
Joined: Jan 2011
Posts: 2,312
From: Brookfield, WI
I was going to weld the holes up, but decided to use JB Weld instead. Removed the nipples and then used a Dremel to make a ridge halfway inside the two openings, so when the JB Weld hardens, the plug cannot come out. I just need to sand the openings down and repaint the parts. After that, I can install the coolant system!
As you can see in the picture, I also removed the superfluous nipple from the top of the thermostat housing.
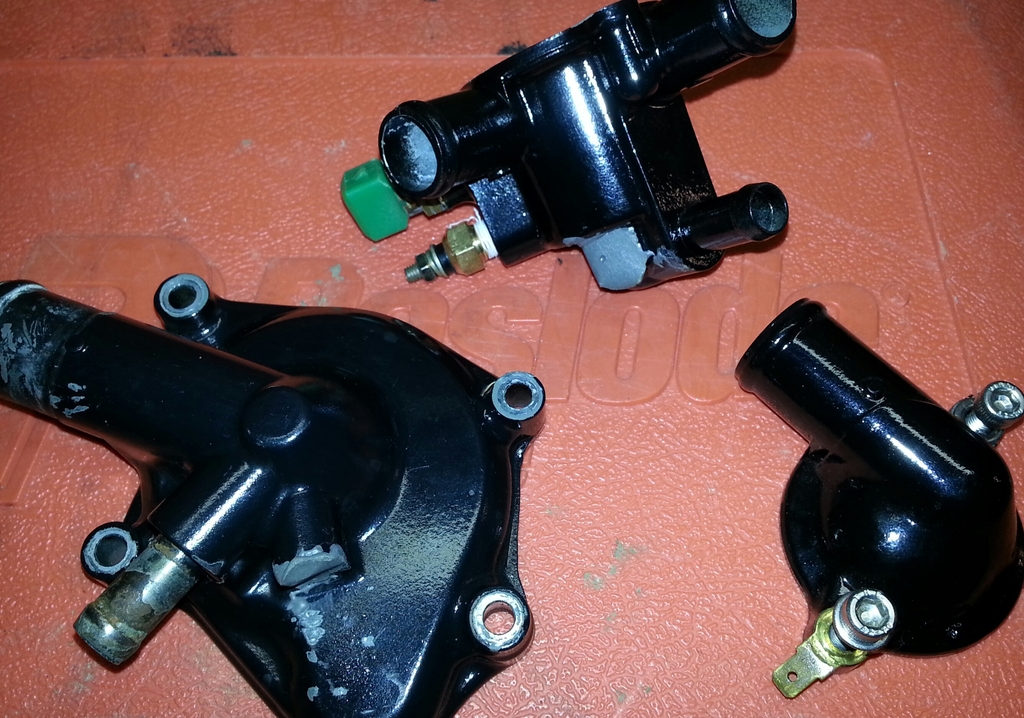
As you can see in the picture, I also removed the superfluous nipple from the top of the thermostat housing.

Last edited by CruxGNZ; May 17, 2016 at 07:30 PM.
Thread Starter
Rex Kramer-Thrill Seeker
SuperBike
Joined: Jan 2011
Posts: 2,312
From: Brookfield, WI
While the paint dries for the coolant system parts, I pushed the bike outside and I am working on the custom dash. The old custom dash is installed in the picture below. That's what the rats nest is of red wires.
I have a sheet of carbon fiber that I was going to lay over the custom dash I have already made, but after seeing how the exhaust looks with a brushed finish, I decided to use stainless steel to make the dash. Once built, I will do a brushed finish on that as well. However, this means I need to rebuild the dash from scratch, which means more time. At this point, I don't know if I am going to make this upcoming trip. It is going to be very close.
I have a sheet of carbon fiber that I was going to lay over the custom dash I have already made, but after seeing how the exhaust looks with a brushed finish, I decided to use stainless steel to make the dash. Once built, I will do a brushed finish on that as well. However, this means I need to rebuild the dash from scratch, which means more time. At this point, I don't know if I am going to make this upcoming trip. It is going to be very close.

Last edited by CruxGNZ; May 21, 2016 at 03:50 PM.
Thread Starter
Rex Kramer-Thrill Seeker
SuperBike
Joined: Jan 2011
Posts: 2,312
From: Brookfield, WI
Need more silver if anything.
My mirrors had a horrible paint job and you can still see the gouges in the plastic that the P.O. tried sanding out and painting over. So, I decided to sand the label off the bottom and smooth them out. I then hit them with some gloss black paint for plastic.
Regarding the dash, I found the original template I made for the first custom dash, so that helps immensely. I have it traced out on a sheet of stainless steel. I got this stainless steel from a job I did a couple years ago. This metal was for wrapping around the outside of a 18 wheeler tanker. It is dull on one side and mirror finish on the other. Very nice to work with. Should have a new dash made soon. Pictures will be posted as usual.
As I'm sanding down the plastic on the mirrors, I noticed that the arms that attach to the mirrors were oxidizing under the paint and the paint was blistering. This will need attention after the paint on the plastic dries. I might have to disassemble the mirrors to fix this. I'll have to figure out how to do this though.


Last edited by CruxGNZ; May 22, 2016 at 05:45 PM.
Thread Starter
Rex Kramer-Thrill Seeker
SuperBike
Joined: Jan 2011
Posts: 2,312
From: Brookfield, WI
Senior Member
SuperBike
Joined: Mar 2012
Posts: 1,544
From: New South Wales Australia
Crux,
Your bike needs some more silver, could I suggest that you polish the mirror stems.
I did that to mine before I fitted the bar end mirrors and I thought it looked good.
By the way your bike looks fantastic, can't wait to see it finished.
You sure are pushing the envelope, your attention to detail is amazing.
Keep the pics coming please!


