
NEED HELP ASAP! WORKING IN GARAGE GUYS :)


Thread Starter
Senior Member
Back Marker
Joined: Jul 2012
Posts: 171
From: Las Vegas, Nv

NEED HELP ASAP! WORKING IN GARAGE GUYS :)
hey fellas!!! so I just did the r/r change.. looks nice... how much voltage should the battery giving off?
Last edited by Shane702; Jul 24, 2012 at 11:16 PM.

Senior Member
SuperBike
Joined: Sep 2008
Posts: 1,707
From: Essex, UK
Should be in the downloadable Honda Superhawk PDF service manual, page 283, Chap 16. Battery/Charging system
SPECIFICATIONS
ITEM SPECIFICATIONS
Battery Capacity - 12 V-10AH
Current leakaQe - 0.1 mAmax.
Voltage Fully charged - 13.0-13.2V
(68 �F/20 �C) Needs charging - Below 12.3 V
Charging current Normal - 1.2A x 5-10h, Quick 5.0 A x 1.0 h
Alternator Capacity 0.280 kW
Chargingcoil resistance (68 �F/20 �C) 0.2-0.5 Q
Regulator/rectifier regulated voltage 13.5-15.5 V/5,000 min-1 (rpm)
Last edited by Wicky; Jul 25, 2012 at 01:16 AM.
Thread Starter
Senior Member
Back Marker
Joined: Jul 2012
Posts: 171
From: Las Vegas, Nv
Should be in the downloadable Honda Superhawk PDF service manual, page 283, Chap 16. Battery/Charging system
SPECIFICATIONS
ITEM SPECIFICATIONS
Battery Capacity - 12 V-10AH
Current leakaQe - 0.1 mAmax.
Voltage Fully charged - 13.0-13.2V
(68 �F/20 �C) Needs charging - Below 12.3 V
Charging current Normal - 1.2A x 5-10h, Quick 5.0 A x 1.0 h
Alternator Capacity 0.280 kW
Chargingcoil resistance (68 �F/20 �C) 0.2-0.5 Q
Regulator/rectifier regulated voltage 13.5-15.5 V/5,000 min-1 (rpm)
SPECIFICATIONS
ITEM SPECIFICATIONS
Battery Capacity - 12 V-10AH
Current leakaQe - 0.1 mAmax.
Voltage Fully charged - 13.0-13.2V
(68 �F/20 �C) Needs charging - Below 12.3 V
Charging current Normal - 1.2A x 5-10h, Quick 5.0 A x 1.0 h
Alternator Capacity 0.280 kW
Chargingcoil resistance (68 �F/20 �C) 0.2-0.5 Q
Regulator/rectifier regulated voltage 13.5-15.5 V/5,000 min-1 (rpm)
Thanks, Shane

Out of my mind, back in 5
MotoGP
Joined: Nov 2006
Posts: 6,109
From: Skurup, Sweden
RULE NO.1
DO ONE THING AT THE TIME... THEN CHECK IT...
If you have 80V at the battery, then you have wired it up completely wrong... Don't start mucking things up at other ends until that's corrected and working... If you do, we might not be able to help you fix it, since the symptoms can be from multiple problems...

Junior Member
Squid
Joined: Jun 2010
Posts: 9
From: Newfoundland, Canada
Is it just me that thinks an 80v reading coming off a 12v battery indicates a serious problem? At 80v I picture your battery throbbing and on the verge of exploding  . If I was you Shane I would go back and double check your readings. Make sue your meter is set properly and that your getting good connection points, a little sand paper goes a long way for that.
. If I was you Shane I would go back and double check your readings. Make sue your meter is set properly and that your getting good connection points, a little sand paper goes a long way for that.


Senior Member
MotoGP
Joined: Jul 2010
Posts: 3,871
From: Phoenix, AZ
Also, check the lines going to the petcock if you've had the tank off. The important ones are the two big ones coming off the sides of the petcock to the carbs, and one small one coming off the nipple in the back (NOT the bottom) of the petcock.

When in doubt, C4
Squid
Joined: Apr 2012
Posts: 72
From: Venice, FL
This info should be stickied, seriously. My bike ran like crap and I couldn't figure out why after the first time I pulled the tank, checked where the hose was connected to and sure enough it was on the wrong nipple.
Senior Member
MotoGP
Joined: Jul 2010
Posts: 3,871
From: Phoenix, AZ
It's kind of like a christening into the Superhawk world. Experiences of PVLIR (petcock vacuum line inadvertent relocation) are common enough that an acronym was named for it!
Clues to look out for: new owner of the bike, and the tank's been off...
Now how's that voltage looking?
Clues to look out for: new owner of the bike, and the tank's been off...
Now how's that voltage looking?

Administrator
MotoGP
Joined: Apr 2006
Posts: 4,402
From: Kempner, TX
Nobody reads FAQ's and sticky’s, there utility is in having a know location to point new folks to that ignored reading them in the first place, then asked a question.
I have written dozens of Tech articles and FAQ’s for web sites over the years… And still, on other boards I moderate on…. The same questions answered by FAQ’s and Sticky’s get asked time and time again.
I have written dozens of Tech articles and FAQ’s for web sites over the years… And still, on other boards I moderate on…. The same questions answered by FAQ’s and Sticky’s get asked time and time again.
Thread Starter
Senior Member
Back Marker
Joined: Jul 2012
Posts: 171
From: Las Vegas, Nv
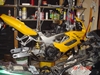
Okay I will go back and check.. i will do every post that was posted to make sure everything is okay... my carbs look like ****!!! everything does.. never been messed with i dont believe... and im not making things hard on myself... im not doing them all at once... i was just saying after the rejetting the carbs and getting those finished, I was going to do the pair system... then the tps... on hawks write up it shows doing the carbs first, then do the TPS.. so i am still only doing the carb setup.. it is night now so im starting my second night working on this... sorry if I miss worded my responses .. thanks alot everyone.. .im going to work on the carb now and it looks like hell.. slides look like there faded half way(not sure if this is normal, the pics on hawks thread from someone else his whole interior is nice and clean lol.. i'll post pics!!
Thread Starter
Senior Member
Back Marker
Joined: Jul 2012
Posts: 171
From: Las Vegas, Nv
anyways... a question.. I have slides off.. is the jb welding red/blue 6 hour epoxy that you mix good to use for the whole?? or what kind do you guys recommend?? and what is the best way to clean the inside of bike / outside of carbs and all that?? is carb cleaner just for inside of carbs?? my bike looks dirty as hell and the hoses are all covered in solutions... should I just use water on the pipes and metal housing and all that?? or what do you guys recommend with this setup... i have the manual so I used that to get the carbs off... also the needle that comes out in the slide.. they each have 1 washer.. are you guys talking about the washers need to go there? 3 back 2 front?? thanks alot fellas!! and tweety I got your pm brotha.. I should be back to work monday after my steroids and pain killers heal my back... so I will be doing that gauge swap after I get my projector led light built by gixerjohn or whatever his name was!!!! thanks again guys!!!
-shane

Member
Squid
Joined: Apr 2011
Posts: 43
By doing one task at a time, it helps you to troubleshoot potential problems. If the bike runs funny, and the ONLY item you removed and installed were the carburetors, I would say the carbs are your first source for gremlins. But, since you are tearing into other parts of the bike without addressing your voltage issue (and being a novice) it could make troubleshooting engine problems very difficult.
I just used quick set epoxy with no ill effects. Carb cleaner on inside, carb cleaner or any engine degreaser for the engine. Check out the "carb set up", there it specifies a starting height for shimming your needles. Take it easy on your back and post pics of the projector.
I just used quick set epoxy with no ill effects. Carb cleaner on inside, carb cleaner or any engine degreaser for the engine. Check out the "carb set up", there it specifies a starting height for shimming your needles. Take it easy on your back and post pics of the projector.
Thread Starter
Senior Member
Back Marker
Joined: Jul 2012
Posts: 171
From: Las Vegas, Nv
By doing one task at a time, it helps you to troubleshoot potential problems. If the bike runs funny, and the ONLY item you removed and installed were the carburetors, I would say the carbs are your first source for gremlins. But, since you are tearing into other parts of the bike without addressing your voltage issue (and being a novice) it could make troubleshooting engine problems very difficult.
I just used quick set epoxy with no ill effects. Carb cleaner on inside, carb cleaner or any engine degreaser for the engine. Check out the "carb set up", there it specifies a starting height for shimming your needles. Take it easy on your back and post pics of the projector.
I just used quick set epoxy with no ill effects. Carb cleaner on inside, carb cleaner or any engine degreaser for the engine. Check out the "carb set up", there it specifies a starting height for shimming your needles. Take it easy on your back and post pics of the projector.
anyways.. so im kind of lost or dont get the adjusting I guess for the tps.. im getting 560 ohms.. but how do i "adjust it" if i turn the silver piece inside it just goes right back to where it was...im not sure if im missing something or doing something wrong.. am i suppose to put the screws in first? blah maybe I just need sleep lol
Slacker
Superstock
Superstock
Joined: Jun 2005
Posts: 489
From: San Antonio, TX

.. so im kind of lost or dont get the adjusting I guess for the tps.. im getting 560 ohms.. but how do i "adjust it" if i turn the silver piece inside it just goes right back to where it was...im not sure if im missing something or doing something wrong.. am i suppose to put the screws in first?
It would be helpful to know what model regulator you installed, and if it was a used unit. Pictures of your wiring job would also help.
If the engine does not want to run, is this with the gas tank off? Are you trying to run the engine with the filter out? If the engine was running poorly with everything assembled, and the only thing you changed was the regulator, then the ignition electronics are malfunctioning because of improper voltage. If you are trying to see how it runs without the gas tank and air box fully assembled, the engine is not getting any fuel or too much air, or both.
Idle speed should be at 1,200 rpm per the manual. I set mine at 1,000 to soften the neutral to first gear engagement.

Thread
Thread Starter
Forum
Replies
Last Post
chadnol10
Classifieds
1
Apr 19, 2011 07:36 PM
SloatsburgSuperhawk
Technical Discussion
14
Aug 19, 2010 05:50 PM
superman_006
Technical Discussion
9
Jun 30, 2009 05:46 AM


