
Flywheel Lightening


Thread Starter
Administrator
MotoGP
Joined: Apr 2006
Posts: 4,402
From: Kempner, TX

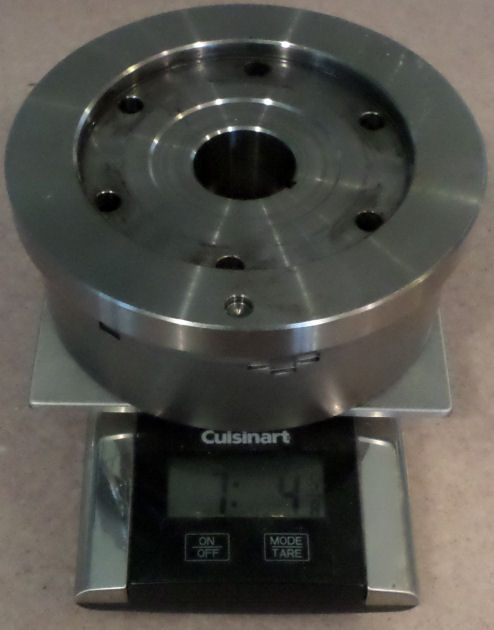
Set up, checking run out PT 1

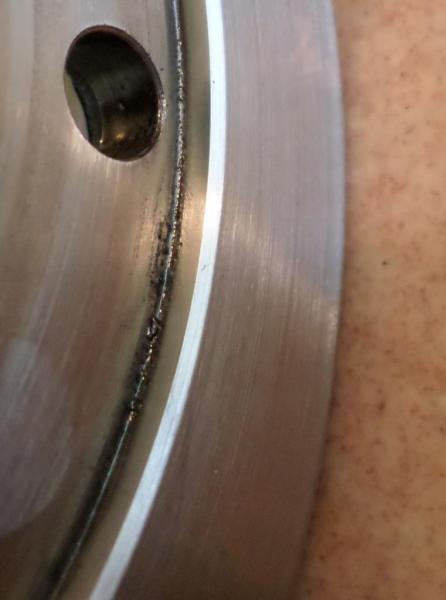
That is the mounting taper, adjusted to run true, with run out less 1/2 a thousandth. Spaceshuttle tolerances? NO, but better then the OEM flywheel is before I start.
After then the flywheel is mounted, run out checked again, the center bolt is cut with a countersink bit to ensure a dead center point for the live center to run in. Failing to re cut the countersink each time after the bolt and flywheel is tightened down will result in a off center position for the live center.
Live center snugged up and run out is again checked.... Then it's time to start the cut.
Last edited by E.Marquez; Mar 6, 2014 at 11:34 AM.
Thread Starter
Administrator
MotoGP
Joined: Apr 2006
Posts: 4,402
From: Kempner, TX
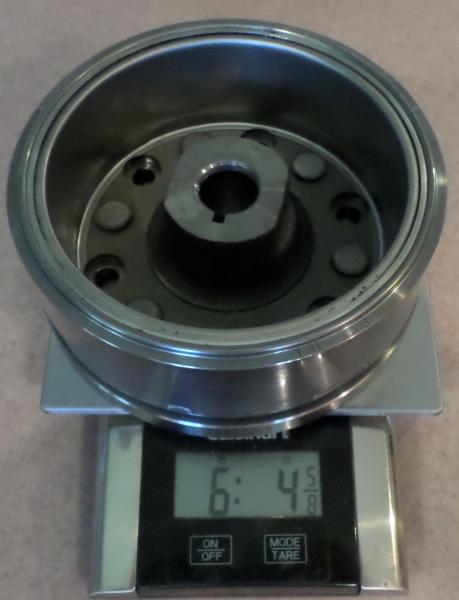
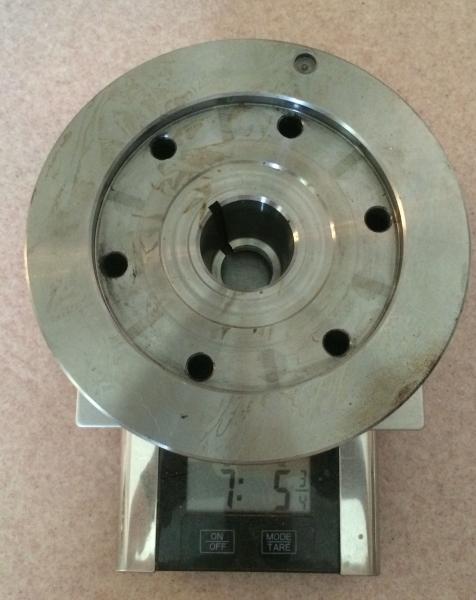
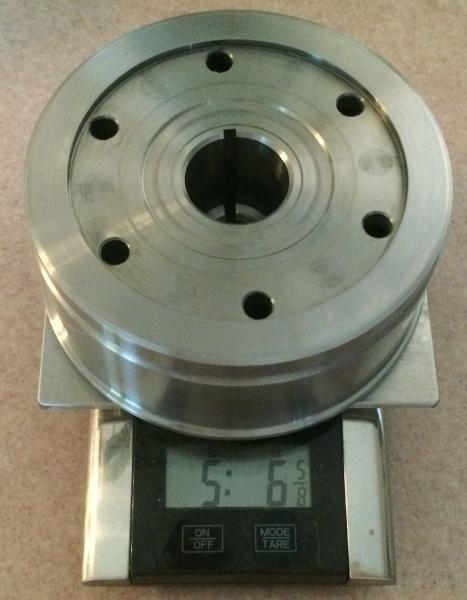
All done..
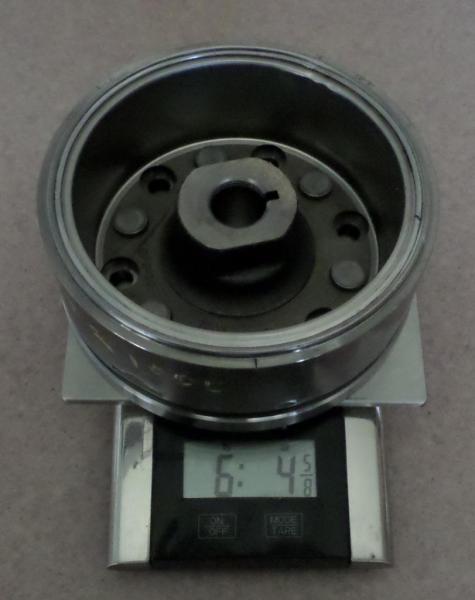
Starting weight 7lb 5 3/8oz
Final weight 6lb 4 5/8oz
For a reduction of 1lb 3/4oz
Little attention to details like leaving chamfering the edges of the flywheel after cutting probable make no difference, but it came that way, so it's leaving that way.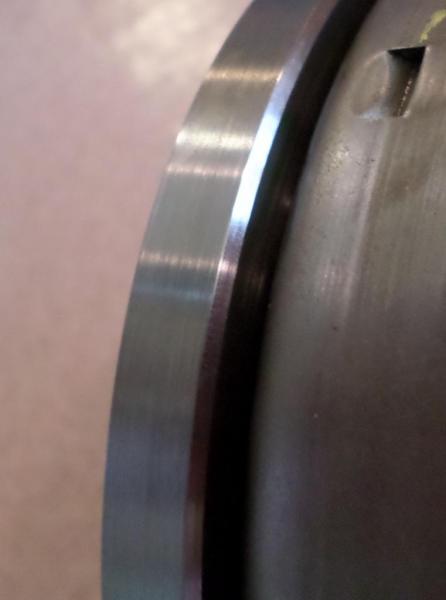
The one chamfer on the clutch bearing side does make it easier to install the starter clutch.
Re-install the starter clutch on this one and in the shipping box it goes
Last edited by E.Marquez; Mar 6, 2014 at 11:56 AM.

Senior Member
SuperSport
Joined: Apr 2013
Posts: 834
From: Thousand Oaks, CA
thanks again Erik! cant wait to get it installed. So far this transaction has been a pleasure as it usually is around here with sellers and buyers. glad you had a spare i could take off your hands so i dont have any downtime. cant wait to report back with my thoughts on it once i get it installed. now hurry up USPS!


Thread Killer
SuperBike
Joined: Apr 2013
Posts: 2,098
From: Geneseo, IL
I agree. Lightened flywheels ARE all that and a bag of chips. Superglue? The money I save on this, I can spring for some Locktite.
Last edited by VTR1000F; Mar 7, 2014 at 05:26 AM. Reason: Superglue's the poor-man's Locktite.
Senior Member
SuperSport
Joined: Apr 2013
Posts: 834
From: Thousand Oaks, CA
So you want to remove your flywheel and have it lightened.. Ok.. here is how.
What you will need.
Basic hand tools... needed for cover screws, hose clamps, flywheel bolt, puller, drain plugs, and separating the starter clutch gear (sprag gear) from the flywheel.
Flywheel puller M22x1.5 .. it can be had on ebay, Amazon or from a company like motion Pro 08-0074 for under $8.00 USD. Order it at the same time you order a gasket and fluids....or if you forget....
An alternative and something you can source immediately is a common replacement drain plug that can be used as a remover.
In the US, in most larger Auto Parts stores there is a replacement part brand called Dorman. They offer oil and other fluid drain plugs in OEM replacement sizes and self threading "fix it" types. DO NOT use the self threading repaie type drain plug.....
As of this article date there are two Dorman part numbers that I know will work..Dorman 65223 Oil Drain Plug Standard M22-1.50, this one has a 19mm hex cap.
Another PN is 090-151, this one has a 3/8 square drive socket head.
I have both, and they both do the jop equally well. The Dorman plug will be a few $ more than a Motion Pro puller, but you can likely get the drain plug any day of the week on hand in stock.

And of course.. someone to lighten the flywheel.
Make sure the machinist is not planning on holding the work by clamping the basket in a chuck. Ask them about setup run out... how close will they get it before starting the cut.. (I adjust setup till run out is .001 or less in both axis's )
Will they use a live or dead center on the non chuck end? they should say yes.. might save them some time and tell um the threaded hole for the puller in the flywheel is not concentric to the center of the part.. and can not be used to hold the work piece. As well as if they try anyway, a live center must be used, or the lead threads will be damaged on the flywheel..(I've posted pictures of my set ups, so its no secret.. ask if you want to try this at home.. I'll help where I can)
All this is likely going to be obvious to a machinist that does this for a living.. my comments are more towards the Hobby guy that has a lathe in his garage, used twice a year
After having spoken to the person doing the work.. you may need to remove starter gear and clutch from the flywheel.(you or the machinist MUST remove the sprag gear... failing to do so will result in metal particle contamination of the bearing, not guessing on this.... I made this mistake on my 1st flywheel ) So you or the machinist will need a hex bit to remove the fasteners. .. If your not using air tools... it is best to break these socket head cap screws loose before you remove the flywheel from the crank. As trying to hold the flywheel still and loosen those screws with hand tools will result in a you tube worthy video and an observation that you may indeed have had relations to a monkey and a football at some point.
If your shipping the flywheel to have it worked on.. in the US, I have found USPS priority mail using a Medium flat rate box is most economical
What you will need.
Basic hand tools... needed for cover screws, hose clamps, flywheel bolt, puller, drain plugs, and separating the starter clutch gear (sprag gear) from the flywheel.
Flywheel puller M22x1.5 .. it can be had on ebay, Amazon or from a company like motion Pro 08-0074 for under $8.00 USD. Order it at the same time you order a gasket and fluids....or if you forget....
An alternative and something you can source immediately is a common replacement drain plug that can be used as a remover.
In the US, in most larger Auto Parts stores there is a replacement part brand called Dorman. They offer oil and other fluid drain plugs in OEM replacement sizes and self threading "fix it" types. DO NOT use the self threading repaie type drain plug.....
As of this article date there are two Dorman part numbers that I know will work..Dorman 65223 Oil Drain Plug Standard M22-1.50, this one has a 19mm hex cap.
Another PN is 090-151, this one has a 3/8 square drive socket head.
I have both, and they both do the jop equally well. The Dorman plug will be a few $ more than a Motion Pro puller, but you can likely get the drain plug any day of the week on hand in stock.
And of course.. someone to lighten the flywheel.
Make sure the machinist is not planning on holding the work by clamping the basket in a chuck. Ask them about setup run out... how close will they get it before starting the cut.. (I adjust setup till run out is .001 or less in both axis's )
Will they use a live or dead center on the non chuck end? they should say yes.. might save them some time and tell um the threaded hole for the puller in the flywheel is not concentric to the center of the part.. and can not be used to hold the work piece. As well as if they try anyway, a live center must be used, or the lead threads will be damaged on the flywheel..(I've posted pictures of my set ups, so its no secret.. ask if you want to try this at home.. I'll help where I can)
All this is likely going to be obvious to a machinist that does this for a living.. my comments are more towards the Hobby guy that has a lathe in his garage, used twice a year
After having spoken to the person doing the work.. you may need to remove starter gear and clutch from the flywheel.(you or the machinist MUST remove the sprag gear... failing to do so will result in metal particle contamination of the bearing, not guessing on this.... I made this mistake on my 1st flywheel ) So you or the machinist will need a hex bit to remove the fasteners. .. If your not using air tools... it is best to break these socket head cap screws loose before you remove the flywheel from the crank. As trying to hold the flywheel still and loosen those screws with hand tools will result in a you tube worthy video and an observation that you may indeed have had relations to a monkey and a football at some point.
If your shipping the flywheel to have it worked on.. in the US, I have found USPS priority mail using a Medium flat rate box is most economical
does anyone know which auto parts stores carry those dorman drain plugs? ive got a pep boys, a napa, and an oriellys really close to me. if i have to there is an auto zone a bit further away
to put my own foot in my mouth... if you look on dormans website you can find where they sell closest to you. i ended up getting mine at napa auto parts. i got the kind that has a 3/8 square socket drive. pep boys said they dont stock either of those so they have to order them. napa had them in stock.
Last edited by jscobey; Mar 8, 2014 at 08:48 AM.

Thread Starter
Administrator
MotoGP
Joined: Apr 2006
Posts: 4,402
From: Kempner, TX
does anyone know which auto parts stores carry those dorman drain plugs? ive got a pep boys, a napa, and an oriellys really close to me. if i have to there is an auto zone a bit further away
to put my own foot in my mouth... if you look on dormans website you can find where they sell closest to you. i ended up getting mine at napa auto parts. i got the kind that has a 3/8 square socket drive. pep boys said they dont stock either of those so they have to order them. napa had them in stock.
to put my own foot in my mouth... if you look on dormans website you can find where they sell closest to you. i ended up getting mine at napa auto parts. i got the kind that has a 3/8 square socket drive. pep boys said they dont stock either of those so they have to order them. napa had them in stock.
Thread Starter
Administrator
MotoGP
Joined: Apr 2006
Posts: 4,402
From: Kempner, TX
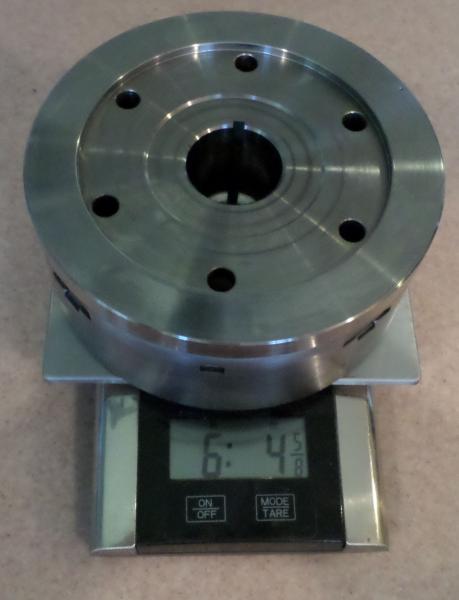
Another Option
Not the lightest weight one, nor the heaviest one .. but lighter then just a bit off the OD, lighter then just the Ditchfield version.. but not as light as all the way to the basket...
OK, we can do that.
Starting at 7lb 4 5/8oz
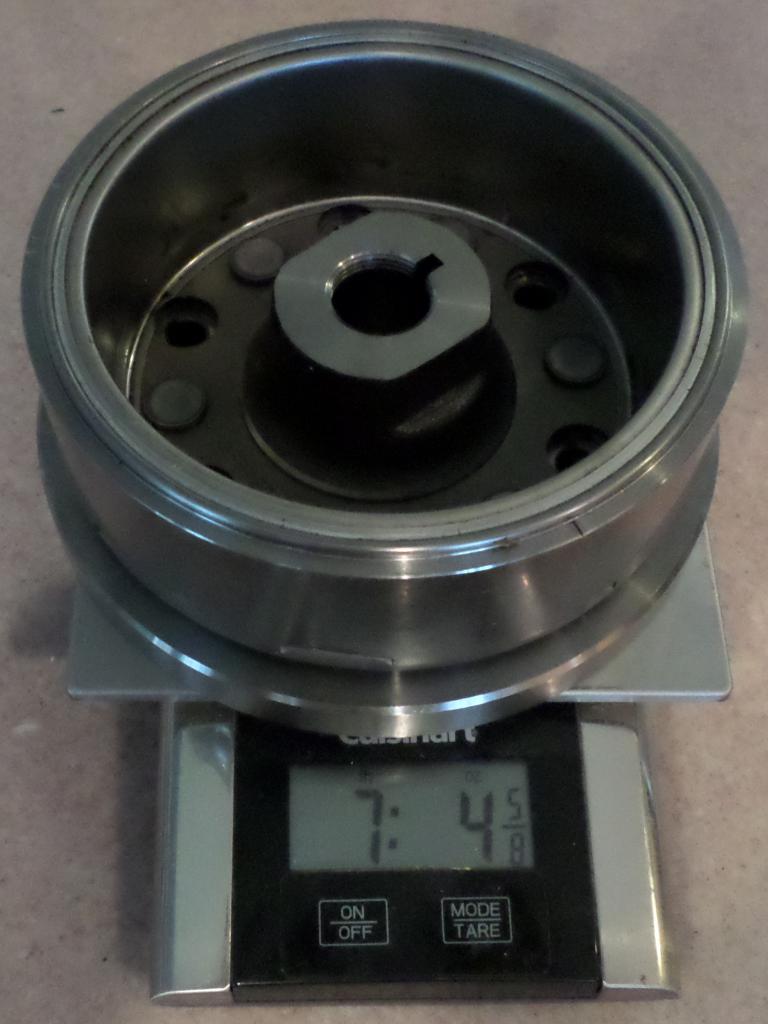
With just one OEM balance hole.
Material to be removed from the engine side of the weight reducing the thickness to 10.5mm and from the OD to an new OD of approx 145mm.
Will set up tonight and let the RTV sealing the gap between the basket and weight cure till morning.
OK, we can do that.
Starting at 7lb 4 5/8oz


With just one OEM balance hole.
Material to be removed from the engine side of the weight reducing the thickness to 10.5mm and from the OD to an new OD of approx 145mm.
Will set up tonight and let the RTV sealing the gap between the basket and weight cure till morning.
Last edited by E.Marquez; Mar 12, 2014 at 05:19 PM.

RUNLEVELZERO #99
SuperBike
Joined: Jan 2007
Posts: 2,223
From: Skokie
Mine?
Is this one for me per our discussion last night?
Not the lightest weight one, nor the heaviest one .. but lighter then just a bit off the OD, lighter then just the Ditchfield version.. but not as light as all the way to the basket...
OK, we can do that.
Starting at 7lb 4 5/8oz


With just one OEM balance hole.
Material to be removed from the engine side of the weight reducing the thickness to 10.5mm and from the OD to an new OD of approx 145mm.
Will set up tonight and let the RTV sealing the gap between the basket and weight cure till morning.
OK, we can do that.
Starting at 7lb 4 5/8oz
With just one OEM balance hole.
Material to be removed from the engine side of the weight reducing the thickness to 10.5mm and from the OD to an new OD of approx 145mm.
Will set up tonight and let the RTV sealing the gap between the basket and weight cure till morning.
Thread Starter
Administrator
MotoGP
Joined: Apr 2006
Posts: 4,402
From: Kempner, TX
Ummmmmmmmmmmmmmm, maybe 
I don't out folks that I do work for,,, but since you posted that...... why yes it is.
It's all set up.... ready for cutting.
I'll be home by 10:00.. with luck, it'll be complete and ready for shipping by mid day.
I don't out folks that I do work for,,, but since you posted that...... why yes it is.
It's all set up.... ready for cutting.
I'll be home by 10:00.. with luck, it'll be complete and ready for shipping by mid day.
Last edited by E.Marquez; Mar 12, 2014 at 07:01 PM.
RUNLEVELZERO #99
SuperBike
Joined: Jan 2007
Posts: 2,223
From: Skokie
Some of your satisfied customers have outed themselves when they thanked you and/or posted up on the results of your work, and anyone who has been a forum member for a while (should) know both of us. Heck, I still know my password to the (Greg's) old forum (runlevelzero.com) back in 1999...when that tanked it took me a while to discover the current forum.
Thread Starter
Administrator
MotoGP
Joined: Apr 2006
Posts: 4,402
From: Kempner, TX
Some of your satisfied customers have outed themselves when they thanked you and/or posted up on the results of your work, and anyone who has been a forum member for a while (should) know both of us. Heck, I still know my password to the (Greg's) old forum (runlevelzero.com) back in 1999...when that tanked it took me a while to discover the current forum.
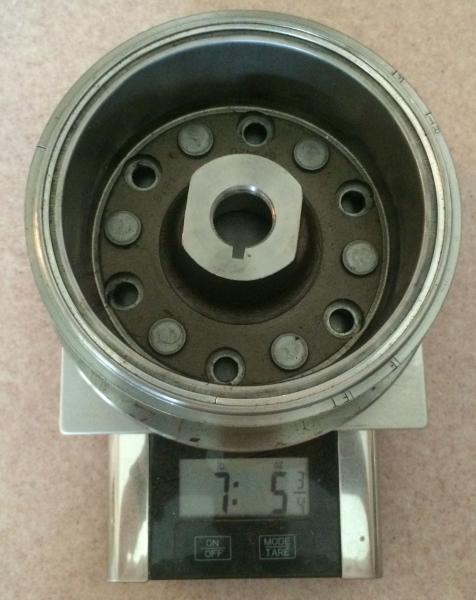
And HERE IT IS...
Exactly 1 pound lighter then it started
I'll install the starter clutch here in a few and it's ready when you are.
Thread Starter
Administrator
MotoGP
Joined: Apr 2006
Posts: 4,402
From: Kempner, TX
I think you mean exactly 16 oz? just the way it turned out... I cut to the dimensions we discussed and thats where the numbers came in.
6lb 4 5/8oz is an ounce or so heavier than the option 2 normally comes in.
option 3 or 4 can be as much as 3-5 ounces less.
Thread Starter
Administrator
MotoGP
Joined: Apr 2006
Posts: 4,402
From: Kempner, TX
One guy in the UK went nuts (in a good way ) and started cutting them down to bare minimum. Well below what was R&D'ed then raced on. But the initial report is the guy running that ultra light one likes it. So who knows.
I stick with what the developers of the MOD created, did R&D on and raced
Rodger Ditchfield's style and then go a little farther for those that want it...or a little less for those that want that..
My lightest ones are a 1lb 8oz or so lighter than stock.
Last edited by E.Marquez; Apr 23, 2014 at 06:07 AM.

Senior Member
Superstock
Joined: May 2012
Posts: 397
From: UK
One guy in the UK went nuts
Piston travel is so fast that I believe max peak pressure is chasing the piston back down on the power stroke and I'm getting unburnt waste. I do know for a fact that my jetting is off (too rich) so that don't help, but it makes sense to me that that faster piston speed has affected ignition timing. I'm not sure if the ICM can compensate for the amount I have, so hoping by moving the baseline advance curve then I shall see an improvement. This I think is why Rogers specs stopped where they did for street bikes. Obviously the Mori's is something else altogether and can't be compared.
I have had no issues with any silly vibrations, no more than usual. So happy with the balance. Bike starts and idles OK, no issues there or any stalling. Engine braking is extreme at higher speeds. The faster I go the more engine braking I get. Low speed around town engine braking does not seem any more than normal, it may even be a little less. It's more higher speeds where it's really noticeable.
The speed increase compared to standard is mad, RPM's are twice as fast. Pulling away from lights is nice with the RPM's shooting up. Maybe the lighter flywheel adds to the clutch grab issue some folk have. It really will be intresting to see how the bike runs once I get the advancer on and my fuelling sorted.
Rogers specs are good and have been proven that things work well with no major drawbacks. Mine is extreme and a little experimental, hence I'm having a few issues. Saying that though, overall I'm enjoying it and it puts a grin on face as I go WOT and feel the pull on my arms being ripped out their sockets LOL
(:-})
Oh I forget to mention I tried some higher octane fuel the other day and the bike ran loads worse whereas before when I have used higher octane it's not made any difference. This confirmed to be that that things need advancing. If I got this right, the higher octane (slower burning) fuel made more waste and less horsepower.
Last edited by cybercarl; Apr 24, 2014 at 10:55 AM.
RUNLEVELZERO #99
SuperBike
Joined: Jan 2007
Posts: 2,223
From: Skokie
If I recall you cut your flywheel down to 4 lb - 7.4 oz.
Mine was reduced 1 lb. from OEM to 6 lb. - 4-5/8 oz., which I have yet to install.
My question to you is with "only" a 1 lb. reduction if any ignition advance would be warranted with my otherwise stock (other than shimmed needles, 48 pilots and 2Bros C2 slip-ons)?
BTW, now that the racing season is underway are you swamped a M and are you working on any new fascinating projects? Also, can you provide any more sets of your very slick carb choke valve cable carb brass "fittings"?
Senior Member
Superstock
Joined: May 2012
Posts: 397
From: UK
The Mori race bikes are a different animal, electronics, pistons, slotted cams etc. They could play with the advance curve electronically for the ignition timing. Adjust the valve open and closing times etc plus different carbs. No comparison! Were limited to adding a factory pro advancer or retarder which adjusts throughout the whole rev range. The standard timing is 15 degrees BTDC so adding a 2 degree advancer moves that to 17, the rest is controlled by the ICM to advance things from that point as and when needs be. I'd love to be able to read what's installed in our ICM's and how far they are capable of controlling or compensate for changes.
I'm not sure if those Roger specs for the flywheel are the same as what was used on the race bikes or if they originated as which would be safe for road use. Roger says they are safe for road use and I would take his word for it every time. Mine has gone beyond that and experimental hence the reason I'm trying to give as good an opinion on things as I can within my knowledge and give the kind of results/feedback I'm getting from it.
skokievtr your getting me confused with gl_s_r who was kind enough to give me his prototype flywheel. He's a very busy man and the odd things he has done is out of good will and just covers cost, so not a business or something he does on a regular basis. He did have a couple of batches of choke nuts at the time which have all since gone. I'm not sure if he has any plans to make any more.
As to whether you should advance or not with your flywheel, well IMO I don't think it would be absolutely necessary as it's not so extreme but would most likely benefit as piston travel is that little faster than standard. Lets face it, those that have put advancers on standard bikes with standard flywheels have benefited a little low down torque and slightly better fuel economy, as Honda plays on the safe side and they emissions to contend with. It depends on other mods one has. ie I would not advance with high comps, some people do, but I personally would not risk it, in fact I would most likely retard things a little on the ignition side maybe. Maybe high comps is what I need instead of an advancer, the extra heat may help LOL or maybe I should try hotter plugs or play with the lobe separation on the cams. Slotted sprockets are on my list But as I have the advancer ignition side of things is first.
This is the problem with modding too far from standard. Cause and effect, it starts a chain reaction and then it's knowing which direction to go with things. Before we know it, we end up with OCMD.
(:-})
I'm not sure if those Roger specs for the flywheel are the same as what was used on the race bikes or if they originated as which would be safe for road use. Roger says they are safe for road use and I would take his word for it every time. Mine has gone beyond that and experimental hence the reason I'm trying to give as good an opinion on things as I can within my knowledge and give the kind of results/feedback I'm getting from it.
skokievtr your getting me confused with gl_s_r who was kind enough to give me his prototype flywheel. He's a very busy man and the odd things he has done is out of good will and just covers cost, so not a business or something he does on a regular basis. He did have a couple of batches of choke nuts at the time which have all since gone. I'm not sure if he has any plans to make any more.
As to whether you should advance or not with your flywheel, well IMO I don't think it would be absolutely necessary as it's not so extreme but would most likely benefit as piston travel is that little faster than standard. Lets face it, those that have put advancers on standard bikes with standard flywheels have benefited a little low down torque and slightly better fuel economy, as Honda plays on the safe side and they emissions to contend with. It depends on other mods one has. ie I would not advance with high comps, some people do, but I personally would not risk it, in fact I would most likely retard things a little on the ignition side maybe. Maybe high comps is what I need instead of an advancer, the extra heat may help LOL or maybe I should try hotter plugs or play with the lobe separation on the cams. Slotted sprockets are on my list
This is the problem with modding too far from standard. Cause and effect, it starts a chain reaction and then it's knowing which direction to go with things. Before we know it, we end up with OCMD.
(:-})
Thread Starter
Administrator
MotoGP
Joined: Apr 2006
Posts: 4,402
From: Kempner, TX
Have not posted one of these in a while.. mostly because I've been having some tooling made for this job.. but also just been lazy.
SO here is todays.
Started at 7lb, 5 �oz
Ended at 5lb, 6 1/2oz
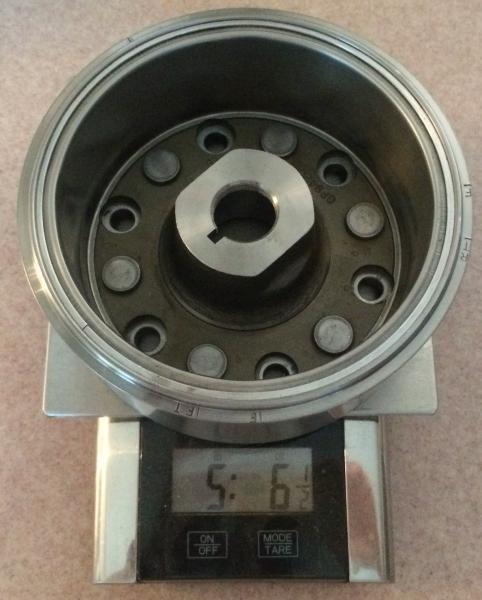
For a reduction of 1lb, 15 � oz.. ALMOST 2LB�.
Not as wild as been done by others... but of the couple of dozen I,ve got out there on bikes, it's a noticeable difference and proven to be trouble free.
I have two more spares coming in the mail.. One Im going to cut down till I find the Min OD I can take the basket to... Meaning cut till is junk.
Then I'll know what the limit is for sure....assuming they are all manufactured to the same spec.
SO here is todays.
Started at 7lb, 5 �oz
Ended at 5lb, 6 1/2oz
For a reduction of 1lb, 15 � oz.. ALMOST 2LB�.
Not as wild as been done by others... but of the couple of dozen I,ve got out there on bikes, it's a noticeable difference and proven to be trouble free.
I have two more spares coming in the mail.. One Im going to cut down till I find the Min OD I can take the basket to... Meaning cut till is junk.
Then I'll know what the limit is for sure....assuming they are all manufactured to the same spec.

European Member
Back Marker
Joined: Mar 2013
Posts: 194
From: Netherlands
not as limited as you think, if your running the Coil on cap mod from a cbr you can for sure get some brand ignition controller that piggybacks on the connectors, dont know if a dynojet unit will function without commander if your determined enough you control your spark, adding FI would be nice either but thats still somewhat of a step (btw how is that guy doing with the RC set up ?)

Senior Member
SuperSport
Joined: Apr 2014
Posts: 932
From: Auckland, new Zealand
Have not posted one of these in a while.. mostly because I've been having some tooling made for this job.. but also just been lazy.
SO here is todays.
Started at 7lb, 5 �oz
Ended at 5lb, 6 1/2oz
For a reduction of 1lb, 15 � oz.. ALMOST 2LB�.
Not as wild as been done by others... but of the couple of dozen I,ve got out there on bikes, it's a noticeable difference and proven to be trouble free.
I have two more spares coming in the mail.. One Im going to cut down till I find the Min OD I can take the basket to... Meaning cut till is junk.
Then I'll know what the limit is for sure....assuming they are all manufactured to the same spec.
And do you have the specs for it so I can get one done locally?
Sadly to send one to you would cost a small fortune.
Thread Starter
Administrator
MotoGP
Joined: Apr 2006
Posts: 4,402
From: Kempner, TX
I have spares..... would a one way trip of a "birthday present " be more affordable ? Off the top USPS is $62 to NZ..

Senior Member
SuperSport
Joined: Apr 2014
Posts: 932
From: Auckland, new Zealand
Got mine back. Started at 3.36kg, came back at 2.58kg.
Its fitted but wont get to ride it until tomorrow. Big thanks to Erik for his help. I would have liked to have got one done by him but our low dollar killed it.
Its fitted but wont get to ride it until tomorrow. Big thanks to Erik for his help. I would have liked to have got one done by him but our low dollar killed it.


