
Teardown and Rebuild


Thread Starter
Senior Member
MotoGP
Joined: Jul 2010
Posts: 3,871
From: Phoenix, AZ

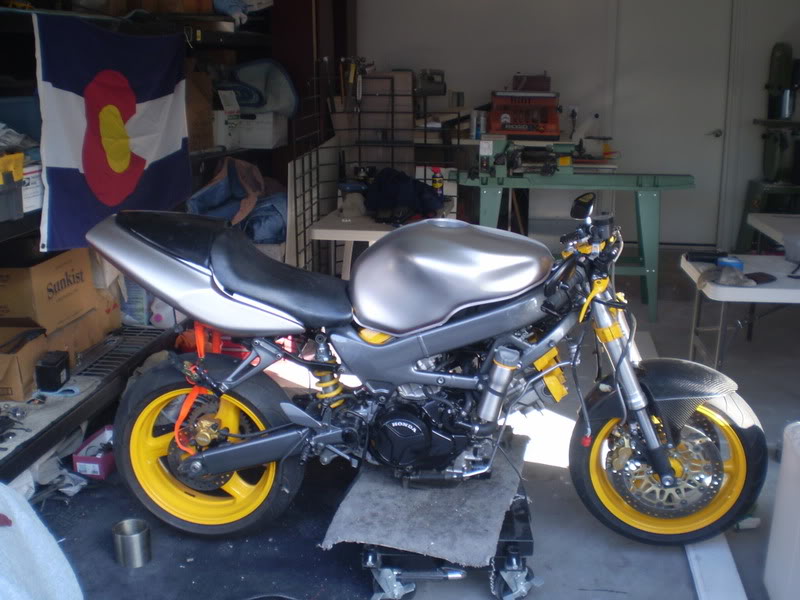
Putting the bike away for a couple of weeks as I head home to family and take care of odds'n'ends. Thought I'd take a pick of where I'm at now before I cover it all up and wheel it to it's little storage corner. So far every piece that has come off the bike has been scrubbed clean, repainted, powdercoated, or replaced. Even the bolts I'm scrubbing off the overspray from the PO. Torqued to spec where needed, replaced any gasket that I uncovered and have done all the upkeep modes that I know about... Amazed at what you can learn doing these things, and very appreciative of all the help so far on this forum. Had no idea that so many people would be willing to give so much good advice out when I joined this thing.
For now, gonna chew on what's next to do and am very open to feedback and suggestions and maybe tips on what I've missed
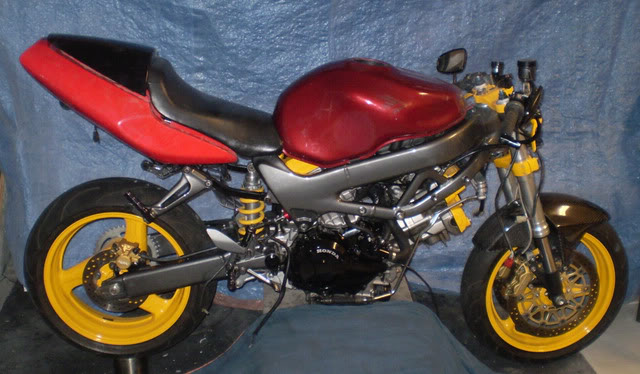
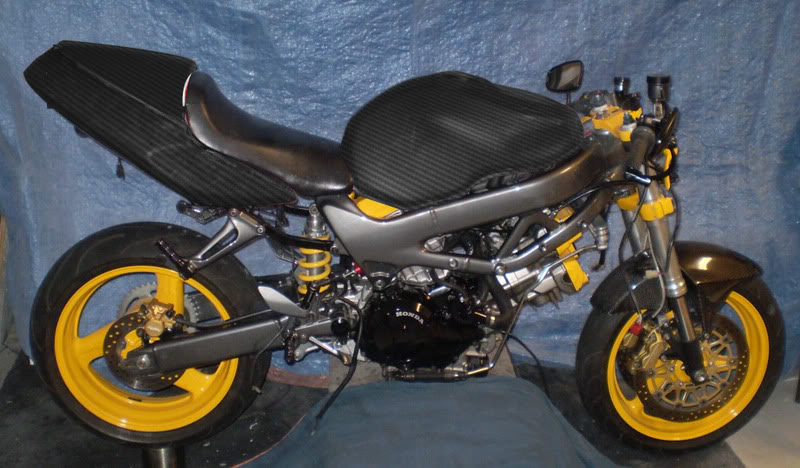
How I was riding her:
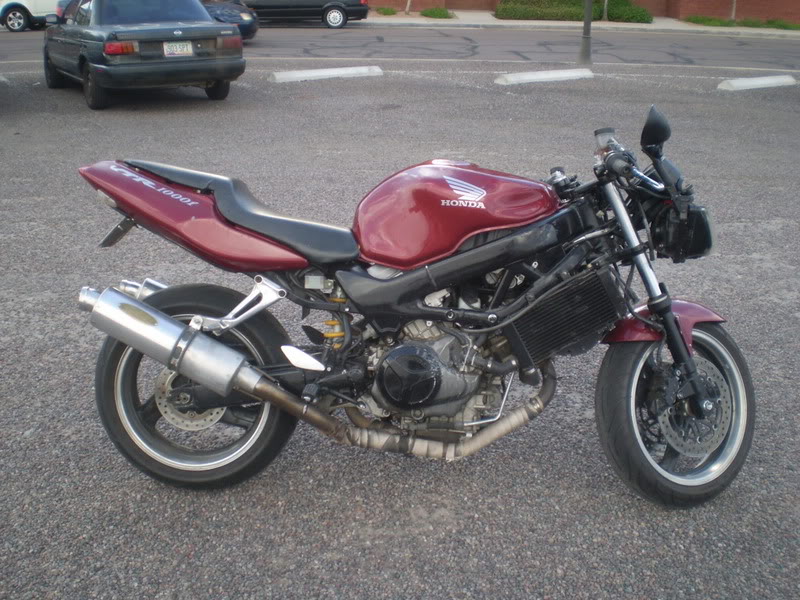
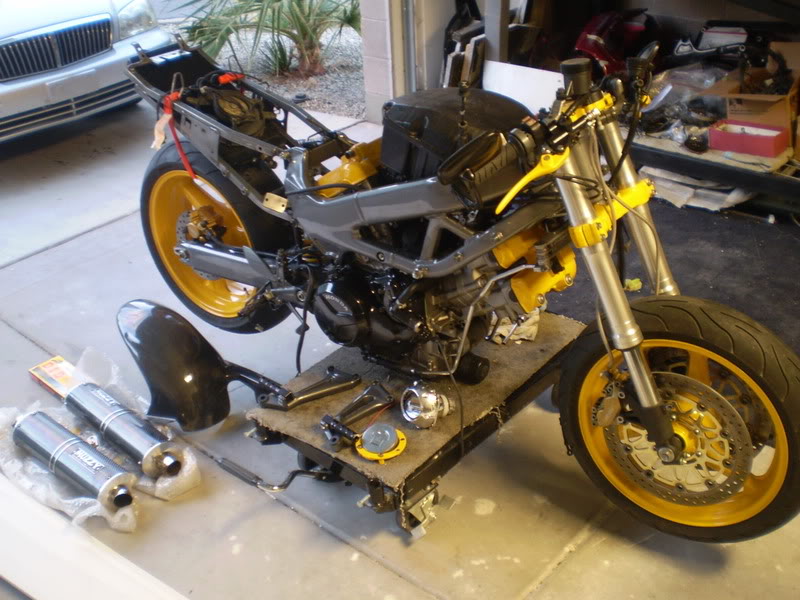
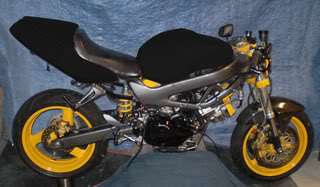
Where she's at now (sorry for the busy background):
For now, gonna chew on what's next to do and am very open to feedback and suggestions and maybe tips on what I've missed
How I was riding her:
Where she's at now (sorry for the busy background):
Last edited by 7moore7; Dec 18, 2010 at 04:43 PM.
Thread Starter
Senior Member
MotoGP
Joined: Jul 2010
Posts: 3,871
From: Phoenix, AZ
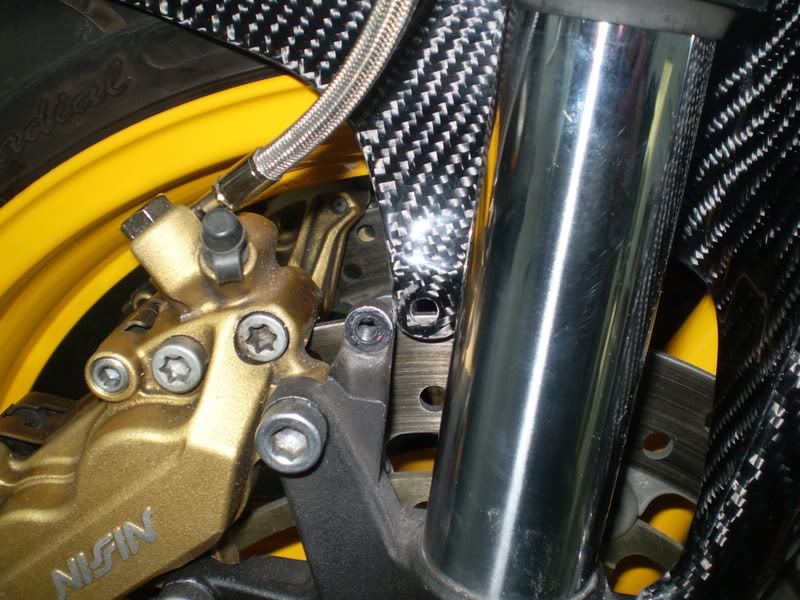
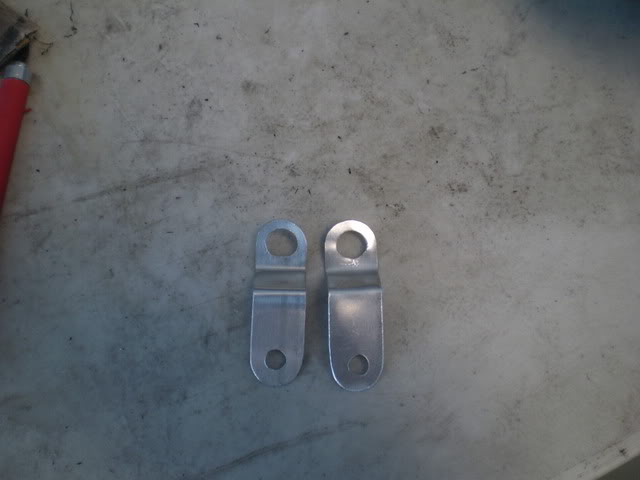
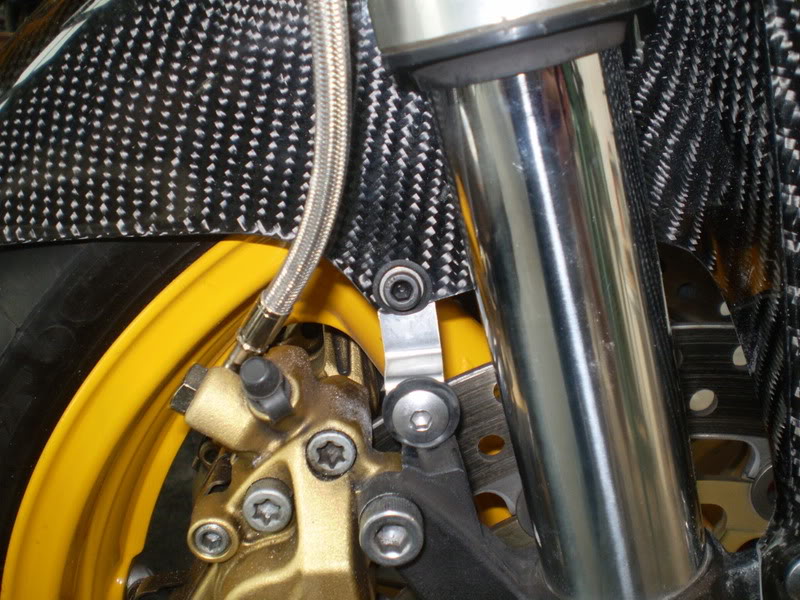
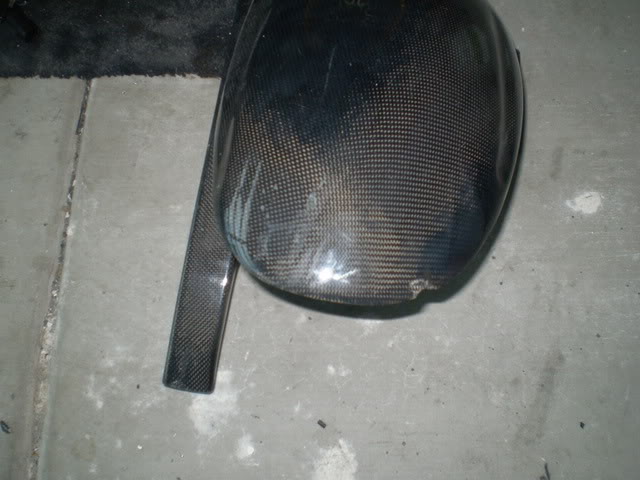
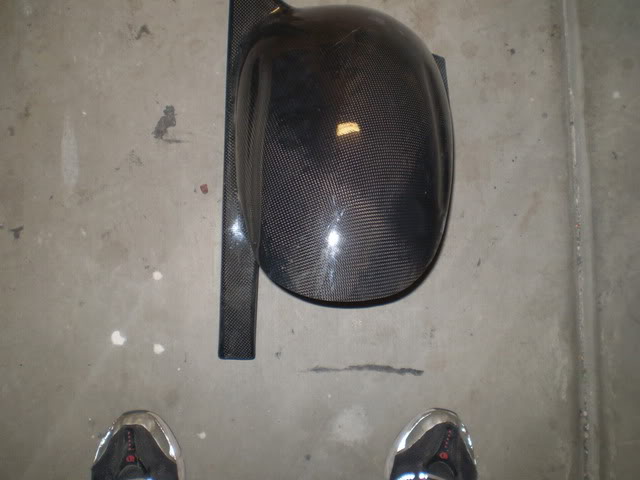
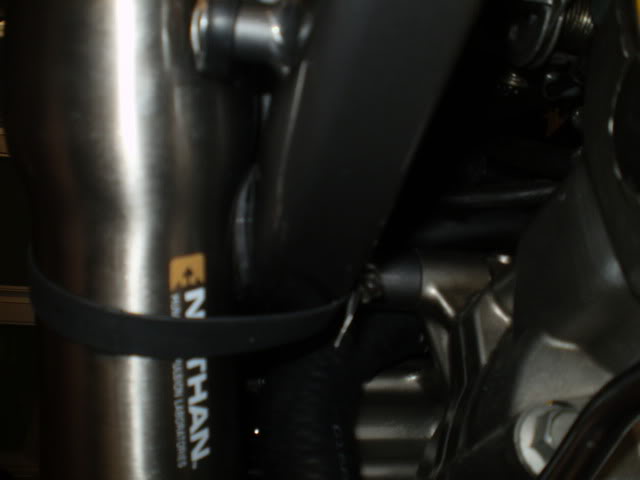
Got back in yesterday! Had a couple of goodies waiting for me- the main one being a carbon fiber front fender. I didn't have one for my setup and the carbon fiber ones from china were as cheap as anything I could find. Problem is, it was from China... so fitament issues ensued. First pic is of where the rear mounting hole ended up. No, it doesn't rotate in, and when aligned with the front forks this is where it needed to be...
It also should have been on the outside of the mount, but hey, what could I expect. Went to sleep, had a dream about the motorcycle, and woke up knowing exactly what I was going to do to fix it. Picked up some aluminum and make a couple of brackets, cut the old tabs off of the fender and added new holes and no one is the wiser!
Now I'm working on mounting a gixxer puller fan on that radiator and try to tackle that big ole mountain once and for all.
Edit: Photos added
Last edited by 7moore7; Jan 3, 2011 at 02:36 PM.

Thread Starter
Senior Member
MotoGP
Joined: Jul 2010
Posts: 3,871
From: Phoenix, AZ
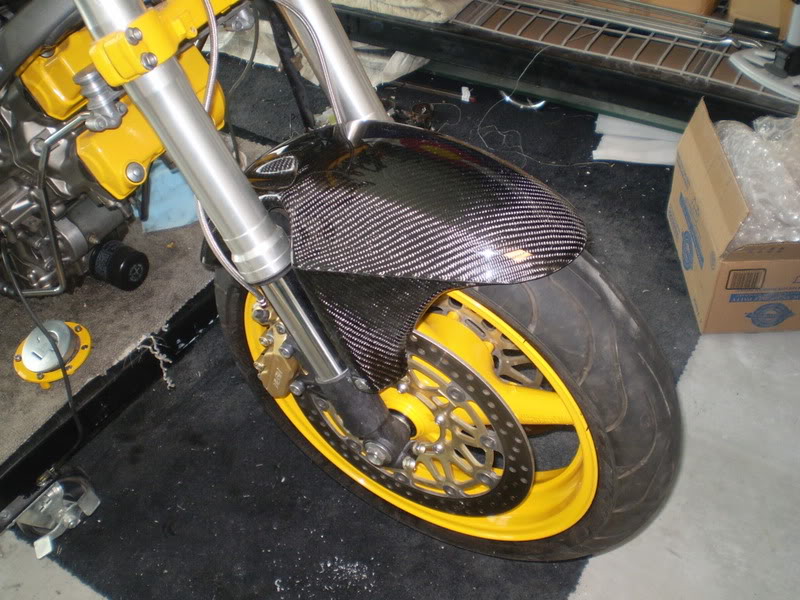
Whatever it was, it is now a front fender for CBR 929rr front forks on a '98 naked superhawk with a tad extra unsprung weight just to annoy the weight junkies

Banned
Back Marker
Joined: Jan 2011
Posts: 156
Why the manual on/off? Wouldn't you want the fans to go on and off when the bike thought it necessary, or is manual on/off fans jargon for what I just said?
Other than that, hella cool idea to mount the radiators under the tail. Totally expose that beautiful motor... Going to put a turbo on her aren't ya?

Banned
Back Marker
Joined: Jan 2011
Posts: 156
Tweety, no welder yet! I'm still building my repertoire of tools and that one is a few items down the list. Keep in mind, I've started from scratch about a year ago with the whole moving out /going to college/living is small spaces thing so am somewhat limited in my metalworking abilities. I do have the frame hung from scaffolding so the rear linkage should be easy to undo.
Looks like the castle nut for the frame should be easy enough to make, and maybe I can find a long enough socket that I don't need a welder- it's worth a shot at least!
Thanks for the help so far... I ended up buying trink's old frame, so will possibly look into going for the polishing route rather than the powdercoating one. Gonna have to think about how this thing should look when I'm done....
Polishing in my opinion doesn't look good on anything unless you're a chrome guy. Chrome guys just like chrome and I get that, just liking something because you do. However, it's my advice that if you're not a chrome guy that you rethink that one and go back to the powder coating route... Wonder if you could anodize a frame, that would be dope as hell. Gold anodized or honda red anodized or even black anodized, or a black anodized frame with a gold anodoized rc51 swingarm and red anodized subframe for your new carbon fiber tail? heheheheheheh
Last edited by SuperBlink; Jan 8, 2011 at 08:27 PM. Reason: Everything from wow down was added..............
Thread Starter
Senior Member
MotoGP
Joined: Jul 2010
Posts: 3,871
From: Phoenix, AZ
Why the manual on/off? Wouldn't you want the fans to go on and off when the bike thought it necessary, or is manual on/off fans jargon for what I just said?
Other than that, hella cool idea to mount the radiators under the tail. Totally expose that beautiful motor... Going to put a turbo on her aren't ya?
Other than that, hella cool idea to mount the radiators under the tail. Totally expose that beautiful motor... Going to put a turbo on her aren't ya?
Supercharger first, then turbo if that's not enough
I was seriously considering anodizing the frame- You're noticing my streetfighter mindset just keeps flipping around. I'm not really a chrome guy either, but when I saw that I could it got to me thinking that I should. Anodizing places are a little harder to come by, though, a little more expensive, take quite a bit more prep from what I understand, and I would have had a much harder time matching colors of different metals. So I went with powdercoat, and that finish is still astounding me! I keep dropping and scraping against it and there is no indication that it didn't come out of the oven yesterday!
Last edited by 7moore7; Jan 9, 2011 at 05:17 PM.
Thread Starter
Senior Member
MotoGP
Joined: Jul 2010
Posts: 3,871
From: Phoenix, AZ
And took care of other things today. A lot of these things the veterans on here have seen day in and day out, but gotta document it for my own entertainment!
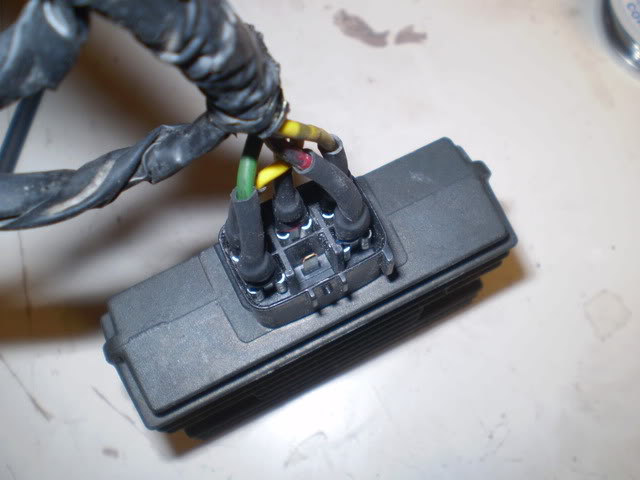
Old R/R connector (burn baby burn):
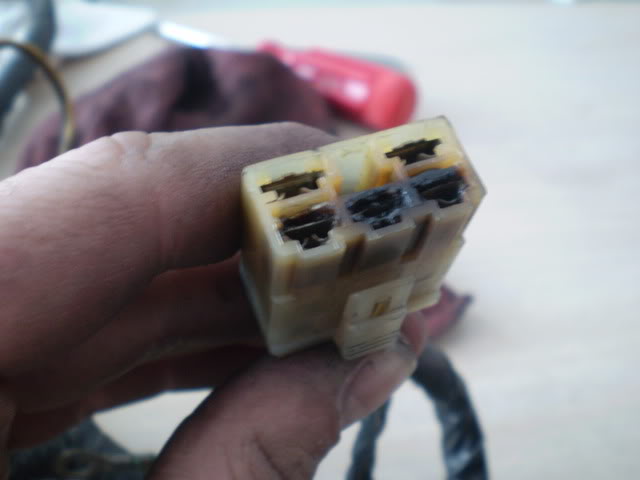
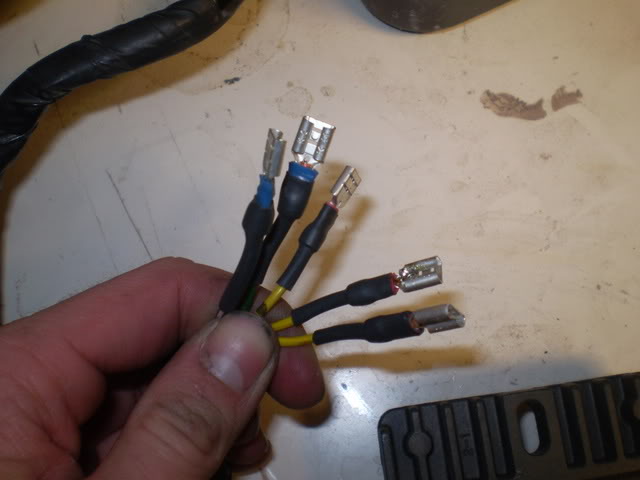
And the new setup, quite easy to do once I started. I didn't have a heat gun so I just held my soldering iron close to the shrink tube to get it to form:
Had to make a decision today to ditch my efforts on the VTR cluster mod... the cost/benefit just didn't justify going further with it! Ah, well, no $ lost, just a good amount of time gone and the sting of a project that beat me
Junkyard had about 4 of these so I grabbed one. The guy was gonna charge me $25 less for one of the dirty ones... I'm thinking, "I've cleaned every single damn other thing on this bike that I'd probably pay more for a dirty one because it would feel right" Saved me $25, he did. Here it is, cleaned (CBR F4i Gauges:
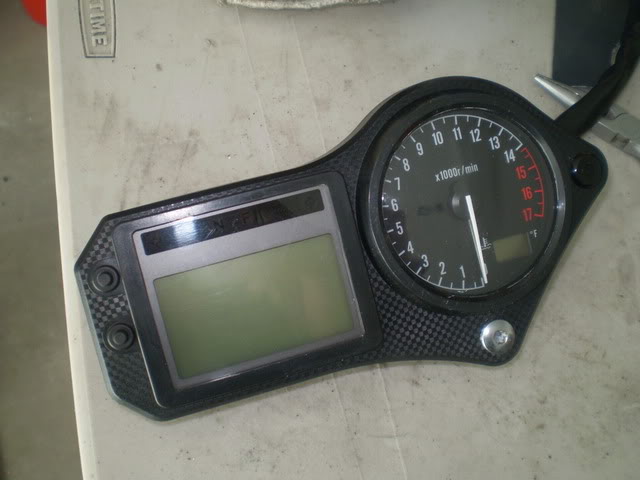
It's so dang small!
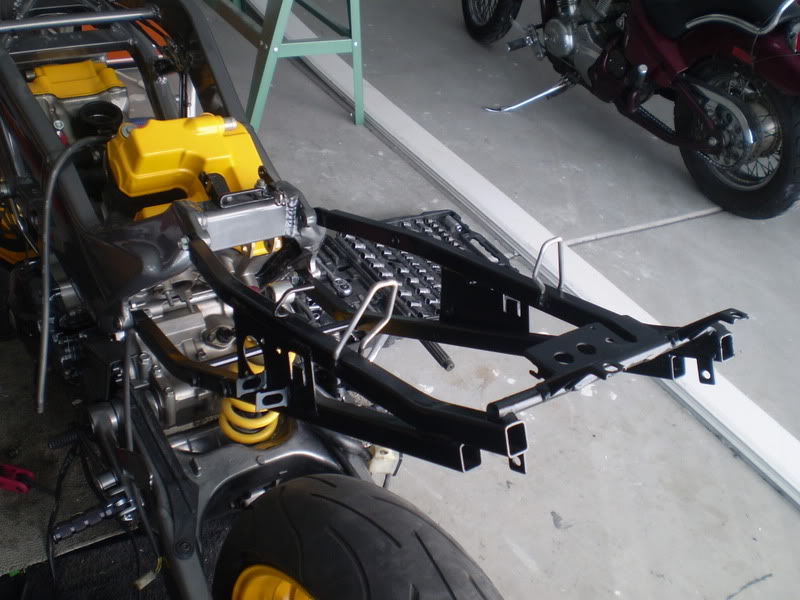
And got the subframe painted with rattle can engine enamel- so now everything that I put on it will be final and I won't have to come back off.
Old R/R connector (burn baby burn):
And the new setup, quite easy to do once I started. I didn't have a heat gun so I just held my soldering iron close to the shrink tube to get it to form:
Had to make a decision today to ditch my efforts on the VTR cluster mod... the cost/benefit just didn't justify going further with it! Ah, well, no $ lost, just a good amount of time gone and the sting of a project that beat me
Junkyard had about 4 of these so I grabbed one. The guy was gonna charge me $25 less for one of the dirty ones... I'm thinking, "I've cleaned every single damn other thing on this bike that I'd probably pay more for a dirty one because it would feel right" Saved me $25, he did. Here it is, cleaned (CBR F4i Gauges:
It's so dang small!
And got the subframe painted with rattle can engine enamel- so now everything that I put on it will be final and I won't have to come back off.
Thread Starter
Senior Member
MotoGP
Joined: Jul 2010
Posts: 3,871
From: Phoenix, AZ
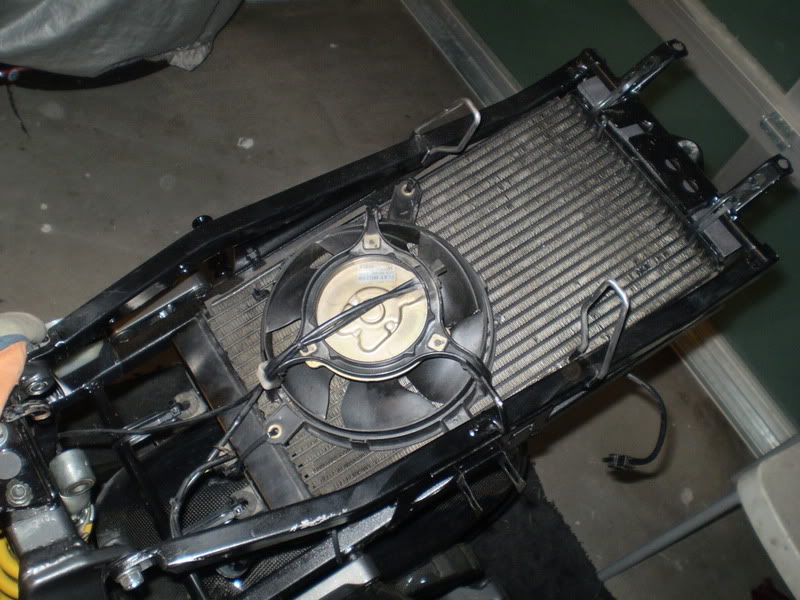
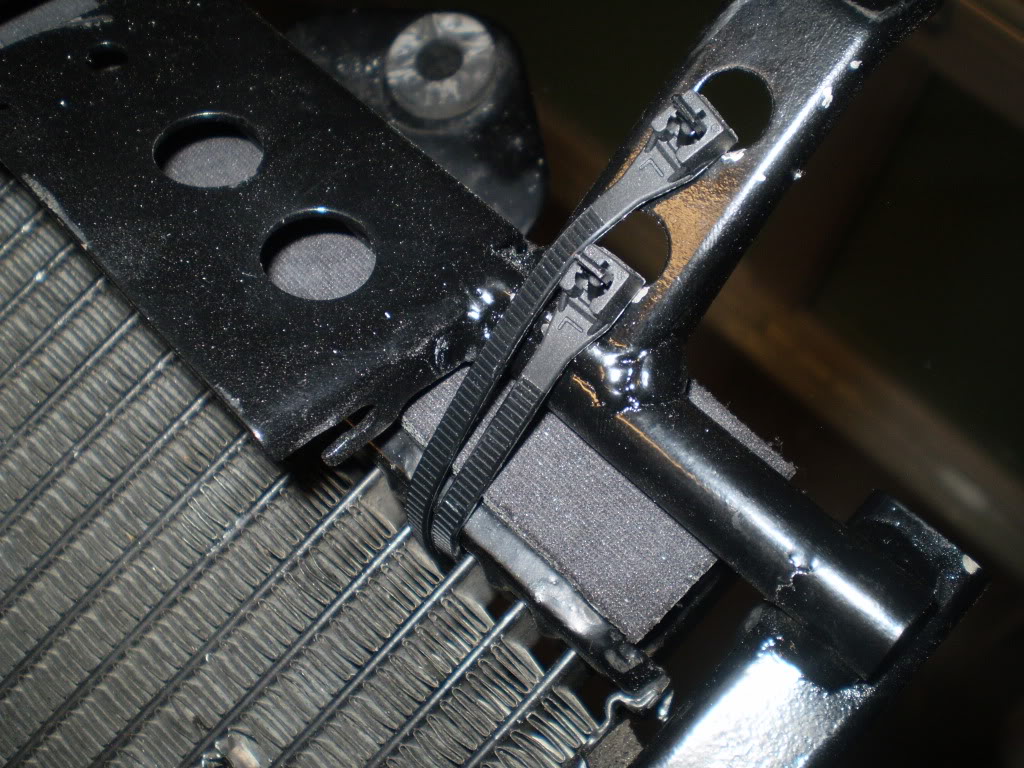
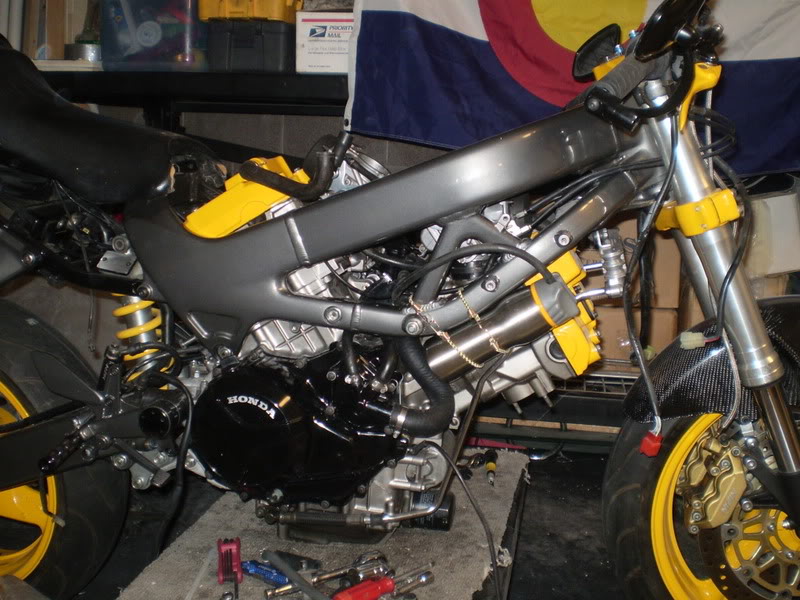
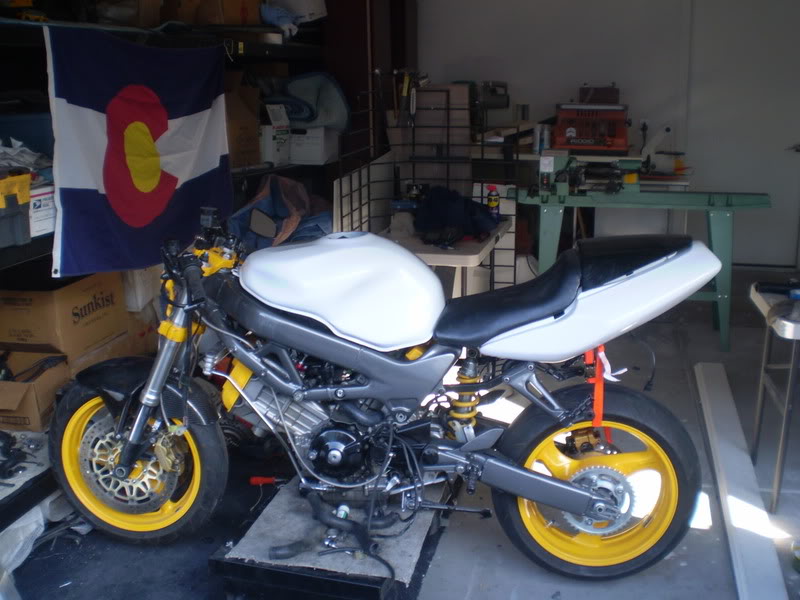
Actually got the radiator mounted today, and yes it's held in with zip ties. Don't worry. I used two. per. side.
I am comfortable with how it sits in there- upper fan just bumps the seat and plenty of lower clearance for the tire hugger to find the full range of the shock. Both fans are mounted. Forgot to take a pic of the lower one, but it's there. Nice to have it there to start playing with the hosing. I will eventually mount this more permanently, but right now I want to get the thing rolling. That's a piece of dense closed cell foam against the frame, to keep the ride Cadillac fresh.
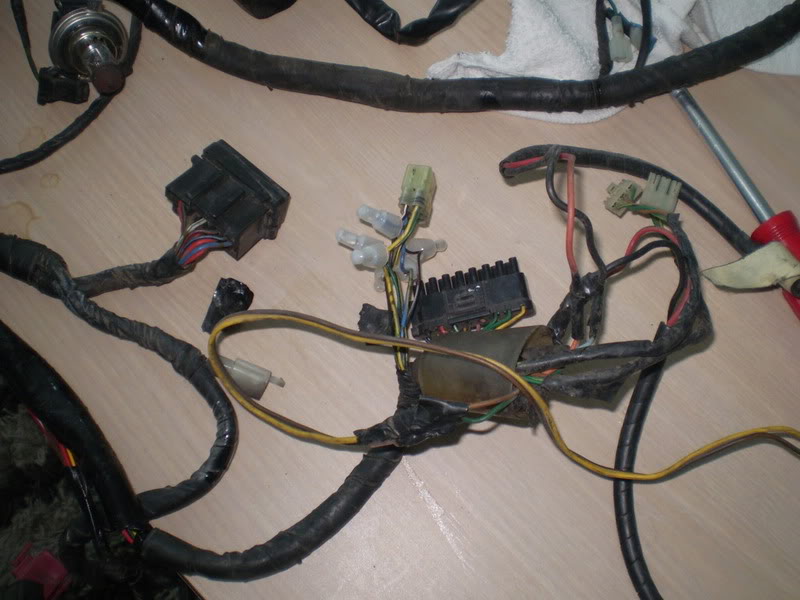
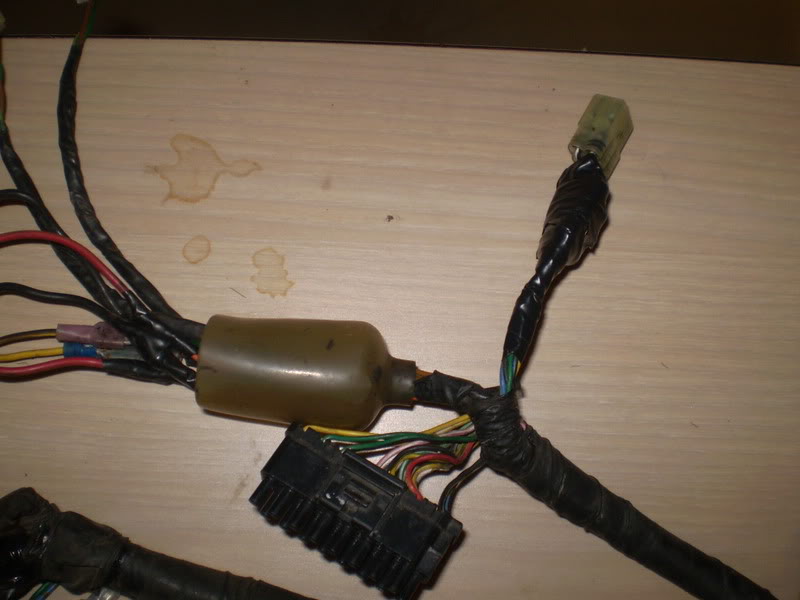
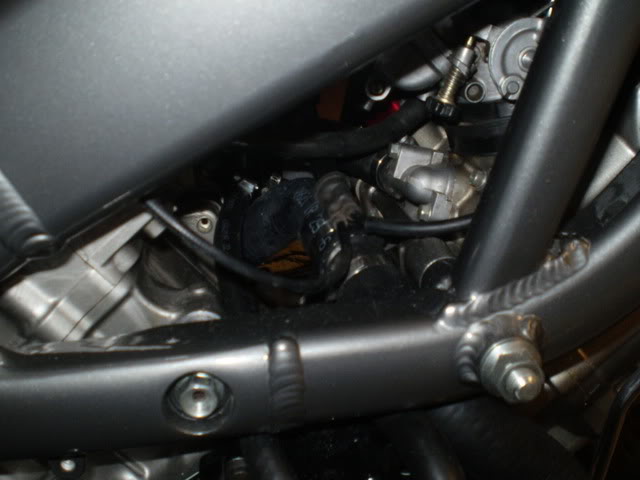
Wiring harness is messy. It's been played with before. I took that thing full of wires in the middle and just cut them and mashed them all together and taped them. Figured they were all going to the same place anyway, and all those white caps were ugly
The thing in the middle is what I edited.
To make the thing in the top:
This forum is terrible for me. In trying to solve one issue, I learn about more that I want to fix. I just learned about adjusting the TPS to factory spec rather than EPA compliance. Plus, before the build, all I had done was the CCT's so I'm not going to notice each individual improvement. Boooooooo! What a terrible hobby. Heh.
I am comfortable with how it sits in there- upper fan just bumps the seat and plenty of lower clearance for the tire hugger to find the full range of the shock. Both fans are mounted. Forgot to take a pic of the lower one, but it's there. Nice to have it there to start playing with the hosing. I will eventually mount this more permanently, but right now I want to get the thing rolling. That's a piece of dense closed cell foam against the frame, to keep the ride Cadillac fresh.
Wiring harness is messy. It's been played with before. I took that thing full of wires in the middle and just cut them and mashed them all together and taped them. Figured they were all going to the same place anyway, and all those white caps were ugly
The thing in the middle is what I edited.
To make the thing in the top:
This forum is terrible for me. In trying to solve one issue, I learn about more that I want to fix. I just learned about adjusting the TPS to factory spec rather than EPA compliance. Plus, before the build, all I had done was the CCT's so I'm not going to notice each individual improvement. Boooooooo! What a terrible hobby. Heh.
Banned
Back Marker
Joined: Jan 2011
Posts: 156
Looking beautiful man! I love looking at those heads shiny yellow like that, SUPER bad *** build dude. keep up the good work, don't worry too much about feeling every change as you make it along the way, riding that monster down the street on the rear wheel will provide you all the good feeling you need for a life time.... SICK.
Thread Starter
Senior Member
MotoGP
Joined: Jul 2010
Posts: 3,871
From: Phoenix, AZ
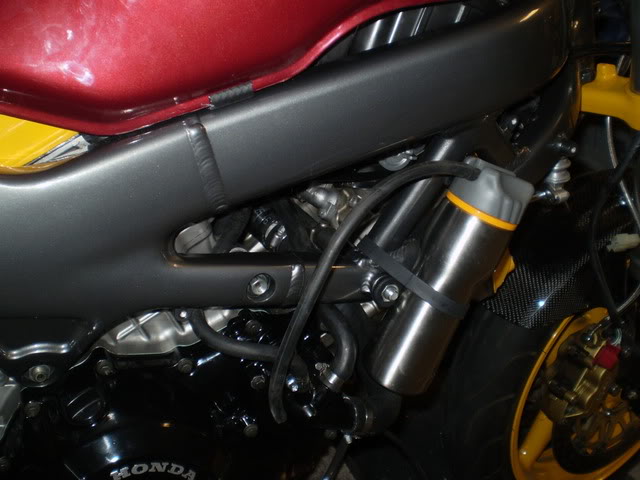
1/3 of the hosing is done! Nice to get something like that started, b/c sometimes it's the hardest part. Kai Ju put a VFR overfill bottle in this little spot and I actually got one but couldn't make it fit the way that I wanted to.
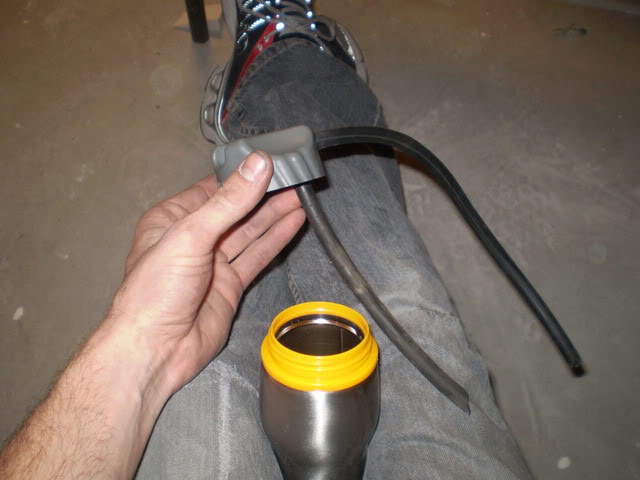
I've seen these done all over on the streetfighter forums, and think that they're pretty cool so made my own overfill using a stainless water bottle. Most people make them out of the aluminum drink cans- monster energy, bud light, etc, but I saw this at REI and thought it would be perfect. Pulled the drink spout, routed a hose in with a 90 degree elbow connector and made a siphon straw.
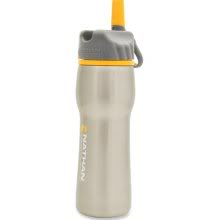
And I think I'm going to put it right here:
Picked up this hugger (to protect that undertail radiator) from t-dogg awhile back and the chip in it has been bugging me the whole time. I should have cleaned it up awhile ago cause I feel much better about it now:
Thoughts on tank/tail colors? I'm thinking silver would look cool.
I've seen these done all over on the streetfighter forums, and think that they're pretty cool so made my own overfill using a stainless water bottle. Most people make them out of the aluminum drink cans- monster energy, bud light, etc, but I saw this at REI and thought it would be perfect. Pulled the drink spout, routed a hose in with a 90 degree elbow connector and made a siphon straw.
And I think I'm going to put it right here:
Picked up this hugger (to protect that undertail radiator) from t-dogg awhile back and the chip in it has been bugging me the whole time. I should have cleaned it up awhile ago cause I feel much better about it now:
Thoughts on tank/tail colors? I'm thinking silver would look cool.
Thread Starter
Senior Member
MotoGP
Joined: Jul 2010
Posts: 3,871
From: Phoenix, AZ
Thanks for the props, man! I'm excited b/c this thing is getting close... the end is in sight (I think!). The whole time I've been riding my Shadow too, so switching from cruiser back to sportbike is definitely gonna give me that Superhawk "**** eatin' grin" again.

Senior Member
Superstock
Joined: Nov 2007
Posts: 320
From: Arlington Heights, IL
You did a great job on the hugger. What did you do/use to clean it up. The bike is looking great by the way. I can't give you any help on the color....I'd just screw it up. I think your doing a pretty good job as it is.
Senior Member
MotoGP
Joined: Aug 2006
Posts: 2,934
From: altoona, pa
nice color coordination on the overflow tank. How are you gonna affix it?
As far as the tank and tail color, i think carbon fiber or like might look good too. The reason i think that is first to separate the frame from tank colorwise, but more to develop monochromatic lines/areas front to back, e.g., headlight, tank, seat and tail to form an upper line of carbon color/dark color, and this to flow with the lower line of front fender, side cover, rear fender, swingarm and tires. This will highlight the silver frame and engine and the yellow wheels/others add enough bling. Otherwise, there might be a big silver area in the middle taking away from the engine and frame.
It's difficult to say w/o putting it on a computer and playing with colors, or drawing and coloring it in, but I like simple/easy on the eye as opposed to busy/distracting so that when you glance at it, it looks right/coherent. That's just a personal suggestion and without seeing it, it's speculative.
Last edited by nath981; Jan 17, 2011 at 05:59 AM.
Senior Member
Back Marker
Joined: Dec 2008
Posts: 226
From: Corpus Christi, TX
Cool build. I like how you're really making it stand out as your own bike. Take some nut to do it. Of course you'll always get some haters, but they can never take away the pride that goes into this. That being said I think color wise if you went with yellow on the tank it would be too much, and I wouldn't go with red or anything bright and flashy, that would take away from the yellow accents. I'd do a silver, graphite, or black. Definitely the tank and the tail in the same color though. Keep up the good work. I'm looking forward to seeing the final product.
Thread Starter
Senior Member
MotoGP
Joined: Jul 2010
Posts: 3,871
From: Phoenix, AZ
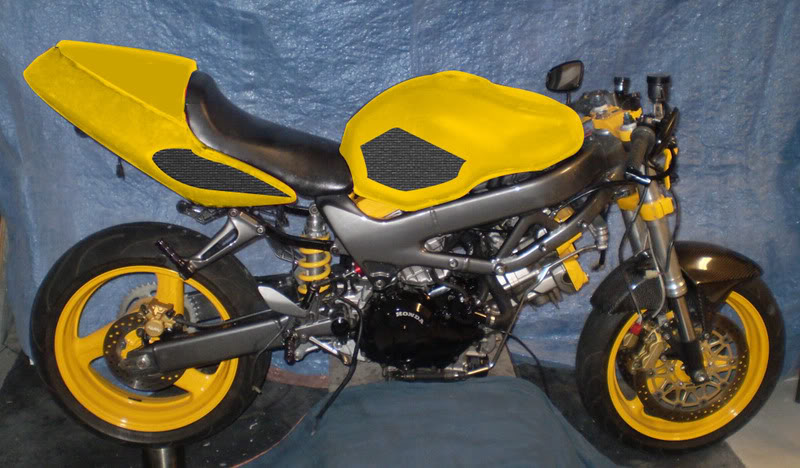
You guys are on the same page as me color-wise! Any color other than yellow looks like a theme/team bike (purple= Vikings, red=ASU, green= Packers, etc...) and yellow takes away the whole point of powdercoating all the cool little details. Which leaves neutral ones...
And yeah, IMO a little sacrilege to take off the gorgeous plastics of this thing, but on the other hand I'm such a fan of naked bikes... making it mine... I kinda want a second VTR fully skinned so I can take staged battle pictures of them together like Autobot vs Decepticon. Yeah, I went there...
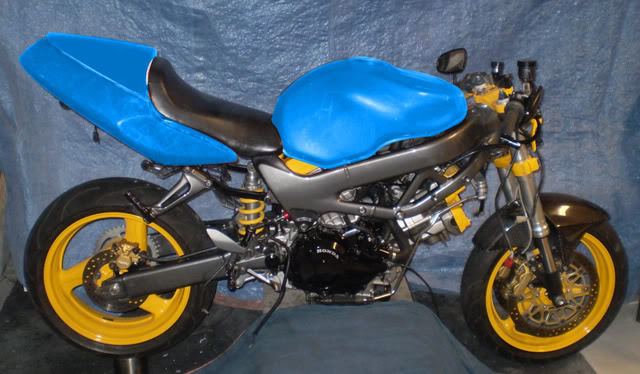
I personally am really leaning toward the white.
Could have made them bigger, but kinda get a better idea when it's smaller I feel...
And yeah, IMO a little sacrilege to take off the gorgeous plastics of this thing, but on the other hand I'm such a fan of naked bikes... making it mine... I kinda want a second VTR fully skinned so I can take staged battle pictures of them together like Autobot vs Decepticon. Yeah, I went there...
I personally am really leaning toward the white.
Could have made them bigger, but kinda get a better idea when it's smaller I feel...

Senior Member
SuperBike
Joined: Sep 2008
Posts: 1,707
From: Essex, UK

Last edited by Wicky; Jan 17, 2011 at 06:42 PM.
Thread Starter
Senior Member
MotoGP
Joined: Jul 2010
Posts: 3,871
From: Phoenix, AZ
Hmm.. I am very tenative about trying to match a paint color with a powdercoat one, although it is a pretty common one so could be easier...
This is as close as I can photoshop it in reasonable time (my tail, cover and tank are different colors to start with haha!)
It looks pretty good too... I like how the rear cylinder cover peaks through between the frame and the tank.
Just for you, Wicky:
Side note: This is how I'm mounting the overflow bottle:
Senior Member
MotoGP
Joined: Aug 2006
Posts: 2,934
From: altoona, pa
that's cool that you can do this overlay ****, so keep it coming. Try yellow, it might work best in terms of simple monchromatic. Then you could apply some tech spec on the tank and tail. It's nice quality stuff and it can be removed. They have it pre-cut like mine below and maybe for tail section or you can cut your own.


Last edited by nath981; Jan 17, 2011 at 08:36 PM.
Thread Starter
Senior Member
MotoGP
Joined: Jul 2010
Posts: 3,871
From: Phoenix, AZ
Tech spec- never heard of that stuff but it looks dang cool. The two flat surfaces on the tail will be cut with mesh to ventilate the radiator, so that should break up the blocky color a bit too. Also, what are you using to line the bottom ridge of your tank?
Senior Member
MotoGP
Joined: Aug 2006
Posts: 2,934
From: altoona, pa
that yellow seems to be the easiest on the eye, most uniform/congruent, like it belongs. I think all the yellow pieces make it difficult for other colors to look right. But it's your call and I'm just offering some opinionated feedback. haha
http://www.ilmberger-carbon.de/html/...r_galerie.html
http://www.ilmberger-carbon.de/html/..._galerie2.html
now that's what we're talking about, huh!
http://www.ilmberger-carbon.de/html/...r_galerie.html
http://www.ilmberger-carbon.de/html/..._galerie2.html
now that's what we're talking about, huh!
Last edited by nath981; Jan 17, 2011 at 10:30 PM.
Thread Starter
Senior Member
MotoGP
Joined: Jul 2010
Posts: 3,871
From: Phoenix, AZ
Feedback is great- I'm kinda just talking aloud and it's already helped... tech spec stuff looks cool and I love stuff that has a functional as well as aesthetic benefit. I may look into graphics via vinyl or my brother's spanking new airbrush too.
There's really not that much real estate to paint either, so I may just rattle can a color to see if I like it first.
There's really not that much real estate to paint either, so I may just rattle can a color to see if I like it first.
Senior Member
MotoGP
Joined: Aug 2006
Posts: 2,934
From: altoona, pa
Feedback is great- I'm kinda just talking aloud and it's already helped... tech spec stuff looks cool and I love stuff that has a functional as well as aesthetic benefit. I may look into graphics via vinyl or my brother's spanking new airbrush too.
There's really not that much real estate to paint either, so I may just rattle can a color to see if I like it first.
There's really not that much real estate to paint either, so I may just rattle can a color to see if I like it first.
Last edited by nath981; Jan 17, 2011 at 10:41 PM.
Thread Starter
Senior Member
MotoGP
Joined: Jul 2010
Posts: 3,871
From: Phoenix, AZ
Ok, those BMW things are unreal. I didn't even know one could do that with carbon fiber. That's definitely one to sleep on... maybe give me some ideas for future projects... I'm sure I don't have enough of whatever foreign money it costs to grab those things. Makes me want to learn how to lay carbon fiber... stuff seems pretty cool. Come to think of it, fiberglass, welding and machining would all be cool too... but one thing at a time I guess.
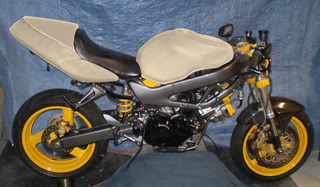
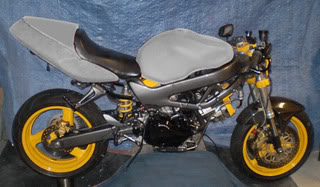
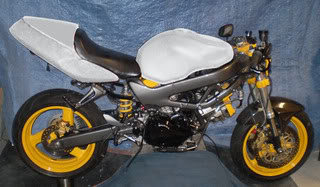
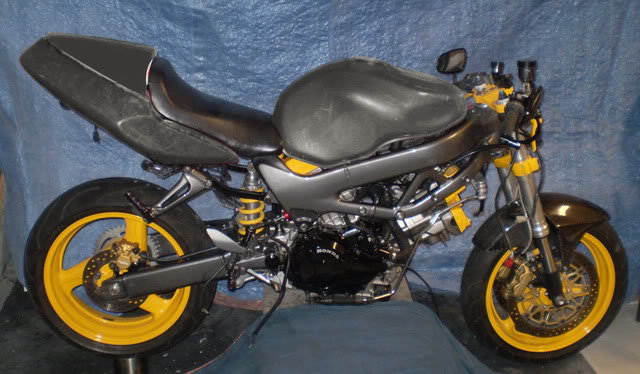
Better way of deciding on paint color: Cheap rattle can mock up. Thought white would look cool, but silver/titanium is money. That with those tech spec pads and I think I'm done with the tank. I don't want to go wild with graphics as the bike speaks for itself aesthetically.
I just painted half white and half silver...
Senior Member
MotoGP
Joined: Aug 2006
Posts: 2,934
From: altoona, pa
The white looks like "too busy" as distracting(looks like two bikes). Silver is better, but still not monochromatic enough.
This makes me want to think that to color match with gray,i.e., same as the frame and swingarm, is best, however, to the contrary as it looks dead and make the yellow bits look busy.
The yellow example pic above looks more unified and visually easier to assimilate. I think it looks the most correct visually than any other.
The color of the frame and swingarm along with the yellow particles and gloss black engine case make it difficult unify everything visually. Maybe this is why I like the yellow, that is, because it overrides these dichotomies and brings it all the yellow bits together. I think yellow with some discreet accents, tech spec, radiator screen vents, and/or some design on the rear cowl would look best to me.
Once you arrive at the main scheme, you can play with accents later.


