
Carb Strip Down Pictures


Thread Starter
ukbiker.me
Back Marker
Joined: Jan 2009
Posts: 116
From: Manchester UK

Couldn't find pics on uk site and didn't know what to expect when having to do carb stuff so took pictures so others can see how simple they are inside, i put off touching mine for years as i didn't know what was what.
Carb Strip Down Pictures,
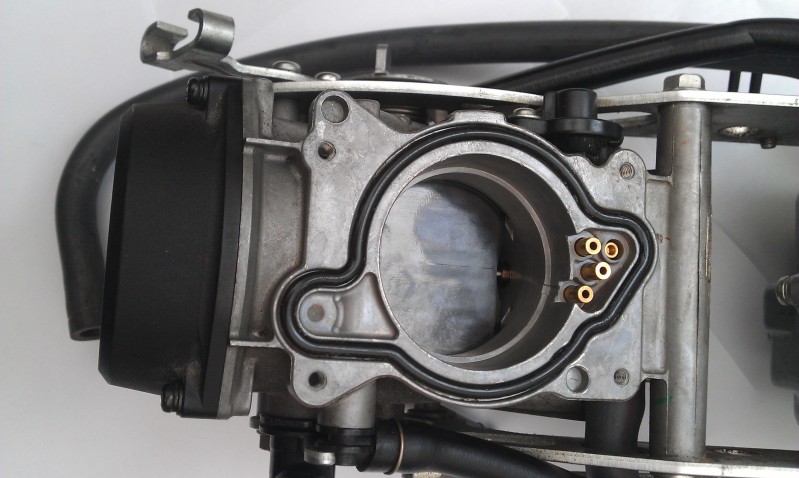
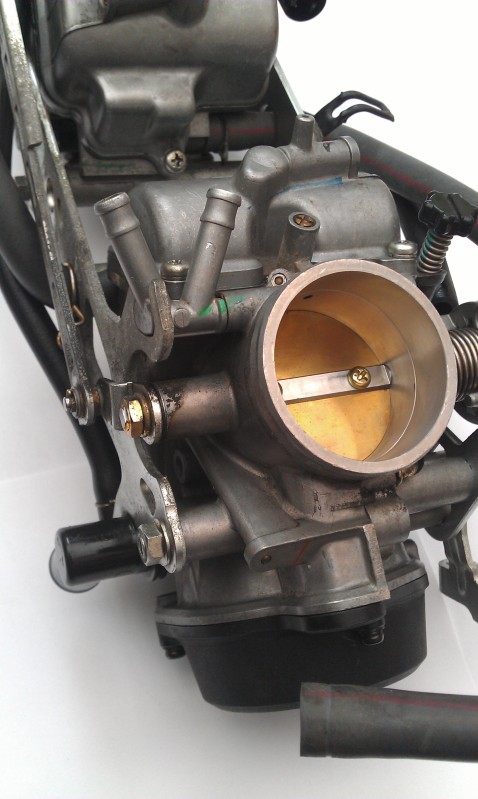
This starts with the carbs removed from the bike, Coolant tubes removed, throttle cables removed and and the Choke cable Removed (two screws one at either side front and rear)
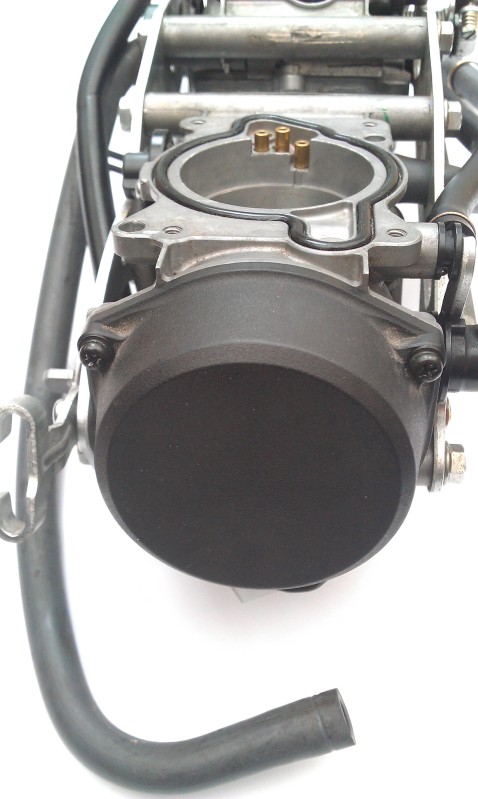
Slide Cover
Float Bowl Cover
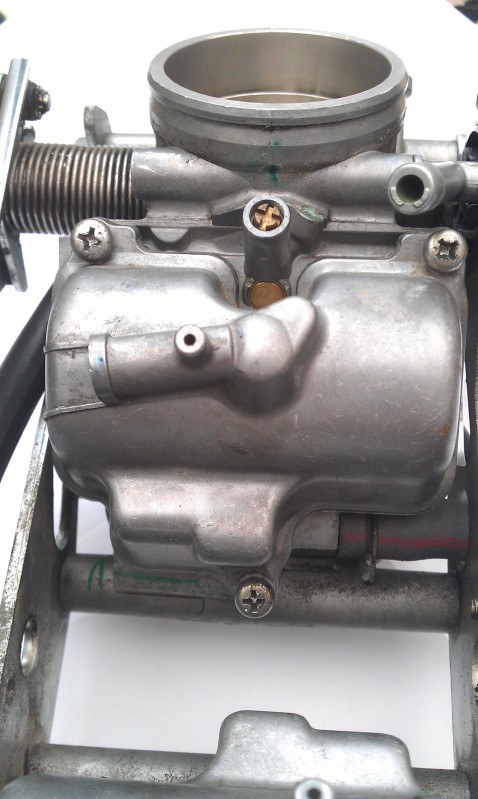
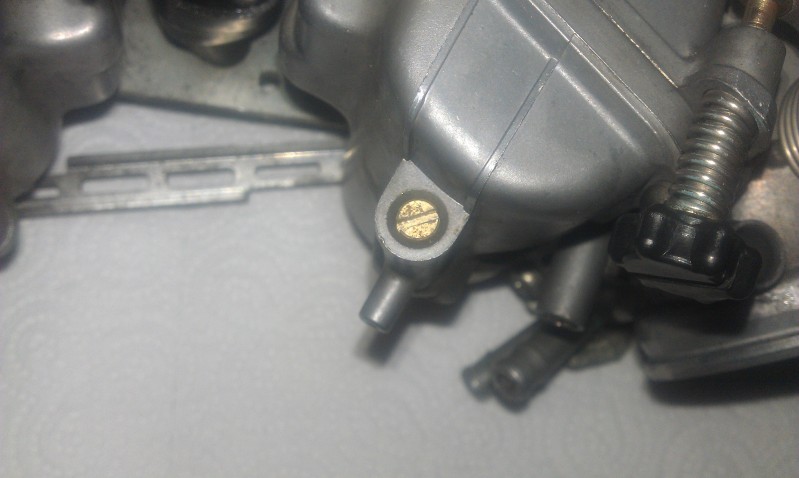
Float Bowl Drain Screw (Front and Rear)
Butterfly Valve
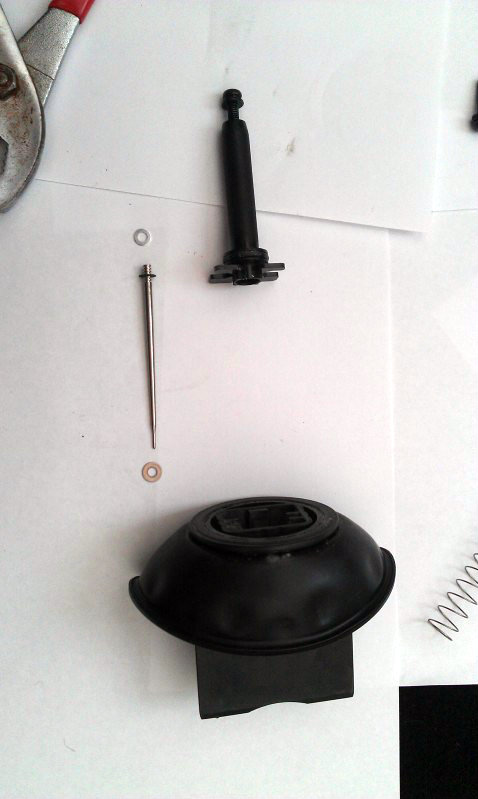
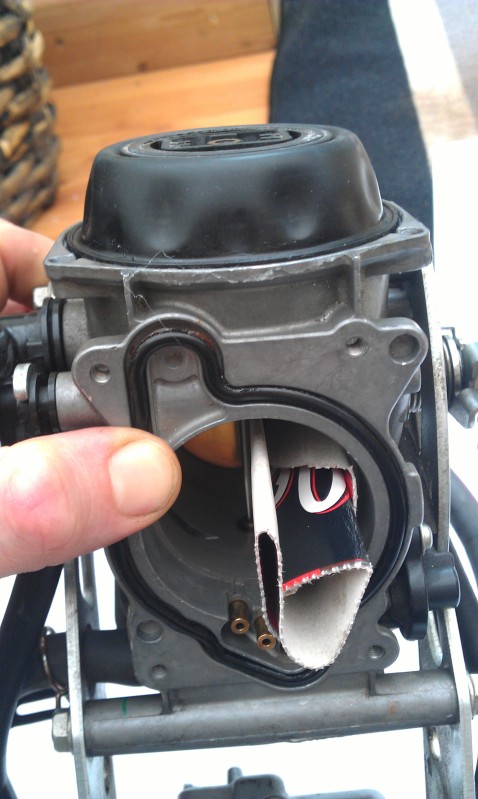
Removal of Carb slide, careful of the spring.
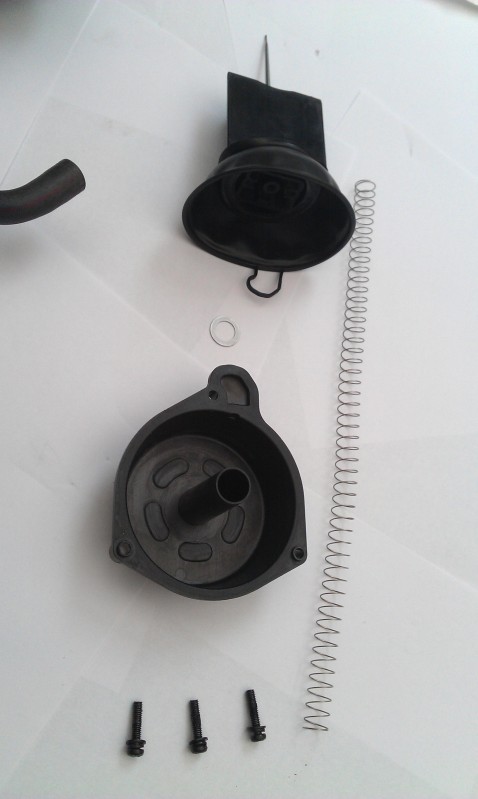
To get the needle out you need to screw one of the cap screws into the thread, fold over the rubber boot and then pull and wiggle

Note the order of washers, large at the front, then the E-clip then the small washer above that,
these are DynoJet needles, standard needles are just use a washer in-front of the needle stop

Slide Lowered back into carb with the boot folded back on its self, be gentle they are fragile, insert cardboard or similar so the slide stays up
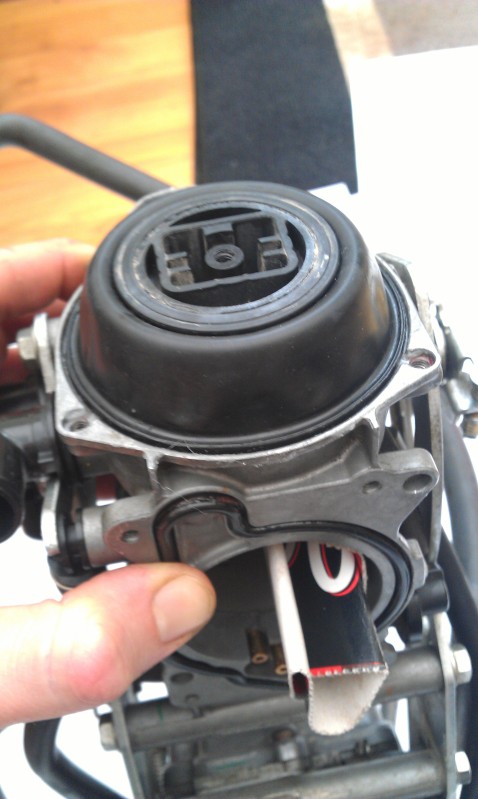
This is the best way i found to get the rubber to seat in the grove and seal properly when the cap is put on, compress the spring in the cap and hold in place with a finger
place above the slide and then release as close as you can, tighten up and see if its sealed properly
Make sure you put the washer back in before the spring and cap goes on
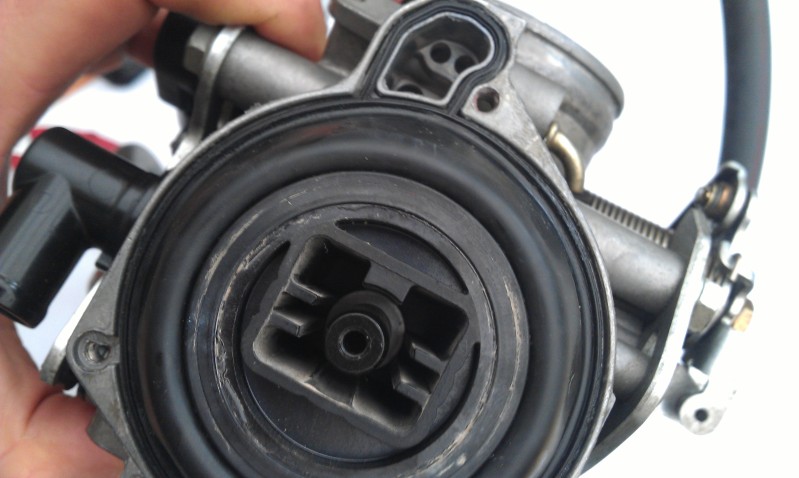
Ensure a good seal all round for the vacuum to work correctly

Float Bowl Cover Removed, these three screws are tight! make sure you have a decent fitting screwdriver before attempting to unscrew as they can easy strip the head
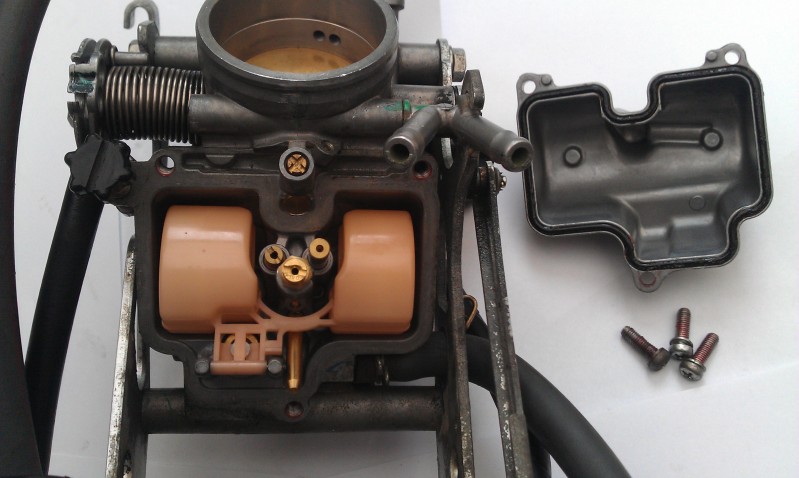
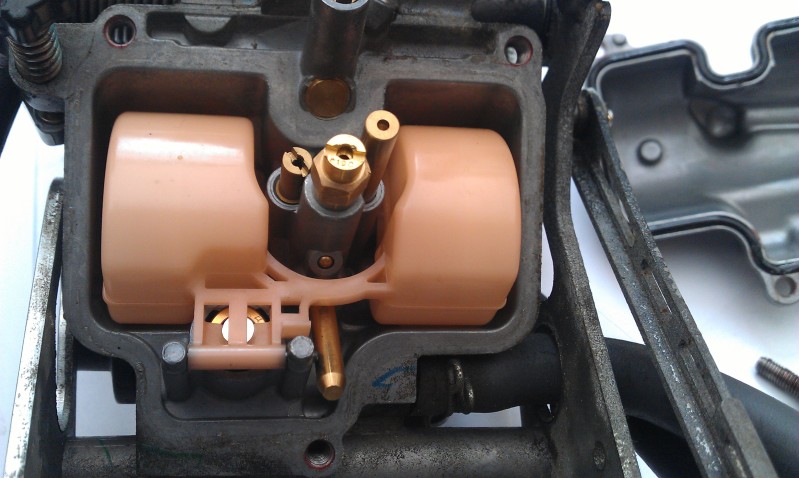
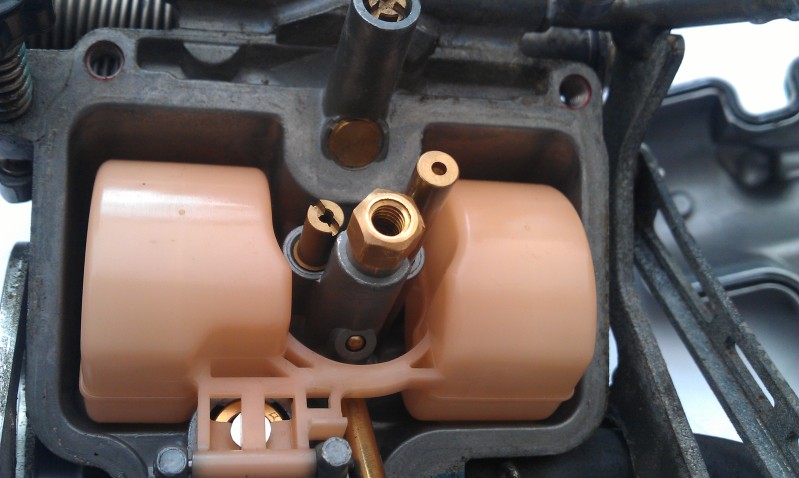
Main jet in the middle screw into the emulsion tube (8mm spanner to remove emulsion tune), Pilot jet to the left of it
Main Jet removed
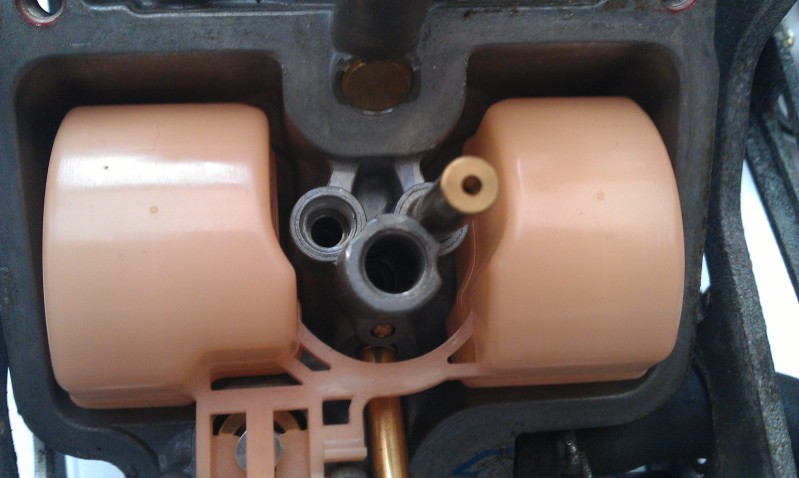
Emulsion Tube removed
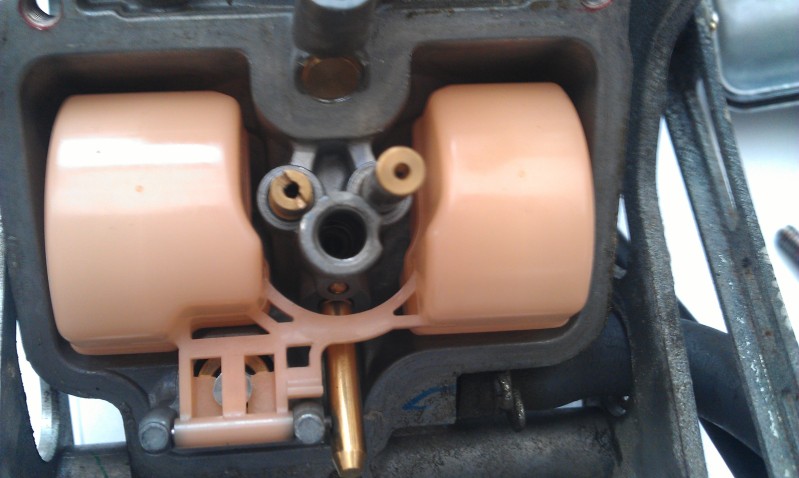
Main Jet, Emulsion Tube
Pilot Jet Removed
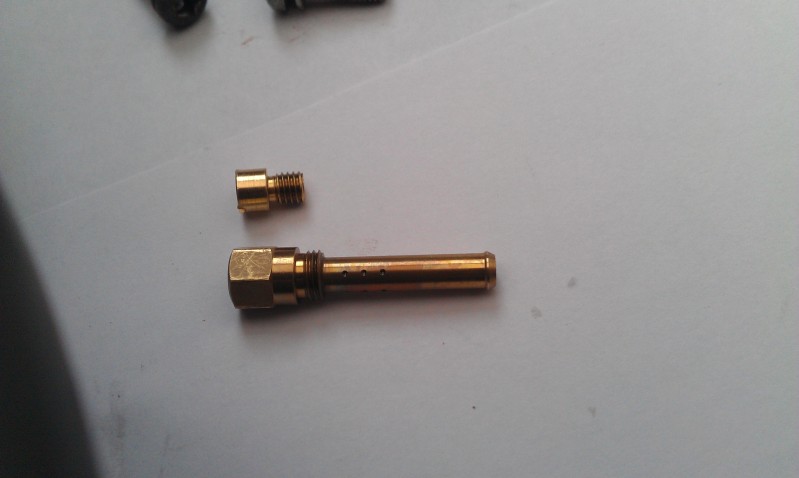
Main Jet,
Emulsion Tube,
Pilot Jet,
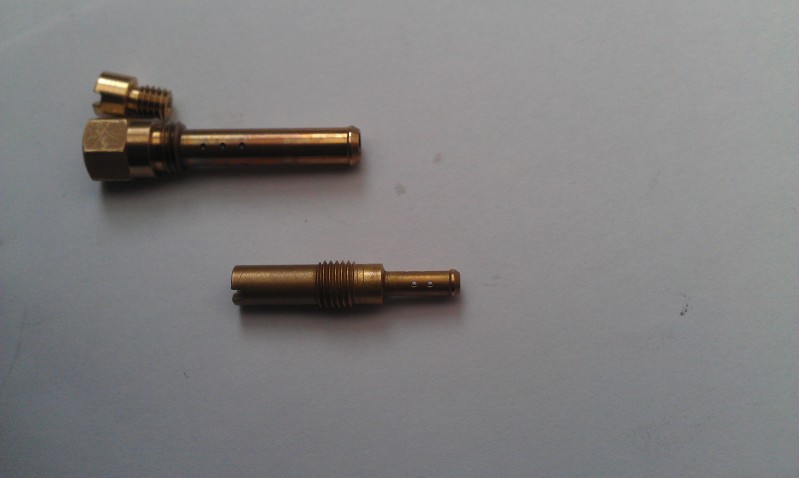
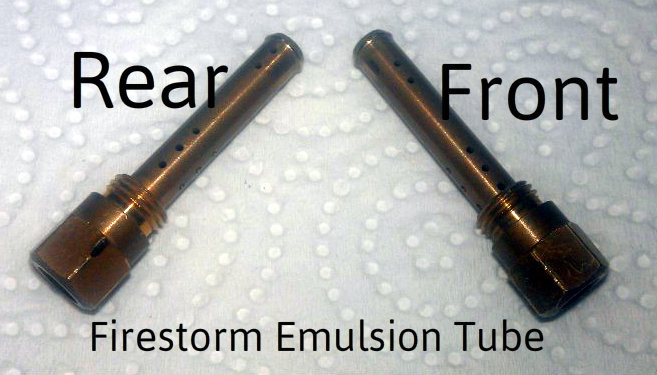
Emulsion tubes, note left and right have difference in hole alinement's,
Stock main jets will also have the larger of the two in the rear Emulsion tube
Sync Screw
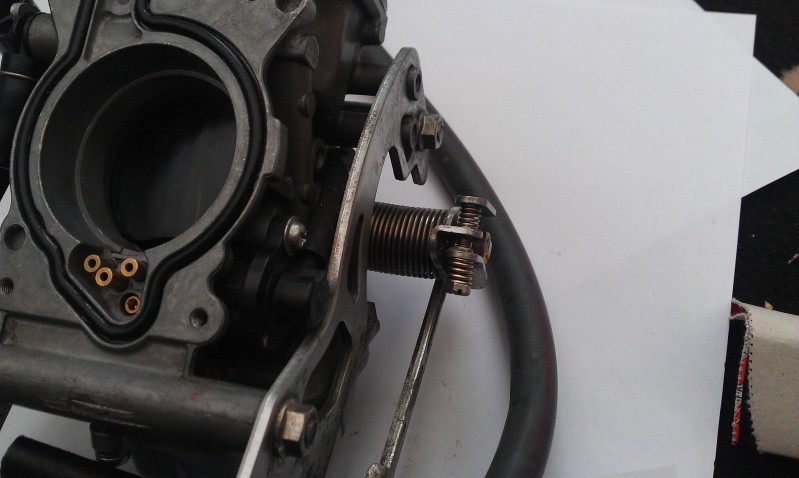
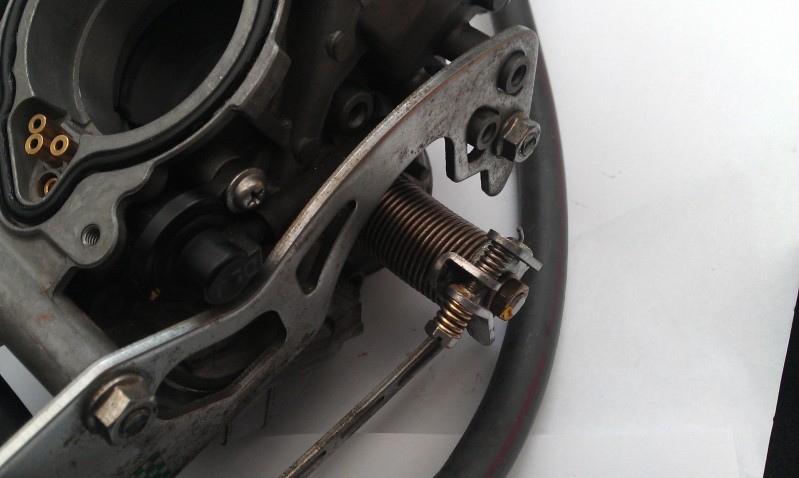
Idle Adjustment Screw
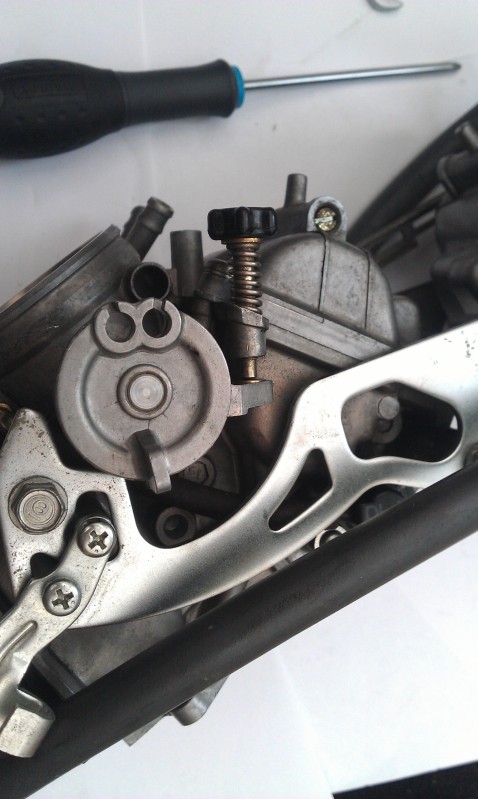
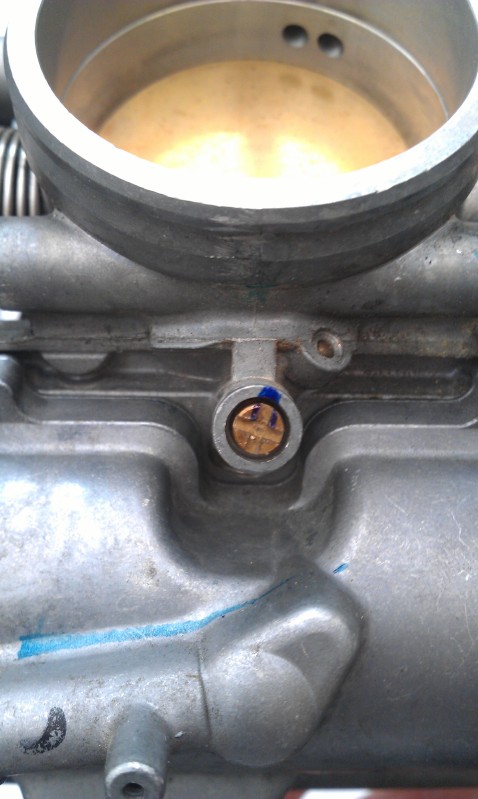
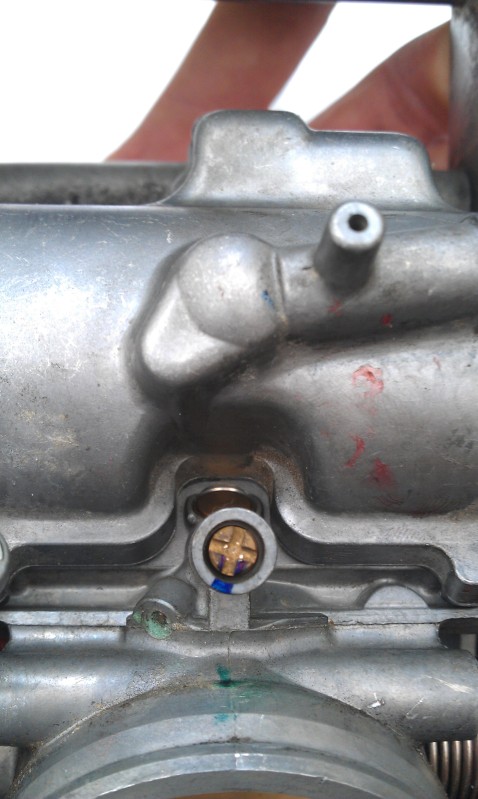
Marked these two Fuel Mixture Screws from fully closed so can see how far of a turn i have adjusted
Video with slides opening and closing
Hope this can be of use to any one considering taking the carbs apart for a clean or re-jetting that hasn't tackled the issue before
Carb Strip Down Pictures,
This starts with the carbs removed from the bike, Coolant tubes removed, throttle cables removed and and the Choke cable Removed (two screws one at either side front and rear)
Slide Cover
Float Bowl Cover
Float Bowl Drain Screw (Front and Rear)
Butterfly Valve
Removal of Carb slide, careful of the spring.
To get the needle out you need to screw one of the cap screws into the thread, fold over the rubber boot and then pull and wiggle
Note the order of washers, large at the front, then the E-clip then the small washer above that,
these are DynoJet needles, standard needles are just use a washer in-front of the needle stop
Slide Lowered back into carb with the boot folded back on its self, be gentle they are fragile, insert cardboard or similar so the slide stays up
This is the best way i found to get the rubber to seat in the grove and seal properly when the cap is put on, compress the spring in the cap and hold in place with a finger
place above the slide and then release as close as you can, tighten up and see if its sealed properly
Make sure you put the washer back in before the spring and cap goes on
Ensure a good seal all round for the vacuum to work correctly
Float Bowl Cover Removed, these three screws are tight! make sure you have a decent fitting screwdriver before attempting to unscrew as they can easy strip the head
Main jet in the middle screw into the emulsion tube (8mm spanner to remove emulsion tune), Pilot jet to the left of it
Main Jet removed
Emulsion Tube removed
Main Jet, Emulsion Tube
Pilot Jet Removed
Main Jet,
Emulsion Tube,
Pilot Jet,
Emulsion tubes, note left and right have difference in hole alinement's,
Stock main jets will also have the larger of the two in the rear Emulsion tube
Sync Screw
Idle Adjustment Screw
Marked these two Fuel Mixture Screws from fully closed so can see how far of a turn i have adjusted
Video with slides opening and closing
Hope this can be of use to any one considering taking the carbs apart for a clean or re-jetting that hasn't tackled the issue before


Senior Member
Back Marker
Joined: Jul 2012
Posts: 171
From: Las Vegas, Nv
Wow thanks man...I have a firestorm in states...I will be starting this monday and u just helped me a bunch mate!!!cheers!!quick question for anyone reading...my choke...I can only get to pull out and stay out, or pulls out and goes 80% in then stops...I have to push it to go back in from being a little hit out...I've heard from the second you pull out it should go back in slowly till it ends...now I've took rubber off and tried adjusting plastic ****....can someone tell me what I'm doing wrong??or how it's suppose to work...or even what it does with fuel/air ration mixture exactly?do I need to replace? Any help/ advice?thanks
-Shane
-Shane
Slacker
Superstock
Superstock
Joined: Jun 2005
Posts: 489
From: San Antonio, TX

Shane, the choke **** should stay in any position it is set to. If it goes in slowly without your input, then the plastic tension adjuster needs to be tightened.
Seb, great effort with the pics. Many people will find this to be helpful.
Seb, great effort with the pics. Many people will find this to be helpful.

Well take off, eh.
SuperBike
Joined: Jun 2012
Posts: 1,206
From: QC, Canada
I've taken care of the Philipps screws on the float bowl by replacing them with
socket head allen key type screws. I never have to worry about stripping the
head, and then having to get them out by vis grip or drilling them.
When you need to play in the carbs and remove the float bowl later on, all you need is a #4 allen key, and voila, no stripping or hassle. And yes, you will need six new lock washers also, cause you won't be able to remove them from the philipps screws.

Senior Member
Superstock
Joined: Apr 2013
Posts: 250
From: Seattle
+1 on the allen screws for the float bowls, replaced mine yesterday.
OK, really i was just tagging this thread so I can find it later at home when I'm working on the bike.
OK, really i was just tagging this thread so I can find it later at home when I'm working on the bike.
Last edited by FTL900; Aug 28, 2013 at 09:31 AM.

Thread
Thread Starter
Forum
Replies
Last Post
darkember
Technical Discussion
20
Oct 14, 2014 10:37 PM
Speed_Demon
General Discussion
22
May 16, 2006 12:11 PM


