When you click on links to various merchants on this site and make a purchase, this can result in this site earning a commission. Affiliate programs and affiliations include, but are not limited to, the eBay Partner Network.
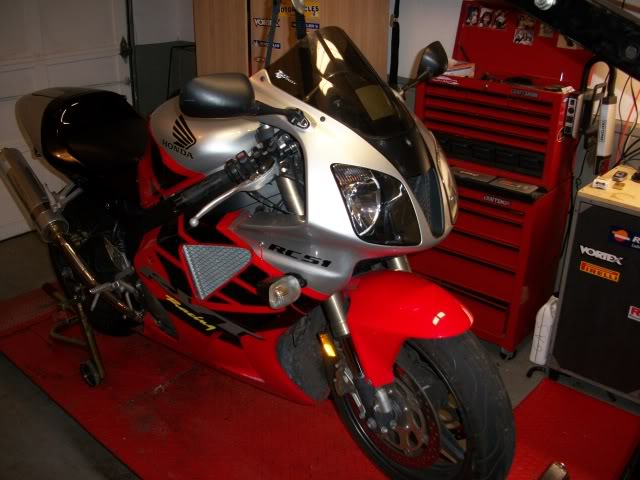
This is for a 2003 RC51. Not a SuperHawk, but the same concept applies. Enjoy!
Doing a fork seal replacement can be very messy. It’s a good idea to start off with a clean work area: Smokes are optional.
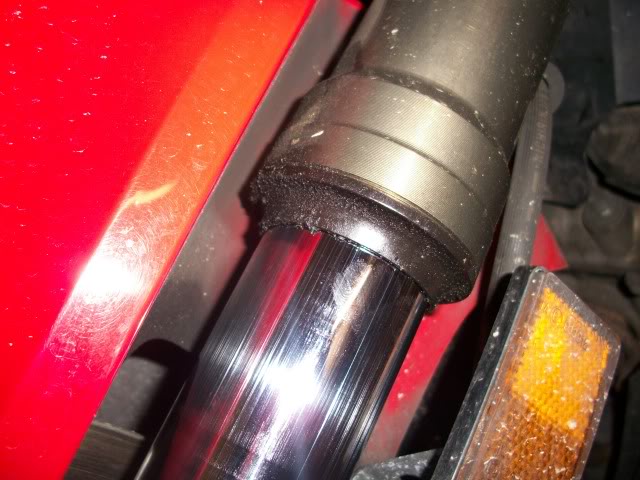
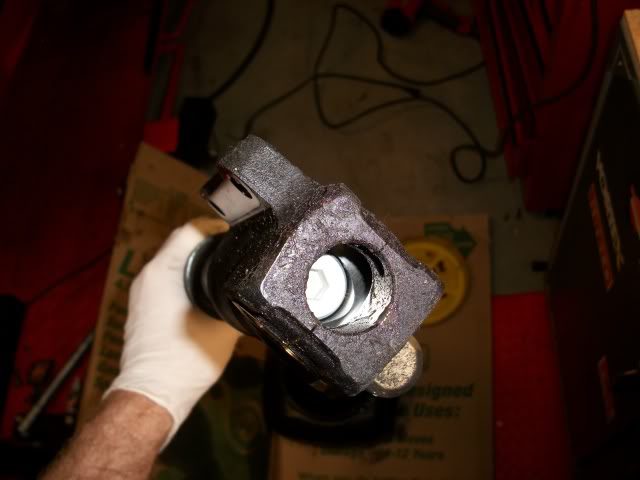
First, Identify bad seals: Notice the oil on the shaft. Seals are designed to "Squeege" all the oil off, so any oil is a bad sign. Anothe tell tale is the gathering of dirt/grime around the dust cap. Oil collects this kind of gunk very well.
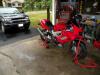
Suspend the motorcycle safely. You can use pitbull fork stands, although if you work on a lot of bikes like I do, the adapters can be expensive. I have a cherry picker and it works very well:
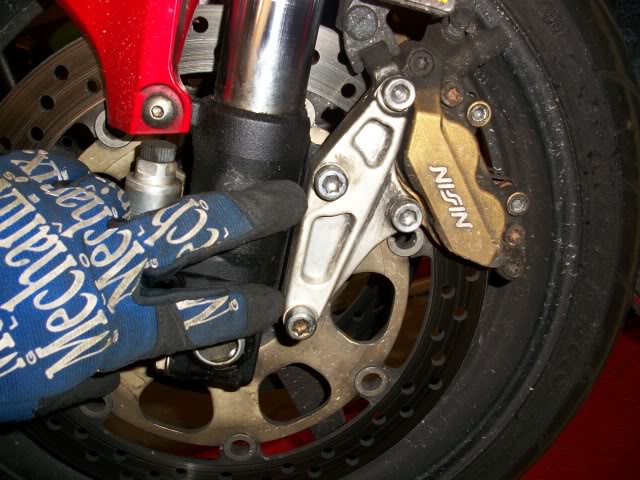
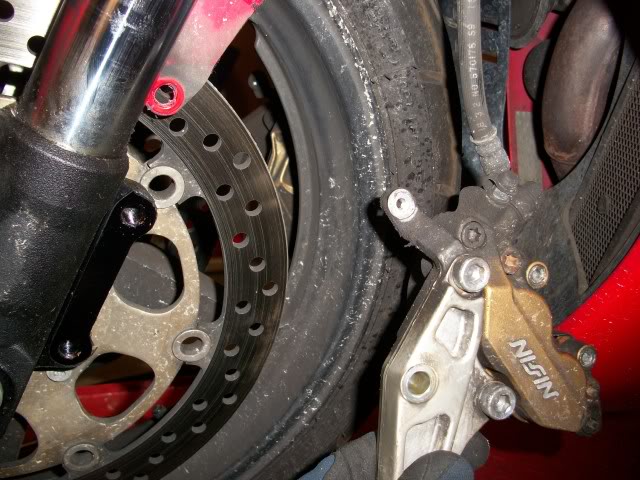
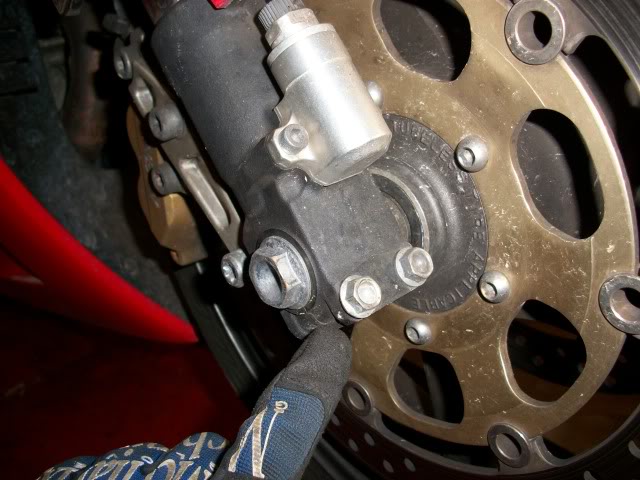
Remove the calipers by first taking out the two bolts that hold them on to the forks. You can then easily slide off the calipers.
With the RC51, you can remove the fender first, but with the Chicken, you have to wait until the tire is off, so go ahead and remove the tire. There are a few pinch bolts that hold the axle in place as well as an axle bolt. Take the pressure off the bolt side of the axle by removing the pinch bolts on the fork, but leave the pinch bolts in the other side for now. That will hold the axle in place while you crank off the bolt. This particular axle had a problem, and you can see the details for that here ( https://www.superhawkforum.com/forums/showthread.php?t=21024 ). Once you have removed the bolt, take out the opposing side pinch bolts and remove the axle.
Once you have removed the tire, set it in a safe place keeping in mind all the collars, washer, axle and bolt placement.
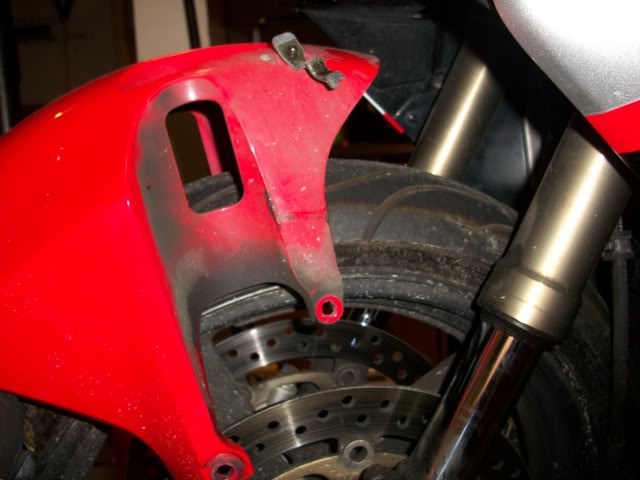
Take out all bolts holding the fender on the forks as well as any bolts holding brake line. Remove the Fender:
Loosen all the pinch bolts holding the forks. There are two on the lower section of the tree, one on top and one holding the clip-ons.
The forks should now slide out pretty easily. If you have problems, loosen the pinch bolts more on the clamps and tap lightly on the BOTTOM of the fork with a dead blow hammer. This will free up the fork from its stuck position.
Once the Forks are out, identify the bolt from the bottom of the fork. If you have not already removed the pinch bolts, like I told you to, do that now. Once the pinch bolts are out, you can put a hex on the bolt. It is MUCH better to have a hex socket as opposed to an allen key. Much better leverage. I’ve found that using an impact wrench can save you A LOT of trouble on this. You need to be careful NOT to use a hex that is ‘ball’ rounded, such as the Craftsman model T-handles. The round hex can strip the hell out of the bolt. I know from experience.
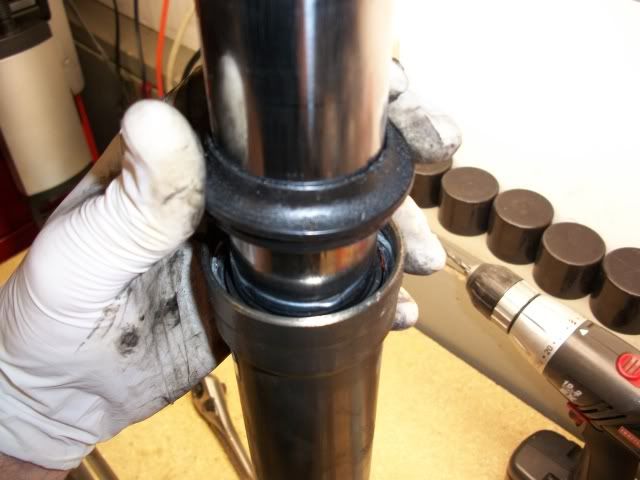
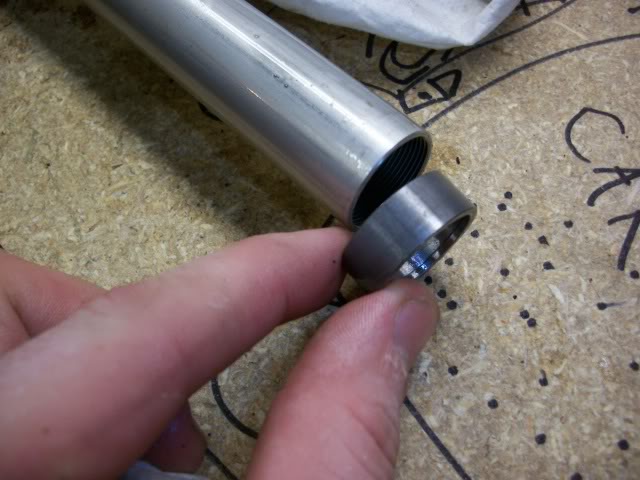
Once the bolt is out, drain all the fluid out. This can get messy. Once the fluid is out, you can remove the dust seal using a small screwdriver.
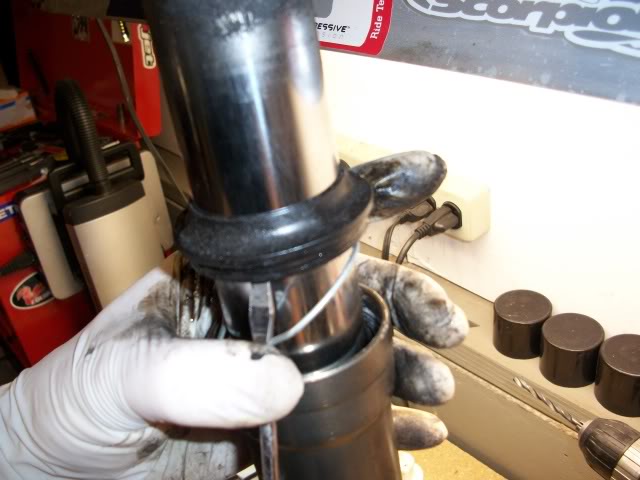
Then remove the Fork seal retaining ring. Use a small screwdriver to get the ring out of its slot. It will then easily slide up and out.
Once the ring is out, you can now remove the Fork Seal. I’ve found that the easiest way is to grab the shiny part (for all intensive purposes) and the bottom part and pull them apart. The shim below will pull the seal out. When you get it out, make SURE that you notice the order of things. Lay them on a clean towel in the order that they come off and the side up or down that they come off. Here’s the order: Dust cap, Fork seal retainer, Fork Seal, Washer, Bushing.
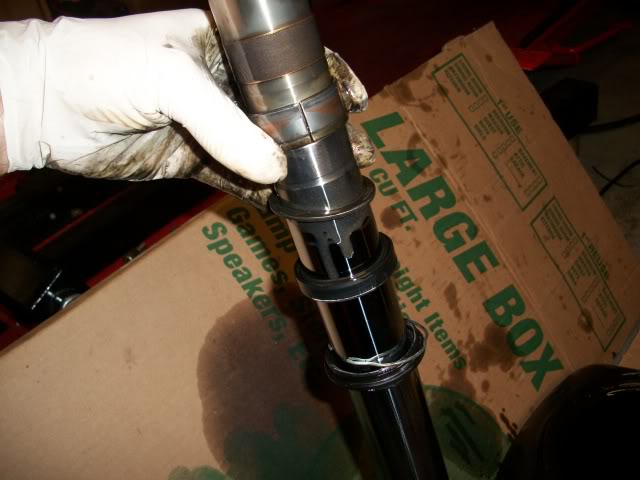
Once you get them out, make sure that the bushings don’t get lost. This is on the end of the shiny parts inners. These little bastards have a way of getting lost. Make SURE that you have each accounted for. A good way to keep them in place is with a coating of grease: This is the best opportunity to clean these dingy damn things, so do it now!
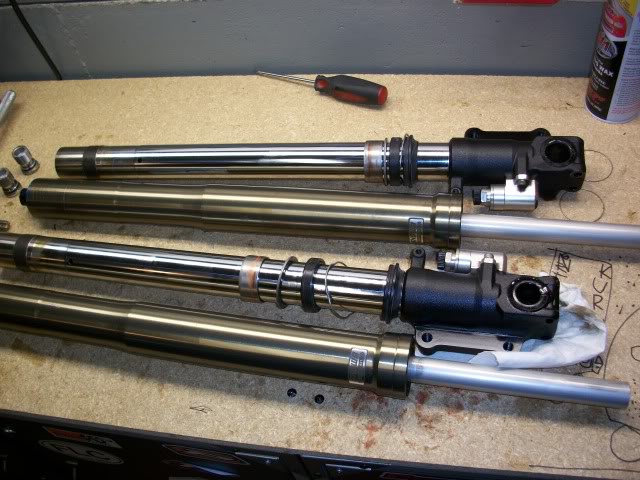
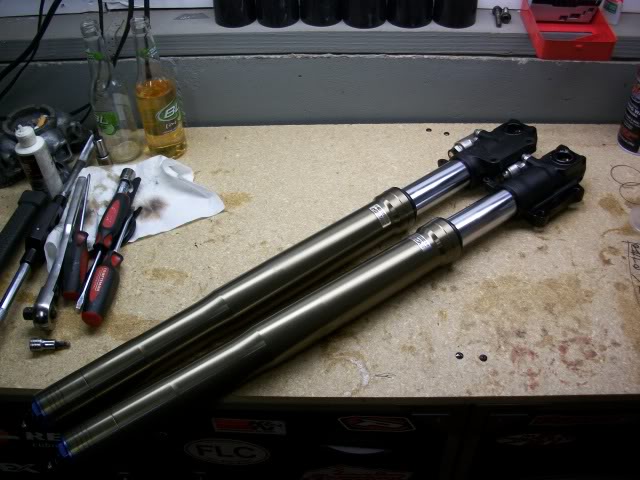
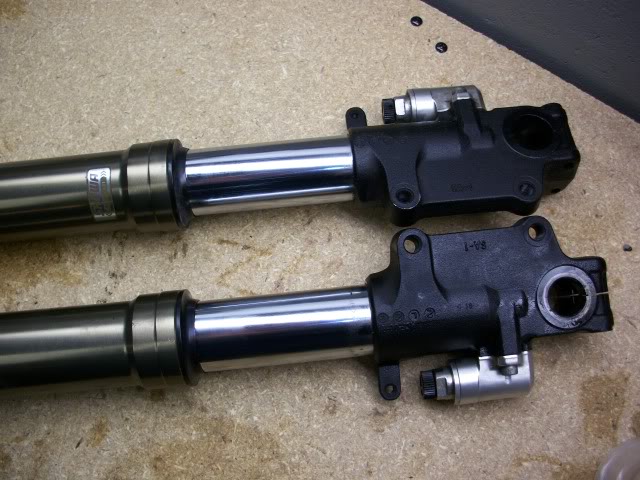
The forks go back together in the reverse order. If you don’t have fork seal drivers, you can use PVC pipe. With the RC51 (as with most modern sportbikes) the forks are upside down, so you need to cut the PVC in half to use them. Make sure that you replenish the oil in your tubes before reassembly. The ending product is VERY good looking:
The last thing: When you put your brake calipers back on, there are two VERY IMPORTANT THINGS THAT YOU MUST DO!!!
1: Put locktight on the bolts holding the calipers to the forks.
More often than not, you need to expand your brake pads to get the calipers back on to the Discs. This creates a gap obviously, so make sure you pump your brakes until pressure builds back up. Or you could be in for a nasty surprise the first time that you go for a test ride. (I know this from experience)
There it is, guys! Enjoy.
Last edited by superchickencornermonster; Dec 14, 2009 at 10:24 PM.
Reason: Edited for wrong pictures posted
nice write up. too bad you didn't have picks of driving in the seals. I think to the non-experienced that is the toughest concept - and the PVC helps.
Also if reusing the brake bolts be sure the clean the threads of old locking agent first.
nice write up. too bad you didn't have picks of driving in the seals. I think to the non-experienced that is the toughest concept - and the PVC helps.
Also if reusing the brake bolts be sure the clean the threads of old locking agent first.
Yeah, I know. I could not hold the camera and drive the seals at the same time. Maybe next time i'll have a helper.
To protect the new seals when putting them on the tubes, we'd always pull a square of plastic bag (lightly oiled) over the top of the tube, then pull the seal on over that. It protects the seal from the edges of the tube.
Great write up! I'm just about to do my Hawk forks (CBR actually ) so good to read as its been yeaaaars since I did this
60,000+ miles on my hawk and just did mine. Not that bad of a job to do. Make use all parts are clean before reassembly. Any dirt or metal particals....you'll be doing the whole job again!
Make sure to remove the retainers, they are revealed when the dust seals are removed. They are metal clips. Then just a few soils pulls should remove the seals.
Thanks for the quick answer, yes dust seal is out, so is the metal clip, then i fully extend the fork, it knocks, soinds like metal to metal, as if it's hitting a stopper. It doesn't sound like pushing on a seal.. I'll give it a couole of more shoves tomorrow, am i supposed to hit it out, pulling the parts against each other repeatedly or just pul it all the and then some? Its not even bulging... Thanks!
Nice of you to do a write up but I'm not so sure it's the best thing to follow to do upside down forks. You're doing them backwards from what I've ever seen them done. And I've done a TON of forks in my day working in the bike shops.
First by taking the bottom off instead of the top you can't set the fork oil height properly. You also can't pump the fluid back into the fork properly.
I noticed someone asked how much. Generally speaking that question is answered with a height not a volume. You are supposed to take the top cap off and take the spring out. Fill it up until you reach a certain level from the top of the slider. Your "shiny part" is called the fork tube. And your "bottom part" is actually the top part on the upside down forks and it is called the slider. And you don't just pull them apart. I noticed someone else asked about this as well. To answer their question you have to slide hammer them apart. Yeah it sounds harsh but that's how you do it. Usually 3 or 4 good wacks and the bushing and seal will come right out.
Also by doing the top you don't have to worry about having the right size allen wrench to get that bottom bolt out. You just loosen the upper cap while the fork is still clamped in the triple clamp and finish unscrewing it once you get it out.
I will give you that your method obviously gets the job done but I can tell you that no professional suspension shop would do it this way.
Thanks for the quick answer, yes dust seal is out, so is the metal clip, then i fully extend the fork, it knocks, soinds like metal to metal, as if it's hitting a stopper. It doesn't sound like pushing on a seal.. I'll give it a couole of more shoves tomorrow, am i supposed to hit it out, pulling the parts against each other repeatedly or just pul it all the and then some? Its not even bulging... Thanks!
If you are working on a SH fork you do need to pull the bolt at the bottom of the slider, which I assume you have already done. Then slide hammer them apart. Yes essentially the bushing on the end of the tube slides up and hits the bushing that's pressed in the slider which pushes the washer and the seal out with it. It sounds kind of bad I guess but that's how they come out.
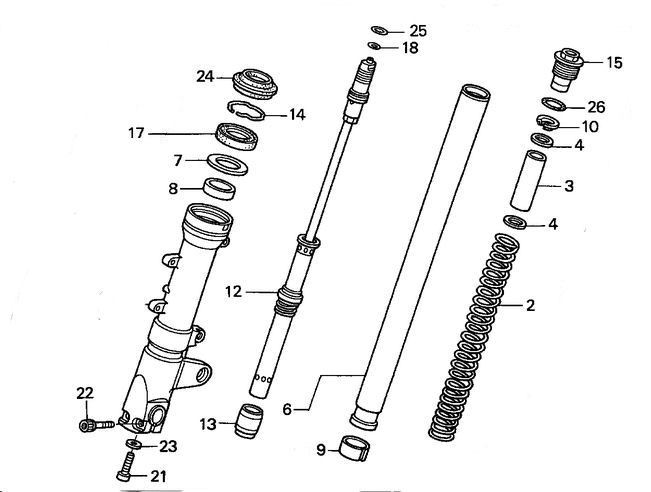
You have to remove the bottom bolt (#21)
The top cap (#15) and spring(#2)
The dust seal (#24)
The Snap ring (#14)
Then pull up and out on the stanchion, using it like a slide hammer,, the bushing (#9) that is held in a retaining grove to the stanchion (#6)will push (hammer) on the bushing (#8), washer (#7) and the oil seal (#17)
Last edited by E.Marquez; Sep 21, 2013 at 06:16 AM.
I'm working on an 05 RC51, got them apart, you need to whack them a few times, got the confirmation in the VTR 1000 SP1 - SP2 manual that said : "using quick successive motion, pull the slide pipe out of the outer tube." Guess what... that worked. Just like you pointed out GTS, the slide hammer motion worked fine! Just didn't want to whack at the forks in doubt. Kind of an important component
I was in the process of replacing my fork seals and I ran into a annoying problem, I cannot seem to get the 10mm hex bolt out from the bottom. I got it out about 1/4 of an inch but it just free spins. Anyone have any ideas?
I use my impact gun and the correct size hex socket. The impact spins it out so fast that it just comes right out.
You can also use the impact to put it back in, assuming your impact has adjustable settings (low, medium, high).
I too loosen the top caps (just a bit) when the forks legs are still clamped in the triple clamps. Saves a lot of time later.
I also agree the fork oil is measured in height - WHEN THE FORKS ARE COMPLETELY COMPRESSED AND WHEN THE SPRINGS ARE OUT. Set the level using a machinist ruler or dial caliper. The manual gives a range because you can dial in the harshness of the fork with the oil level. The more air gap at the top means the fork will feel a bit softer (because air compresses). The more you fill it with fluid, the more harsh it is (because fluid doesn't compress as easy as air).
Another way to think of it is: less fluid=less harsh. More fluid=more harsh.
Next month we can do a thread on valving shim stacks... We can cover bypass stacks, shim thickness, taper... All the good stuff.
Cool! Good information here. I want to rebuild my '07 CBR1000RR forks this winter. They already have the correct springs for my weight from the factory, I just need different or better valving than stock to match the Ohlins rear shock...right?
Nice to meet you. I'm Yamada. I am Japanese.
Therefore English may not be good.
I also want to maintain the RVT SP2 front fork. I removed the fork from the bike. I also removed the stopper ring.
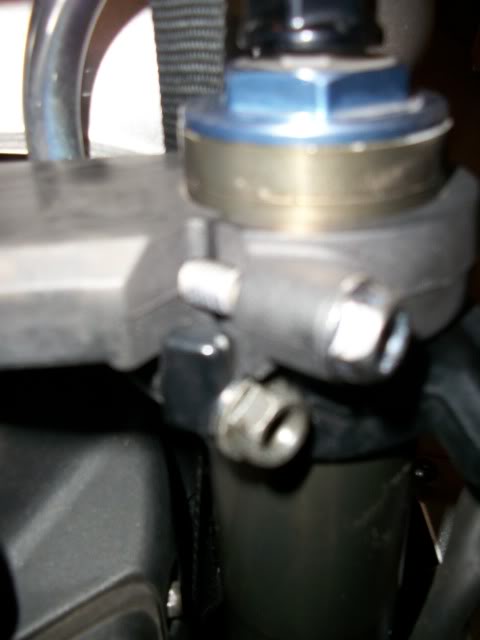
After that, I tried to remove the pre-load adjuster, but it didn't come off. I have attached a photo. I think the black part(No.2) in the photo is the pre-load adjuster, so I tried to remove it, but it didn't work.
So I have two questions. Which of the No.1 to No.4 options in the picture is a pre-load adjuster?
The second question. Which of the options No.1 to No.4 should be fixed and which should be turned clockwise or counterclockwise to remove the part?
I have experience in servicing upright fron fork.
Of the maintenance this time, I'm having trouble only removing the pre-load adjuster.
I'm sorry if there are rude parts in poor English. that's all. We look forward to your reply.
Nice to meet you. I'm Yamada. I am Japanese. Therefore English may not be good. I also want to maintain the RVT SP2 front fork. I removed the fork from the bike. I also removed the stopper ring. After that, I tried to remove the pre-load adjuster, but it didn't come off. I have attached a photo. I think the black part(No.2) in the photo is the pre-load adjuster, so I tried to remove it, but it didn't work. So I have two questions. Which of the No.1 to No.4 options in the picture is a pre-load adjuster? The second question. Which of the options No.1 to No.4 should be fixed and which should be turned clockwise or counterclockwise to remove the part?I have experience in servicing upright fron fork. Of the maintenance this time, I'm having trouble only removing the pre-load adjuster.I'm sorry if there are rude parts in poor English. that's all. We look forward to your reply.
#2 is your preload adjuster. If you want to remove the cap to service the internals, remove #3. I use a plastic bag between it and the socket to protect the anodize.


 ) so good to read as its been yeaaaars since I did this