
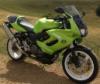
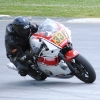
Swingarm brace install + Underslung caliper mount

Senior Member
SuperBike
Joined: Jul 2011
Posts: 1,461
From: South of Live Free or Die & North of Family Guy

I don't know about you guys but when I do mods I get impatient and just want to get it done.
In this case I found it easy to follow the tried and proven method of using the 900RR caliper bracket but I don't like the look of it.
The effort required to undersling the caliper is worth it in my opinion as it gives the bike a totally different personalised look.
Of course cost is a consideration, and as I still wanted to ride my bike I had to purchase 2 used swingarms and a caliper bracket, then weld and paint, as well as buy a hugger.
My all up cost was approx $450- Oz and then there was my time as well.
Looking forward to the finished item
God knows what all this would cost if you got a custom builder to do it!!!


Thread Starter
Administrator
MotoGP
Joined: Apr 2006
Posts: 4,402
From: Kempner, TX
If you use a cutting tool (mil, carbide burr, ect)... a good general rule of thumb is fractures 1/2 the depth of the cut happen during the cutting process. , in boring a cylinder we would solve this by taking smaller cuts at the final few passes, and then rigid hone ..to final size..
On that bracket... after you rough it out with whatever cutting tool you choose, use a sanding drum or hand sand all edges and corners smooth, rounded over, and with luck, past the depth of the micro fractures imparted to the material when cut.
Last edited by E.Marquez; Dec 30, 2013 at 07:07 PM.
Thread Starter
Administrator
MotoGP
Joined: Apr 2006
Posts: 4,402
From: Kempner, TX
I made an ebay offer on a GSX1300R caliper and bracket... If I get it..
I think I will make a press fit 25mm plug, press it in place with some Loctite 690 retaining compound..
Then make a 20mm bore off set 10mm toward the axle center line.... that will account for both the change in axle diameter, and the Busa 240mm disk size in the bracket design.
Thread Starter
Administrator
MotoGP
Joined: Apr 2006
Posts: 4,402
From: Kempner, TX
New Years Eve Update
Long past my drinking and partying days, so in the shop I go...
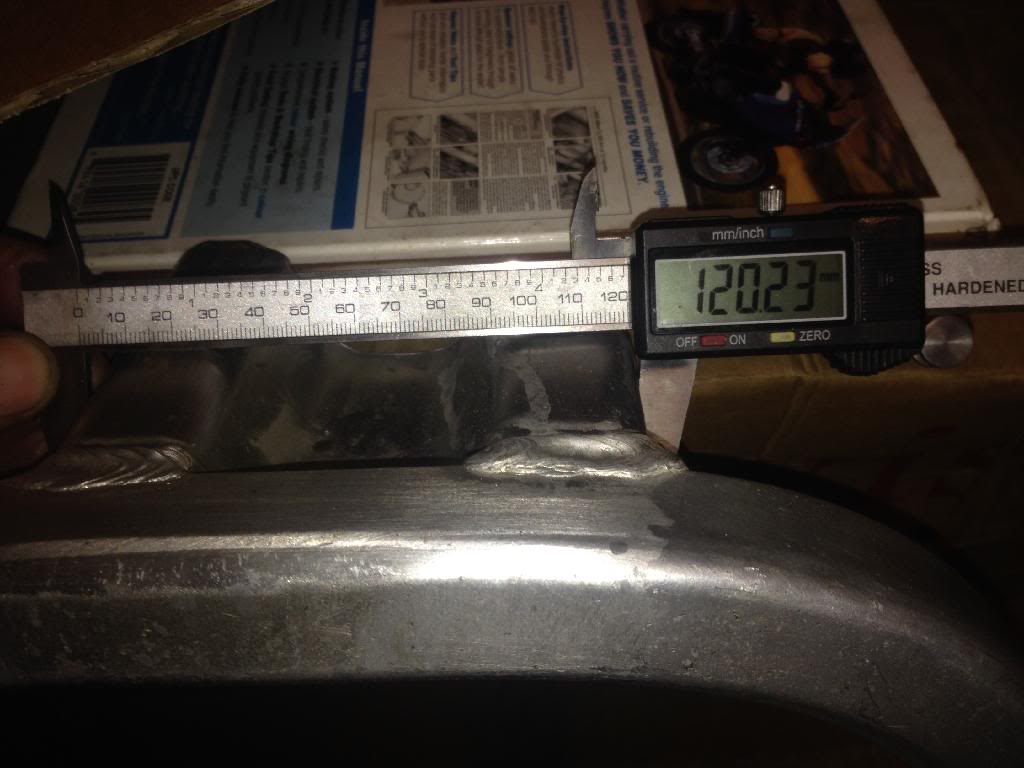
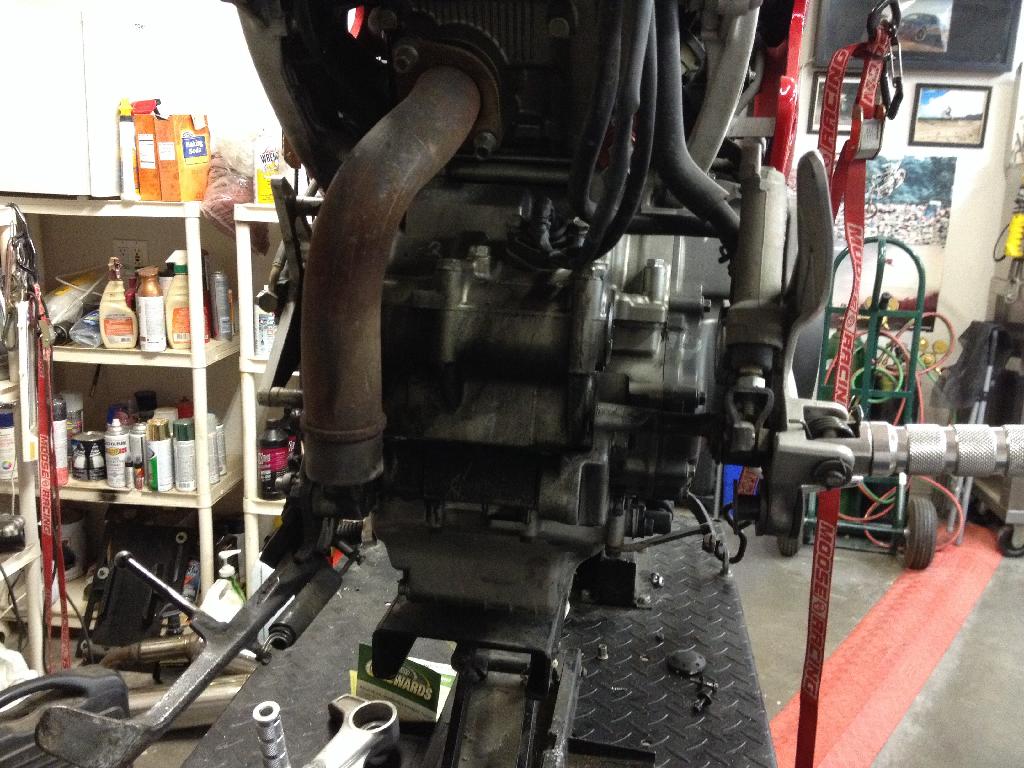
My used VTR swing arm came in today.. so removed the chain guard and chain slider, and fired up the cut off wheel and air sander.
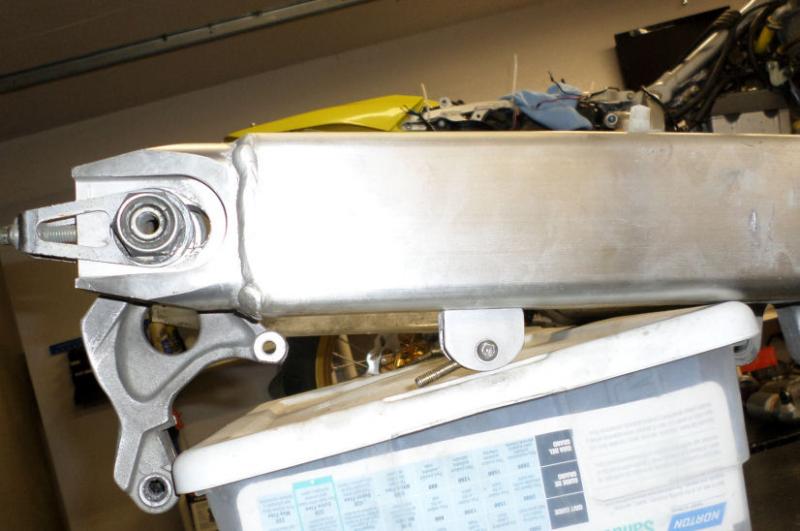
Setting the brace on the swing arm it was clear the casting point center of the top cast section had to go
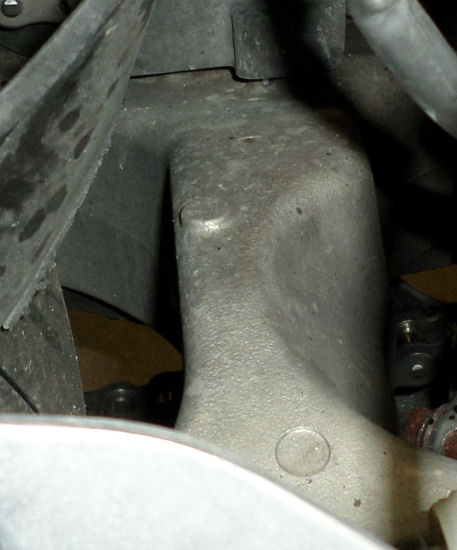

Chain guard tab and caliper mount tab removed.
Initial fitment looks way off.


My used VTR swing arm came in today..
Setting the brace on the swing arm it was clear the casting point center of the top cast section had to go
Chain guard tab and caliper mount tab removed.
Initial fitment looks way off.
Thread Starter
Administrator
MotoGP
Joined: Apr 2006
Posts: 4,402
From: Kempner, TX
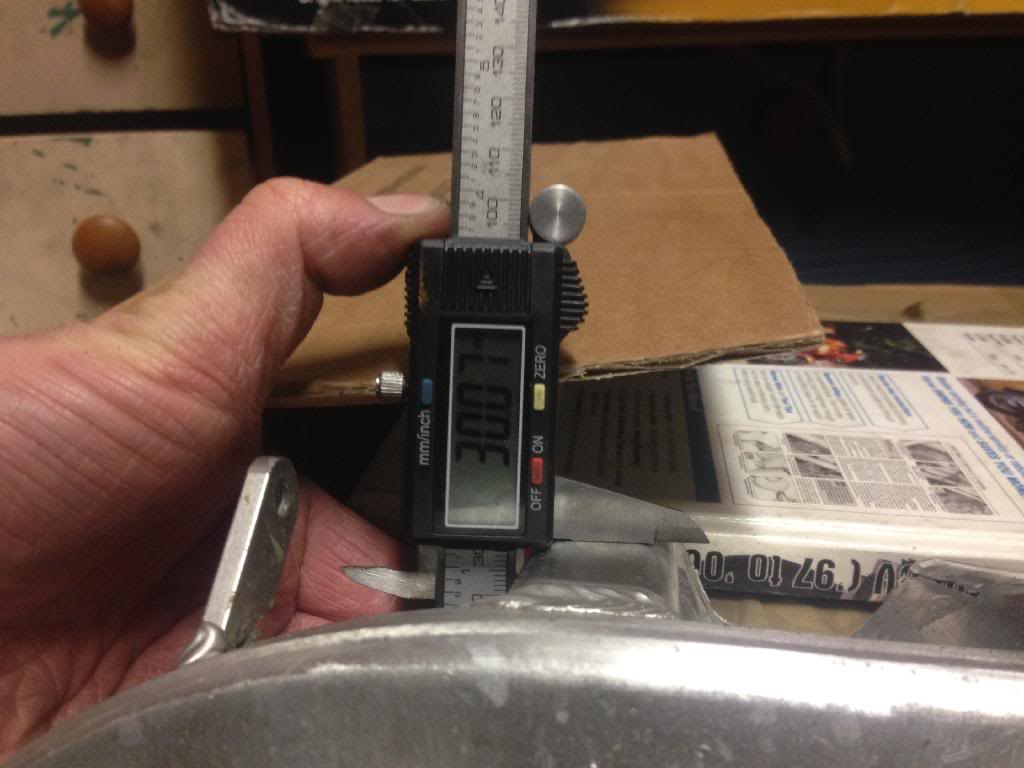
New Years Eve update continued
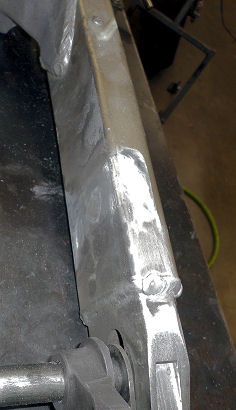
Left rear foot initial fitment
Right foot initial fitment

Initial look at where I'll weld the brake caliper strut front mount
I'll start with cleaning up the brace cut ends, removing all weld fill material down to base metal.
Then radius the front mount to fit the general shape of the swing arm...
Right foot initial fitment
Initial look at where I'll weld the brake caliper strut front mount
I'll start with cleaning up the brace cut ends, removing all weld fill material down to base metal.
Then radius the front mount to fit the general shape of the swing arm...

Senior Member
SuperBike
Joined: Mar 2012
Posts: 1,544
From: New South Wales Australia
Satin black, that's what I did, now I have an excuse to paint the fork lowers if I ever get around to it.
One thing I was concerned about with my brace was the way it sat at the back of the swingarm.
I wanted to keep the tapered look and not have to file the brace at the back too much!
I think it looks more factory if you know what I mean.
P.S my party days are over too!
I hate to admit it but I was in the sack at 9.30, mind you a couple of Jacks were consumed during the day!
Thread Starter
Administrator
MotoGP
Joined: Apr 2006
Posts: 4,402
From: Kempner, TX
Black is on the short list, as is a gun metal grey, silver, and a new color on the market.
Lots to choose from and that makes it worse for me...
I even considered Italian red to match the bike plastic.. but reality is.. I ride more then I stare at the bike, and ride lots more then I wash and primp it, so likely I'll stick with black (Gloss or satin) or a silver that replicates semi polish Aluminum
I have not decided yet if i will shape and taper the back legs to fit, and then raise and fill the front... or taper the back legs and font (slightly lower setting the brace over all).
Satin black, that's what I did, now I have an excuse to paint the fork lowers if I ever get around to it.
One thing I was concerned about with my brace was the way it sat at the back of the swingarm.
I wanted to keep the tapered look and not have to file the brace at the back too much!
I think it looks more factory if you know what I mean.
P.S my party days are over too!
I hate to admit it but I was in the sack at 9.30, mind you a couple of Jacks were consumed during the day!
One thing I was concerned about with my brace was the way it sat at the back of the swingarm.
I wanted to keep the tapered look and not have to file the brace at the back too much!
I think it looks more factory if you know what I mean.
P.S my party days are over too!
I hate to admit it but I was in the sack at 9.30, mind you a couple of Jacks were consumed during the day!
Thread Starter
Administrator
MotoGP
Joined: Apr 2006
Posts: 4,402
From: Kempner, TX
Spent some time today building a simple jig.

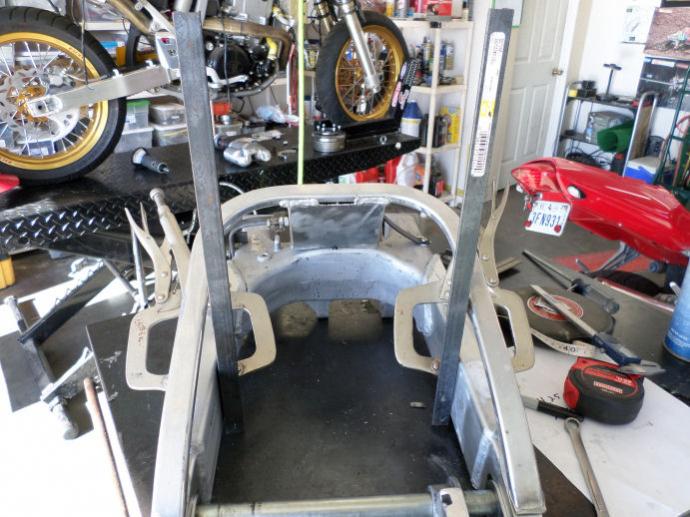
As I was shaping the brace to fit, was having a hard time returning it to the same location on the swing arm to check fit.
an hour making a jig saved frustrating and time over all.
As I was shaping the brace to fit, was having a hard time returning it to the same location on the swing arm to check fit.
an hour making a jig saved frustrating and time over all.
Senior Member
SuperBike
Joined: Mar 2012
Posts: 1,544
From: New South Wales Australia
Looking good, won't be long now.
You are going to weld it yourself?
I had a mate do mine while I watched and then if it was not positioned right it was my fault.
You have a nice man cave, wish I had half the stuff you have.
You are going to weld it yourself?
I had a mate do mine while I watched and then if it was not positioned right it was my fault.
You have a nice man cave, wish I had half the stuff you have.
Thread Starter
Administrator
MotoGP
Joined: Apr 2006
Posts: 4,402
From: Kempner, TX
I can Stick, Mig and Tig all manner of steel.... But when it comes to Aluminum, at best I can make it stick together.
Have a friend that will Tig this for me... I rebuilt some forks and a shock for him a few months ago... He is going to hook me up on the welding.
Have a friend that will Tig this for me... I rebuilt some forks and a shock for him a few months ago... He is going to hook me up on the welding.
Thread Starter
Administrator
MotoGP
Joined: Apr 2006
Posts: 4,402
From: Kempner, TX
Spool Mounts
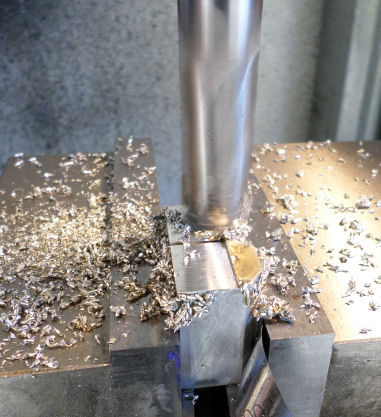
Started fitting the brace, but it was getting tiresome,, so I whittled some spool mounts as a distraction.
Rough shaping done, holes bored for the thread to be made.
Will be installing M8x1.25 Stainless steel thread coils.

All taped for thread inserts

Thread inserts installed and locked in place with Locktite #680 retaining compound

Trimming down to final length and facing the back side
All done... when welded in place, the outside face will be just inboard of the swingarm. I'll make the spools tomorrow .

Rough shaping done, holes bored for the thread to be made.
Will be installing M8x1.25 Stainless steel thread coils.
All taped for thread inserts
Thread inserts installed and locked in place with Locktite #680 retaining compound
Trimming down to final length and facing the back side
All done... when welded in place, the outside face will be just inboard of the swingarm. I'll make the spools tomorrow .
Thread Starter
Administrator
MotoGP
Joined: Apr 2006
Posts: 4,402
From: Kempner, TX
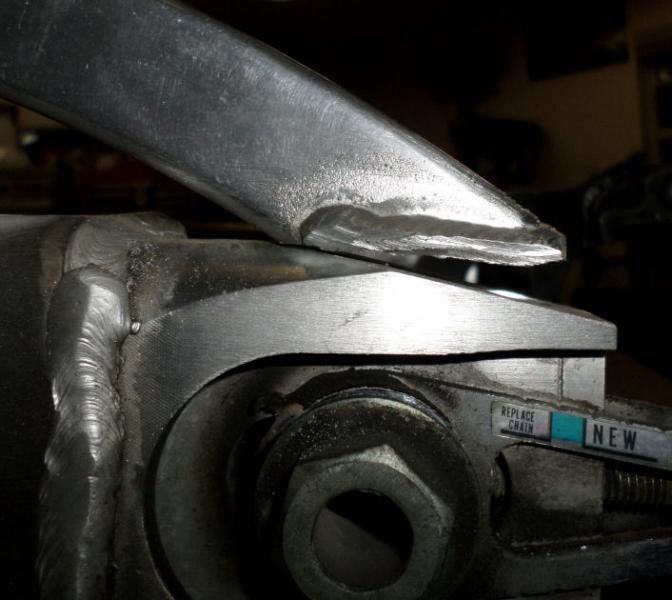
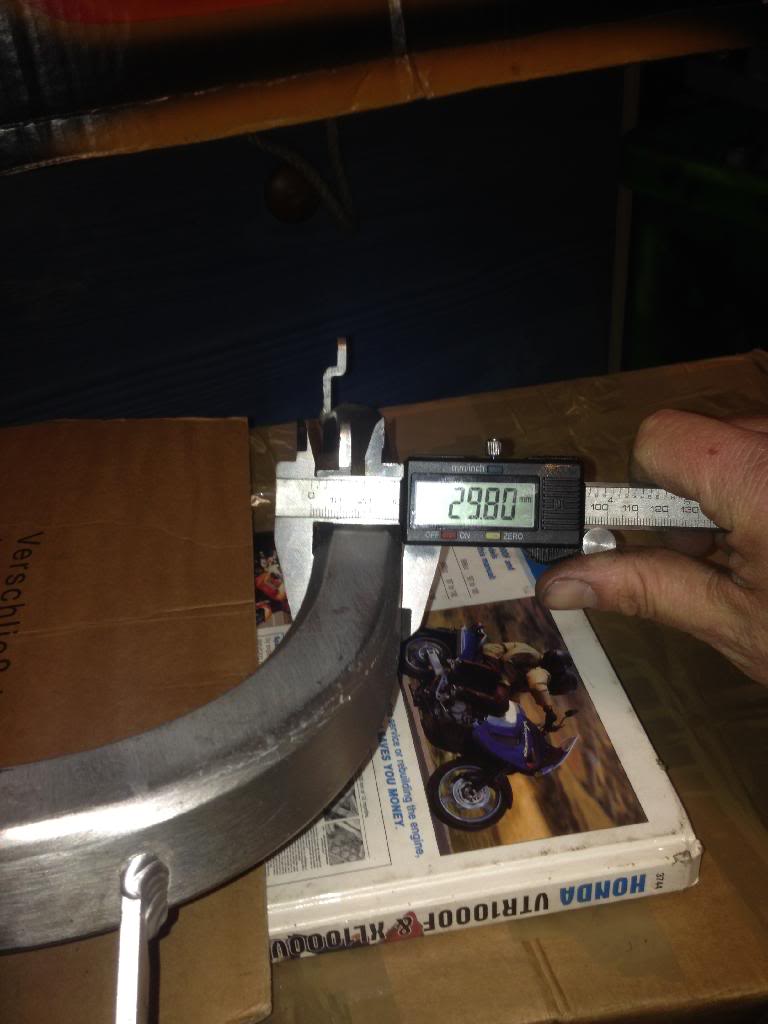
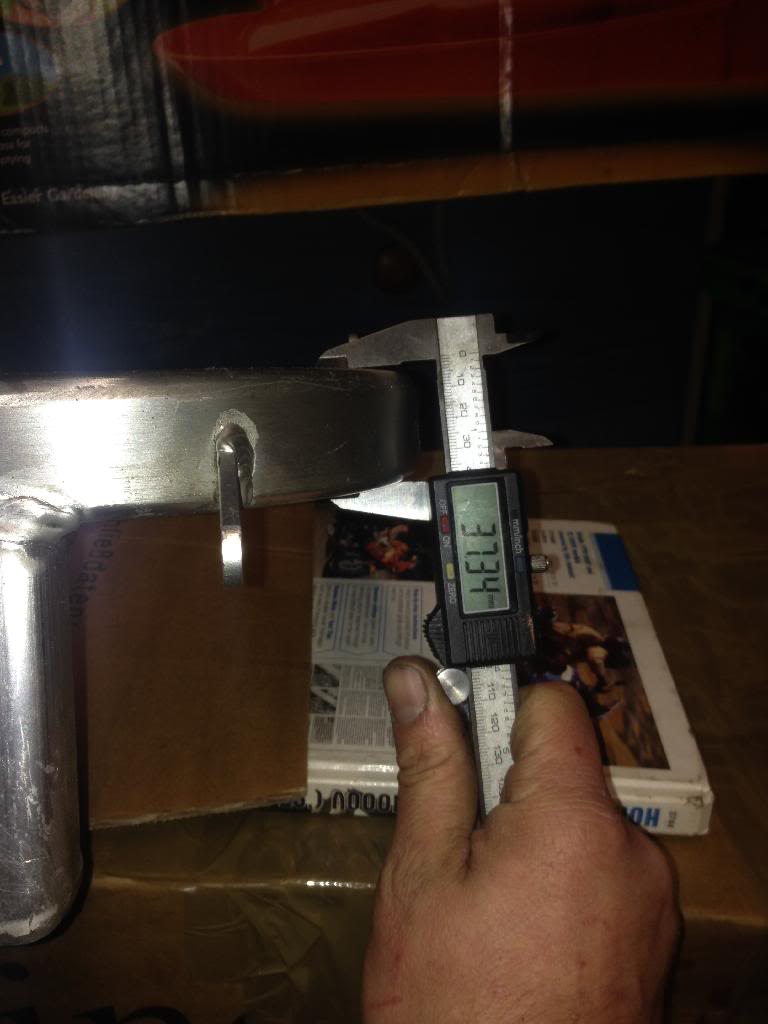
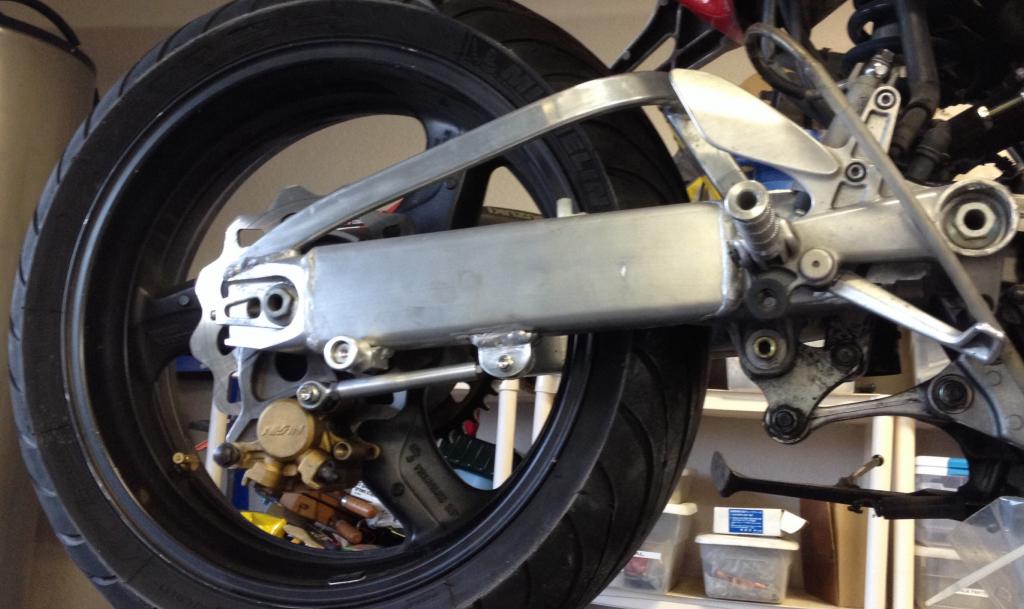
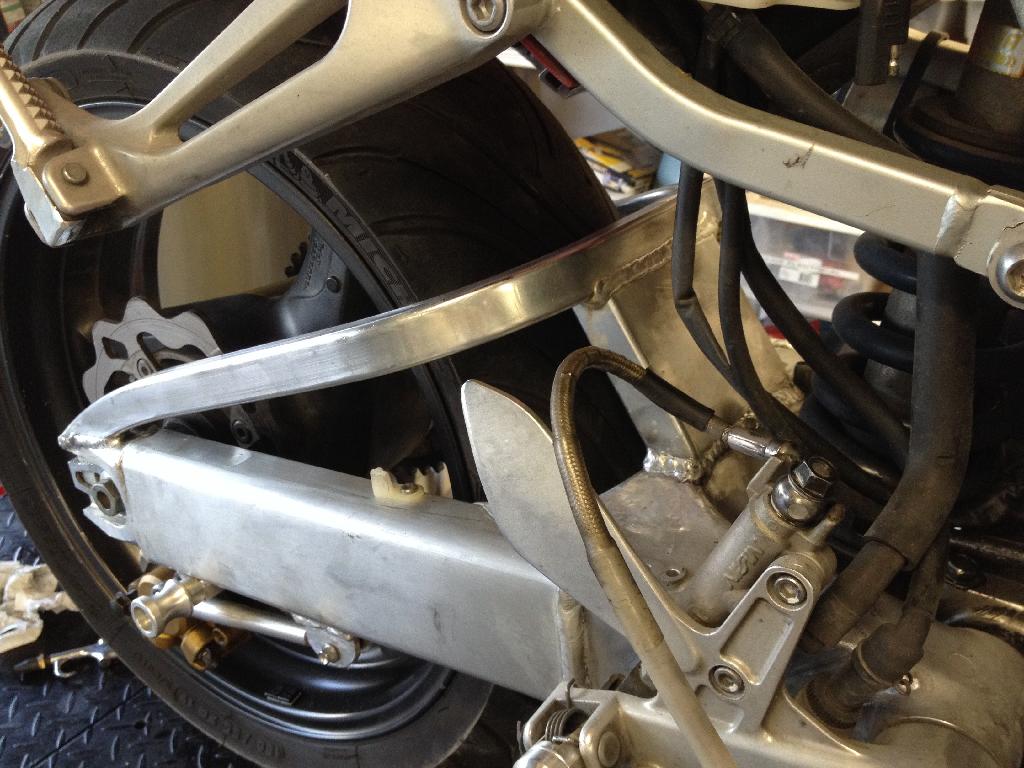
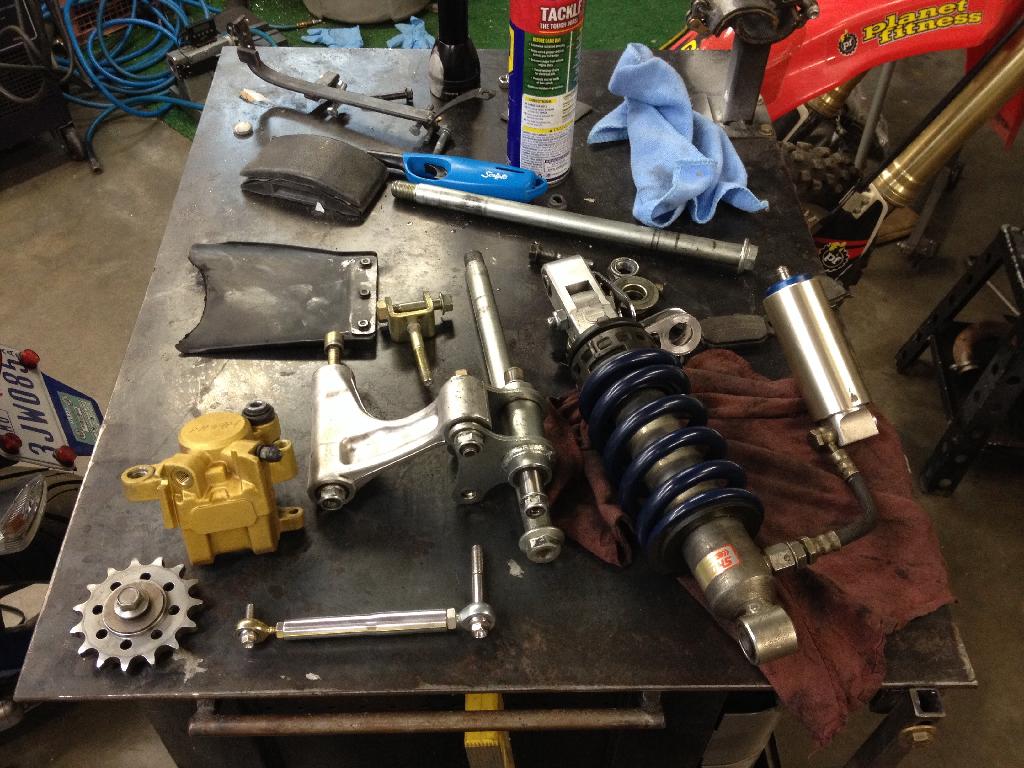
Finished the caliper strut today.
7075 Aluminum bar .750 dia.
Cut and finished to 100mm long
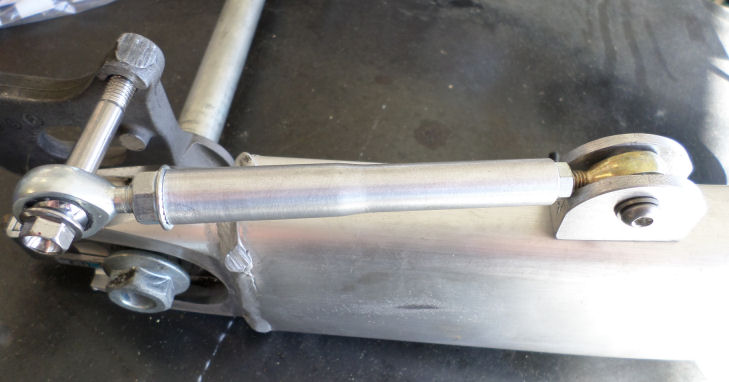
Turned to 15mm on one end tapered to 13mm about mid way to the other end.
15mm end drilled and taped for a M8x1.25 Stainless steel coil thread insert.
13mm end drilled and taped for a M6x1.0 Stainless steel coil thread insert.
8mm three piece high strength rodend on one side that the caliper mount bolt will pass though.
6mm three piece high strength rodend on the other side that will be held in a clevis mount welded to the swing arm.

Need to go pick up a box of M8x1.25 SS nuts as all I had on hand were zinc flange nuts.. But other than that Im about ready to weld it all up.
7075 Aluminum bar .750 dia.
Cut and finished to 100mm long
Turned to 15mm on one end tapered to 13mm about mid way to the other end.
15mm end drilled and taped for a M8x1.25 Stainless steel coil thread insert.
13mm end drilled and taped for a M6x1.0 Stainless steel coil thread insert.
8mm three piece high strength rodend on one side that the caliper mount bolt will pass though.
6mm three piece high strength rodend on the other side that will be held in a clevis mount welded to the swing arm.
Need to go pick up a box of M8x1.25 SS nuts as all I had on hand were zinc flange nuts.. But other than that Im about ready to weld it all up.
Senior Member
SuperBike
Joined: Mar 2012
Posts: 1,544
From: New South Wales Australia
Mate that looks grouse(Cool)
Can't wait to see it finished.
I think the under arm caliper will look the goods.
I will be curious how good your rear brake is when all is done.
Mine is ****! Never was any good.
Lucky I don't use the back brake much, usually only when I alter line at high speed through corners.
Will be curious about your thoughts when the job is done.
Thread Starter
Administrator
MotoGP
Joined: Apr 2006
Posts: 4,402
From: Kempner, TX
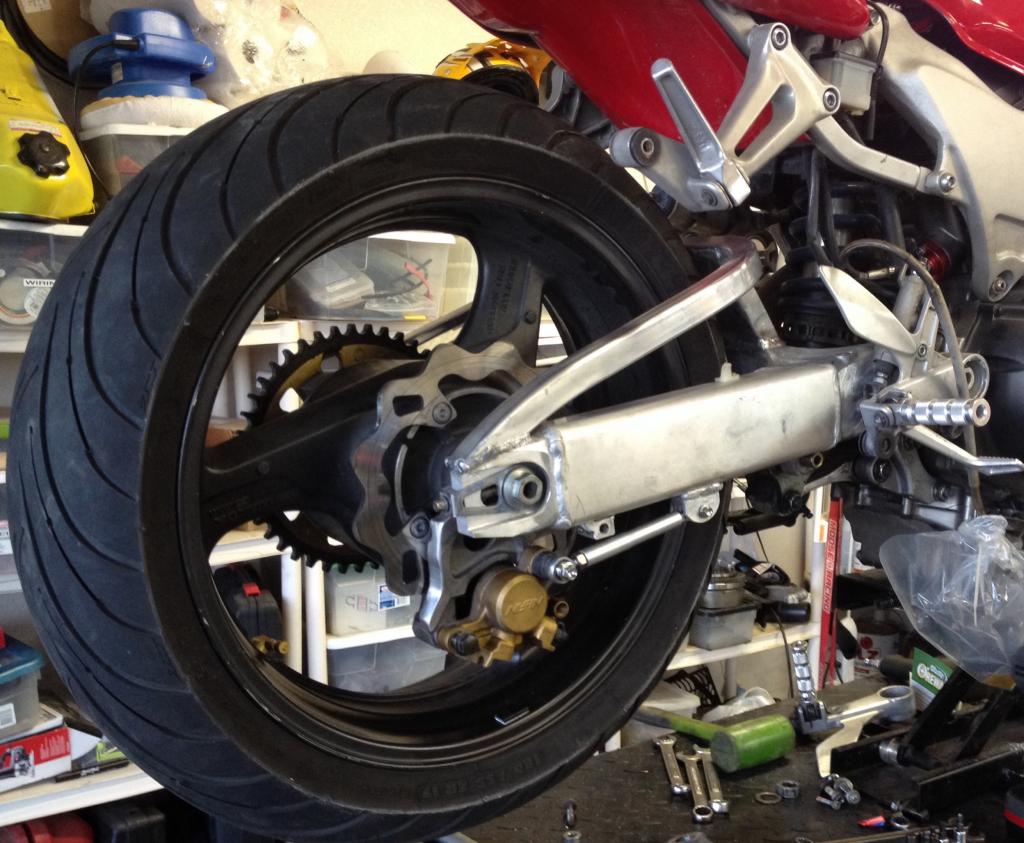
Old swing arm off
New one on,,, and brace test fit

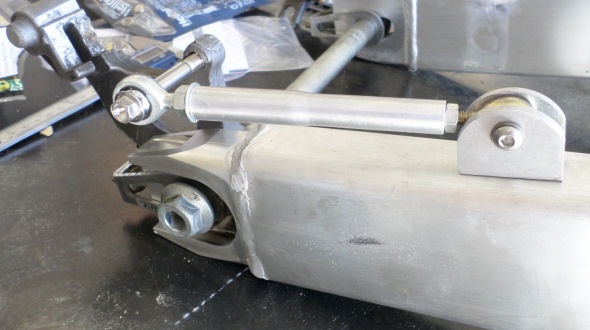
Test fit caliper strut location, and the placement of the lift mount.
Had to mil some off the lift mounts for better clearance, but still plenty of material left for a strong bond.
Looking at it from a partial rear view

Looking ok, may do some more fitting of the brace today so there is less gap to fill.
Then it all gets welded up tomorrow
New one on,,, and brace test fit
Test fit caliper strut location, and the placement of the lift mount.
Had to mil some off the lift mounts for better clearance, but still plenty of material left for a strong bond.
Looking at it from a partial rear view
Looking ok, may do some more fitting of the brace today so there is less gap to fill.
Then it all gets welded up tomorrow
Last edited by E.Marquez; Jan 18, 2014 at 09:58 AM.

Thread Starter
Administrator
MotoGP
Joined: Apr 2006
Posts: 4,402
From: Kempner, TX
You of course cut off and fit the brace to the VTR swing arm..
You cut off and discard the VTR swing arm caliper mount (the slider on the swing arm)
You cut off the 900rr swing arm caliper mount (the slider on the swing arm) and weld it in place using the 900RR caliper bracket and mounted wheel as a placement guide.
Senior Member
SuperBike
Joined: Mar 2012
Posts: 1,544
From: New South Wales Australia
Just like I thought, the underslung caliper looks great!
I don't like the 900 RR caliper bracket, it is ugly.
Wait till you feel the difference with the brace, like me you are sure to be surprised how much of a difference it makes.
I don't like the 900 RR caliper bracket, it is ugly.
Wait till you feel the difference with the brace, like me you are sure to be surprised how much of a difference it makes.
Thread Starter
Administrator
MotoGP
Joined: Apr 2006
Posts: 4,402
From: Kempner, TX
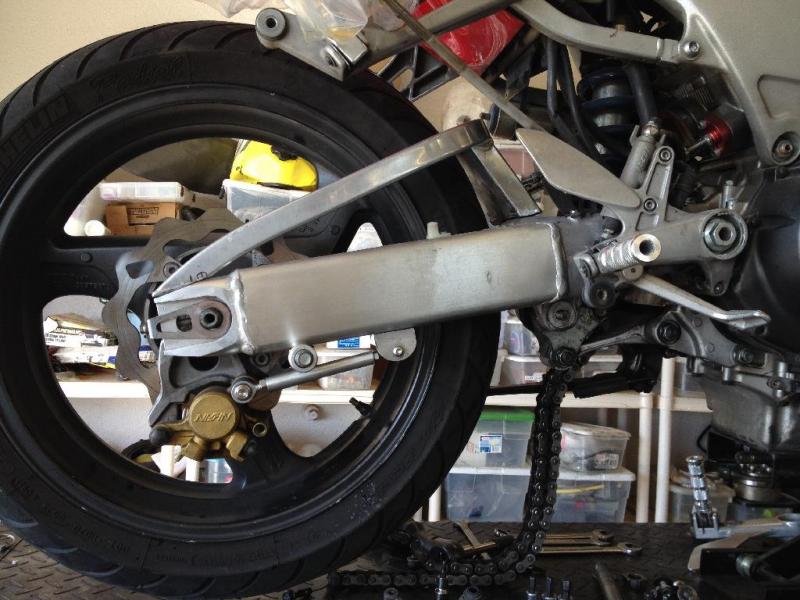
Back from welding at a friends house...
Got to say it's good to have friends... :thumbup:
Just had to mount it up and see how it looked
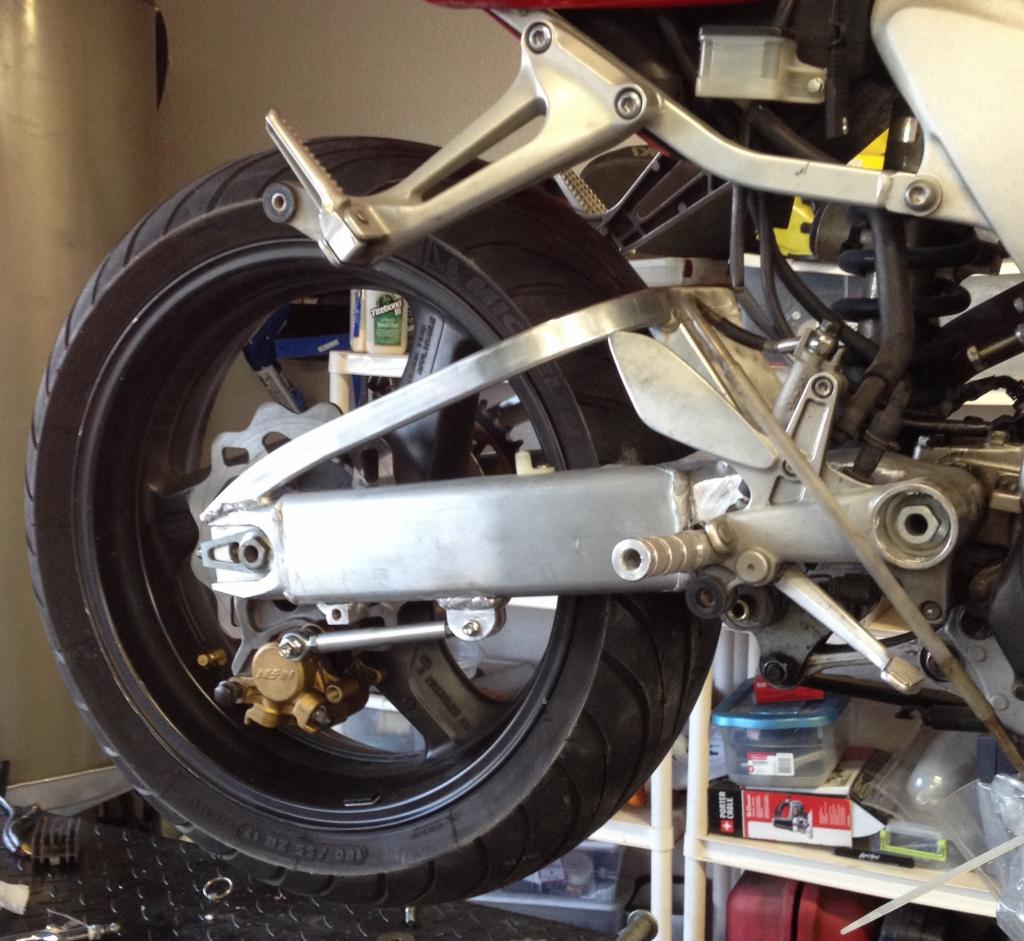
You'll have to excuse the dirt and grime.. Have not even started cleaning up that area of the bike yet. Came home and did some sanding on the swingarm.. then tossed it on to have a look....
Not bad.... now to decide on a powder coat color,,, silver... gloss black,,, satin black... gunmetal....textured black....
That and need to order a longer brake line....... no way the stock Stainless Steel braided one will fit.... On the bright side,,,, in a few days there will be a OEM swing arm for sale in the classifieds.
Got to say it's good to have friends... :thumbup:
Just had to mount it up and see how it looked


You'll have to excuse the dirt and grime.. Have not even started cleaning up that area of the bike yet. Came home and did some sanding on the swingarm.. then tossed it on to have a look....
Not bad.... now to decide on a powder coat color,,, silver... gloss black,,, satin black... gunmetal....textured black....
That and need to order a longer brake line....... no way the stock Stainless Steel braided one will fit.... On the bright side,,,, in a few days there will be a OEM swing arm for sale in the classifieds.
Last edited by E.Marquez; Jan 20, 2014 at 10:07 AM.

Thread Starter
Administrator
MotoGP
Joined: Apr 2006
Posts: 4,402
From: Kempner, TX
New Brake line ordered from CORE MOTO Custom and Aftermarket Sport Bike Parts and Accessories – Coremoto
Pleasure to work with these folks.. truly custom options for the same prices there standard lines are going for.
Pleasure to work with these folks.. truly custom options for the same prices there standard lines are going for.
Senior Member
SuperSport
Joined: Jun 2010
Posts: 636
From: Baltimore, Maryland
Eric, very nice work all around.
I'm curious, why have you used the thread inserts on things?(spool mounts, caliper mount brace) Stronger connection? To prevent steel bolts from seizing in the aluminum?
I'm curious, why have you used the thread inserts on things?(spool mounts, caliper mount brace) Stronger connection? To prevent steel bolts from seizing in the aluminum?
Thread Starter
Administrator
MotoGP
Joined: Apr 2006
Posts: 4,402
From: Kempner, TX
Yes and Yes
I use thread inserts in AL anytime I see the need to remove and replace the threaded fastener more then a few times.
When I don't want a steel fastener in direct contact with AL.
Repair worn threads in an AL part
Thread Starter
Administrator
MotoGP
Joined: Apr 2006
Posts: 4,402
From: Kempner, TX
Swingarm and caliper bracket off to powder coating.. Satin Black was the chosen color. Should be back on Sat.
Polished the strut

Now it's time to clean up the bike and parts..
Nasty few months of road grime and chain lube.
Starting to get better
Polished the strut

Now it's time to clean up the bike and parts..
Nasty few months of road grime and chain lube.

Starting to get better


