
New "SUBTLE" mods...Happy, Happy, Joy, Joy


Thread Starter
Member
Squid
Joined: Aug 2013
Posts: 40

New "SUBTLE" mods...Happy, Happy, Joy, Joy
Hey whats up guys, I recently did 3 new subtle mods to my 03 VTR and wouldn't ya know it, its been raining every since the mods here in So Cal. This is after much reviewing this forum and its members opinions. THANKS GUYS.
Anyways, here is what I've done recently:
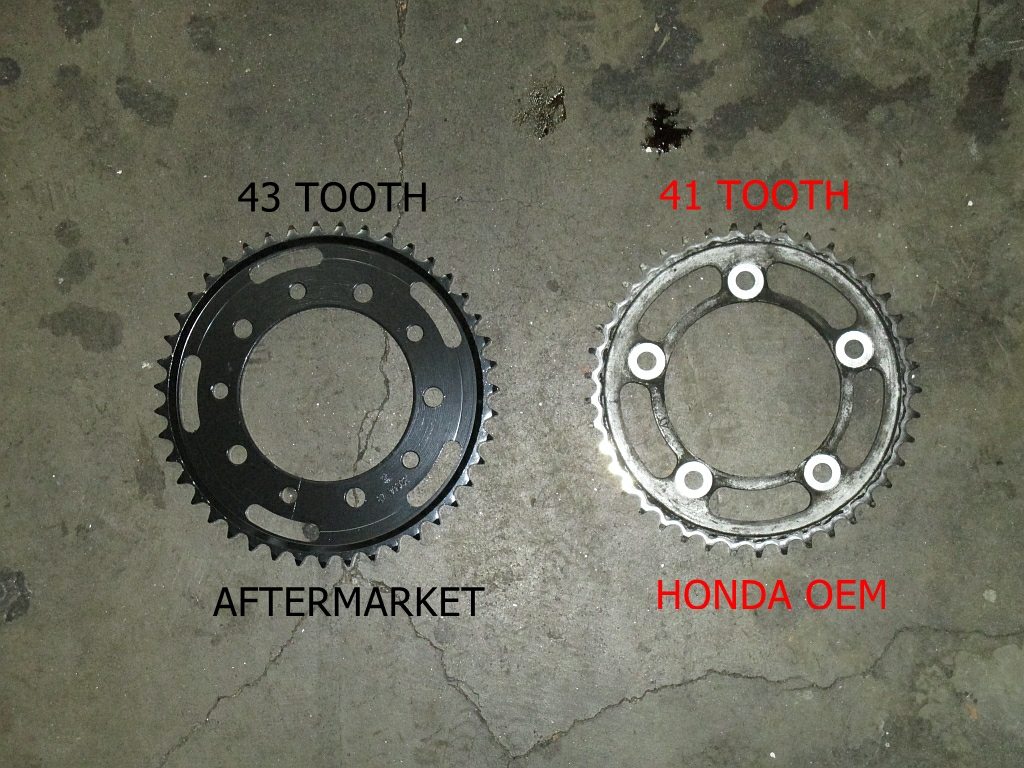
1: I wanted to change my gearing to see if it suits my riding in the local canyons. Now, I didn't want to get all crazy with this as I still drive it to work on the weekends (Saturdays are my Fridays) in which I take the freeway. After much reading, it was between the 15/43 set up and the 16/43 set up. Or -1, +2 vs the 0, +2 (front to rear). So I choose to go the cheaper route and get a 43 tooth Rear Steel Sprocket as a start. While I have not taken it to the canyons yet due to constant raining, I have riden it up and down the streets and I can definitely tell a difference in pick up. Especially in 1st gear. The bike doesn't LAG in 1st like with the OEM gearing. It takes off much smoother for sure. And the installation of the sprocket definitely brings the rear wheel forward that shortens the wheelbase for sure.
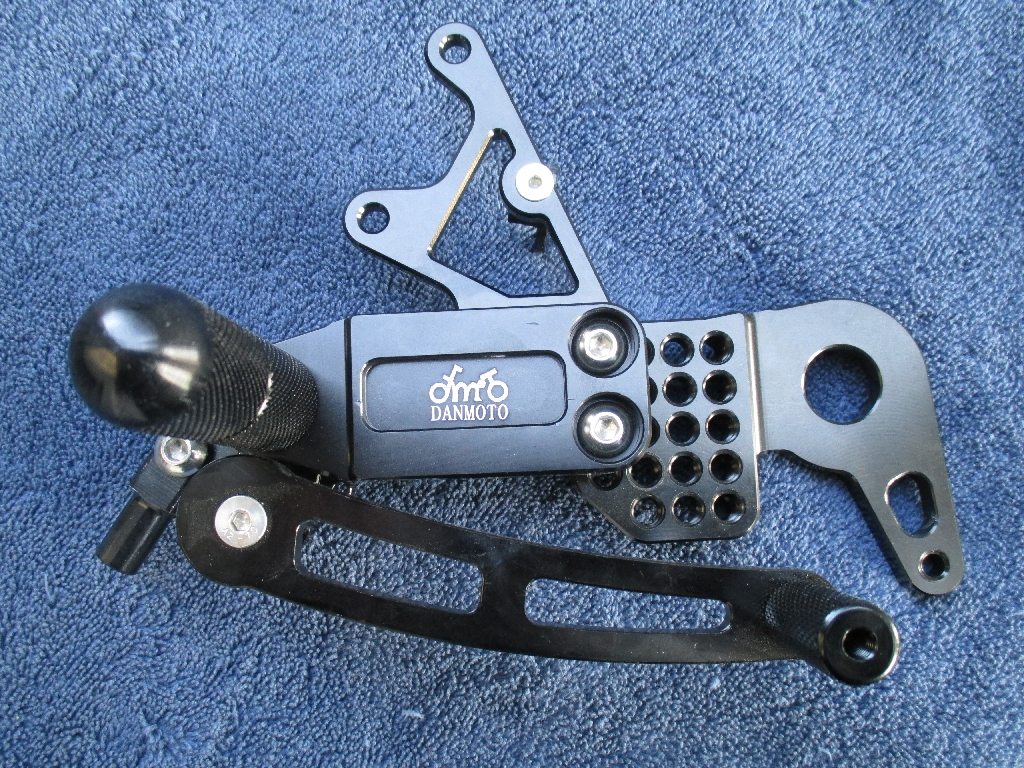
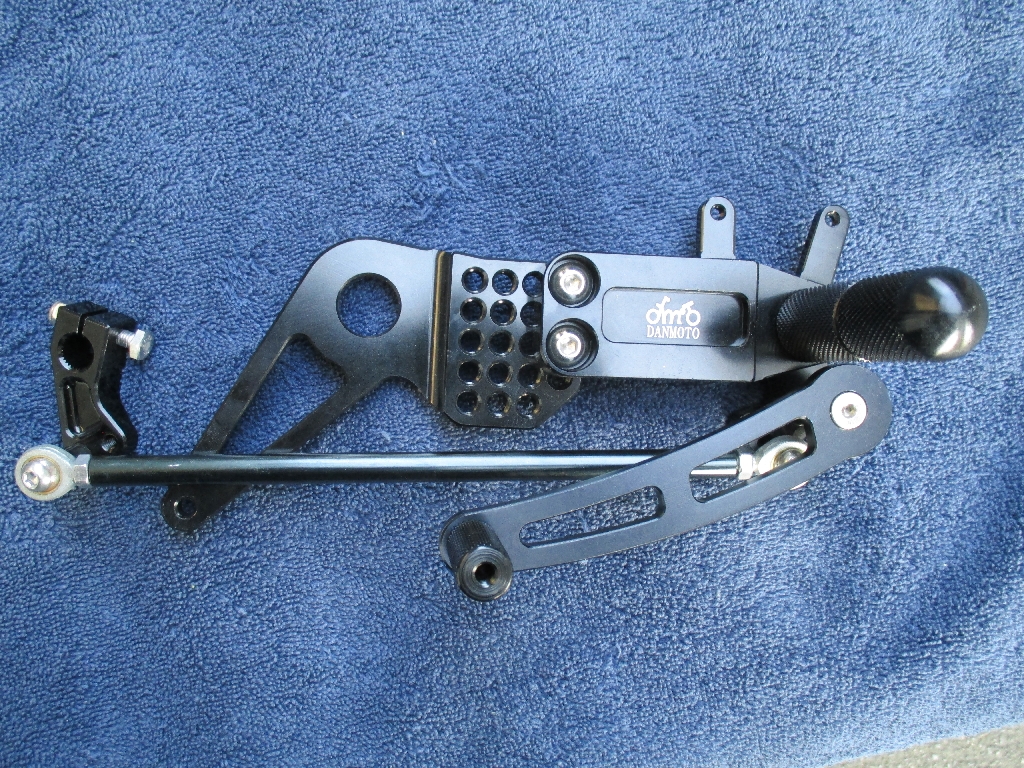
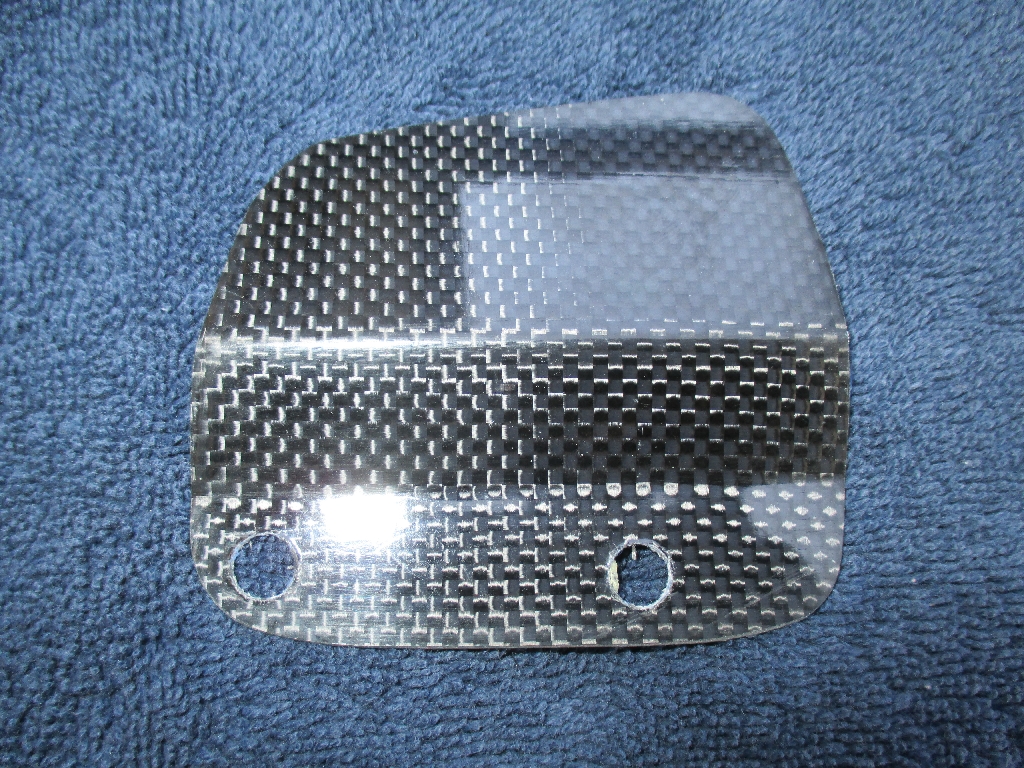
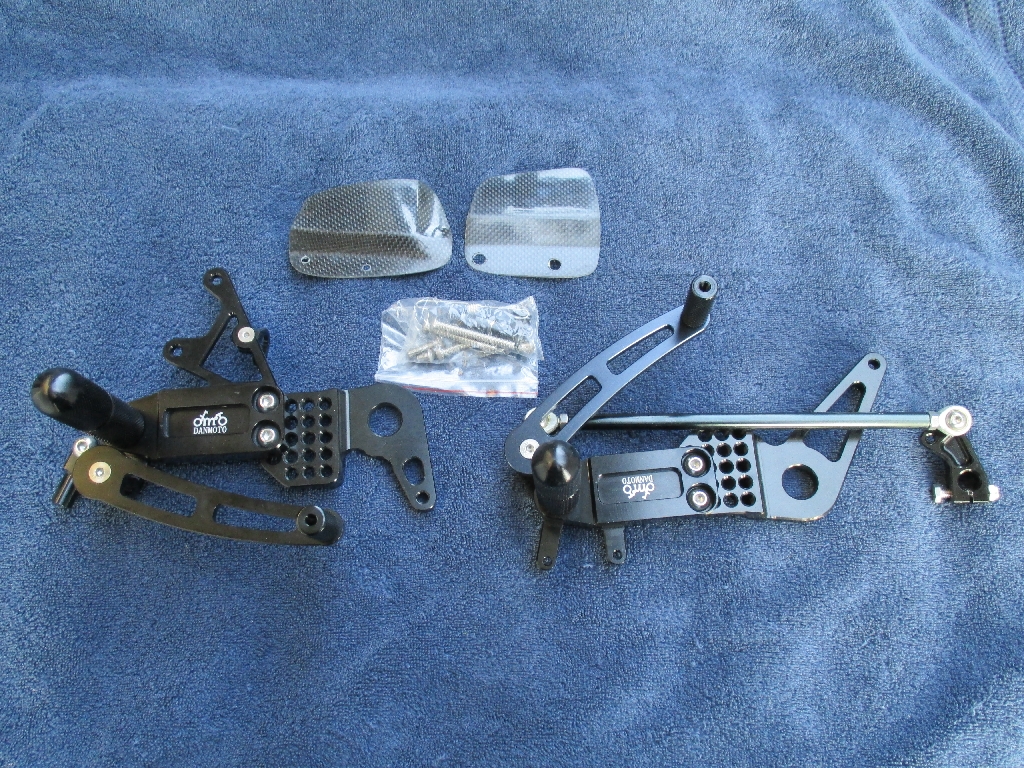
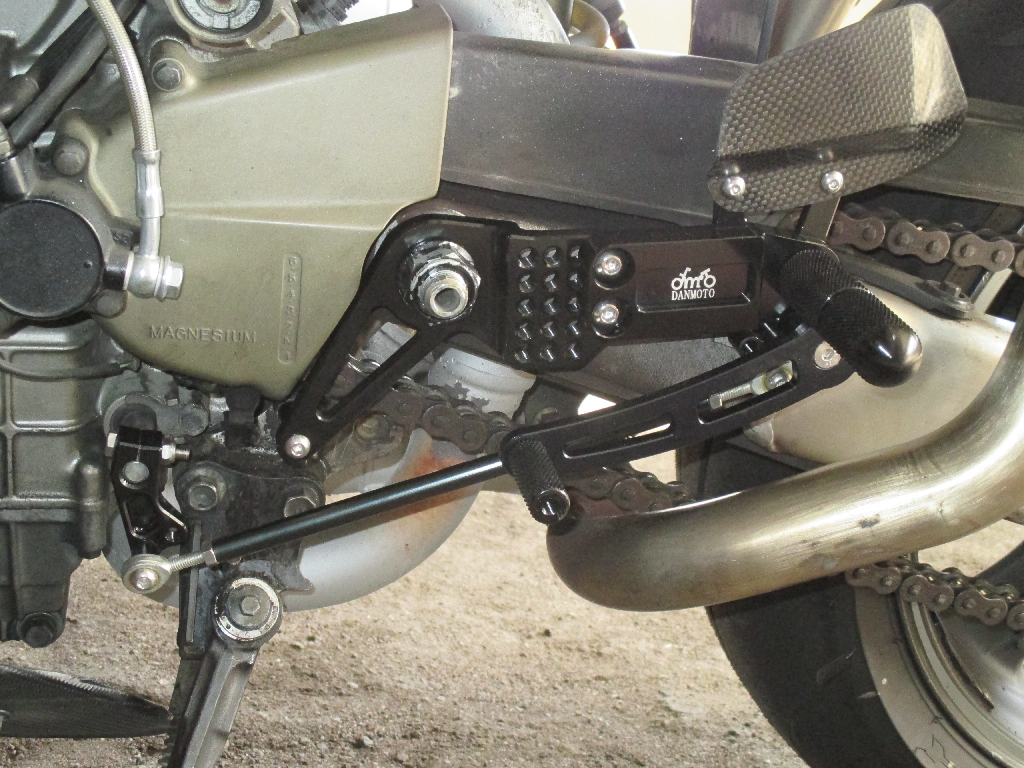
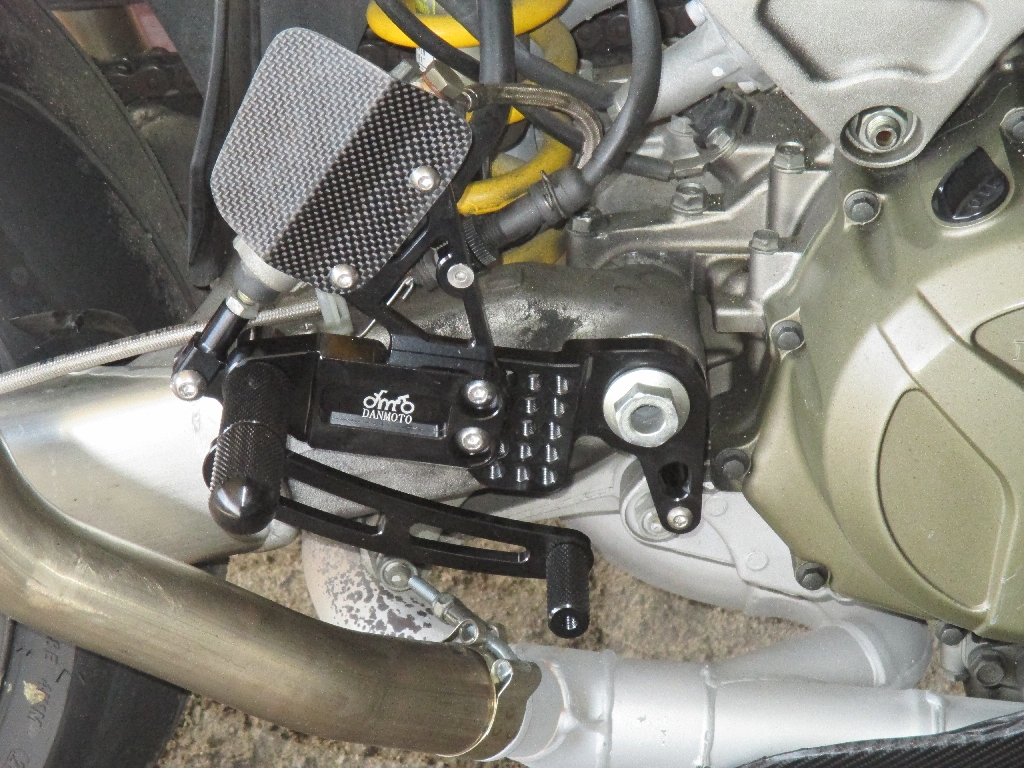
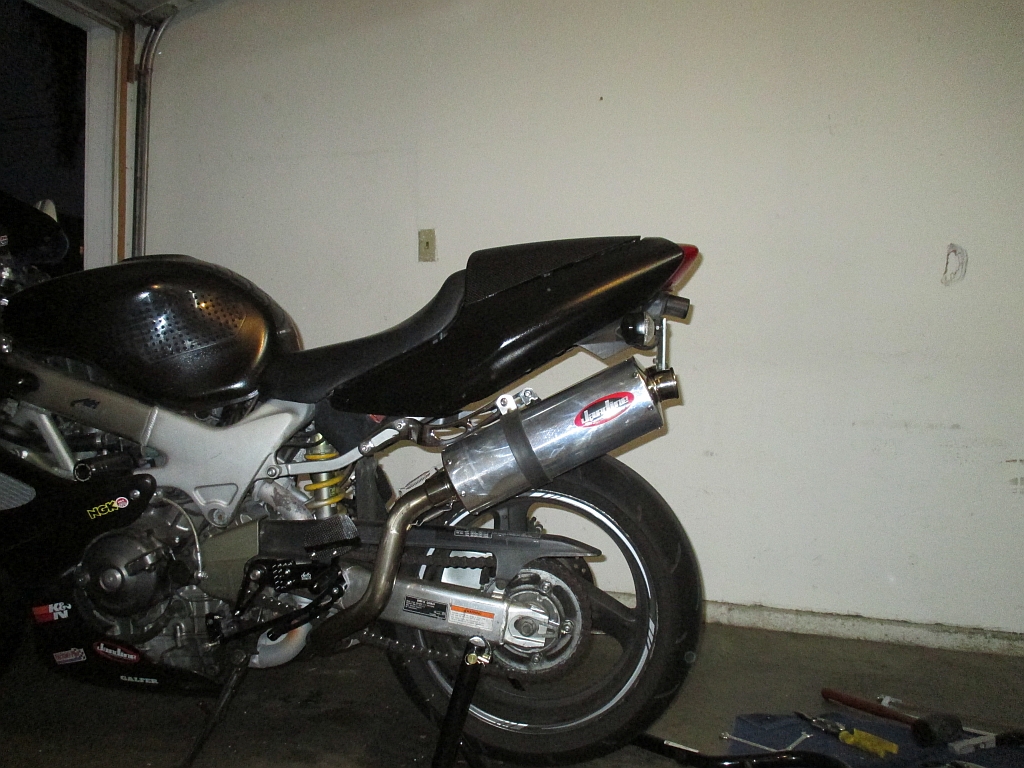
2. I bought and installed a DANMOTO rearset. I really like these especially for the money. After doing some research on the net and here, I found the COERCE ones on Ebay for about 400+ bucks. I was set to buy them then all of a sudden on the next day of viewing the web, up pops the DanMoto rear sets for 200 bucks. That's less than half than the Coerce ones. Don't know how the DM's compare to any other set as this is the 1st time ive owned anything DanMoto. But with limited time riding them, i'm in love so far. I CAN SAY THIS THOUGH....THEY ARE A MUCH IMPROVED SET OVER THE OEM ONES......LOL. These are adjustable by about .40" in every direction (up, down, forward and backwards). The black anodizing is very nice and its a deep black. My paint job is black also so it goes well with the look of the bike. For the price, they also provide a set of "REAL" carbon fiber heal guards. They are fully adjustable.
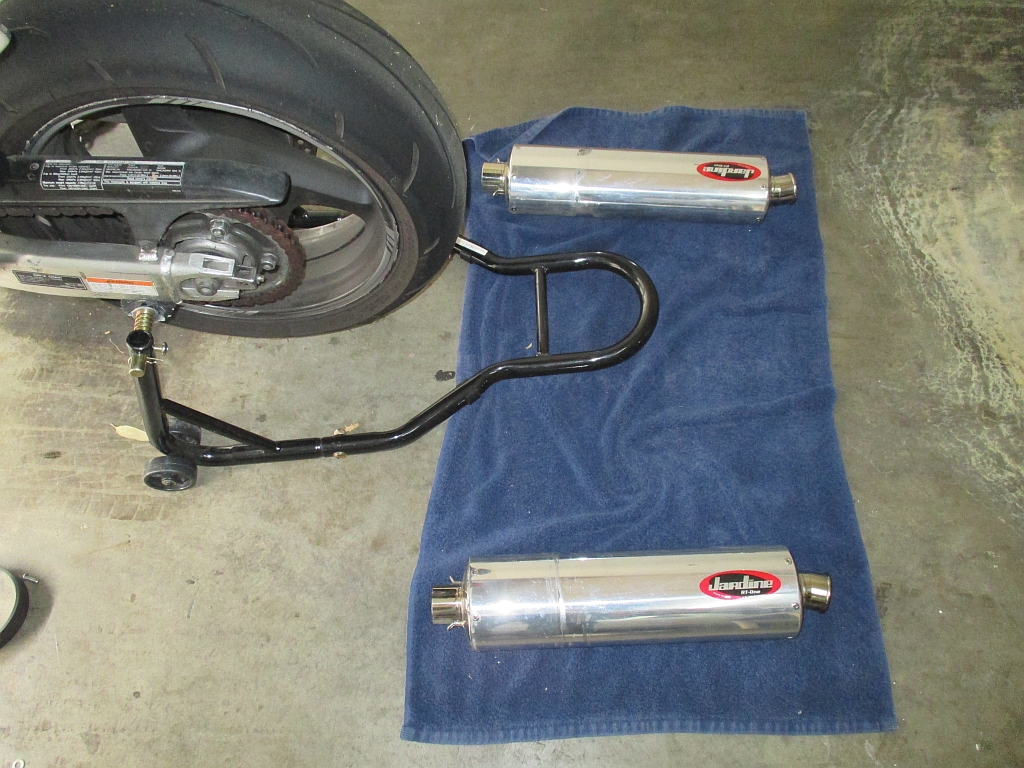
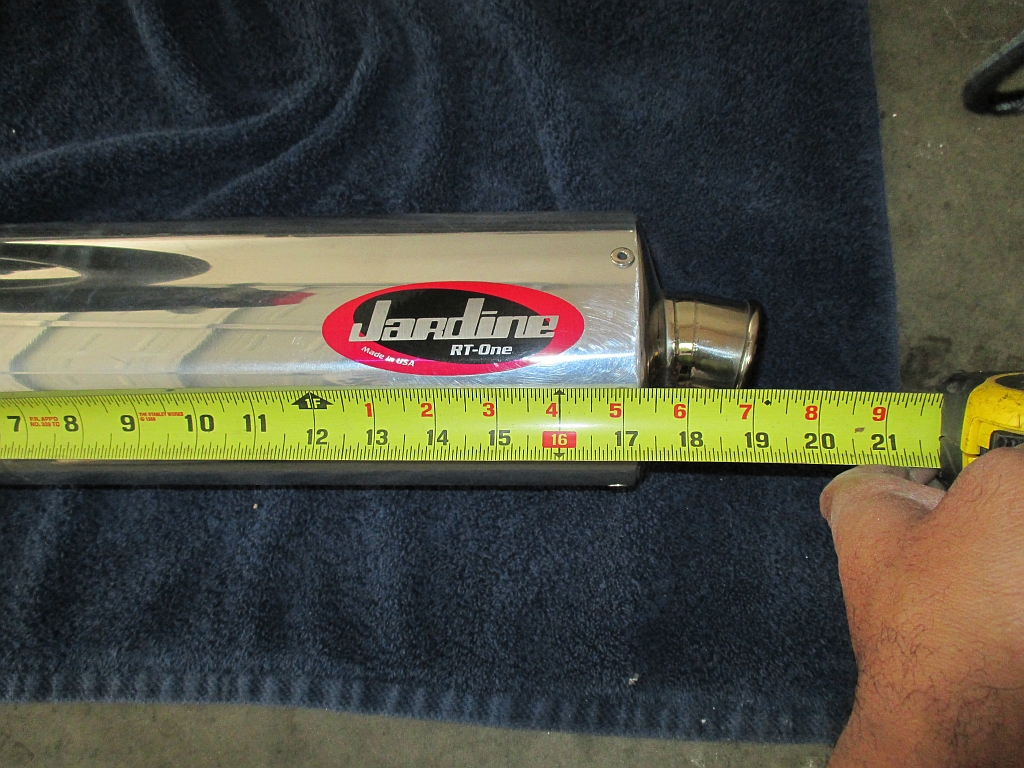
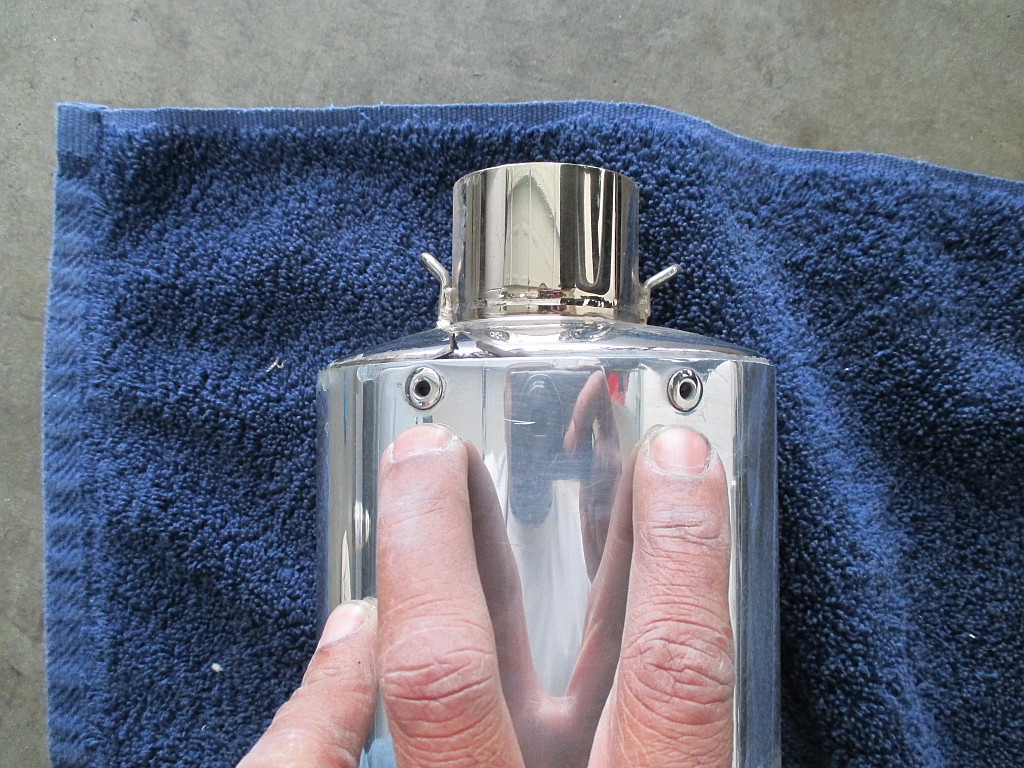
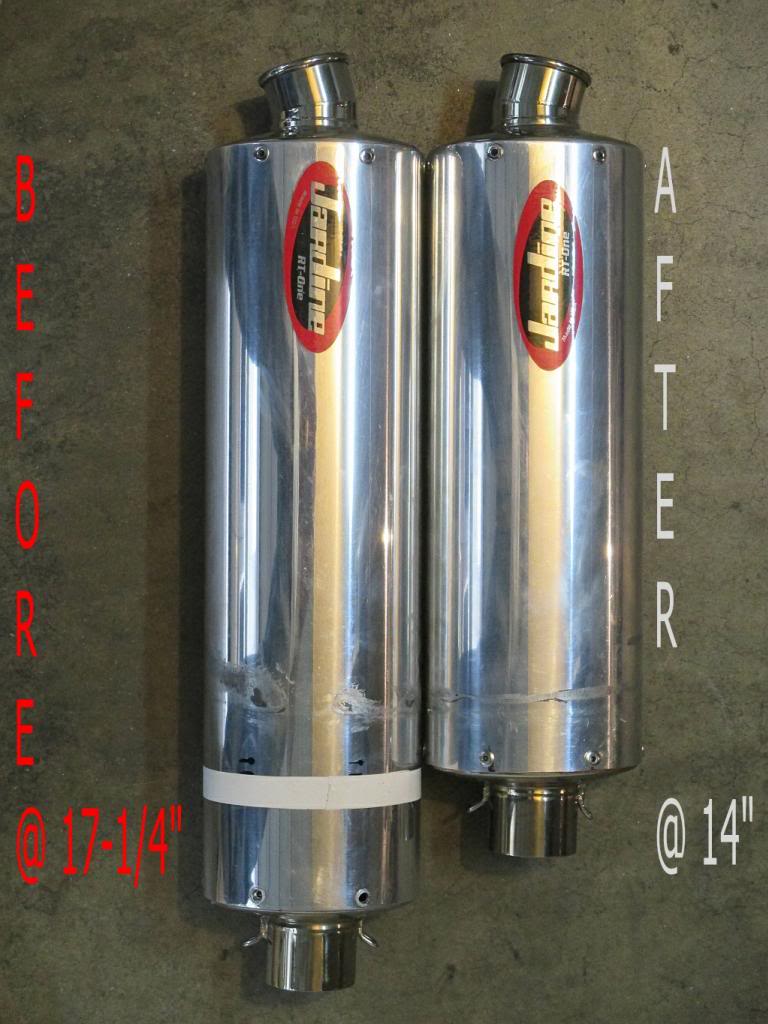
3. The last thing I recently did was to shorten my Jardine Exhaust cans just because. Well, just to see if it might make them a tad bit louder. This is a better solution that spending ANOTHER 600-1000 dollars on another set of cans in which I would be taking a chance anyways. The stock length of just the can itself is roughly 17-1/4" long. I cut the cans down by 3" for and OAL of 14" (just the can itself and not TIP to TIP). 3" was just a number I came up with after premeasuring and thinking out loud for at least 2 days.....lol! I just "GUESSED" that 3" should at least give me a sound change and not be enough to cause any real performance deficiencies (I hope). And yes, I can tell you that once I broke out the Dremel and the Hacksaw, my heart started jumping through my chest. But hey, i'm not really the girlie type so a measuring and a cutting I went. I measured everything twice, then wrapped the circumference of the cans with electrical tape then measured from the tip of the can to the start of the tape all the way around just to make sure I didn't make ugly cuts. I used a hacksaw to SCORE the circumference of the cans ahead of the tape and I used the Dremel with cutoff wheels to cut down through the scoring about 1" at a time. Things went really, really, really well with the whole process. I TOOK MY TIME and that's very important. So between measuring, drilling, cutting, pulling and thinking, the whole job turned out bitchin:
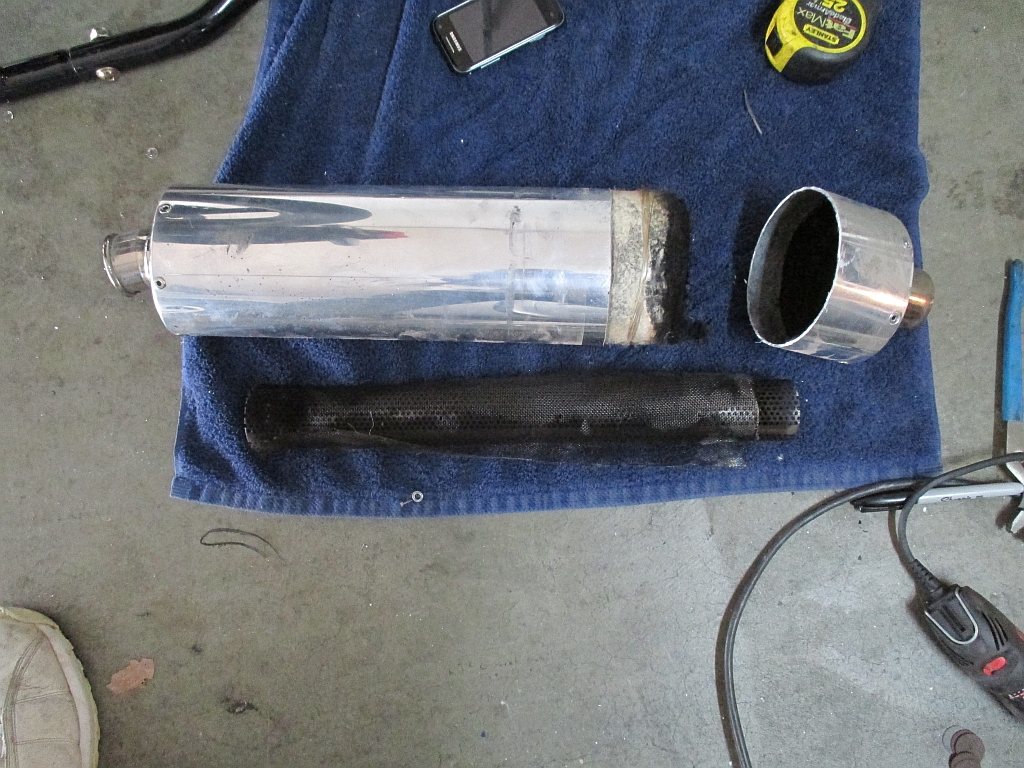

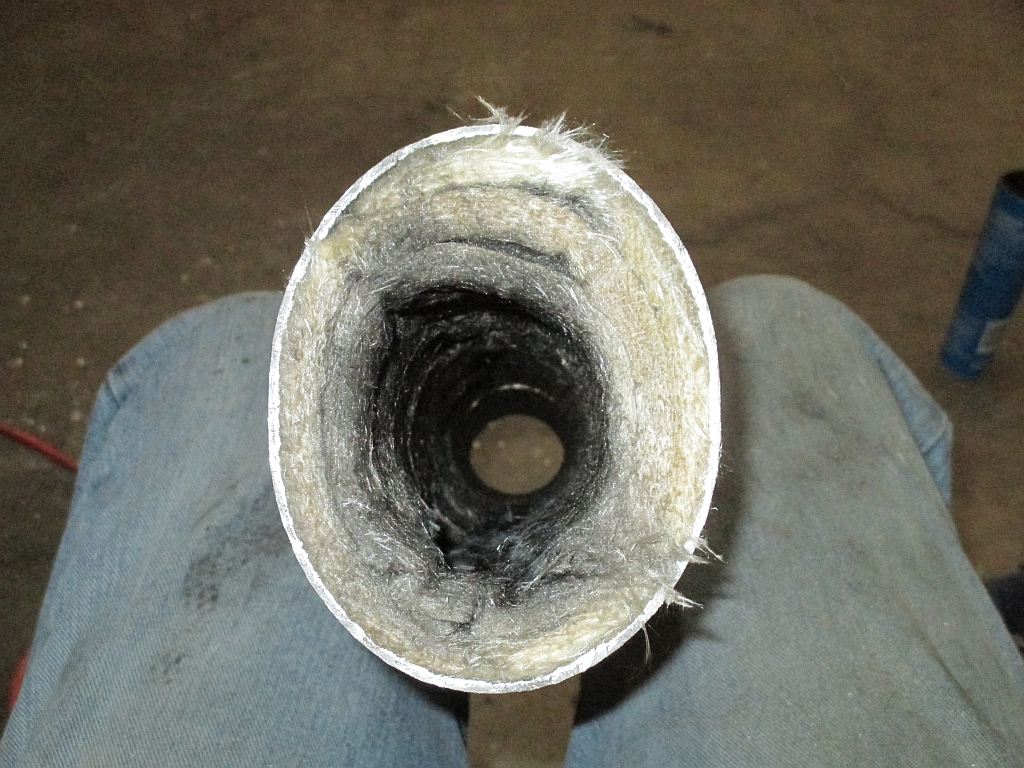
This is my 1st PICTURE post on here and I hope the pics aren't too big and cause problems. I'm still learning the ropes around here. If anyone is interested in doing any of these "SUBTLE" mods, my advice on only 2 of them is 1, with the DM rearsets, read the instructions and actually think about what your doing when you put the new sets on and when you are removing the swingarm bolt. Having at least 2 people available with this installation really helps as you have to pull the swingarm bolt completely OUT from the right side of the bike to get the right rear set ON. Then you have to put it back in. So you will need a helping hand or two. It took 2 guys, a rear bike stand, a floor jack and some patience and thinking to get the bolt out. 2nd thing is with cutting ANY exhaust down, don't go crazy on the length and to measure all your marks 2-3 times or more to make sure your cut is straight. And yes, you can simply use a table top band saw but here is the catch, YOU MUST NEVER CUT STRAIGHT THROUGH THE EXHAUST UNLESS YOU DO THE MOD FROM THE OUTLET TIP END and NOT THE INLET TIP SIDE of the can. The reason why is this, the serrated inner core is "BELL SHAPED" on one end and straight on the other. It flares over the inlet tips inner lip and sets inside the outlet tips inner lip on that end. So if you cut straight through the can and all on the inlet side, you will "REMOVE" the flare/bell and then your probably screwed. The 2 ends of the core are DIFFERENT. I can only speak of this about the Jardines. I don't know the internals of other exhaust manufacturers.
Thanx guys,
Cedric aka "TOFAZFOU*
Anyways, here is what I've done recently:
1: I wanted to change my gearing to see if it suits my riding in the local canyons. Now, I didn't want to get all crazy with this as I still drive it to work on the weekends (Saturdays are my Fridays) in which I take the freeway. After much reading, it was between the 15/43 set up and the 16/43 set up. Or -1, +2 vs the 0, +2 (front to rear). So I choose to go the cheaper route and get a 43 tooth Rear Steel Sprocket as a start. While I have not taken it to the canyons yet due to constant raining, I have riden it up and down the streets and I can definitely tell a difference in pick up. Especially in 1st gear. The bike doesn't LAG in 1st like with the OEM gearing. It takes off much smoother for sure. And the installation of the sprocket definitely brings the rear wheel forward that shortens the wheelbase for sure.

2. I bought and installed a DANMOTO rearset. I really like these especially for the money. After doing some research on the net and here, I found the COERCE ones on Ebay for about 400+ bucks. I was set to buy them then all of a sudden on the next day of viewing the web, up pops the DanMoto rear sets for 200 bucks. That's less than half than the Coerce ones. Don't know how the DM's compare to any other set as this is the 1st time ive owned anything DanMoto. But with limited time riding them, i'm in love so far. I CAN SAY THIS THOUGH....THEY ARE A MUCH IMPROVED SET OVER THE OEM ONES......LOL. These are adjustable by about .40" in every direction (up, down, forward and backwards). The black anodizing is very nice and its a deep black. My paint job is black also so it goes well with the look of the bike. For the price, they also provide a set of "REAL" carbon fiber heal guards. They are fully adjustable.


3. The last thing I recently did was to shorten my Jardine Exhaust cans just because. Well, just to see if it might make them a tad bit louder. This is a better solution that spending ANOTHER 600-1000 dollars on another set of cans in which I would be taking a chance anyways. The stock length of just the can itself is roughly 17-1/4" long. I cut the cans down by 3" for and OAL of 14" (just the can itself and not TIP to TIP). 3" was just a number I came up with after premeasuring and thinking out loud for at least 2 days.....lol! I just "GUESSED" that 3" should at least give me a sound change and not be enough to cause any real performance deficiencies (I hope). And yes, I can tell you that once I broke out the Dremel and the Hacksaw, my heart started jumping through my chest. But hey, i'm not really the girlie type so a measuring and a cutting I went. I measured everything twice, then wrapped the circumference of the cans with electrical tape then measured from the tip of the can to the start of the tape all the way around just to make sure I didn't make ugly cuts. I used a hacksaw to SCORE the circumference of the cans ahead of the tape and I used the Dremel with cutoff wheels to cut down through the scoring about 1" at a time. Things went really, really, really well with the whole process. I TOOK MY TIME and that's very important. So between measuring, drilling, cutting, pulling and thinking, the whole job turned out bitchin:


This is my 1st PICTURE post on here and I hope the pics aren't too big and cause problems. I'm still learning the ropes around here. If anyone is interested in doing any of these "SUBTLE" mods, my advice on only 2 of them is 1, with the DM rearsets, read the instructions and actually think about what your doing when you put the new sets on and when you are removing the swingarm bolt. Having at least 2 people available with this installation really helps as you have to pull the swingarm bolt completely OUT from the right side of the bike to get the right rear set ON. Then you have to put it back in. So you will need a helping hand or two. It took 2 guys, a rear bike stand, a floor jack and some patience and thinking to get the bolt out. 2nd thing is with cutting ANY exhaust down, don't go crazy on the length and to measure all your marks 2-3 times or more to make sure your cut is straight. And yes, you can simply use a table top band saw but here is the catch, YOU MUST NEVER CUT STRAIGHT THROUGH THE EXHAUST UNLESS YOU DO THE MOD FROM THE OUTLET TIP END and NOT THE INLET TIP SIDE of the can. The reason why is this, the serrated inner core is "BELL SHAPED" on one end and straight on the other. It flares over the inlet tips inner lip and sets inside the outlet tips inner lip on that end. So if you cut straight through the can and all on the inlet side, you will "REMOVE" the flare/bell and then your probably screwed. The 2 ends of the core are DIFFERENT. I can only speak of this about the Jardines. I don't know the internals of other exhaust manufacturers.
Thanx guys,
Cedric aka "TOFAZFOU*
Last edited by Tofazfou; Mar 2, 2014 at 06:00 PM.

Senior Member
SuperSport
Joined: Apr 2013
Posts: 834
From: Thousand Oaks, CA
did danmoto send you the 6mm spacers that go in between the rear sets and the adjustable plate? i didnt see them in your pictures and i know they didnt send them when i bought the rearsets as well as a few other guys on here with the same issue. if you dont have the spacers in there the rearsets hit the swingarm when the suspension is compressed. i ended up just putting 3 2mm washers on each mounting bolt


Senior Member
Superstock
Joined: Jul 2013
Posts: 458
From: Rome, GA
mine are supposed to show up Tuesday.. I'm not looking forward to the install. Trying to figure out how I'm going to hold the rear of the bike up when I pull the swingarm bolt out
Thread Starter
Member
Squid
Joined: Aug 2013
Posts: 40
Thank you gentlemen.
Insulinboy, here is one more tip also. I had to removed the top bolt on the rear shock. The swing arm is linked to the shock and vice versa and its a big pivot point for the rear end. The shock keeps a constant LOAD on the swing arm and its pivot point when its all bolted up. So if you try and remove the swing arm bolt with the shock attached and under pressure, the swing arms pivot try's to lock the bolt in. And while using a rubber mallet to get the bolt out, u could possible damage the bolt threads once the threads on the bolt enter the frame of the swing arm. This is were a floor jack and another guy holding the front of the bike comes into play. The floor jack under the oil pan and someone hold the front of the bike and the top of the shock unbolted means no pressure on the swingarm and bolt. If you also put a rear wheel stand under the swingarm to LIFT the rear, then you are also putting pressure on that bolt which makes it hard to come out also. Once I figured all this out, the bolt came out pretty easy. Once I cleaned the heck out of the bolt (oh my god it was filthy) with WD40 and some brake cleaner in a can, I greased it up nicely (just enough and not heavy on the lube) and it slid back in PERFECTLY and EASILY.
DONE!
If you need help, just call me out on here. I'll make sure i'm checking this forum
Thread Starter
Member
Squid
Joined: Aug 2013
Posts: 40
jscobey,
No sir, I did not receive the spacers either. The really funny thing about it is, as i'm reading the instructions about using spacer if necessary, I started tearing up my garage THINKING that somehow only the spacer fell out of the parts bag onto the floor somehow. I looked everywhere.....lol. There never were any .
.
But it was easy, as I have all types of washers and shim that fit just perfectly. I did the same as you cause in the beginning and without the shim, that nylock nut kept hitting the swingarm and slowing me down....lol. Once I drove back home, I looked down and just laughed so loud. I was sorta mad, but it was pretty funny (only cause it was an easy fix).
No sir, I did not receive the spacers either. The really funny thing about it is, as i'm reading the instructions about using spacer if necessary, I started tearing up my garage THINKING that somehow only the spacer fell out of the parts bag onto the floor somehow. I looked everywhere.....lol. There never were any
.But it was easy, as I have all types of washers and shim that fit just perfectly. I did the same as you cause in the beginning and without the shim, that nylock nut kept hitting the swingarm and slowing me down....lol. Once I drove back home, I looked down and just laughed so loud. I was sorta mad, but it was pretty funny (only cause it was an easy fix).
Senior Member
Superstock
Joined: Jul 2013
Posts: 458
From: Rome, GA
I was thinking my pitbull front steering stem stand and an engine hoist with a strap around the subframe. I will be doing the install by myself, I just want to make sure the bike doesn't tip over. I didn't know about the shock, thanks for that information

Senior Member
SuperSport
Joined: Oct 2012
Posts: 501
From: Orlando, FL
For the quick redneck way, I had already mounted hooks in the trusses in my garage, so when i finished the front, I set the bike down rolled it forward and just used the hooks and ratchet straps to lift the rear of the bike this time instead of the front. worked perfectly. I also used a jack under the pan to help keep the bike stable, I didn't use the front pin stand because when you change the angle that much it tends to try to fold back over and I actually dropped the bike one day doing it.
Last edited by sailorjerry; Mar 3, 2014 at 02:50 PM.
Senior Member
SuperSport
Joined: Oct 2012
Posts: 501
From: Orlando, FL
actually it's less leg room, the sets are higher than stock by maybe 3 to 4mm and sit further back. If you mount them all the way back you'll get a little more leg room but I found it harder to switch corners as quick because you don't have as good of foot position on the pegs when all the way back.

Thread
Thread Starter
Forum
Replies
Last Post


