
Motrax LED "Arrow" signal install *pics*


Thread Starter
Senior Member
SuperSport
Joined: May 2008
Posts: 702
From: Bham, AL

Stopped by Cycle Gear on my lunch break today looking for some parts. I currently have the "frisbee" flushmounts with a incadesent bulb. I've felt that cars might not be able to see these as well from the front since they sit flush. You can see them, but not nearly as much as you can from the side. So I have been wanting to switch that out for a stalk style LED to seperate the turn signal a little form the bike. Opposite of what most people do as they generally want flushmounts and discard their stalk stockers LOL.
While in CG I saw a few LED front designs I liked from both Lockhart Philips and Motrax. The Motrax are all E-code which is a higher lighting standard than here in the states. I decided to go with the Motrax "LED Arrow" lights with the short stalk.
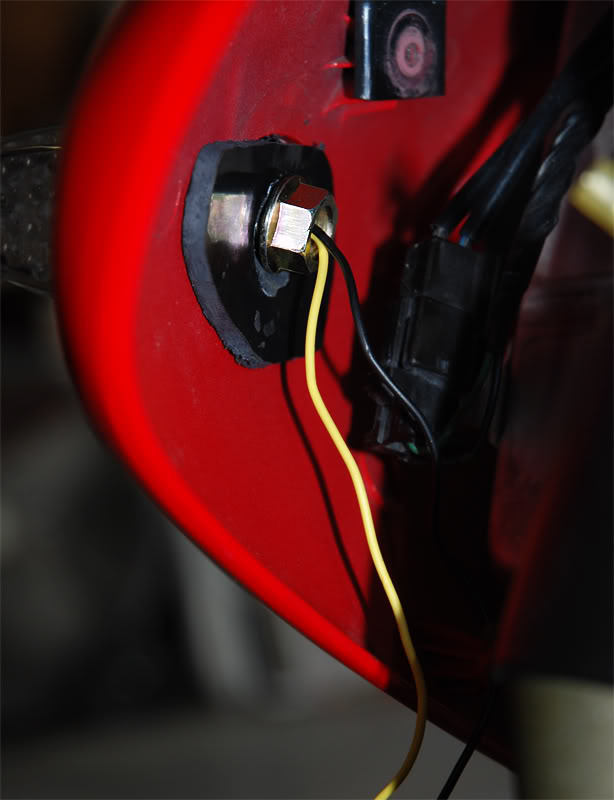
Now as I'm sure many of you know, there is a big *** hole left in the stock fairing when you remove the turn signals. I didn't see any adapter plates while at CG so I shrugged it off and decided I'd make my own from some ABS sheets I have lying around in the garage. I had to make a front plate and a rear backplate.
For the front, all I did was trace the outline of my old frisbee turnsignal as that resembles the stock Honda hole fairly close. I trimmed up a piece of ABS roughly to the shape desired. I'll go back and smooth the edges with sand paper using multiple grit until I get a nice clean edge. For now, it's fairly rough as I'm still test fitting everything.
For the rear I did a similar method, only I had nothing to use as a pattern to trace out for my shape. I started with a rectangular shape of ABS I cut up. After test fitting the general shape and trimming a few times, I finally got it to a shape I wanted. The first problem I encountered was the SH has a very contoured surface both on the outside and inside of the fairing side. Thise poses an issue for bolt clearance of the turn signal as it wouldn't allow me enough space to get the retaining nut started on the threads of the turn signal. So....I then grabbed my trusty old heat gun and took the backplate I trimmed up and placed it on the garage floor to heat it thoroughly. Once hot as hell, I grabbed it with some oven mitts and then took it over to the bike where I then placed it how I wanted on the inside of the fairing and then press formed it to mold it to the contours of the fairing. This free'd up a good bit of space but I still wanted some more just for a good initial bite on the threads. So I then took a dremel sandstone grinding bit and made a countersunk area since the ABS is 1/8" thick. I removed maybe a 1/32" of material and this allowed the nut to get a good initial bite.
Now all that is left is to finish the edges of the front plate to give it a finished look. I might even go by some rattle can in red to blend the plate in a little bit better. Although the contrast of black on red works for my bike, so I may leave it black. I'm undecided at this point.
Enogh rambling, here are some pics of the turn signal mod....
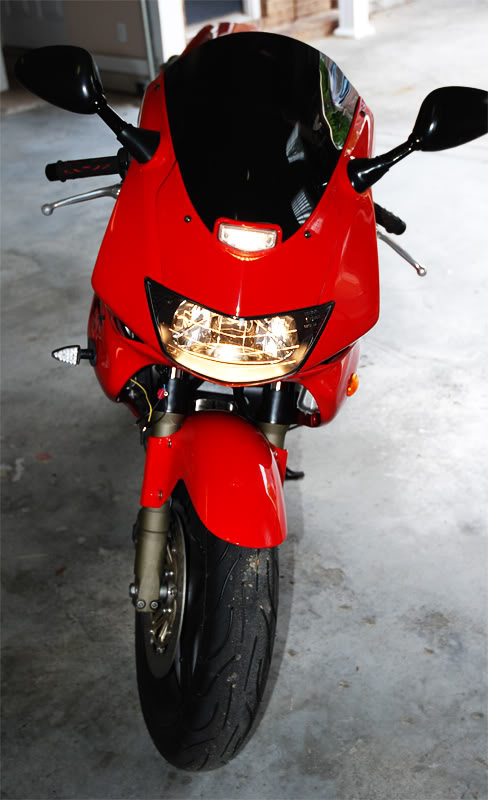
Old frisbee flushmounts (OFF)
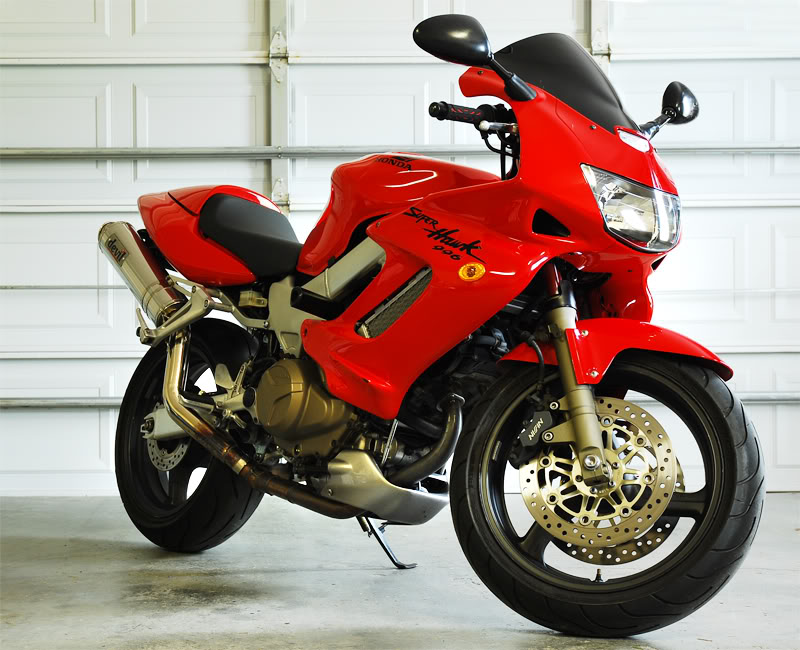
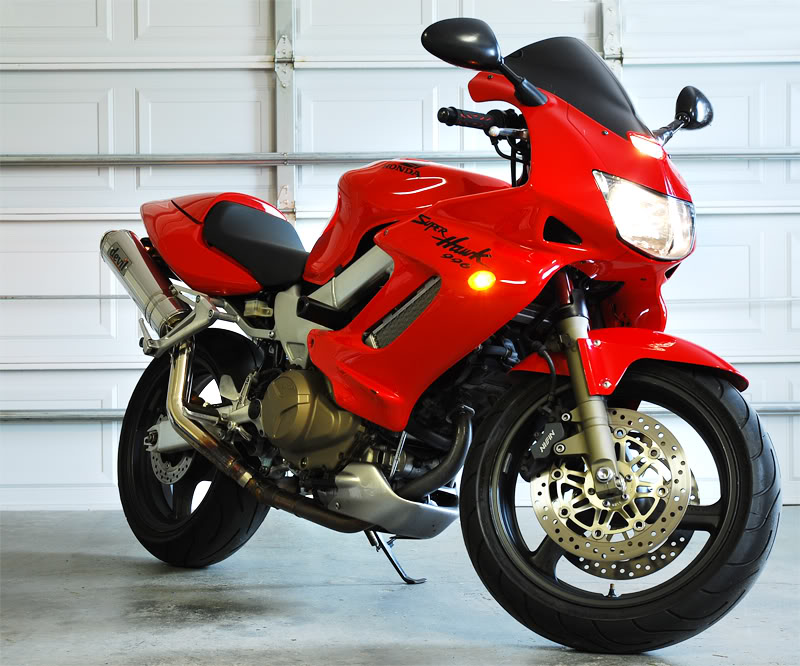
Old frisbee's (ON)
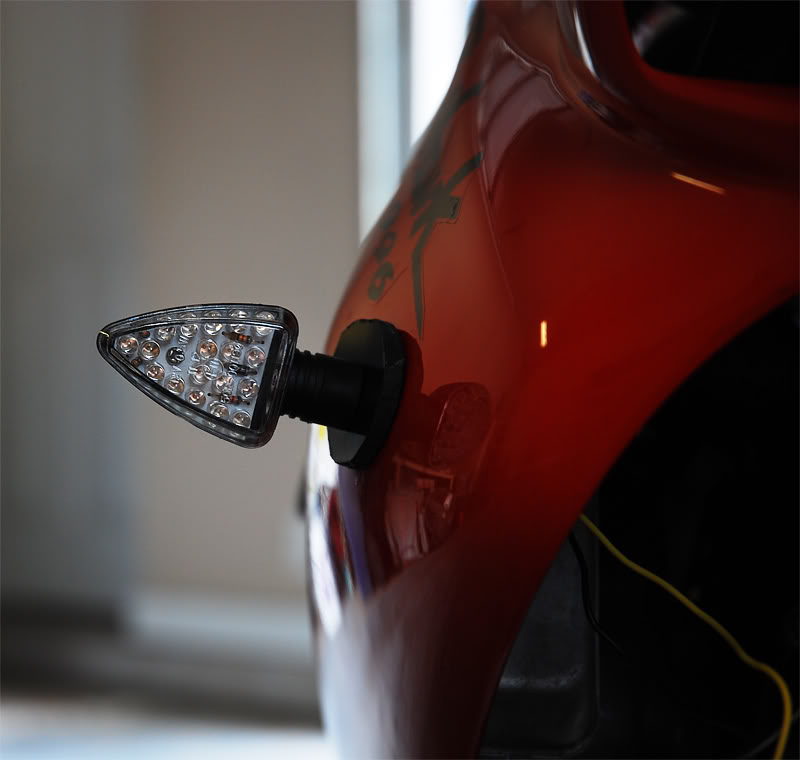
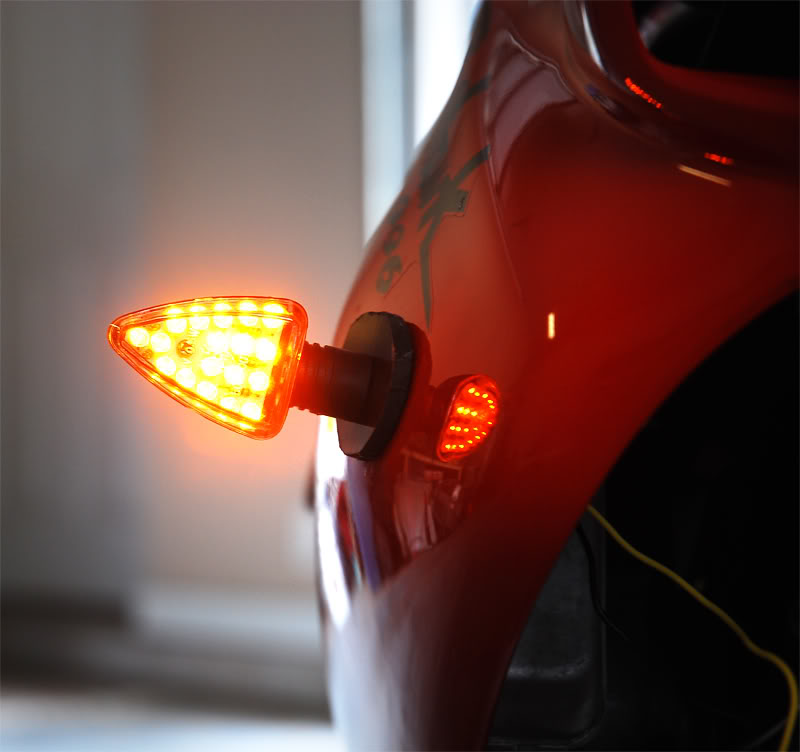
Here is one Motrax LED Arrow installed with the custom plates....
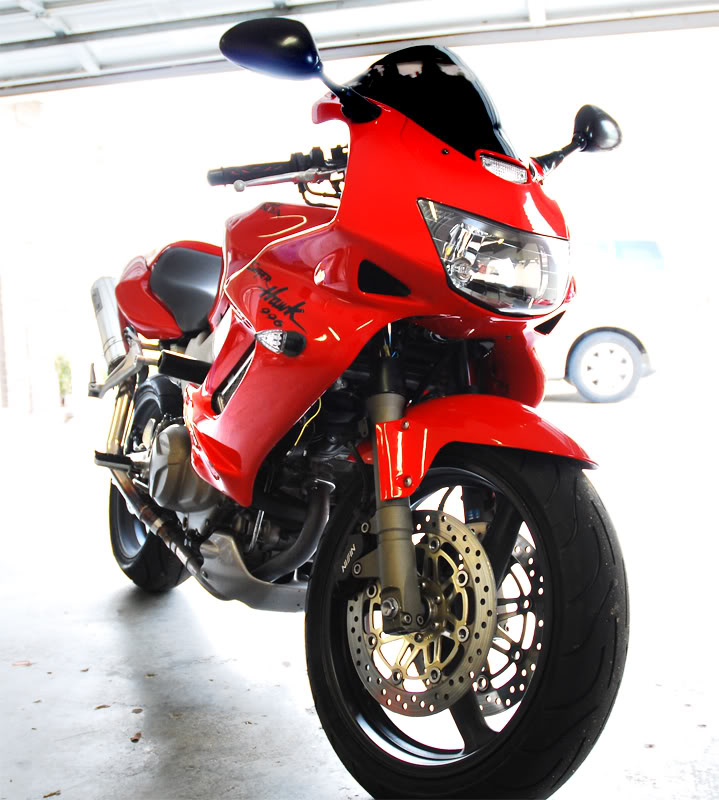
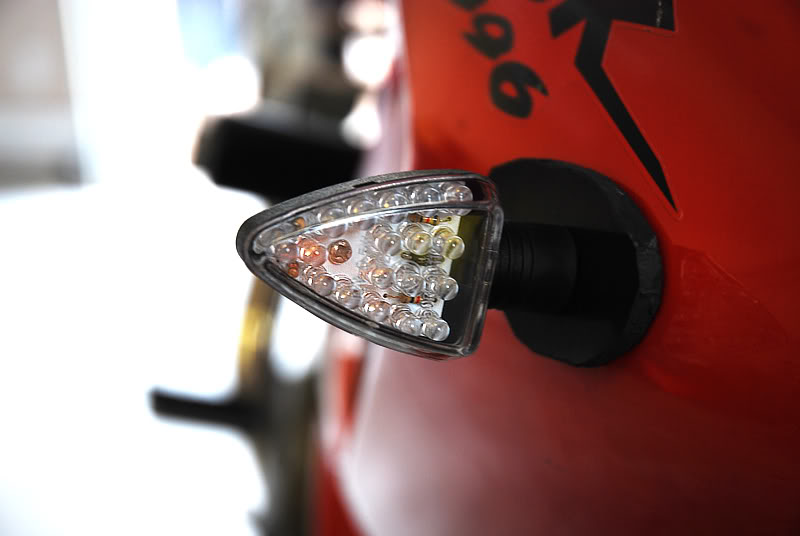
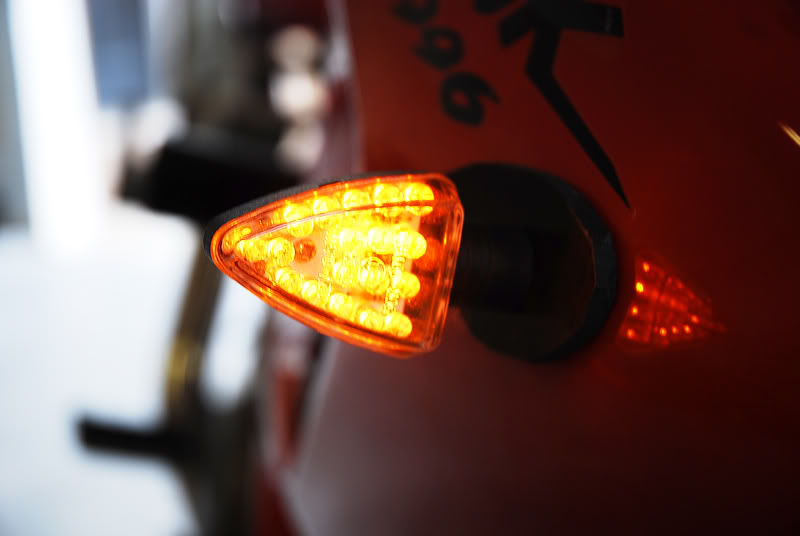
A few close-ups opf them both off and on....
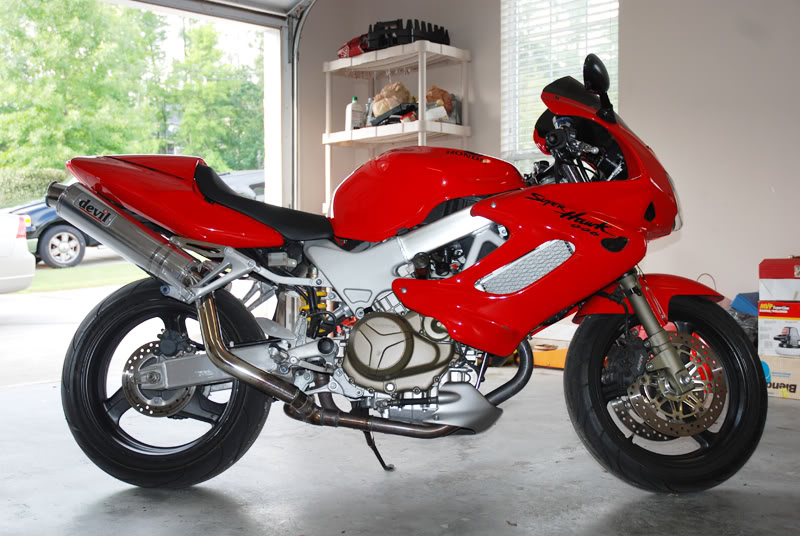
Comparison of the frisbee and the LED Arrow....

Here is the molded rear backplate...
While in CG I saw a few LED front designs I liked from both Lockhart Philips and Motrax. The Motrax are all E-code which is a higher lighting standard than here in the states. I decided to go with the Motrax "LED Arrow" lights with the short stalk.
Now as I'm sure many of you know, there is a big *** hole left in the stock fairing when you remove the turn signals. I didn't see any adapter plates while at CG so I shrugged it off and decided I'd make my own from some ABS sheets I have lying around in the garage. I had to make a front plate and a rear backplate.
For the front, all I did was trace the outline of my old frisbee turnsignal as that resembles the stock Honda hole fairly close. I trimmed up a piece of ABS roughly to the shape desired. I'll go back and smooth the edges with sand paper using multiple grit until I get a nice clean edge. For now, it's fairly rough as I'm still test fitting everything.
For the rear I did a similar method, only I had nothing to use as a pattern to trace out for my shape. I started with a rectangular shape of ABS I cut up. After test fitting the general shape and trimming a few times, I finally got it to a shape I wanted. The first problem I encountered was the SH has a very contoured surface both on the outside and inside of the fairing side. Thise poses an issue for bolt clearance of the turn signal as it wouldn't allow me enough space to get the retaining nut started on the threads of the turn signal. So....I then grabbed my trusty old heat gun and took the backplate I trimmed up and placed it on the garage floor to heat it thoroughly. Once hot as hell, I grabbed it with some oven mitts and then took it over to the bike where I then placed it how I wanted on the inside of the fairing and then press formed it to mold it to the contours of the fairing. This free'd up a good bit of space but I still wanted some more just for a good initial bite on the threads. So I then took a dremel sandstone grinding bit and made a countersunk area since the ABS is 1/8" thick. I removed maybe a 1/32" of material and this allowed the nut to get a good initial bite.
Now all that is left is to finish the edges of the front plate to give it a finished look. I might even go by some rattle can in red to blend the plate in a little bit better. Although the contrast of black on red works for my bike, so I may leave it black. I'm undecided at this point.
Enogh rambling, here are some pics of the turn signal mod....
Old frisbee flushmounts (OFF)
Old frisbee's (ON)
Here is one Motrax LED Arrow installed with the custom plates....
A few close-ups opf them both off and on....
Comparison of the frisbee and the LED Arrow....
Here is the molded rear backplate...


Senior Member
MotoGP
Joined: Sep 2006
Posts: 4,138
From: Austin, Tx
I used the Motrax signals too. I didn't do the plate install although this is a great job. I just threaded mine into the inner wall which puts them real close in. CG had signals with two different tower heights. I think I used the shorter ones.
Thread Starter
Senior Member
SuperSport
Joined: May 2008
Posts: 702
From: Bham, AL
Thanks!
Nice install! Only thing is I don't have anything inside to thread them to  . So I had to come up with something. Yours look good tucked in as well.
. So I had to come up with something. Yours look good tucked in as well.
Thread Starter
Senior Member
SuperSport
Joined: May 2008
Posts: 702
From: Bham, AL
Well I ended up not using these for the front. I plan to buy some of the Protons for the front soon.
So I used the Motrax LEDs for the rear since my old ones were smoked + small and not very bright for the rear. I had to angle these up to clear my exhaust. It's not too bad since that voided space in between my exhaust and my rear tail was kind of triangular to begin with.
I also installed some load equalizers so I don't get the flash-fast crap.
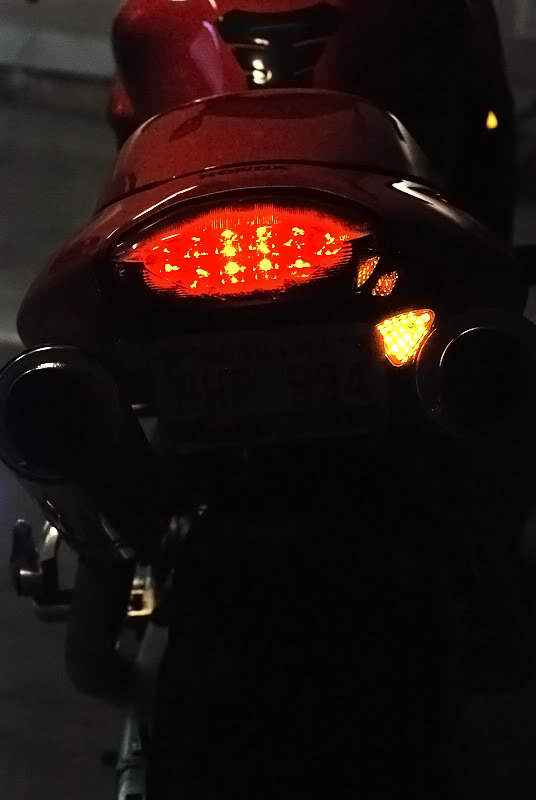
What you guys think? Too cluttered or OK? I might stain glass paint the LED lenses to be amber but I'm not sure yet.
(sorry for the camera flash on the 1st one. too lazy to use my tripod LOL)
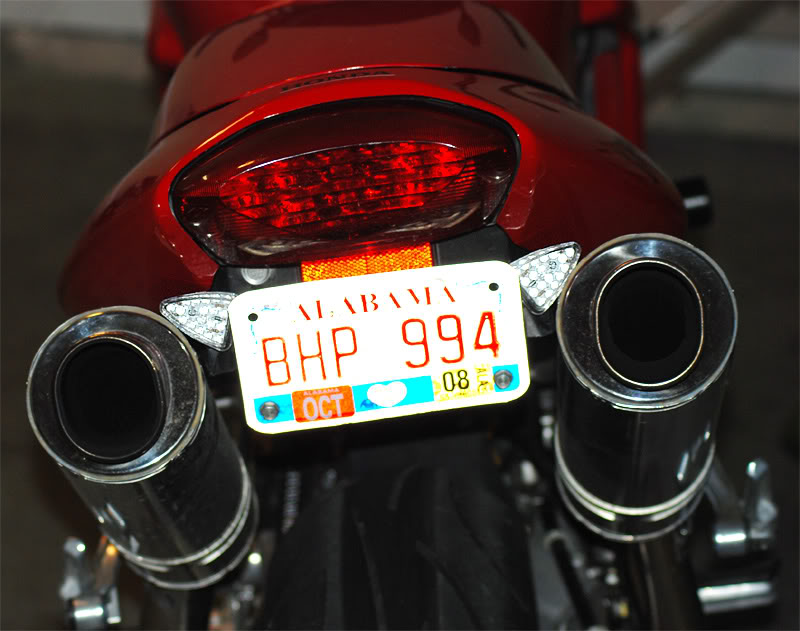
So I used the Motrax LEDs for the rear since my old ones were smoked + small and not very bright for the rear. I had to angle these up to clear my exhaust. It's not too bad since that voided space in between my exhaust and my rear tail was kind of triangular to begin with.
I also installed some load equalizers so I don't get the flash-fast crap.
What you guys think? Too cluttered or OK? I might stain glass paint the LED lenses to be amber but I'm not sure yet.
(sorry for the camera flash on the 1st one. too lazy to use my tripod LOL)
Senior Member
SuperBike
SuperBike
Joined: Jun 2007
Posts: 1,031
From: Los Angeles ish
Only because you asked.. I'm not wild about the angle, and I agree it looks a little cluttered. Not sure I have a good suggestion though. It all boils down to personal taste. I'm sure some people don't like what I've done to my bike.

Senior Member
Back Marker
Joined: Apr 2005
Posts: 187
From: Massachusetts

Finding rear signal that (a)look good, and (b) are bright enough is such a PITA. I've been through several setups (that's where the Protons were originally), and finally have something I'm somewhat comfortable with. Just about everything needs to be modded to fit and look decent with a high mount exhaust. I've found that as I get older I'll take something that's bright and looks a little off over getting rear ended any day.I think I'll probably work on something new over the winter.
Thread Starter
Senior Member
SuperSport
Joined: May 2008
Posts: 702
From: Bham, AL
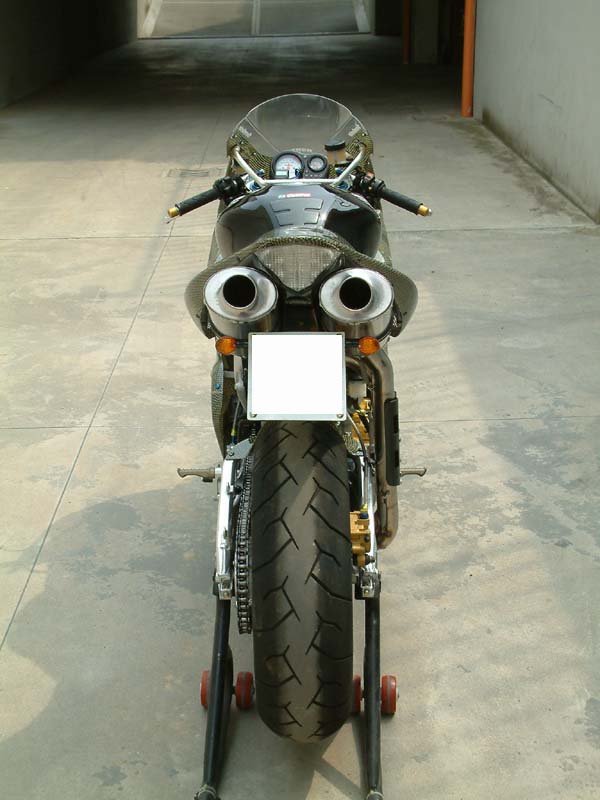
VTRumble, yeah that's kind of my thinking too these days. Trying to stand out in the sea of mad cagers over looks (if I have to). Just this morning a guy that worked at the local Icon Motorsports (bike dealership) was killed as he was struck by a truck early this morning http://cfc.abc3340.com/forums/viewme...84&topic=42402.
I'm not too hot on the angle of them either and yeah it's somewhat cluttering to me. I am like VTR and go thru many setups on turn signals. I think I had 4 different pairs of front turn signals on my CBR lol.
I was wondering today of seeing if a R1 tail would be doable as a mod on the VTR. I like the way both exhaust pipes can be tucked close.
I absolutely love this modded VTR....
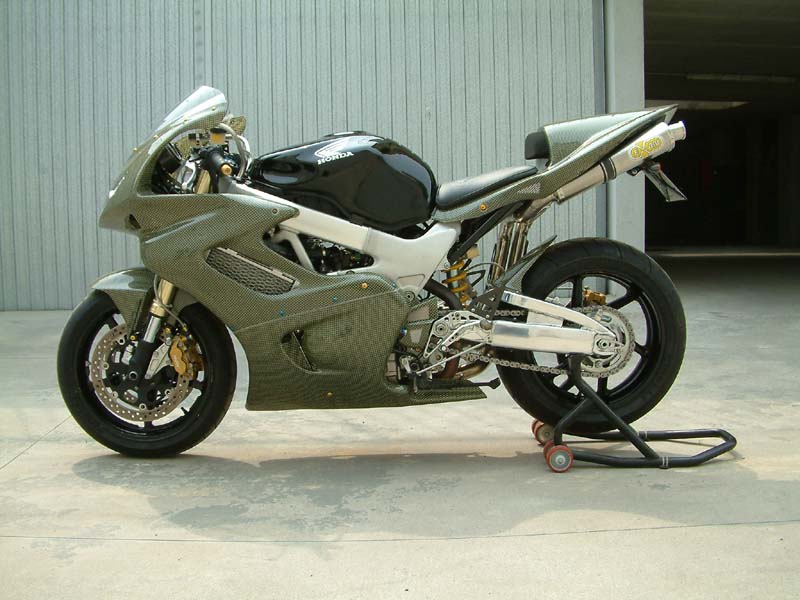
The tail looks like once was a R1 tail but has been modified a great bit. I like the way the exhaust is closer (resembles a Duc almost, sin I know) but more importantly how the tag and lights can be mounted below the exhaust. Making it more visible IMO....
I'm not too hot on the angle of them either and yeah it's somewhat cluttering to me. I am like VTR and go thru many setups on turn signals. I think I had 4 different pairs of front turn signals on my CBR lol.
I was wondering today of seeing if a R1 tail would be doable as a mod on the VTR. I like the way both exhaust pipes can be tucked close.
I absolutely love this modded VTR....
The tail looks like once was a R1 tail but has been modified a great bit. I like the way the exhaust is closer (resembles a Duc almost, sin I know) but more importantly how the tag and lights can be mounted below the exhaust. Making it more visible IMO....

Thread
Thread Starter
Forum
Replies
Last Post
handkaudio
Modifications - Cosmetic
23
Jul 20, 2008 07:29 AM


