HID Retrofit in progress - E46 Bixenon Projectors
 03-02-2009, 08:52 AM
#31
Senior Member
Superstock

Join Date: Mar 2007
Location: San Diego
Posts: 268

Looking good so far, nice job on the shroud! Just make sure you get rotational alignment correct. Thats the worst part 
A tip for all you guys, ddmtuning.com has slim ballasts for cheap, they aren't OEM but have been used by many with excellent results. Go for the 35w ones, not the 55w unless you have specialized DL50 bulbs (they run really hot) and try to get some OEM bulbs. If not, the ones included in the kit will work.
Also, when sourcing a projector, go for a Japanese made Bi-xenon one. Most of them have a wider and more intense beam pattern, are fully enclosed, and wire up super easy for bixenon. Hak would probably agree why they are generally superior to their German counterparts. Examples would be:
G35 projector
FX projector
TL projector
Murano projector
Specific Porsche projector (Stanley made)
Combine this with a clearlens for added WOW factor. Sharper cutoff line and more intense beam pattern.
Just a little inspiration for you guys:
My FX with TSX Clearlens, 35w setup.
My current setup is even more intense with a 55w components

Get out there and do it!!
A tip for all you guys, ddmtuning.com has slim ballasts for cheap, they aren't OEM but have been used by many with excellent results. Go for the 35w ones, not the 55w unless you have specialized DL50 bulbs (they run really hot) and try to get some OEM bulbs. If not, the ones included in the kit will work.
Also, when sourcing a projector, go for a Japanese made Bi-xenon one. Most of them have a wider and more intense beam pattern, are fully enclosed, and wire up super easy for bixenon. Hak would probably agree why they are generally superior to their German counterparts. Examples would be:
G35 projector
FX projector
TL projector
Murano projector
Specific Porsche projector (Stanley made)
Combine this with a clearlens for added WOW factor. Sharper cutoff line and more intense beam pattern.
Just a little inspiration for you guys:
My FX with TSX Clearlens, 35w setup.
My current setup is even more intense with a 55w components
Get out there and do it!!
Last edited by Anto; 03-02-2009 at 08:54 AM.
 03-02-2009, 09:45 AM
#32
2nd mouse gets the cheese
SuperBike
Join Date: Jan 2008
Location: Beaverton, OR
Posts: 1,697
so the way I wired my light for start up is its on its own relay circuit so when the key is turned on it lights right away, and even when the starter is engaged it stays lit. I don't know if it will cause any damage but the bike doesn't seem to mind too much. I have been running it like that for over a year with no issues so far. I don't notice any drop in cranking power and the HID lit doesn't dim when the starter is engaged.
"V" looks like you are doing a stand up job on the whole install, thanks for the write up and all the details its awesome.
"V" looks like you are doing a stand up job on the whole install, thanks for the write up and all the details its awesome.
03-02-2009, 06:15 PM
#33
Senior Member
SuperSport
Thread Starter

Join Date: Dec 2008
Location: Arizona
Posts: 507
I am debating what to seal the housing back up with. Once I found a thread on this stuff
http://www.hidplanet.com/forums/view...t=glue&start=0
It seams this is the choice of many that do retrofits. This stuff apparently comes free when you buy certain taillights from nissan. According to the thread some people have even been able to get it for free from them by asking. The benefit to this stuff is that it is pretty much what they use stock. So it remains somewhat flexible in different environments keeping a good seal. Ones you put a layer of it in the groove you bake it to soften it up then seal it back up. It is also good if you need to take it apart again(knock on wood) to make modifications or adjustments, you just put it back in the oven or use a heat gun.
03-10-2009, 11:53 PM
#34
Senior Member
SuperSport
Thread Starter
Join Date: Dec 2008
Location: Arizona
Posts: 507
Well I have had things on the bike for over a week now, I figured I should share things before I forget the details.
Back to the shroud.
The first picture shows the projector mounted inside the shroud. I placed a few drops of epoxy on key areas to ensure it would not rotate in the housing down the road. I also epoxied the threaded ring in place to make sure it would not back out and cause the projector to move around. I even put a dab of epoxy on the edge of the lens as it looked like it may want to rotate with vibration after a while
Next thing I needed to do was epoxy the shroud together. I used some that was designed for abs, pvc, fiberglass, etc. Now that the shroud was together I decided I needed to stop the light leakage. After ended up using spotting putty which is in the bondo section of most auto shops. Wow did I discover why I was not into autobody work.
After the first attempt of the spotting putty and painting I discovered that what if you’re going to be painting something it needs to be as smooth as a babies *** otherwise you are going to see every imperfection. I had to sand things down and apply more putty, then sand, about 8 times to get things where I wanted them. What a pain. Using a 400 grit sand paper worked really well on that stuff. I had a few other imperfections and used a “build up” primer which I filled in the rest. The thing that sucked is I had mounted the projector inside first so I needed to tape and prevent any dust from getting inside. I finally got a few coats of flat black on and then epoxied the shroud inside the stock housing.
03-10-2009, 11:59 PM
#35
Senior Member
SuperSport
Thread Starter
Join Date: Dec 2008
Location: Arizona
Posts: 507
Now comes the fun part of electrical stuff.
I ended up not using the delay circuit as it was a piece of crap. I ran the electrical up the left side of the bike along side the stock harness. I placed the relay on the left in front of the started relay, that way it did not get in my way of the sides I use for storage. I ran a ground and a positive straight from the battery and have the relay triggered off the stock lighting wire off the stock harness. I used a 14 gauge wire and made sure to solder every connection, heat shrink, then wrapped with electrical tape to keep the stock look. We soldered a diode directly to the terminals of the relay as others recommend. I epoxied the ballast to the black removable air ram insert on the left side. I found it fit perfectly between two notches and cannot be seen from top of in front of the bike. The pic shows the original setup I did which in which I used an "add a circuit" fuse holder. Since then I have replaced that and did another setup.
Oh yeah while I had the fairings off I decided to paint the grill that goes over them black...looks really good.
03-11-2009, 12:05 AM
#36
Senior Member
SuperSport
Thread Starter
Join Date: Dec 2008
Location: Arizona
Posts: 507
Putting things back together.
I was ready to pull my stock light off and pull it apart. We were much more confident this time as we already had one under our belt. 250 in the oven for 10 minutes without shutting the heat off is perfect. We pulled it apart within a minute. This time we used a flat head screw driver flatten the stock sealant back into place by sliding it along the groove. By the time we finished the stock stuff was nicely in the groove evenly all around. You’ll want to hurry with that part as it sets back up fast as it cools down.
As you can see I bent the stock adjusting screws as I found they will give a rotation adjustment as well as the normal horizontal and vertical. Its not much but it is enough. We thoroughly cleaned everything multiple times and used compressed air to try and get every possible piece of lint or dust from showing. We placed the new reflector/projector into my housing and placed the stock lens over it. This was the part we were worried about as we did not know if the solenoid and electronics could deal with the oven again to seal it up.
For security precautions we placed 2 pieces of ice underneath in hopes it would keep things cool. 250 at 10 minutes again. We were all ready to pull it out of the oven and have to start pushing and sealing things back up. To our surprise the weight of the lens and the heat was enough to settle the lens into place itself including locking the little clips.
Last pic is before we sealed it I had cut a piece of paper out to eye ball what an angel eye would look like in there. I may still do it down the road, not sure.
03-11-2009, 12:13 AM
#37
Senior Member
SuperSport
Thread Starter
Join Date: Dec 2008
Location: Arizona
Posts: 507
All that and the lights goes out on me after a few miles. After doing some research and tons of troubleshooting we determined the issue is 99% a bad bulb. I have ordered a new one and should be here within the week. The light does look amazing when its on. I will be posting some comparison shots of this setup with Lazn's Silverstar. If there is anyone in Arizona that has a complete stock setup let me know as I want to try to get a pic of all three in comparison. I will also be selling all my extra stuff that I have, which includes the headlight I used to do moch ups, another e46 projector with the high beam solenoid attached and an oem 85122+ phillips 4300k bulb, e46 stock ballast and igniter and a 12 volt spst automotive relay. Pretty much you would just need the plumbing parts and some time to do the same thing.
03-11-2009, 12:27 AM
#38
Senior Member
SuperSport
Thread Starter
Join Date: Dec 2008
Location: Arizona
Posts: 507
And while hanging a clock in my bathroom I slipped and hit my head. When I woke up a had a vision of the next mod I wanted to do to my bike, I made a sketch. Not sure what I will call it yet.
03-11-2009, 08:56 AM
#39
Senior Member
MotoGP

Join Date: Mar 2007
Location: Phoenix, AZ
Posts: 3,132
Hmm that device looks to have a fluxating pulse pattern to it.. Perhaps calling it a Flux something or other.
03-18-2009, 08:27 AM
#40
Senior Member
SuperSport
Thread Starter
Join Date: Dec 2008
Location: Arizona
Posts: 507
For sale: all my extra stuff that I have, which includes the stock headlight I used to do moch ups, another e46 projector with the high beam solenoid attached and an oem 85122+ phillips 4300k bulb, e46 stock ballast and igniter and male h4 connector so you wont need to cut the stock wiring up front to get the hi beam to work. I think I am going to be asking $175 for all this.
03-21-2009, 01:48 AM
#41
Senior Member
SuperSport
Thread Starter
Join Date: Dec 2008
Location: Arizona
Posts: 507
Finally finished with the retrofit
And so the project of the retrofit is finally complete. Thanks to Lazn for all his help, my wife for allowing the bike to sit in the living room when needed and my dad for giving me some insight as usual and letting me use his shop. We got pretty good at taking the front of the bike off as we had to do it at least 10 times for both troubleshooting and tweaks here and there. I ended up getting a male h4 plug so I could have that plug into the stock connector instead of using spade connectors for the hi beam. We finally got the routing of the wires under the dash ok so the front fairing was not pinching anything. Wires are all wrapped up and everything seems to be working awesome.
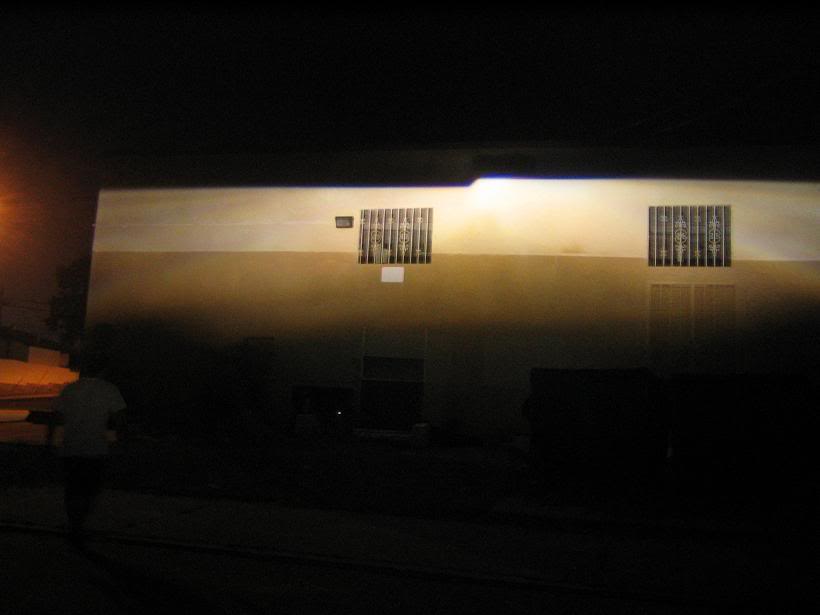
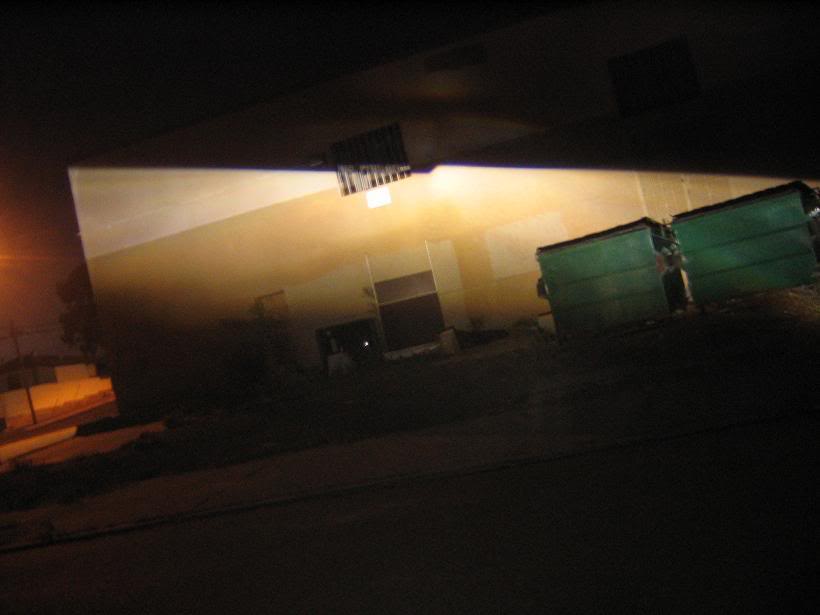
I must say I really like the color temperature and the amount of light is awesome. Definitely a difference going down dark roads. Last week we took at 400 mile ride and I did not have my hi beam as one of the wires broke. I must say for anyone doing a retrofit you must have a BiXenon setup. The cutoff was so abrupt I literally could not see a thing beyond my cutoff. I had Lazn lead the way with the hi beams.
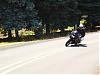
Pics came out ok I think I will be doing a few more down the road. Lazn has the Sylvania Silverstar Ultra installed. I wish we had a stock bike to compare.
I definitely recommend anyone doing this project have another stock light like I did to do the mochs ups and prevent any down time, it was a time saver and still got to ride whenever I wanted to.
The only reason I may take things apart in the future would be the angel eye I am still thinking about installing. Hope this thread helps others interested. If you have questions please ask.
Pic 1 is both our low beams on sitting the bikes side by side, the beams overlap but you can still see the difference in them
pic 2 is just my low beam
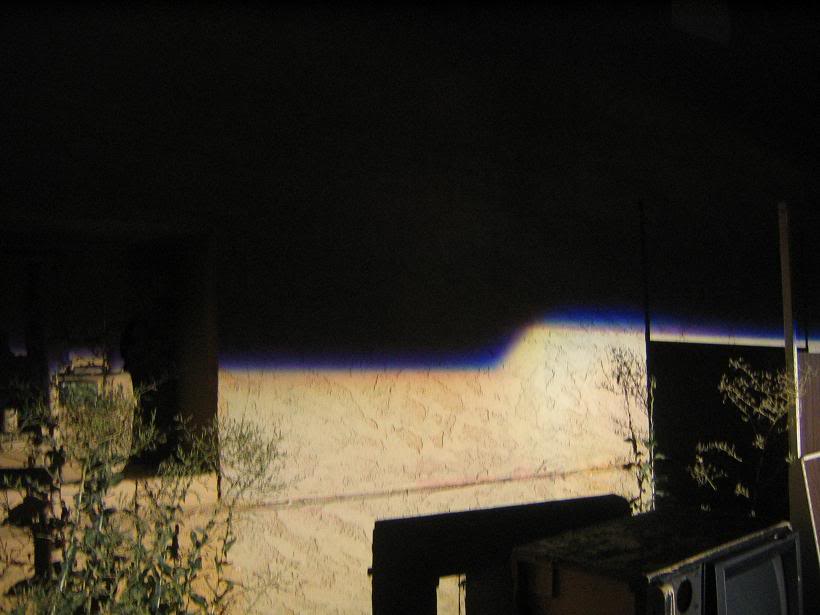
pic 3 is Lazn's Sylvania Silverstar ultra low beam
I must say I really like the color temperature and the amount of light is awesome. Definitely a difference going down dark roads. Last week we took at 400 mile ride and I did not have my hi beam as one of the wires broke. I must say for anyone doing a retrofit you must have a BiXenon setup. The cutoff was so abrupt I literally could not see a thing beyond my cutoff. I had Lazn lead the way with the hi beams.
Pics came out ok I think I will be doing a few more down the road. Lazn has the Sylvania Silverstar Ultra installed. I wish we had a stock bike to compare.
I definitely recommend anyone doing this project have another stock light like I did to do the mochs ups and prevent any down time, it was a time saver and still got to ride whenever I wanted to.
The only reason I may take things apart in the future would be the angel eye I am still thinking about installing. Hope this thread helps others interested. If you have questions please ask.
Pic 1 is both our low beams on sitting the bikes side by side, the beams overlap but you can still see the difference in them
pic 2 is just my low beam
pic 3 is Lazn's Sylvania Silverstar ultra low beam
Last edited by yruyur; 03-21-2009 at 02:21 AM.
03-23-2009, 12:42 PM
#45
Senior Member
SuperSport
Thread Starter
Join Date: Dec 2008
Location: Arizona
Posts: 507
Parts for sale
Now that the project is done I created another post in the classified section selling all my extra parts.
https://www.superhawkforum.com/forum...ad.php?t=17972
https://www.superhawkforum.com/forum...ad.php?t=17972
 09-23-2009, 08:04 AM
#47
Senior Member
SuperBike

Join Date: Aug 2009
Location: thorold ontario
Posts: 1,978
looks great, i may have missed it but how did you mount the projector to the stock housing? do you have any shots of it? ill be doing mine in a month or so, waiting for the snow to come or for it to get too cold to ride and then my retrofit begins,
09-23-2009, 08:34 AM
#48
Senior Member
SuperSport
Thread Starter
Join Date: Dec 2008
Location: Arizona
Posts: 507
I got plumbers putty and made a long worm out of it, stuck it to the bottom of the shroud and made a seat for it basically. seated it into the stock housing, let it harden up, after about 20 minutes took out the shroud and had a perfect seat. I used epoxy then to get it to mount to the new seat that was made, it prevented any light from leaking out, still working great to this day.
09-23-2009, 09:49 AM
#49
Senior Member
SuperBike
Join Date: Aug 2009
Location: thorold ontario
Posts: 1,978
i see, i figured it would get bolted in some way so that you could make any major adjustments to light output with it and then just fine tune it from there with the original housing adjusters.

 02-07-2010, 07:19 AM
#53
Senior Member
MotoGP
Join Date: Mar 2007
Location: Phoenix, AZ
Posts: 3,132
Bake it.. (well let it sit in a preheated oven with the oven off) We put it on a cookie sheet with a kitchen towel.. We also put some ice in the middle just to be sure the bottom stays cool. (overkill)
It worked quite well actually, just have a screwdriver ready and some gloves to be able to pull on the hot parts once they come out of the oven.

Thread
Thread Starter
Forum
Replies
Last Post
Anto
Classifieds
18
11-15-2010 05:49 PM
aftermarket, ballasts, bixenon, e46, hid, leaks, light, murano, oem, projector, projectors, pvc, retrofit, troubleshooting, wiring


