Scottiemann goes streetfighter
 06-11-2015, 09:17 AM
#211
Senior Member
SuperBike
Thread Starter
Join Date: Feb 2007
Location: boston
Posts: 1,252

I did ran some errands today and finally found a reducer hose I can work with. Also dropped off my battery cables at the local car audio shop to have some new ones made up so I should be able to pick those up this afternoon. I need to stop by pep boys or advanced auto and see if I can find some pod filters... the only ones autozone had go up to 1/2" and the connections are 3/4", well technically .71"
 06-11-2015, 09:21 AM
#212
Member
Squid

Join Date: Apr 2015
Location: St. Louis MO!
Posts: 79
I bought 3/4 to 1/4 angled brass from home depot.
Something similar to this.
3/4 in. Brass 90-Degree Barb x Barb PEX Equal Elbow (10-Pack)-RP3E4B4B-10 - The Home Depot
Something similar to this.
3/4 in. Brass 90-Degree Barb x Barb PEX Equal Elbow (10-Pack)-RP3E4B4B-10 - The Home Depot
06-11-2015, 04:02 PM
#214
Senior Member
SuperBike
Thread Starter
Join Date: Feb 2007
Location: boston
Posts: 1,252
I just got home from running around ALL day and have got nothing done on the bike. HOWEVER, I am coming home with and to a bunch of good stuff...
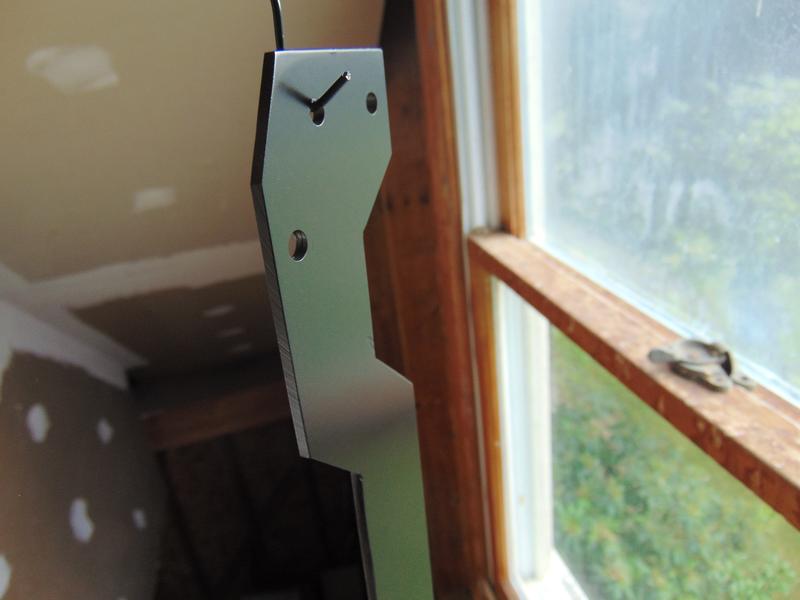
First off I found 1 of the reducer hoses I need, its not cut to length yet but I took a pic of it mounted to show you what limited space I'm working with here and why I cant use anything else for the most part. And Ken this is why I need to mount the pump higher, not lower. I'm still trying to find the other reducer hose as I believe the fitting doesnt exist which would be:
1" T3/4"
3/4"
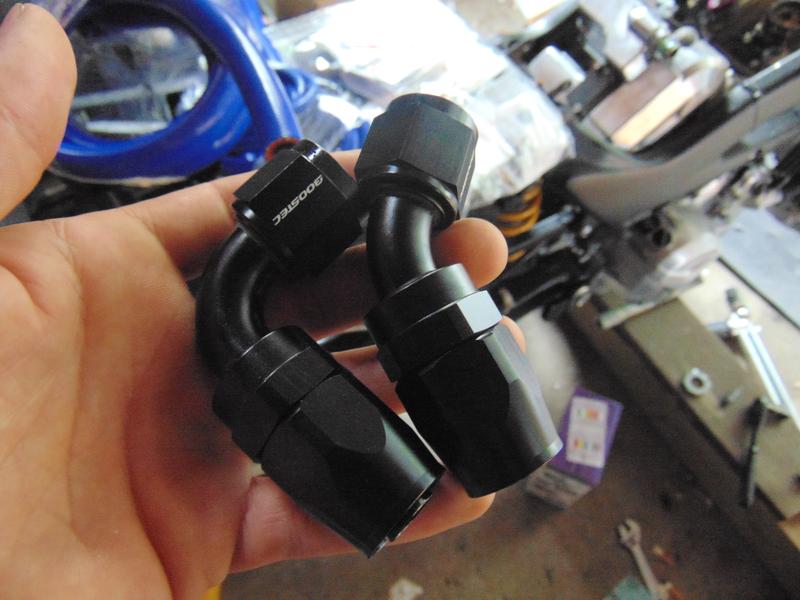
Next up is the 2 45 degree AN fittings I need for the oil cooler side so I'm not hitting the rads with SS braided hose...
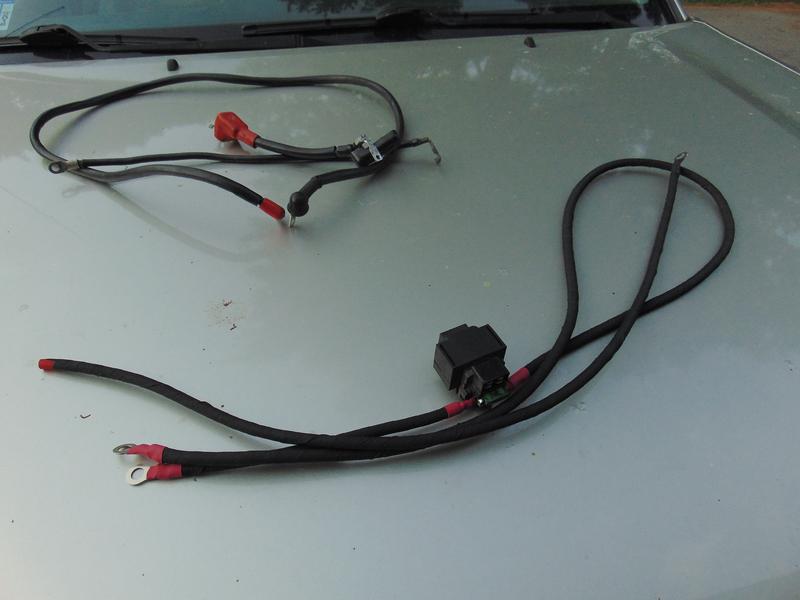
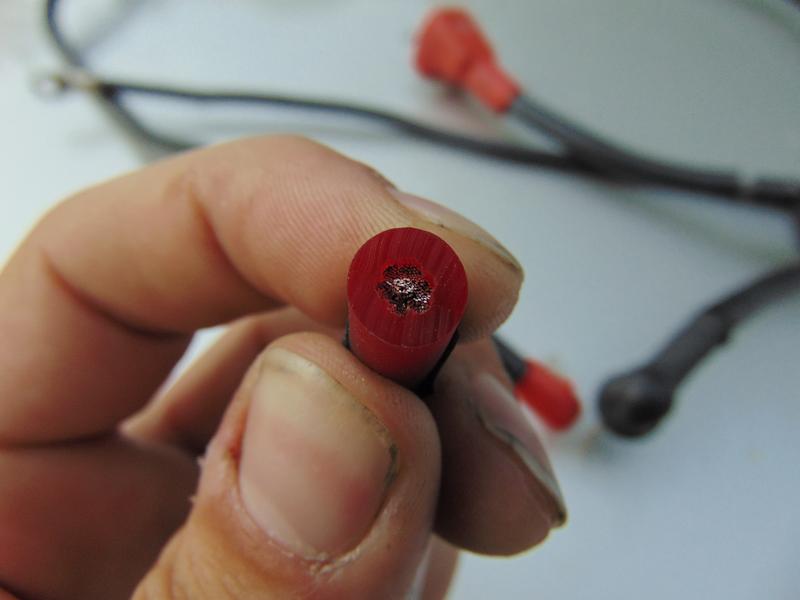
And lastly had my guys at the local car audio place make me up new power and ground cables. High end car audio 8AWG and super conductive, these have atleast 20x the strand count of factory if not way more and the wire is wrapped in high heat protective tape. The high strand count creates an incredible amount of surface area for better conductivity and flexibility. The pic looking down the sheath doesnt show what I can see but I took the best pic I could...
If your wondering why the ground cable is so long and doesnt have a connector at one end, its because I will be relocating the chassis ground and running some type of bus bar for individual component battery grounds. I'm not saying this electrical system will be fail proof but it will definitely be as efficient as it can be...
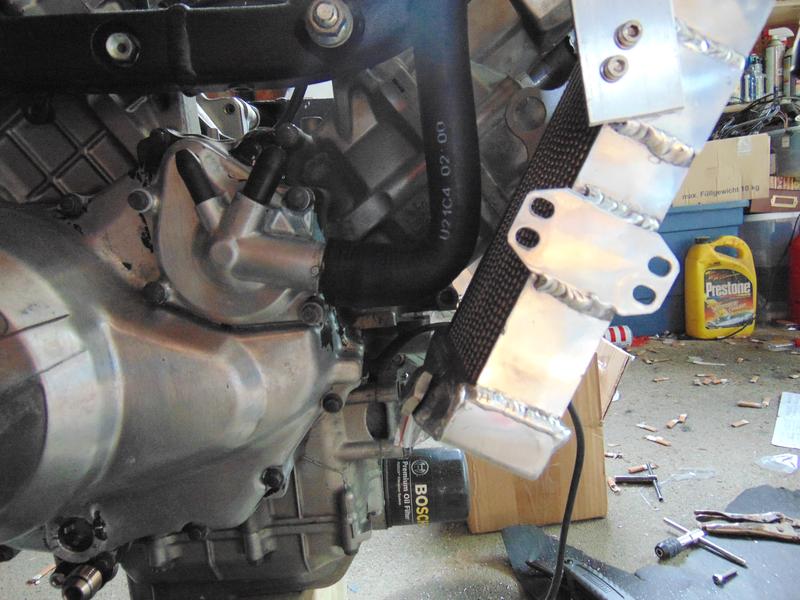
First off I found 1 of the reducer hoses I need, its not cut to length yet but I took a pic of it mounted to show you what limited space I'm working with here and why I cant use anything else for the most part. And Ken this is why I need to mount the pump higher, not lower. I'm still trying to find the other reducer hose as I believe the fitting doesnt exist which would be:
1" T3/4"
3/4"
Next up is the 2 45 degree AN fittings I need for the oil cooler side so I'm not hitting the rads with SS braided hose...
And lastly had my guys at the local car audio place make me up new power and ground cables. High end car audio 8AWG and super conductive, these have atleast 20x the strand count of factory if not way more and the wire is wrapped in high heat protective tape. The high strand count creates an incredible amount of surface area for better conductivity and flexibility. The pic looking down the sheath doesnt show what I can see but I took the best pic I could...
If your wondering why the ground cable is so long and doesnt have a connector at one end, its because I will be relocating the chassis ground and running some type of bus bar for individual component battery grounds. I'm not saying this electrical system will be fail proof but it will definitely be as efficient as it can be...
06-11-2015, 09:06 PM
#215
Senior Member
SuperBike
Thread Starter
Join Date: Feb 2007
Location: boston
Posts: 1,252
Got some work done tonight...
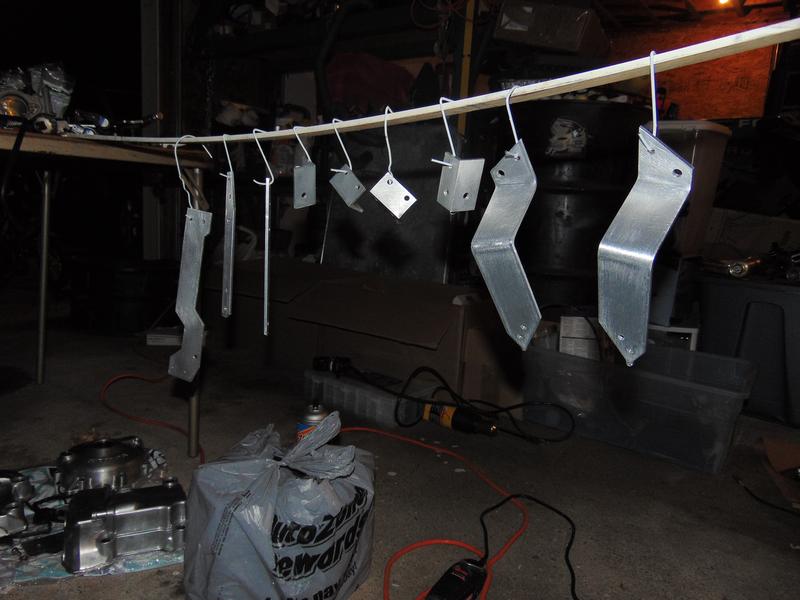
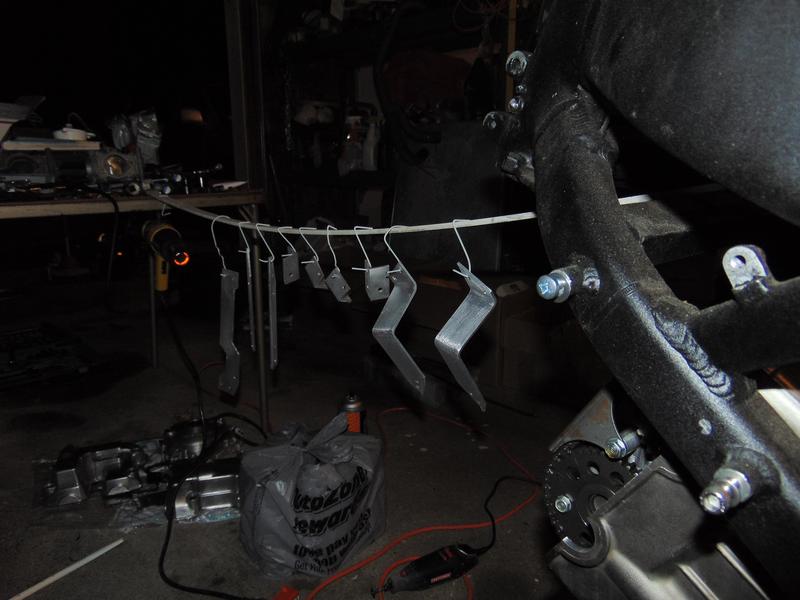
Cut off the lower mounting tabs on the oil cooler. Cut to size all of the brackets for the cooling system. The upper cross bars are almost complete, outer brackets need more cleaning up and the lower bracket needs a lot of clean up. will post pics tomorrow as things get done.
Cut off the lower mounting tabs on the oil cooler. Cut to size all of the brackets for the cooling system. The upper cross bars are almost complete, outer brackets need more cleaning up and the lower bracket needs a lot of clean up. will post pics tomorrow as things get done.
06-11-2015, 10:41 PM
#216
Member
Squid

Join Date: Jun 2015
Location: Mid West
Posts: 42
I'm going to need your help this winter when I go through this engine, You do impeccable work scottiemann..! Everything is so precise and well thought out, I went through 3 different plans with just my taillights today... LOL
Great job with both the wiring and those A-N fittings.
Great job with both the wiring and those A-N fittings.
06-12-2015, 03:26 PM
#217
Senior Member
SuperBike
Thread Starter
Join Date: Feb 2007
Location: boston
Posts: 1,252
HA!!! "Well thought out" lol
The general plans and goals have been well thought out but the details are what gets ya, I dont post about all the things Ive tried and failed or thought would work but cant. When you go this far into the custom realm rarely do things go right with the very first plan or idea... I appreciate the compliments though
I am somewhat of a perfectionist though so when I do tackle things I like to be thorough "precise" depends on what you consoder a healthy margin for error
06-14-2015, 06:52 PM
#218
Senior Member
SuperBike
Thread Starter
Join Date: Feb 2007
Location: boston
Posts: 1,252
So as usal this weekend was spent with the little man and the lady friend but its sunday night and its back to work on the bike. Funny story... I need to get a new helmet for the lady friend, its going to be white because she is going to bedazzle it  anyways, she literally sat next to me for about an hour while wearing my helmet and jacket looking at helmets for her lol
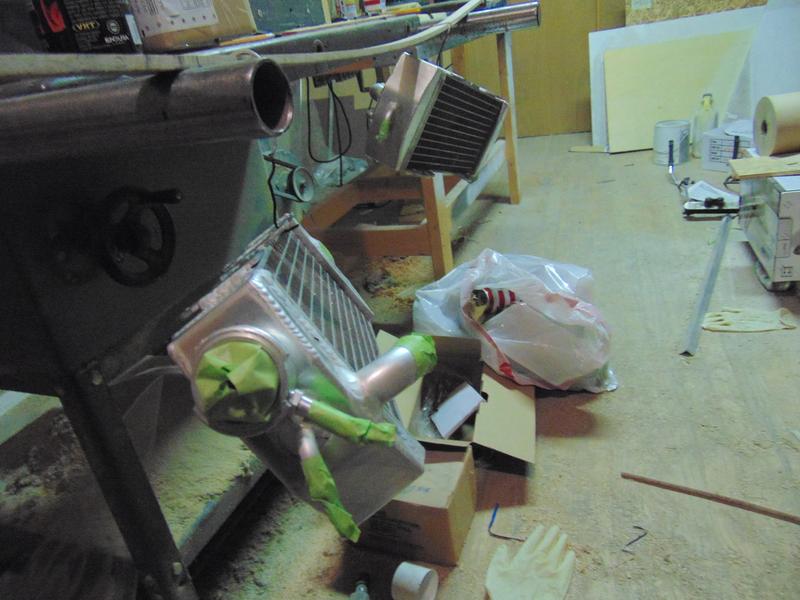
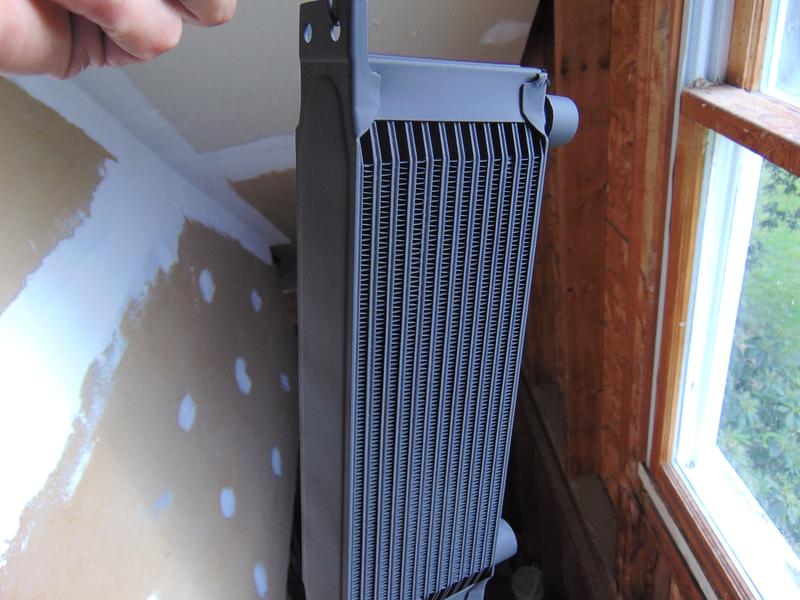
So I tore down the rads and oil cooler in order to trim down and clean up all the brackets and prep them for paint. Just finished that, hopefully I can grab the paint for that tomorrow. I also cut off the lower mounting brackets on the oil cooler as i wont be using them and need to get the paint for that as well.
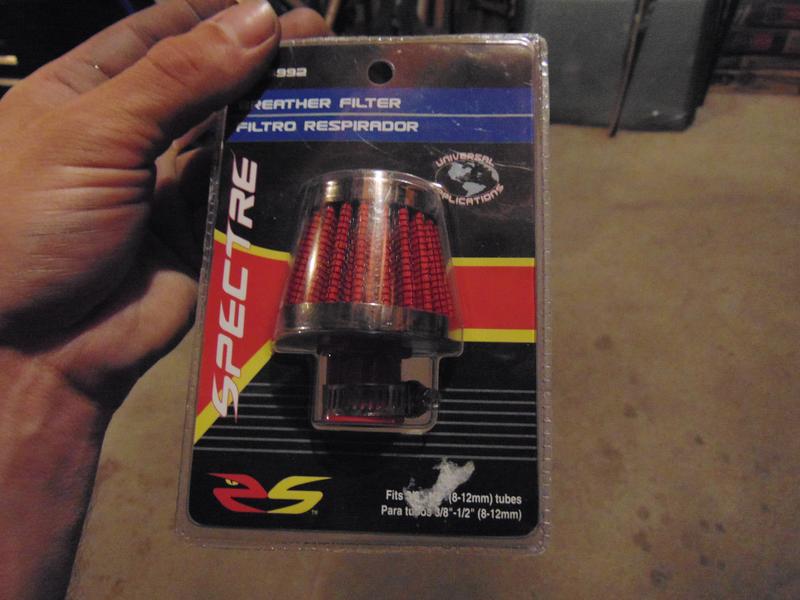
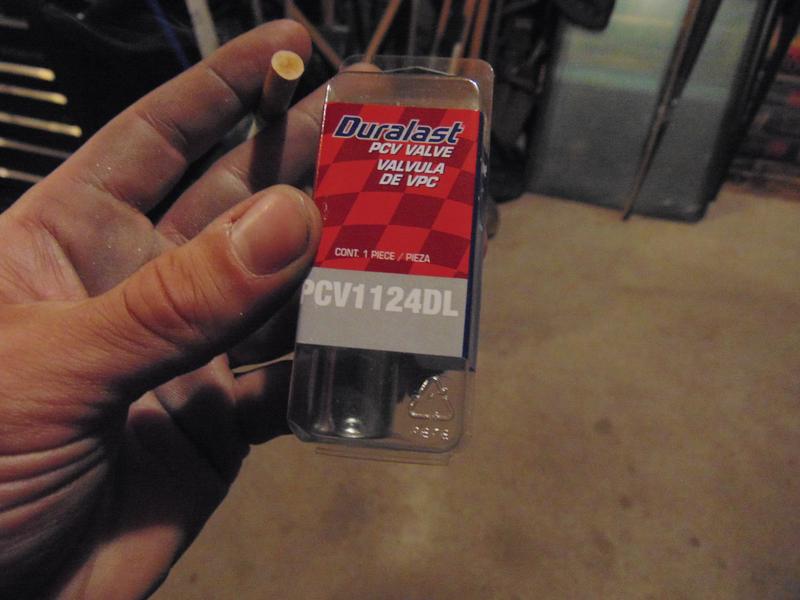
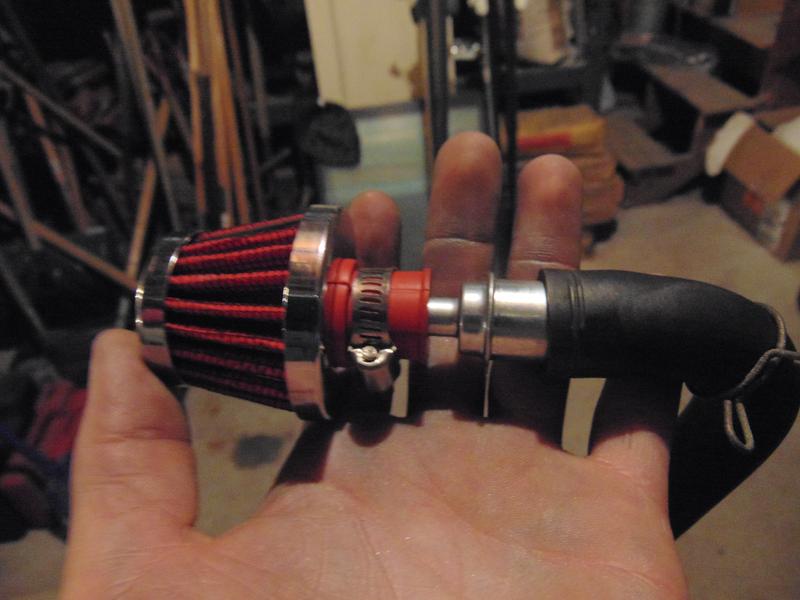
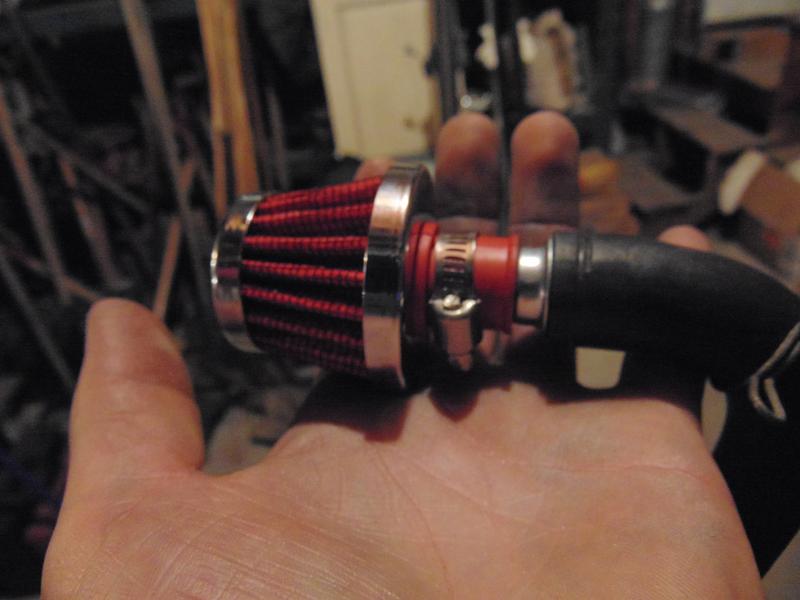
i have also decided I will be running external pod filters for my PCV system, however I live in new england and I will inevitably be caught in a downpour at some point and dont feel comfortable risking the possibility of sucking water into my heads so I went to the parts store grabbed a pair of cheap pod filters and found suitable PCV valves to make me feel more comfortable with that setup...
until I can start reassembling the cooling system I am working on my carbs, brackets are getting cleaned up and painted, blue silicone vacuum hoses, rejetting...etc
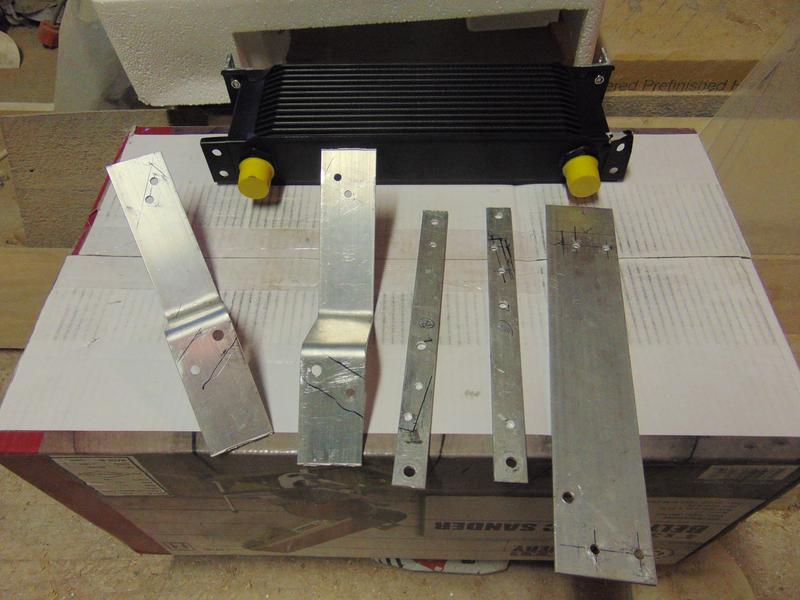
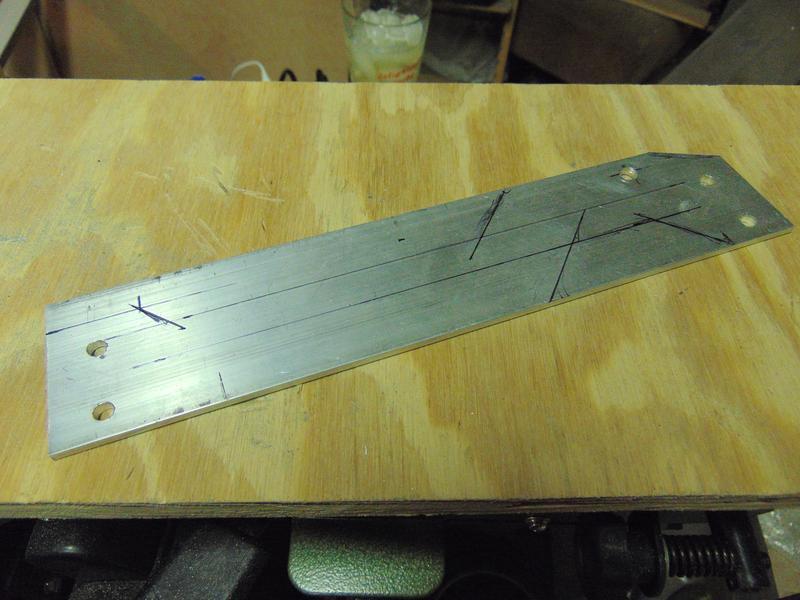
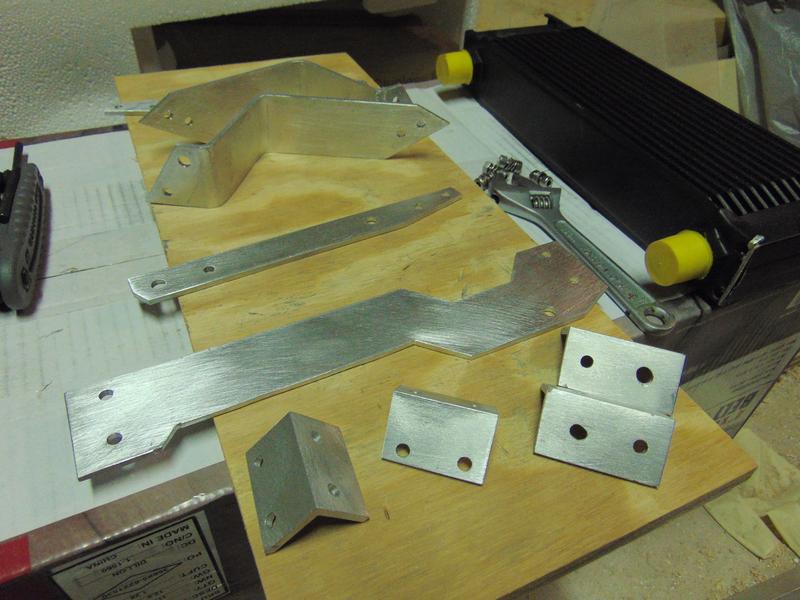
So I tore down the rads and oil cooler in order to trim down and clean up all the brackets and prep them for paint. Just finished that, hopefully I can grab the paint for that tomorrow. I also cut off the lower mounting brackets on the oil cooler as i wont be using them and need to get the paint for that as well.
i have also decided I will be running external pod filters for my PCV system, however I live in new england and I will inevitably be caught in a downpour at some point and dont feel comfortable risking the possibility of sucking water into my heads so I went to the parts store grabbed a pair of cheap pod filters and found suitable PCV valves to make me feel more comfortable with that setup...
until I can start reassembling the cooling system I am working on my carbs, brackets are getting cleaned up and painted, blue silicone vacuum hoses, rejetting...etc
 06-15-2015, 07:55 PM
#224
Senior Member
SuperBike
Thread Starter
Join Date: Feb 2007
Location: boston
Posts: 1,252
So because I worked late tonight (thank god UPS pays me enough to not care ) I wasnt able to get to the parts store to grab paint for my rads and brackets I have been picking away at other things that need to be done...
Seperated my carbs, brackets are getting paint, waiting on pretty blue vacuum hose, second slide hole is filled and filed smooth.
installed new spark plugs and coils, wont be able to get to the front plug and coil once the oil cooler is installed...
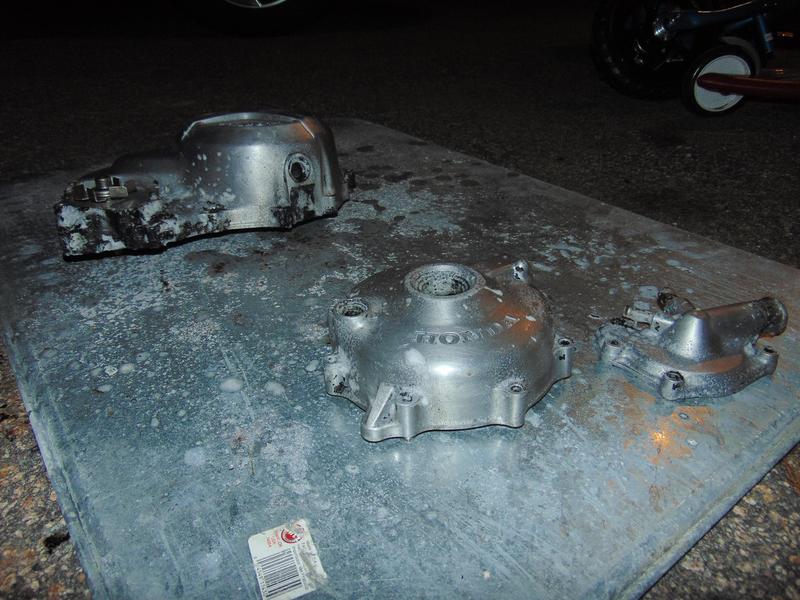
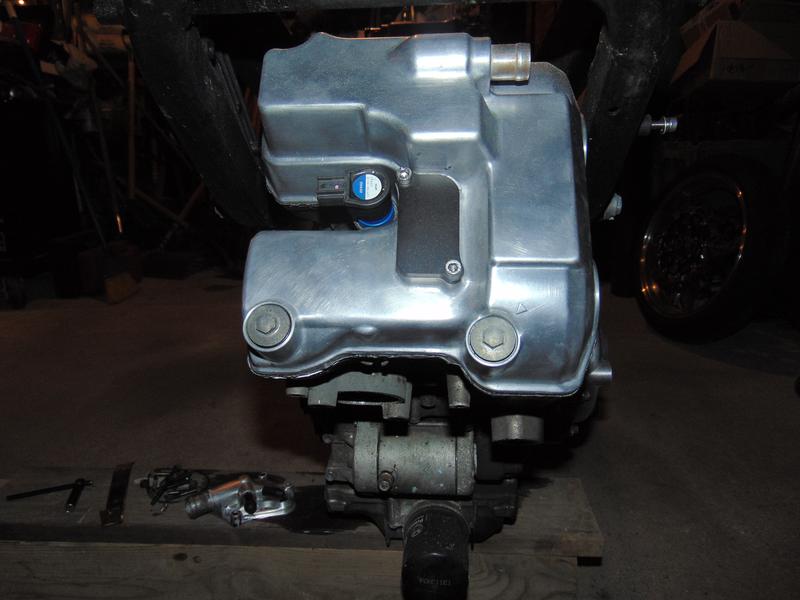
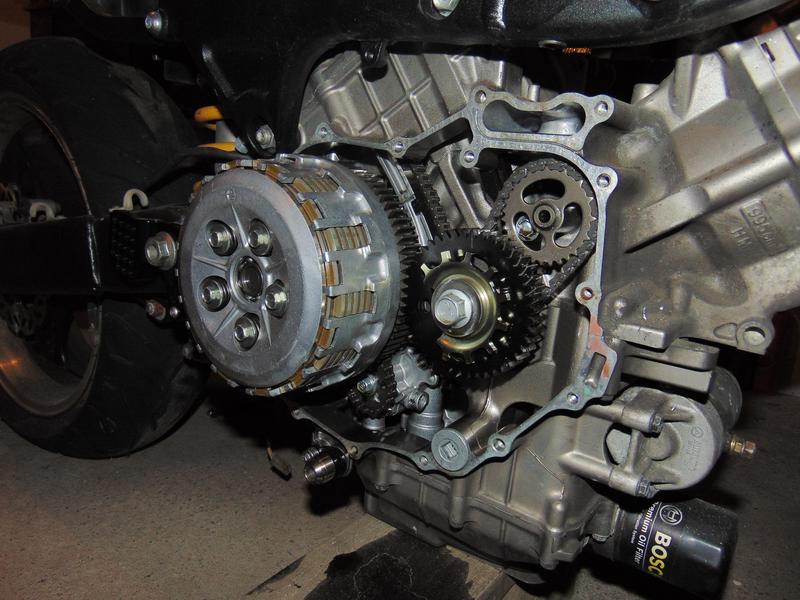
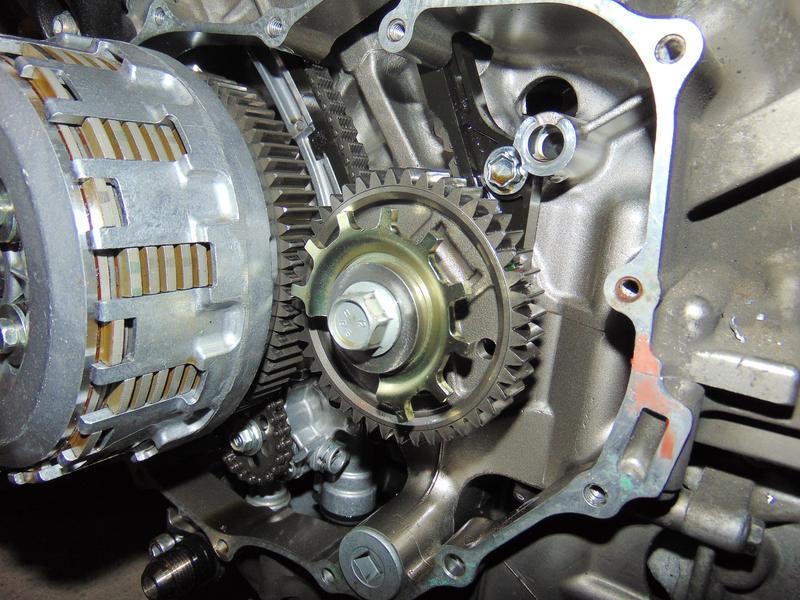
removed water pump cover and clutch cover. for once in my life the clutch cover gasket came off in one piece... I'm amazed I dont have to scrape my life away on the crank case lol
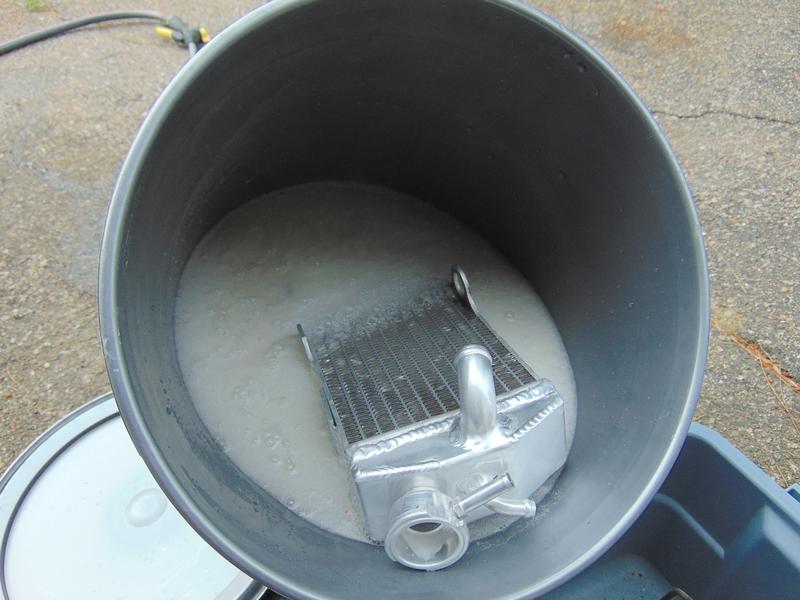
Removed the sub-gear (anti-rattle gear), removed the water pump gear/chain. still have to strip the rest of the paint off both covers, clean them up, brush them up and throw some polish on them... I'm contemplating painting them again as I just remembered I have a bucket of etcher that I completely forgot I had last time I painted these. not sure what to do there...
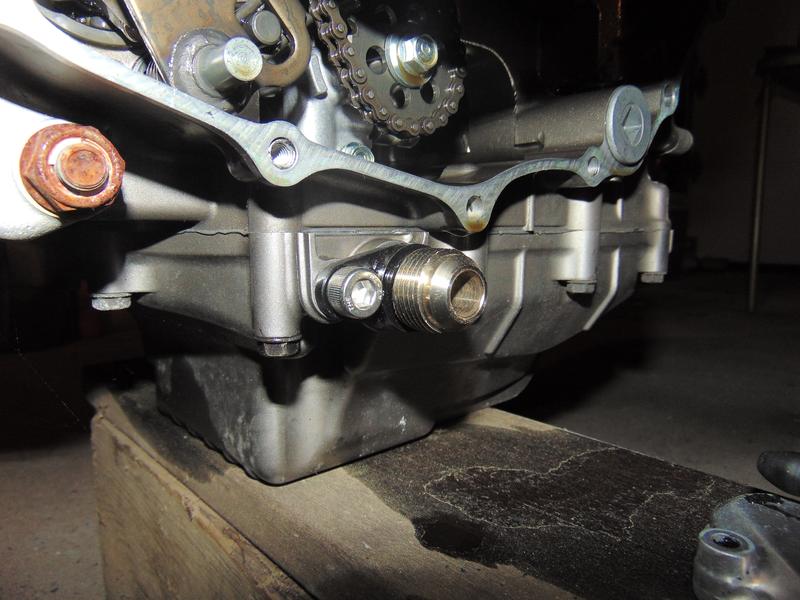
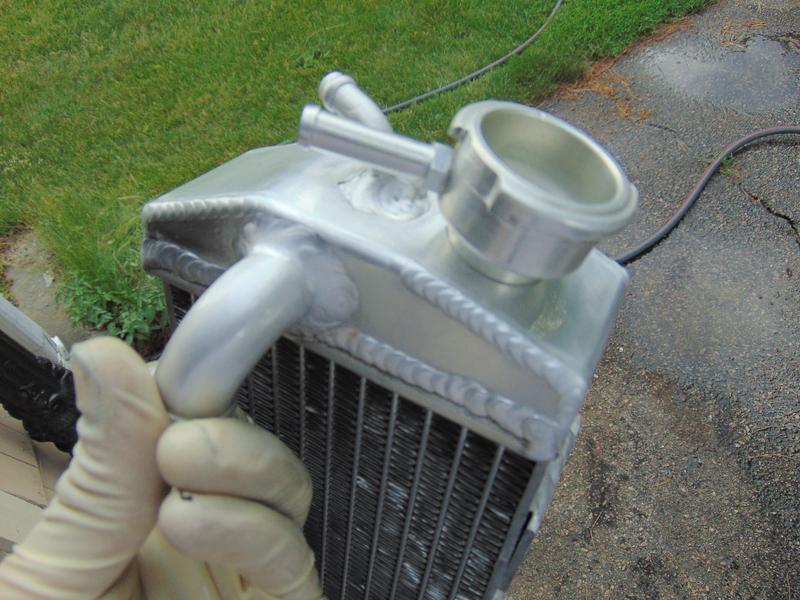
And a lil pic of the oil cooler engine side connections...
Seperated my carbs, brackets are getting paint, waiting on pretty blue vacuum hose, second slide hole is filled and filed smooth.
installed new spark plugs and coils, wont be able to get to the front plug and coil once the oil cooler is installed...
removed water pump cover and clutch cover. for once in my life the clutch cover gasket came off in one piece... I'm amazed I dont have to scrape my life away on the crank case lol
Removed the sub-gear (anti-rattle gear), removed the water pump gear/chain. still have to strip the rest of the paint off both covers, clean them up, brush them up and throw some polish on them... I'm contemplating painting them again as I just remembered I have a bucket of etcher that I completely forgot I had last time I painted these. not sure what to do there...
And a lil pic of the oil cooler engine side connections...
06-16-2015, 04:13 PM
#229
Senior Member
SuperBike
Thread Starter
Join Date: Feb 2007
Location: boston
Posts: 1,252
So got myself a whole ton of paint, thats right a whole 2000lbs...jk
but seriously I have a lot to paint and prep tonight and I want everything painted tonight because I want to start assembly and maybe finish or be close to finished with the entire cooling system thursday...
so whats getting painted? the rads and oil cooler are going flat black, I know the oil cooler already is but I have to touch up the cuts I made and I might as well spray the whole thing with the same paint as the rads so they look like they belong together. All of the brackets for the cooling system as well as the carbs are going flat black. The throttle linkages on the carbs are going gloss black. And I made the last minute decision to paint my valve covers. Hopefully with a chemical etching, engine enamel primer and engine enamel I wont have the same flaking froblem as before... HOPEFULLY
pics coming soon
06-16-2015, 10:03 PM
#230
Senior Member
SuperBike
Thread Starter
Join Date: Feb 2007
Location: boston
Posts: 1,252
Didnt make as much progress as I though I would tonight but did get some things done...
removed all the engine covers. Broke out the tub of etching solution. Washed the cooling system brackets, etched them, painted them. cleaned up the oil cooler and painted that. fixed all the dented rad fins, etched it. I think it needs more time in the etcher because it is highly polished...
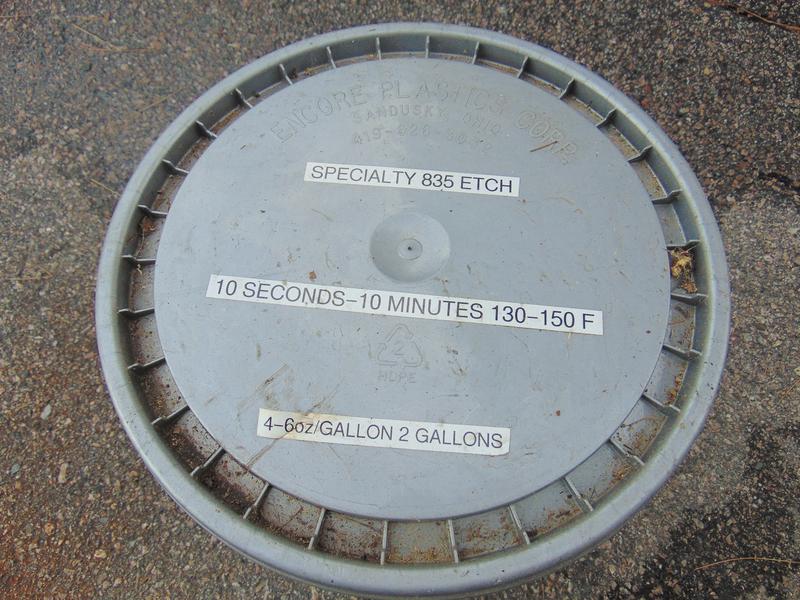
removed all the engine covers. Broke out the tub of etching solution. Washed the cooling system brackets, etched them, painted them. cleaned up the oil cooler and painted that. fixed all the dented rad fins, etched it. I think it needs more time in the etcher because it is highly polished...
06-17-2015, 02:55 AM
#231
Senior Member
SuperBike

Join Date: Mar 2012
Location: New South Wales Australia
Posts: 1,544
The flywheel mate,
The biggest thing that I noticed with the flywheel was difference in throttle response, engine braking, the way it sounds at idle , not to mention the way that it wails from 6,ooo revs on.
My brother who has a Suzuki TLS commented the other day when we went for a ride about how the engine barks when I get up it and asked if I had removed or modded my exhaust baffles.
I can only attribute that comment to the flywheel and the way that the bike now revs.
One downside for me is the loss of thump at idle though I wouldn't have it any other way.
You will find out what I mean when you give it some for the first time with the flywheel modded.
It's an unusual sound to say the least.
Keep going, it's looking good!
Can't wait to see it finished and to get your thoughts.
06-17-2015, 01:32 PM
#232
Senior Member
SuperBike
Thread Starter
Join Date: Feb 2007
Location: boston
Posts: 1,252
I still need to talk to erik about getting one... dont know if I can spend the money at the moment, although that hasnt really stopped me during this build lol
And whos got the flywheel puller tool they dont mind me borrowing? Ill pay shipping
And whos got the flywheel puller tool they dont mind me borrowing? Ill pay shipping
06-17-2015, 04:18 PM
#235
Senior Member
SuperBike
Thread Starter
Join Date: Feb 2007
Location: boston
Posts: 1,252
Daylight Pictures!!!!
I think that deserves a few exclamation points lol
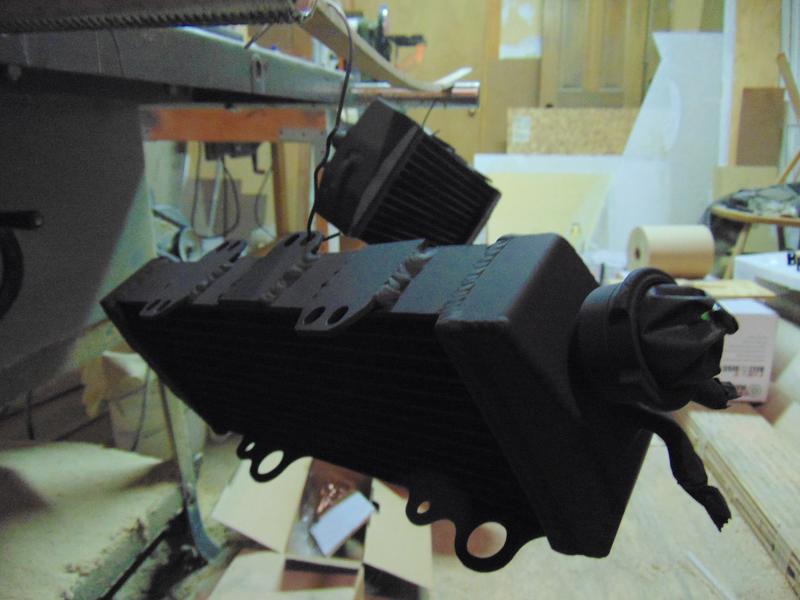
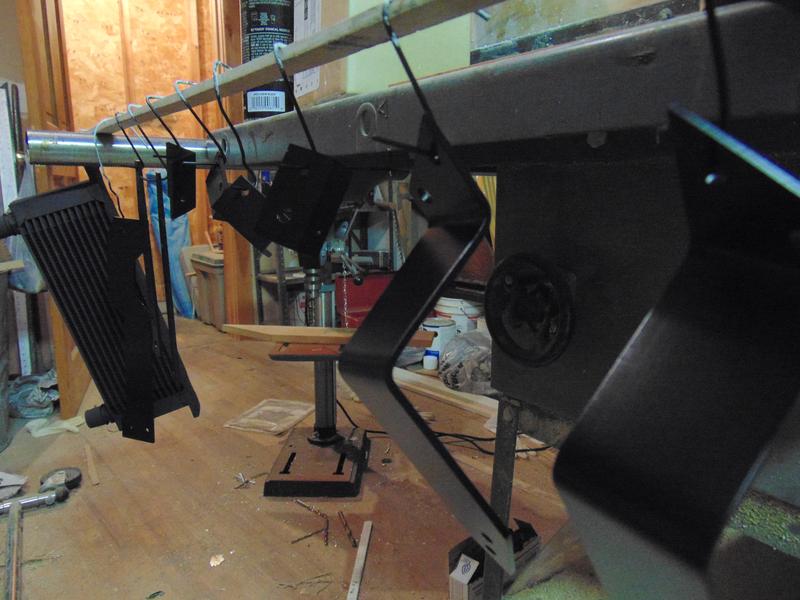
so I took a closeup picture of one of the rad brackets now that its dry to show the satin black, also the oil cooler in flat black...
I also took some "in-progress" pics of etching the rads, now that they are etched I need to dry them as much as possible, tape up the openings and spray them down with some flat black to match the oil cooler.

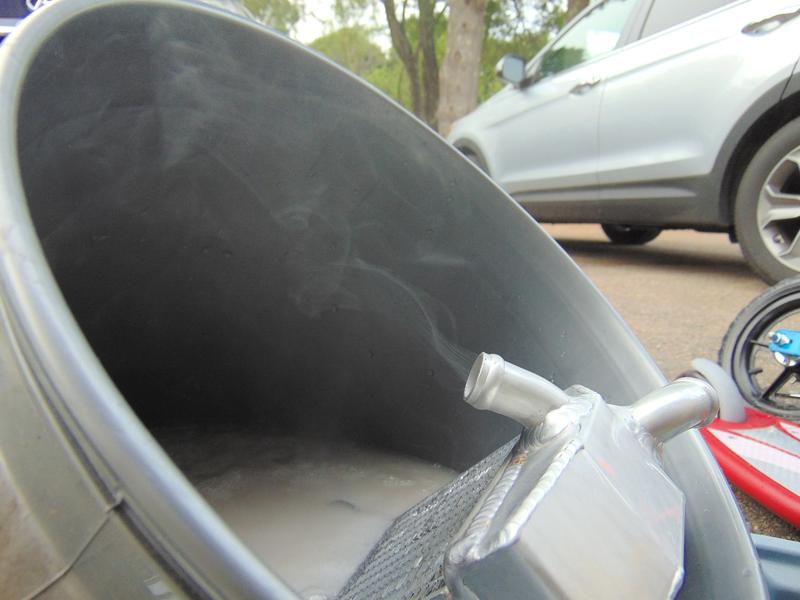
I think that deserves a few exclamation points lol
so I took a closeup picture of one of the rad brackets now that its dry to show the satin black, also the oil cooler in flat black...
I also took some "in-progress" pics of etching the rads, now that they are etched I need to dry them as much as possible, tape up the openings and spray them down with some flat black to match the oil cooler.


 06-17-2015, 05:53 PM
#239
Senior Member
SuperBike
Thread Starter
Join Date: Feb 2007
Location: boston
Posts: 1,252
Rads are dry and ready for tape and paint, valve covers are etched and need to dry then ready for tape/primer/paint... gotta work on stripping the rest of the paint off the side covers then etch them
06-17-2015, 09:42 PM
#240
Senior Member
SuperBike
Thread Starter
Join Date: Feb 2007
Location: boston
Posts: 1,252
Well I'm still working on the engine covers but I got the rads painted. hopefully tomorrow I can get those mounted and start working on hose routing and placement of the electric water pump...