ALUMINUM 101 (how to polish without sanding)


Thread Starter
mad skill collector
Squid
Joined: Oct 2009
Posts: 77
From: Hayward, San Francisco bay area: California

Well I have been lurking and reading for some time now, and feel that I need to contribute some now as a payback for all the help I have recieved from this forum.
The information I have is passed from another , I found it
to be the holy grail when it comes to aluminum ,I hope you all will as well....
In order to polish any part of aluminum one must first
remove any protective coating that has been applied to it.
The prossess to keep all aluminum durable is usually anodizing and it provides a hard coating over the part that protects it and makes it resistant to abuse....
Often refered to as clear coating it is this layer of protection that most people sand off in multiple steps from coarse to fine.....very time consuming and labor intensive ... Well no more my friends !!! follow my instructions that follow for yourself , you will be amazed
how easy this can be.
1 . mask off all parts with masking tape and newspaper that have paint or plastic or finish that you like. use 3 or 4 layers and take your time here it will be worth it. The only thing exposed should be the areas you want polished.
2 . Painted surfaces must be removed with paint remover such as jasc (follow there directions on the back)
3 . now go to the grocery store and buy a can of
EASY-OFF OVEN CLEANER the lemon scented kind.
shake it well and read the back for safety precautions.
I am warning you to use care around animals and kids.
That said : spray your part with a coat of the cleaner and
then wait.... in 5 to 15 mins. the part will turn black , use some newspaper and wipe the black away , throw away the soaked paper carefully . Apply another coat of
oven cleaner , wait, then wipe the black off. repeat untill the part no longer discolors black. usually 3 times a charm... but it is important that no black areas are left.
4 . Remove the top coat of masking after wiping the excess oven cleaner off and wash the areas with soap and water to remove any remaining ovencleaner .
5 . what you have left is a dull gray finish with no anodizing left, or fresh aluminum ready to be buffed
with a spiral sewn wheel and tripoli. Then follow with a loose sewn wheel and white polishing compound.
6 . Use mothers polish or your favorite mag polish and a
soft cloth then stand back and enjoy....
7 . of course cast or scratched parts must still be sanded
but Frames, swingarms ,rims, and engine covers are what this prossess is for.....
 Thanks and goodnite!
The information I have is passed from another , I found it
to be the holy grail when it comes to aluminum ,I hope you all will as well....
In order to polish any part of aluminum one must first
remove any protective coating that has been applied to it.
The prossess to keep all aluminum durable is usually anodizing and it provides a hard coating over the part that protects it and makes it resistant to abuse....
Often refered to as clear coating it is this layer of protection that most people sand off in multiple steps from coarse to fine.....very time consuming and labor intensive ... Well no more my friends !!! follow my instructions that follow for yourself , you will be amazed
how easy this can be.
1 . mask off all parts with masking tape and newspaper that have paint or plastic or finish that you like. use 3 or 4 layers and take your time here it will be worth it. The only thing exposed should be the areas you want polished.
2 . Painted surfaces must be removed with paint remover such as jasc (follow there directions on the back)
3 . now go to the grocery store and buy a can of
EASY-OFF OVEN CLEANER the lemon scented kind.
shake it well and read the back for safety precautions.
I am warning you to use care around animals and kids.
That said : spray your part with a coat of the cleaner and
then wait.... in 5 to 15 mins. the part will turn black , use some newspaper and wipe the black away , throw away the soaked paper carefully . Apply another coat of
oven cleaner , wait, then wipe the black off. repeat untill the part no longer discolors black. usually 3 times a charm... but it is important that no black areas are left.
4 . Remove the top coat of masking after wiping the excess oven cleaner off and wash the areas with soap and water to remove any remaining ovencleaner .
5 . what you have left is a dull gray finish with no anodizing left, or fresh aluminum ready to be buffed
with a spiral sewn wheel and tripoli. Then follow with a loose sewn wheel and white polishing compound.
6 . Use mothers polish or your favorite mag polish and a
soft cloth then stand back and enjoy....
7 . of course cast or scratched parts must still be sanded
but Frames, swingarms ,rims, and engine covers are what this prossess is for.....


evil man of nothing
MotoGP
Joined: Jan 2006
Posts: 4,523
From: Boynton Beach, FL
How did you try to take it off? I've done a bunch of them and I use a cheap black and decker mouse sander with 220 grit, and wet sand with say 400, 800, 1000 (and if you want 1500 or 2000) and then hand polish with mothers. It's really not hard and if you're careful and are sure to remove all the surface scratches with your current grit you're using before moving on to a finer grit, you'll get mirror results. The superhawk swingarm is easy because it's all flat surfaces. To do something like an RC51 swingarm, with welds and voids, you do need to use a wheel and some compound. Caswell plating sells kits that work fantastic for the tougher spots like that. And to polish the rough stuff like the rear portion of many frames, you need to grind it down smooth first. It's alot of work and alot of upkeep, but if you're really **** like me you can get pro results on the cheap in your garage.

Senior Member
Superstock
Joined: Jul 2005
Posts: 416
From: North Central Indiana

You will have to sand the swing arm. The swing arm and frame are extruded aluminum. If you look you can see the extrusion lines in the aluminum. It takes alot of sanding to get the surface smooth enough to polish.
evil man of nothing
MotoGP
Joined: Jan 2006
Posts: 4,523
From: Boynton Beach, FL
There is no "easy" way to do this guys. There is an "easier" and a couple "correct" ways to do it, but the theory behind making something shine is to get the surface like glass-as smooth as possible so it reflects light and doesn't send it in 90 different directions. No matter how you do it it's hard, dirty, and time consuming. I'd tell anyone to practice on a small part before you go trying to do your whole bike. That way you get a feel for how the process works. Once you do you can polish anything-aluminum, steel, plastic, even glass.
I'm a little ocd with detail stuff...so I don't mind sitting there for hours getting a part to shine. It's also addictive and soon you'll want to start polishing everything once you get good at it. But I don't think the process is for everyone as many folks would rather ride than clean and think any bike worth it's salt should have some dirt and grime on it.
I'm a little ocd with detail stuff...so I don't mind sitting there for hours getting a part to shine. It's also addictive and soon you'll want to start polishing everything once you get good at it. But I don't think the process is for everyone as many folks would rather ride than clean and think any bike worth it's salt should have some dirt and grime on it.
Last edited by captainchaos; Feb 5, 2010 at 07:26 AM.
Senior Member
Superstock
Joined: Jul 2005
Posts: 416
From: North Central Indiana
There is no "easy" way to do this guys. There is an "easier" and a couple "correct" ways to do it, but the theory behind making something shine is to get the surface like glass-as smooth as possible so it reflects light and doesn't send it in 90 different directions. No matter how you do it it's hard, dirty, and time consuming. I'd tell anyone to practice on a small part before you go trying to do your whole bike. That way you get a feel for how the process works. Once you do you can polish anything-aluminum, steel, plastic, even glass.
I'm a little ocd with detail stuff...so I don't mind sitting there for hours getting a part to shine. It's also addictive and soon you'll want to start polishing everything once you get good at it. But I don't think the process is for everyone as many folks would rather ride than clean and think any bike worth it's salt should have some dirt and grime on it.
I'm a little ocd with detail stuff...so I don't mind sitting there for hours getting a part to shine. It's also addictive and soon you'll want to start polishing everything once you get good at it. But I don't think the process is for everyone as many folks would rather ride than clean and think any bike worth it's salt should have some dirt and grime on it.

Senior Member
SuperBike
SuperBike
Joined: Jun 2007
Posts: 1,031
From: Los Angeles ish
I would think there is a risk of three coats of Easy Off soaking through the newspaper and ruining the bodywork. I always have some heavy duty 18" wide aluminum foil in the garage for masking stuff off. I like it cuz you can mold it to parts.
evil man of nothing
MotoGP
Joined: Jan 2006
Posts: 4,523
From: Boynton Beach, FL
Also sometimes it's easier/safer/neater to brush on paint removers/easy off than spray it on. If it's a spray can spray it into a cap or small bowl first then use a brush. Always wear gloves and eye protection!
Senior Member
Superstock
Joined: Jul 2005
Posts: 416
From: North Central Indiana
They're painted aren't they? The easiest way would be to scuff them up and find a similar paint and clearcoat them. It depends on what kind of finish you want though. The term "polishing" is thrown around alot. Folks say they "polish" stuff with steel wool. It'll make something filthy shine more but to get something to shine like chrome you have to put in the work. Even after you strip off clearcoat/paint you still need to sand it smooth to do it properly. There really is no such thing as polishing without sanding. You can substitute some of the sanding with a wheel and different grits of an abrasive compound but the process is still the same.
Also sometimes it's easier/safer/neater to brush on paint removers/easy off than spray it on. If it's a spray can spray it into a cap or small bowl first then use a brush. Always wear gloves and eye protection!
Also sometimes it's easier/safer/neater to brush on paint removers/easy off than spray it on. If it's a spray can spray it into a cap or small bowl first then use a brush. Always wear gloves and eye protection!
Thread Starter
mad skill collector
Squid
Joined: Oct 2009
Posts: 77
From: Hayward, San Francisco bay area: California
HEY ALL.... THE METHOD I AM TELL YOU IS A PROVEN NO SAND METHOD , THE FRAME ON MY HAWK HAS NOT GOT THIS TREATMENT YET, I WILL DOCUMENT THE PROCEDURE WITH PICS TO SHOW HOW EASY, AGAIN I SAY EASY , THIS IS . JUST DON'T
SAND BEFORE YOU TRY IT , I SCREWED UP MY VFR FRAME A BIT
BY SANDING IT, THEN I LEARNED THIS METHOD AND DID THE WHOLE BIKE WITHOUT TROUBLE, SO STAY TUNNED AND I WILL GET YOU GUYS SOME PICS, IF YOU LIKE SANDING AND DISMANTLING PARTS THEN GO AHEAD.. ITS YOUR TIME...
SAND BEFORE YOU TRY IT , I SCREWED UP MY VFR FRAME A BIT
BY SANDING IT, THEN I LEARNED THIS METHOD AND DID THE WHOLE BIKE WITHOUT TROUBLE, SO STAY TUNNED AND I WILL GET YOU GUYS SOME PICS, IF YOU LIKE SANDING AND DISMANTLING PARTS THEN GO AHEAD.. ITS YOUR TIME...
Thread Starter
mad skill collector
Squid
Joined: Oct 2009
Posts: 77
From: Hayward, San Francisco bay area: California
YOU MUST STILL USED A BUFFER AND COMPOUND TO POLISH THE
ALUMINUM BUT THE SANDING IS DONE TO REMOVE THE ANODIZING THAT IS ON ALL MANUFACTURED PARTS , REMOVE PAINTED PARTS LIKE TANK AND FAIRING OF COURSE AND DO NOT USE ALUMINUM FOIL TO MASK WITH. EASY OFF REACTS WITH ALUMINUM ....! THATS THE POINT
ALUMINUM BUT THE SANDING IS DONE TO REMOVE THE ANODIZING THAT IS ON ALL MANUFACTURED PARTS , REMOVE PAINTED PARTS LIKE TANK AND FAIRING OF COURSE AND DO NOT USE ALUMINUM FOIL TO MASK WITH. EASY OFF REACTS WITH ALUMINUM ....! THATS THE POINT
evil man of nothing
MotoGP
Joined: Jan 2006
Posts: 4,523
From: Boynton Beach, FL
Didn't mean to offend you dude. There's always more than one way to do things. Your way sounds like an great way to remove clearcoat. But it doesn't offer much in the way of advice or technique on actual polishing. And it limits you to only the easy stuff that's already smooth. I can remove the clearcoat pretty quickly and at the same time be on my way to removing the machining marks and also any wear and tear scratches all with one grit of sandpaper with a small hand sander. And you HAVE to disassemble stuff if you want to get everywhere you can see and get professional results.
evil man of nothing
MotoGP
Joined: Jan 2006
Posts: 4,523
From: Boynton Beach, FL
And as I already said you can substitute "sanding" with different wheels and grits of compound. Call it whatever you like it's still doing exactly the same thing and instead of having a black puddle from wetsanding you have a black cloud and black splatter in every direction from compound spitting off the wheel. Anyway I know how to polish and utilize both wetsanding and hand polishing, and also wheels and compounds. I'm not trying to bust your *****. Check out my old gsxr I built a few years back-you could shave it in. Post up some pics of your vfr I'd love to see it.

Banned
MotoGP
Joined: Aug 2007
Posts: 5,942
From: Lake View Terrace, CA
HEY ALL.... THE METHOD I AM TELL YOU IS A PROVEN NO SAND METHOD , THE FRAME ON MY HAWK HAS NOT GOT THIS TREATMENT YET, I WILL DOCUMENT THE PROCEDURE WITH PICS TO SHOW HOW EASY, AGAIN I SAY EASY , THIS IS . JUST DON'T
SAND BEFORE YOU TRY IT , I SCREWED UP MY VFR FRAME A BIT
BY SANDING IT, THEN I LEARNED THIS METHOD AND DID THE WHOLE BIKE WITHOUT TROUBLE, SO STAY TUNNED AND I WILL GET YOU GUYS SOME PICS, IF YOU LIKE SANDING AND DISMANTLING PARTS THEN GO AHEAD.. ITS YOUR TIME...
SAND BEFORE YOU TRY IT , I SCREWED UP MY VFR FRAME A BIT
BY SANDING IT, THEN I LEARNED THIS METHOD AND DID THE WHOLE BIKE WITHOUT TROUBLE, SO STAY TUNNED AND I WILL GET YOU GUYS SOME PICS, IF YOU LIKE SANDING AND DISMANTLING PARTS THEN GO AHEAD.. ITS YOUR TIME...

Thread Starter
mad skill collector
Squid
Joined: Oct 2009
Posts: 77
From: Hayward, San Francisco bay area: California
LOL I forgot about what caps means sorry, I am not offended.
I am just lazy with my keyboard. I love mines road. Any time you guy's want to meet up I am up for it.
I am just lazy with my keyboard. I love mines road. Any time you guy's want to meet up I am up for it.

Senior Member
Superstock
Joined: Dec 2004
Posts: 367
From: Independence, Oregon
No Sand
HEY ALL.... THE METHOD I AM TELL YOU IS A PROVEN NO SAND METHOD , THE FRAME ON MY HAWK HAS NOT GOT THIS TREATMENT YET, I WILL DOCUMENT THE PROCEDURE WITH PICS TO SHOW HOW EASY, AGAIN I SAY EASY , THIS IS . JUST DON'T
SAND BEFORE YOU TRY IT , I SCREWED UP MY VFR FRAME A BIT
BY SANDING IT, THEN I LEARNED THIS METHOD AND DID THE WHOLE BIKE WITHOUT TROUBLE, SO STAY TUNNED AND I WILL GET YOU GUYS SOME PICS, IF YOU LIKE SANDING AND DISMANTLING PARTS THEN GO AHEAD.. ITS YOUR TIME...
SAND BEFORE YOU TRY IT , I SCREWED UP MY VFR FRAME A BIT
BY SANDING IT, THEN I LEARNED THIS METHOD AND DID THE WHOLE BIKE WITHOUT TROUBLE, SO STAY TUNNED AND I WILL GET YOU GUYS SOME PICS, IF YOU LIKE SANDING AND DISMANTLING PARTS THEN GO AHEAD.. ITS YOUR TIME...
Thread Starter
mad skill collector
Squid
Joined: Oct 2009
Posts: 77
From: Hayward, San Francisco bay area: California
ok I am off work and gonna start on my frame rails using my method, I almost wish someone would video the whole thing so that one would get the idea of time start to finish. Of course as Captainchaos has said the amount of "polish" is subject to ones level of mental disorder. I think my level is medium at least thats what my doc says, she's a Vetrinarian.

Thread Starter
mad skill collector
Squid
Joined: Oct 2009
Posts: 77
From: Hayward, San Francisco bay area: California
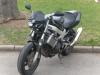
Hey all just posted the pics of the prosses I am sharing with you all.
not a single sheet of sandpaper was harmed from start to finish.
the steps are cut down to half in this procedure because your not scratching a perfectly smooth part. Enjoy ...I am beat now...
not a single sheet of sandpaper was harmed from start to finish.
the steps are cut down to half in this procedure because your not scratching a perfectly smooth part. Enjoy ...I am beat now...
Banned
MotoGP
Joined: Aug 2007
Posts: 5,942
From: Lake View Terrace, CA
As for weather.... compared to most of the members we are doing good....lol