
Need help! An internal portion of the fork leg got sandblasted


Thread Starter
Senior Member
SuperBike
Joined: Feb 2013
Posts: 1,510

Need help! An internal portion of the fork leg got sandblasted
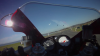
Hey guys! Just got a bunch of parts back from the powder coater, and the only mistake they made was that the top of the fork leg was not plugged exactly right, and a bit of blast material got past the plug. I'm attaching a picture to show what I see; a roughed up portion of the uppermost part of the fork leg. It looks like it is blasted about 3 1/4 inches down, but that is only in one small section. Most of the blasting is up near the Seattle area. It's actually not too bad, if anything it feels like the aluminum is raised, and not indented.
These are great guys to work with, and they are excellent at what they do, and this was just one minor mistake. I would love to let it go and move on, but I need to know if this area of the fork leg is used by the bushing, or if it is just dead space where fluid resides.
Not looking to point any fingers at the shop, or to get new parts, I would really just like to move on because the work they do is usually very good.
Thanks!
James

VTR virgin
Superstock
Joined: Mar 2015
Posts: 447
From: Auckland, New Zealand
In normal use, no the lower bushing is much further down the tube. But when you assemble fork your delicate teflon coated bushing will have to pass through that rough area, and might get a bit torn up. I would get in there with sandpaper and take off any high spots in the tube before you reassemble, and make sure all grit is washed out afterwards.
For the next level up, that's where the upper bush sits but the outside (non-coated) part is in contact with the rough section so it doesn't mattter. It might pay to take off any high spots just to make sliding parts together a little easier.
For the next level up, that's where the upper bush sits but the outside (non-coated) part is in contact with the rough section so it doesn't mattter. It might pay to take off any high spots just to make sliding parts together a little easier.
Thread Starter
Senior Member
SuperBike
Joined: Feb 2013
Posts: 1,510
OK, that makes perfect sense. I just went out and measured everything and it looks like the top of the lower fork bushing would only contact the rough area if the fork were extended to 907mm in total length! I'm pretty certain that's not even possible.


Administrator
MotoGP
Joined: Apr 2006
Posts: 4,402
From: Kempner, TX
As suggested already, lightly clean up the area for the bushing, don't touch the seal area as it wont matter to the OD of the seal.
Use lots of lube assembling the fork parts.. I use Race Tech seal grease but there are other products that are compatible with the fork fluid as well.
Likely a no brainer.. but if the inside got media blasted.... then blast media got inside..Single biggest mistake I see commonly with media blasters after hitting the worng areas or unprotected parts...is failure to remove all media after the job, before assembly.
Media hids in pores of metal, cracks, seams, machining marks.
When glass bead blasting was new... we lost dozens of high buick builds.. 10's of thousands of dollars in motors destroyed at start up and the first minutes of running.. media was found embedded in the metal, and had traveled through the motor damaging everything it touched.
Media blast cabinets are not even allowed in the same building in a good race shop as the motor builds happen in, or Airplane repair shop..
I found heated fluid with pressure and volume works well to flush media. The heated fluid be it water with surfactant or solvent... cuts through any oil or crud that might help retain the media and also in my theory.. causes the material to expand and that helps release media trapped in a parting line, groove, nick or actually embedded in the material blasted. Hit a piece of aluminum with media at high enough pressure to quickly and aggressively remove paint. Blow it off with compressed air, or even run it under cold water and then dry with compressed air. Now look at the piece of material under a strong magnifying class and good light or better a microscope.. you will be surprised by what you will see.
Thread Starter
Senior Member
SuperBike
Joined: Feb 2013
Posts: 1,510
I planned to rinse them off in my bathtub in very hot water, then use compressed air to dry them inside and out, then let them sit overnight for good measure...
P.S. Now you have me worried... Did i mention i had my oil pan and clutch cover done too? They didn't get blasted on the inside, but they are very dusty!
James
P.S. Now you have me worried... Did i mention i had my oil pan and clutch cover done too? They didn't get blasted on the inside, but they are very dusty!
James
Last edited by thedeatons; Feb 12, 2016 at 06:29 PM.
Administrator
MotoGP
Joined: Apr 2006
Posts: 4,402
From: Kempner, TX
I planned to rinse them off in my bathtub in very hot water, then use compressed air to dry them inside and out, then let them sit overnight for good measure...
P.S. Now you have me worried... Did i mention i had my oil pan and clutch cover done too? They didn't get blasted on the inside, but they are very dusty!
James
P.S. Now you have me worried... Did i mention i had my oil pan and clutch cover done too? They didn't get blasted on the inside, but they are very dusty!
James
Way too much pressure.
Blasting an assembly (vice an individual part)
Not removing all the paint or other "soft" coating that was on the part and media is still stuck in the "soft" coating remaining.
Or not cleaning the part post media blasting.
Sounds like your on the right path to success.

Thread
Thread Starter
Forum
Replies
Last Post


