
Factory Pro Shift Kit with Detent Arm


Thread Starter
Senior Member
Superstock
Joined: Apr 2007
Posts: 284
From: Warren, NH

Factory Pro Shift Kit with Detent Arm
I got around to installing this the other day, so I thought I would do an install guide to help anyone out with this. If some of the pictures are a little blurry, sorry, I am a mechanic not a photographer.
First thing to do is throw their instruction's away. They are horrible.
You could do this without draining your oil if you do this with the bike on the side stand. I would recomend draining the oil. You will probally get some coolant in the oil when you pull the clutch cover off.
Remove your fairing to gain easy acces to the clutch cover. You can either drain your coolant or pinch off the coolant lines to the waterpump.
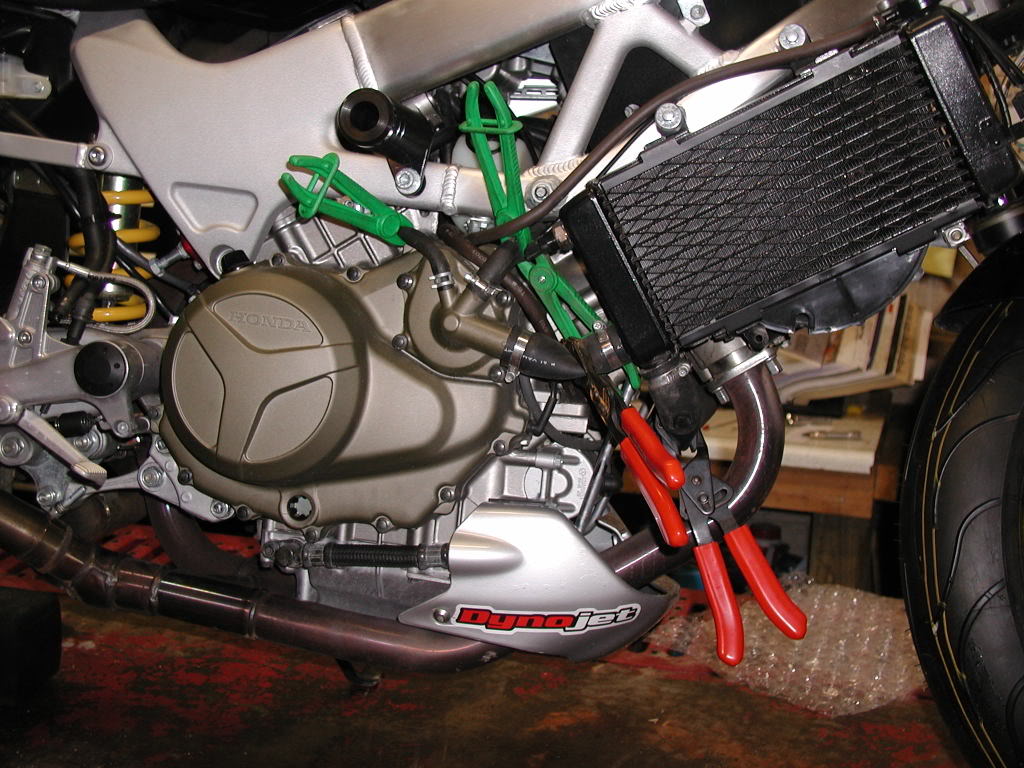
Loosen you radiator to make it easier to get the main coolant line off the water pump.
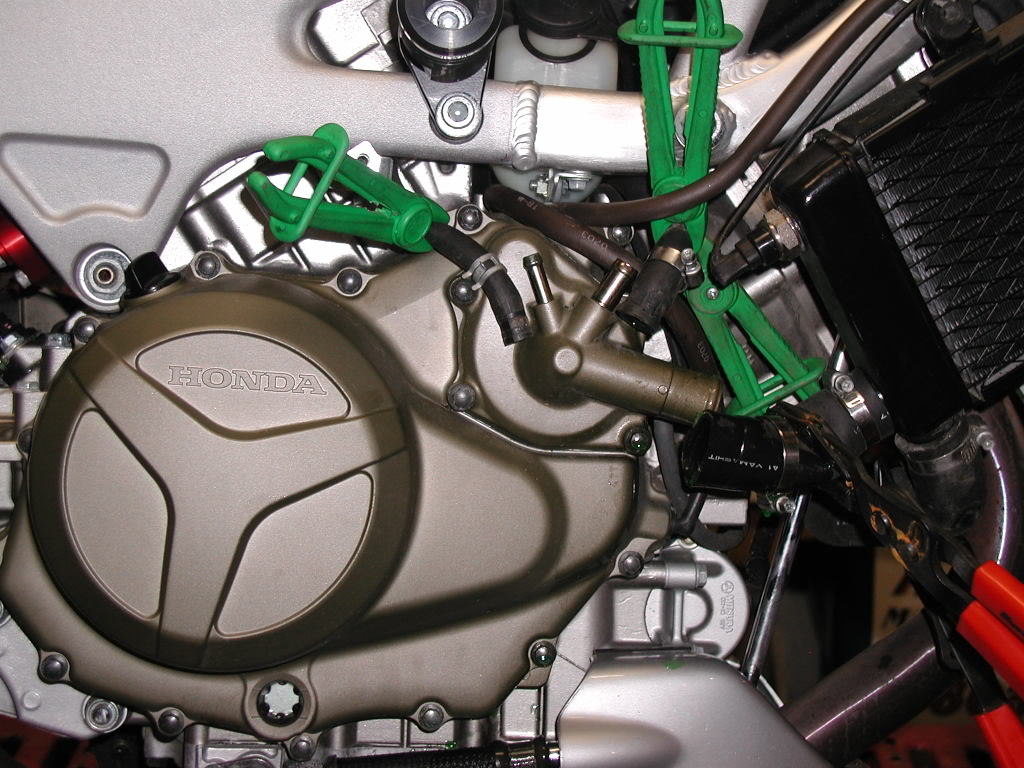
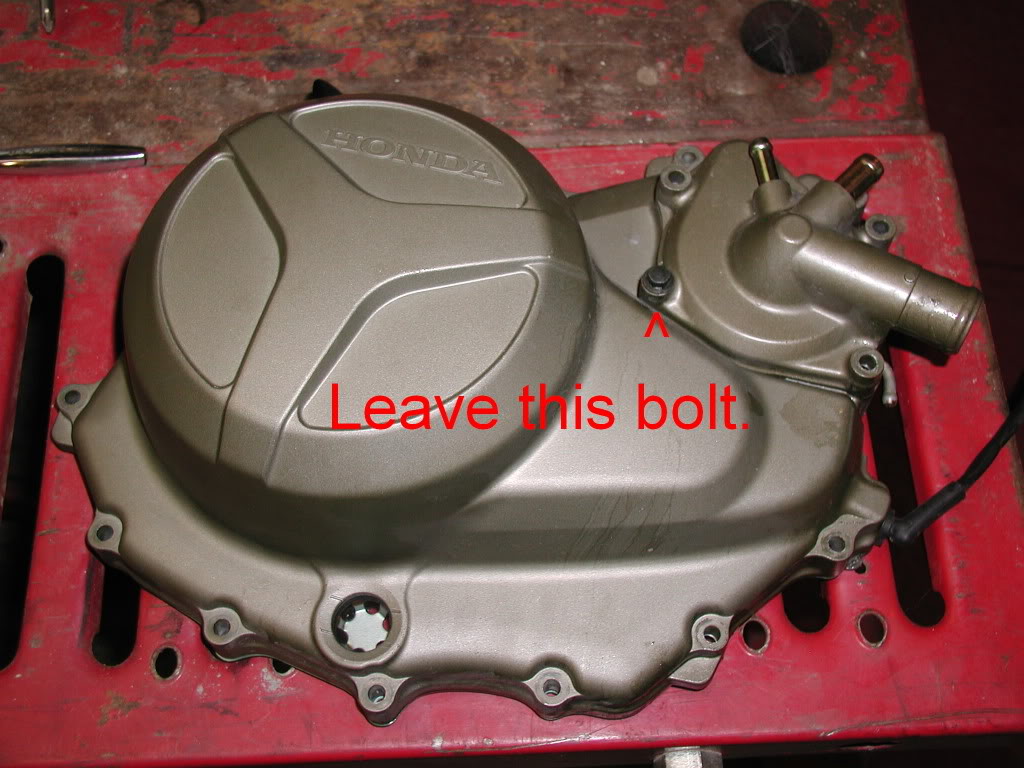
Remove the bolts holding both the waterpump and clutch cover on except for the one noted. This way the water pump will stay attached to the cover.
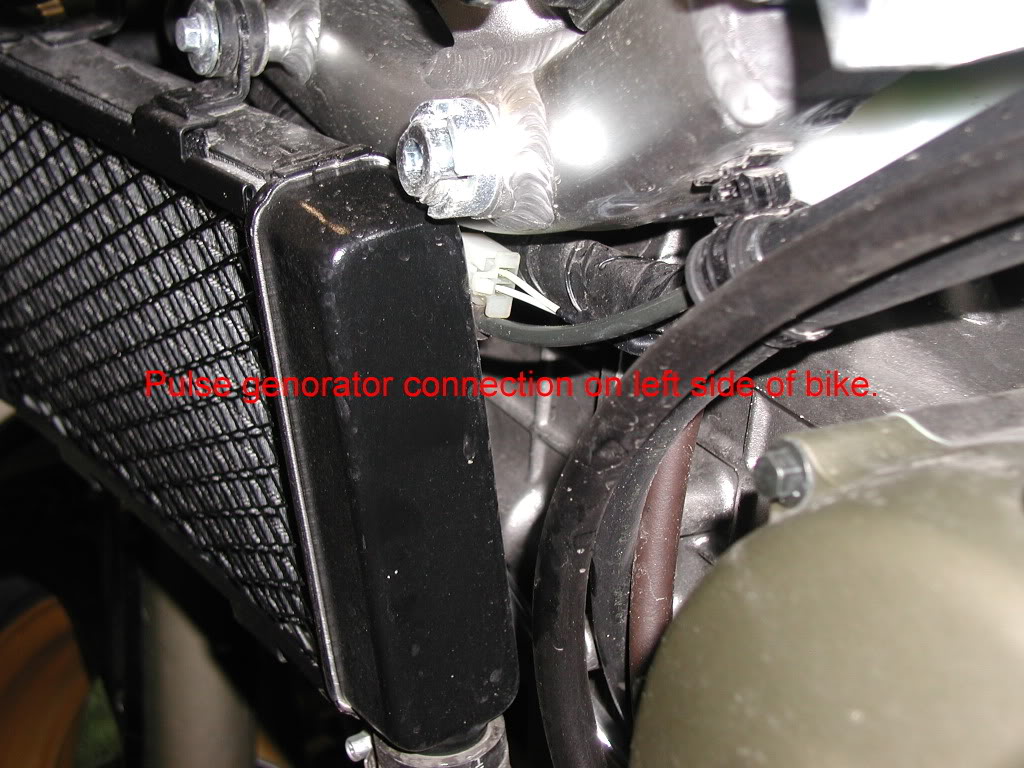
Disconnect the pulse genorator wire connection behind the left raidator and pull clear.
Work the cover and water pump assembly off. There are 2 dowel pins that help align the cover that can stick a bit to get the cover off.
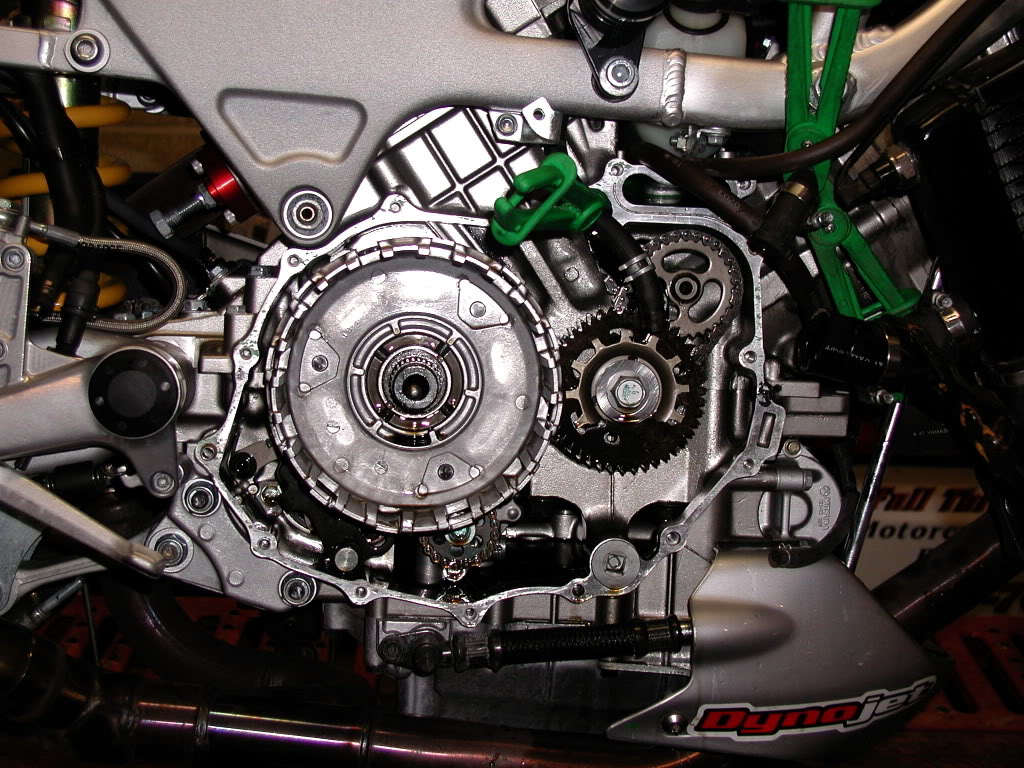
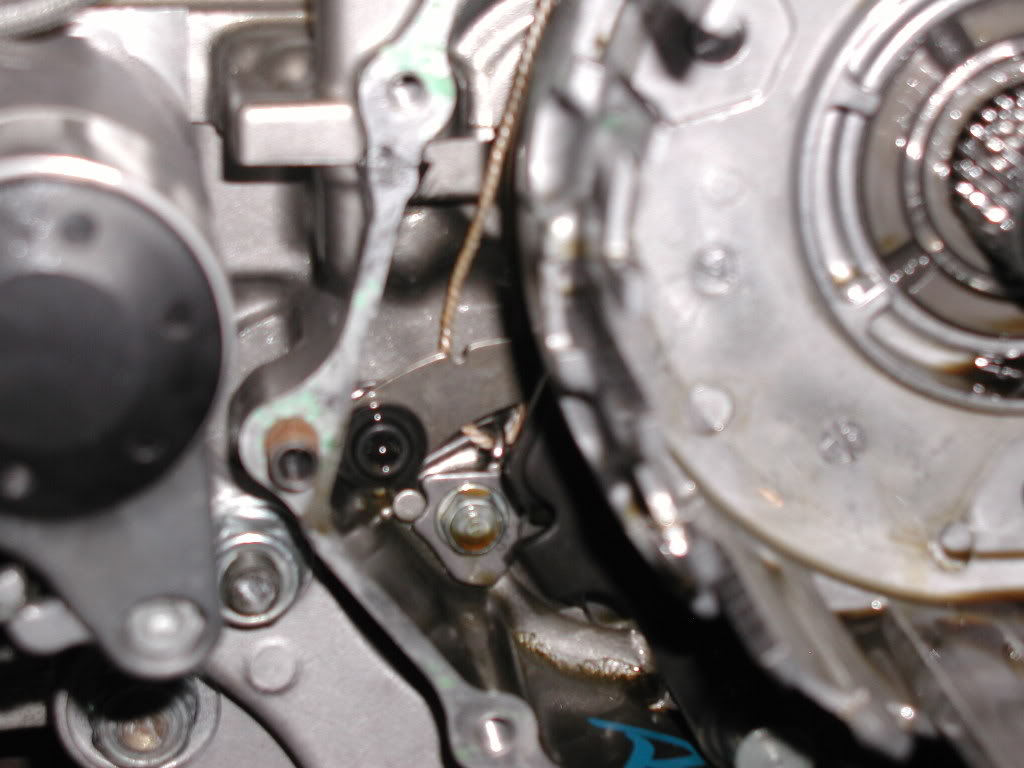
With the cover off you can see the arm tucked behind the cutch on the left side of the screen.
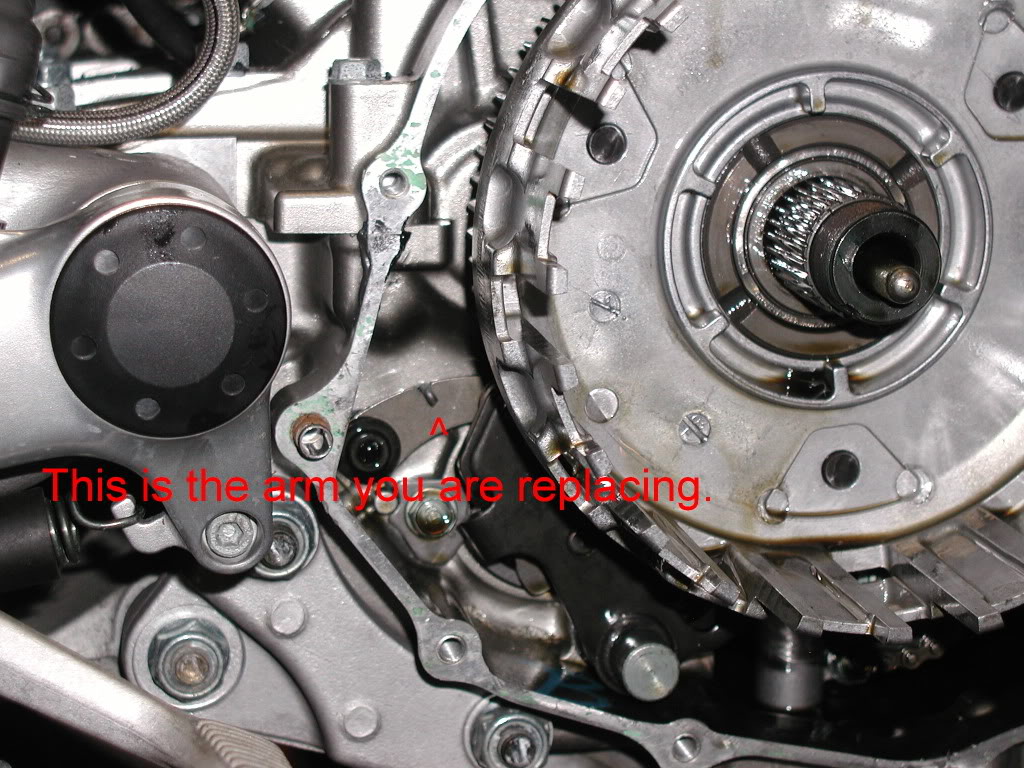
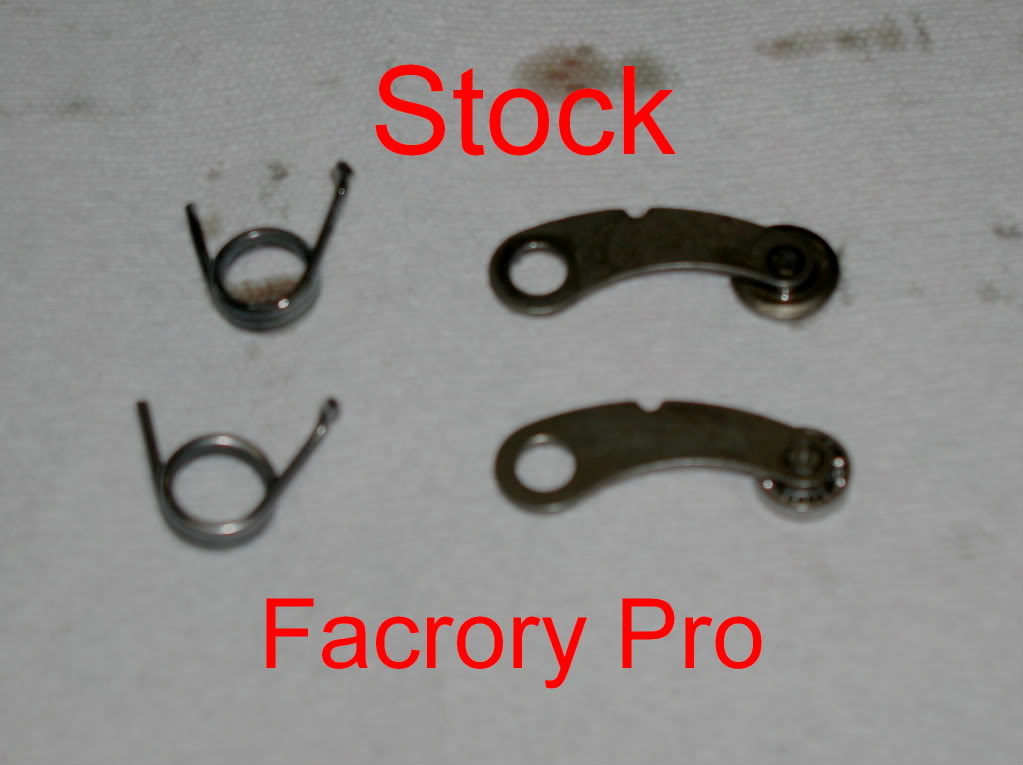
Remove the bolt holding the arm on. There is a washer on the backside of the arm. The Factory Pro spring is a larger diameter wire and stiffer. The detent arm with the ball bearing end is a lot nicer than the washer that is on the OEM one.
Set the new spring in place. Take a piece of string and make a loop out of it and loop it around the spring. This will make it easier to get the spring on the detent arm.
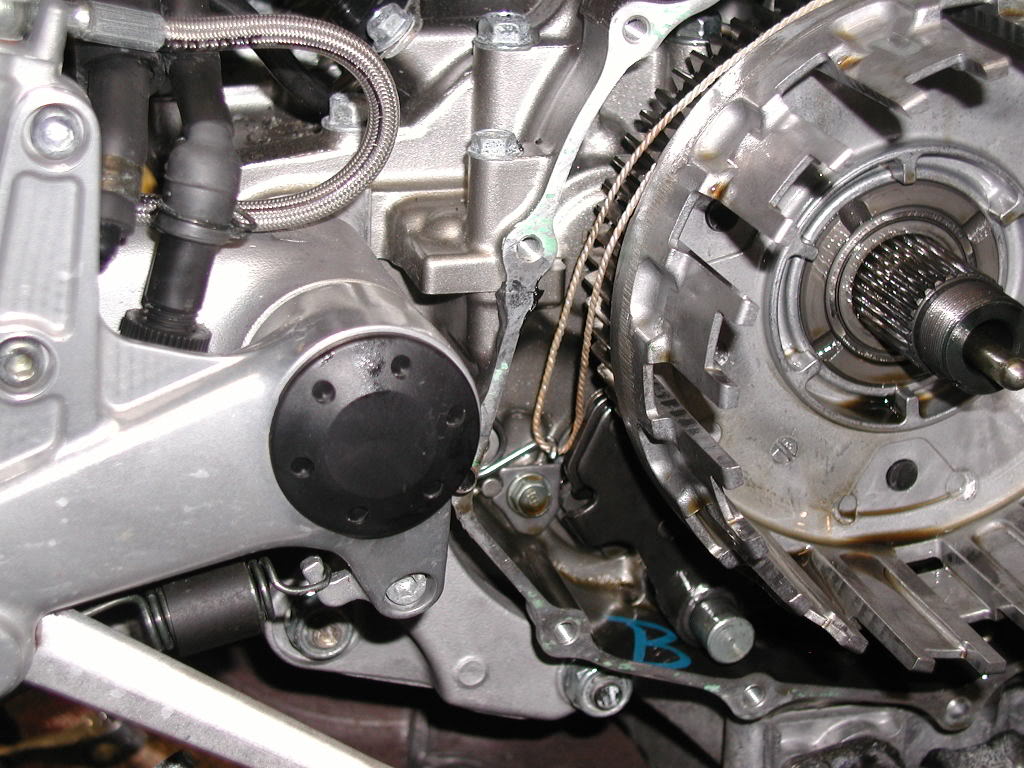
Install the new detent arm and use the string to pull the spring up and over the arm.
Now just button everything back up. Fill and top off fluids and you are good to go.
You are looking at about 2 hours worth of work.
If you chose to go with the the shift kit with the star gear be prepared to remove your clutch assembly. You will need some special tools to do that with.
Did it make a difference? Shifting is a lot more postive of a feeling, especially 1st to 2nd. Clutchless shifts are definately better.
First thing to do is throw their instruction's away. They are horrible.
You could do this without draining your oil if you do this with the bike on the side stand. I would recomend draining the oil. You will probally get some coolant in the oil when you pull the clutch cover off.
Remove your fairing to gain easy acces to the clutch cover. You can either drain your coolant or pinch off the coolant lines to the waterpump.
Loosen you radiator to make it easier to get the main coolant line off the water pump.
Remove the bolts holding both the waterpump and clutch cover on except for the one noted. This way the water pump will stay attached to the cover.
Disconnect the pulse genorator wire connection behind the left raidator and pull clear.
Work the cover and water pump assembly off. There are 2 dowel pins that help align the cover that can stick a bit to get the cover off.
With the cover off you can see the arm tucked behind the cutch on the left side of the screen.
Remove the bolt holding the arm on. There is a washer on the backside of the arm. The Factory Pro spring is a larger diameter wire and stiffer. The detent arm with the ball bearing end is a lot nicer than the washer that is on the OEM one.
Set the new spring in place. Take a piece of string and make a loop out of it and loop it around the spring. This will make it easier to get the spring on the detent arm.
Install the new detent arm and use the string to pull the spring up and over the arm.
Now just button everything back up. Fill and top off fluids and you are good to go.
You are looking at about 2 hours worth of work.
If you chose to go with the the shift kit with the star gear be prepared to remove your clutch assembly. You will need some special tools to do that with.
Did it make a difference? Shifting is a lot more postive of a feeling, especially 1st to 2nd. Clutchless shifts are definately better.


RUNLEVELZERO #99
SuperBike
Joined: Jan 2007
Posts: 2,223
From: Skokie
Nice instructions but you apparently replaced the detent/star wheel because you have the clutch apart (though basket still in place). Besides a clutch holder tool (which can damage the basket or the use of though rags and the trany in 1st can work) and an air impact to get the basket nut off, what other "special tools" are needed?
PS: What year is your VTR and how many miles, its so clean it looks low miles. How did the clutch basket (tab grooving looks minimal), friction & drive plates look wear wise? And whose sliders are those? I have 60k+ miles on mine and never had either side cases off, and was wondering how th clutch is doing. Any issue pulling the right side cover with the clutch push rod ball falling out?
PS: What year is your VTR and how many miles, its so clean it looks low miles. How did the clutch basket (tab grooving looks minimal), friction & drive plates look wear wise? And whose sliders are those? I have 60k+ miles on mine and never had either side cases off, and was wondering how th clutch is doing. Any issue pulling the right side cover with the clutch push rod ball falling out?
Last edited by skokievtr; Aug 12, 2008 at 06:35 PM.
Thread Starter
Senior Member
Superstock
Joined: Apr 2007
Posts: 284
From: Warren, NH
I didn't replace the star. I pulled the clutch apart just to look at it and check for any issues, since I was right there. The bike is a 04 with 8,000 miles. I have had it at the drag strip a couple of times. No signs of wear on the frictions and no discoloring on the steels. Basket an inner hub just showing marks, no grooving to speak of. I run full synthetic oil in it.
There is not a ball bearing on the push rod.
I would rather use a clutch holder tool than the rag trick. I have never had an issue with the clutch holder tool. You also need, it was either a 30mm or 32mm 12 point socket which is not a common size for most people to have in their tool collections.
As far as how clean the bike is, all of my toys are that way. Since my machines are lettered up to represent my shop, I keep there appearance up.
The frame sliders are T-Rex.


Senior Member
SuperBike
Joined: Jul 2004
Posts: 1,015

Shortining the shift lever overall movement will also add to the improvement of the dentent arm kit. If i recall stock throw movement is 7/8" and you can move the arm on the shaft one tooth (i forget if it is clockwise or counter clockwise) and the re-adjust the lever to teh same ride height from the floor. Usually ends up arounf 5/8" to 3/4" over all shift throw after the adjustment.
All you need is a good tape measure and a couple of wrenches to do this.
All you need is a good tape measure and a couple of wrenches to do this.

Senior Member
SuperSport
Joined: Dec 2005
Posts: 963
From: Sunshine Coast, Australia
Shortining the shift lever overall movement will also add to the improvement of the dentent arm kit. If i recall stock throw movement is 7/8" and you can move the arm on the shaft one tooth (i forget if it is clockwise or counter clockwise) and the re-adjust the lever to teh same ride height from the floor. Usually ends up arounf 5/8" to 3/4" over all shift throw after the adjustment.
All you need is a good tape measure and a couple of wrenches to do this.
All you need is a good tape measure and a couple of wrenches to do this.
Oh, sorry, you said "wrenches".
Still, the wenches are not a bad idea.........
")

Thread
Thread Starter
Forum
Replies
Last Post
inderocker
Modifications - Performance
61
Feb 19, 2010 09:23 AM


