
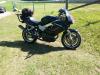
Yoshimura RS3 Re-pack/Re-sleave

Thread Starter
Senior Member
Superstock
Joined: Jul 2009
Posts: 348
From: Melbourne Australia

Yoshimura RS3 Re-pack/Re-sleave
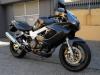
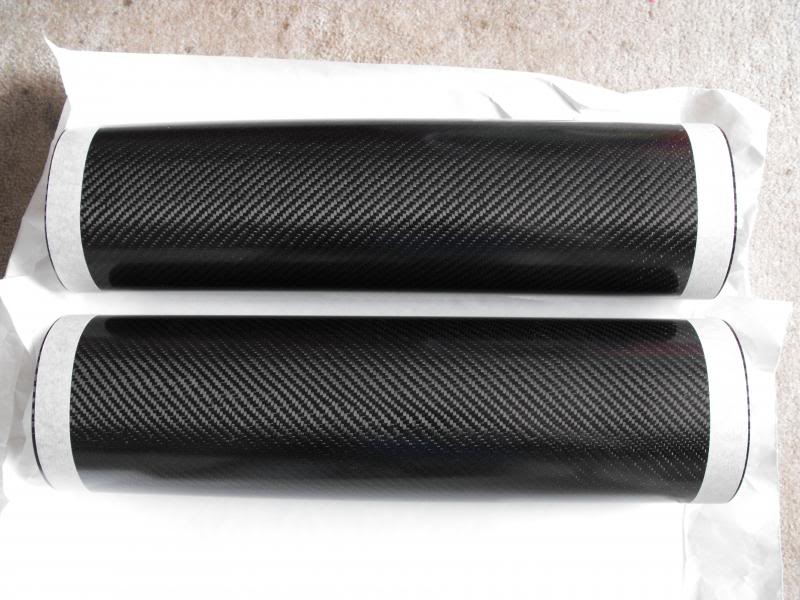
I thought I would take some pic's of my experience doing a muffler re-pack & re-skin, also put some parts on the scale as I went. When I bought my VTR it came with crash damaged Stainless Yoshimura RS3's. So I bought some carbon sleave replacements to repair them. This is not a how to, just the way I did it, The two things I have done differently are, I used aluminium rivets instead of stainless rivets because I already had the aluminium rivets and I did not re-use the metal bands as mine were damaged. This is a budget build, if you want to do it as Yoshimura have, then use Stainless rivets and re-use the Yoshimura bands.


Last edited by hondavtr1000sp2; Feb 8, 2014 at 01:11 AM.


Thread Starter
Senior Member
Superstock
Joined: Jul 2009
Posts: 348
From: Melbourne Australia
Then use a punch to drive out the rest of the rivets.
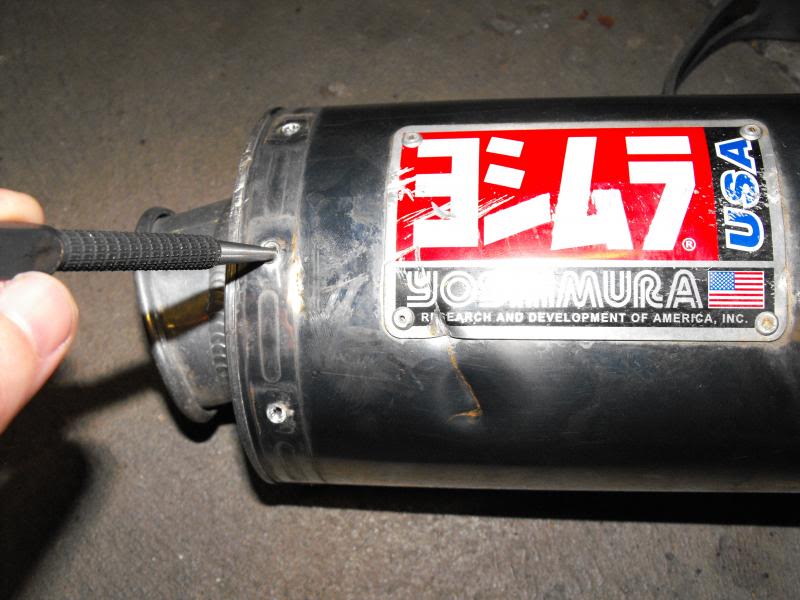
Now the next step Yoshimura say to use a rubber mallet to tap off the end cap, I tried this and had no luck, so I found a piece of soft pine timber and tapped out the end cap. Worked fairly easy.
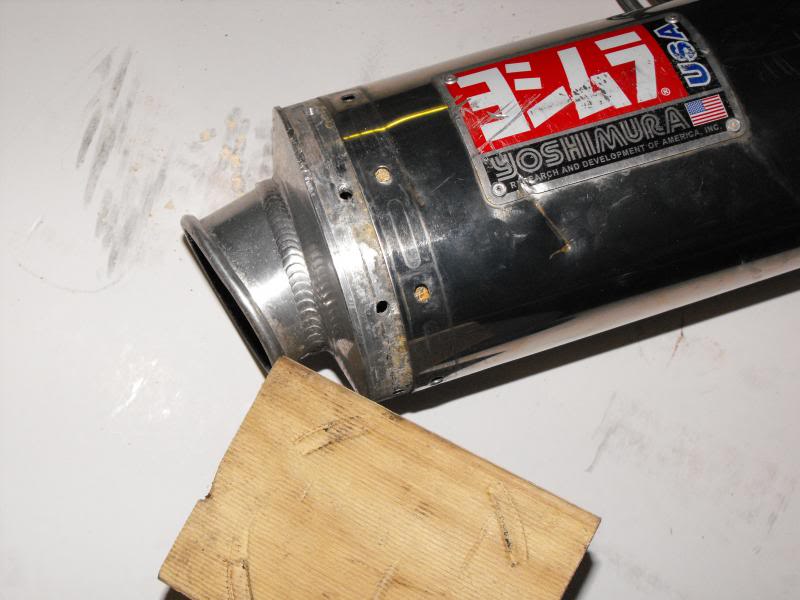
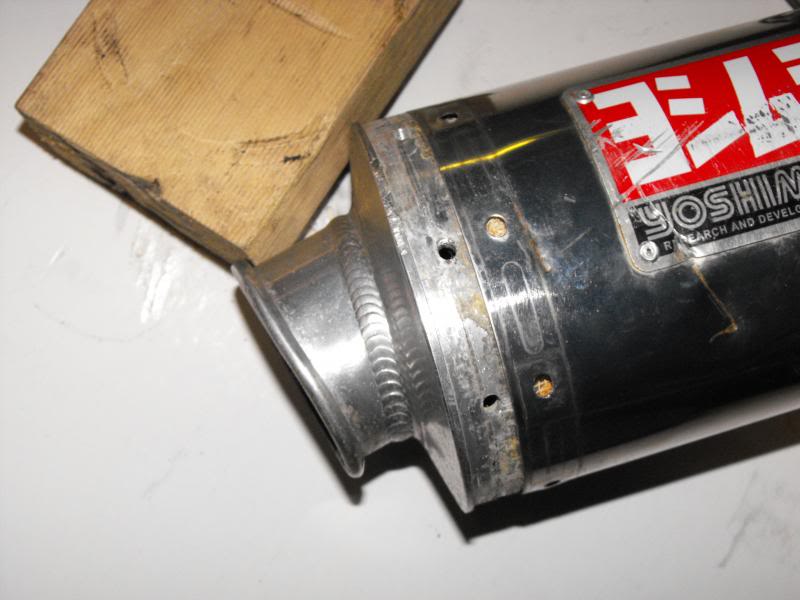
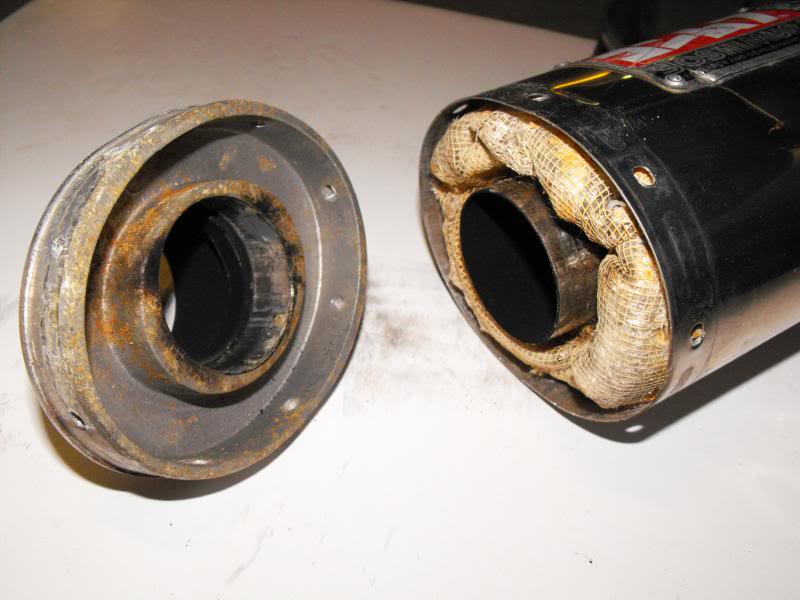

Now the next step Yoshimura say to use a rubber mallet to tap off the end cap, I tried this and had no luck, so I found a piece of soft pine timber and tapped out the end cap. Worked fairly easy.


Last edited by hondavtr1000sp2; Feb 8, 2014 at 04:16 PM.
Thread Starter
Senior Member
Superstock
Joined: Jul 2009
Posts: 348
From: Melbourne Australia
With the same piece of pine I tapped on the centre core tube,
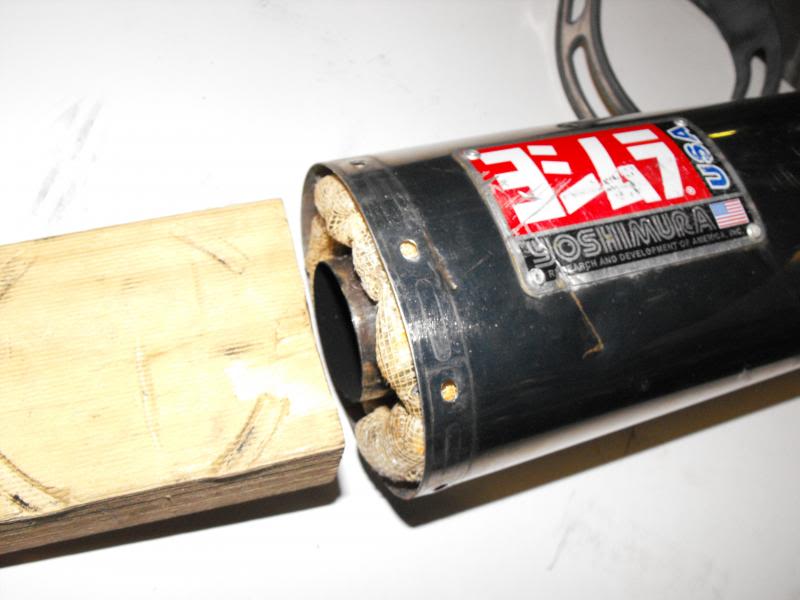
This is the core once you remove the fibre glass matting and stainless steel wool.


This is the core once you remove the fibre glass matting and stainless steel wool.

Last edited by hondavtr1000sp2; Feb 8, 2014 at 04:16 PM.
Thread Starter
Senior Member
Superstock
Joined: Jul 2009
Posts: 348
From: Melbourne Australia
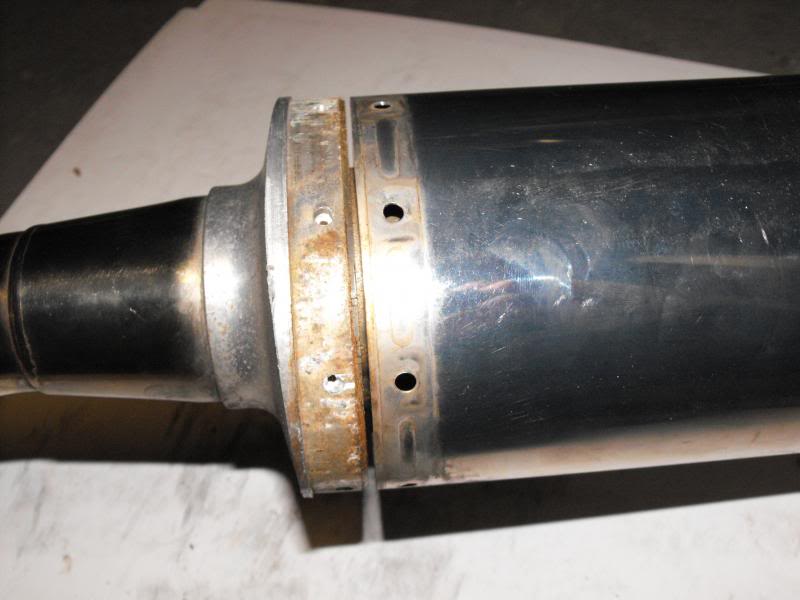
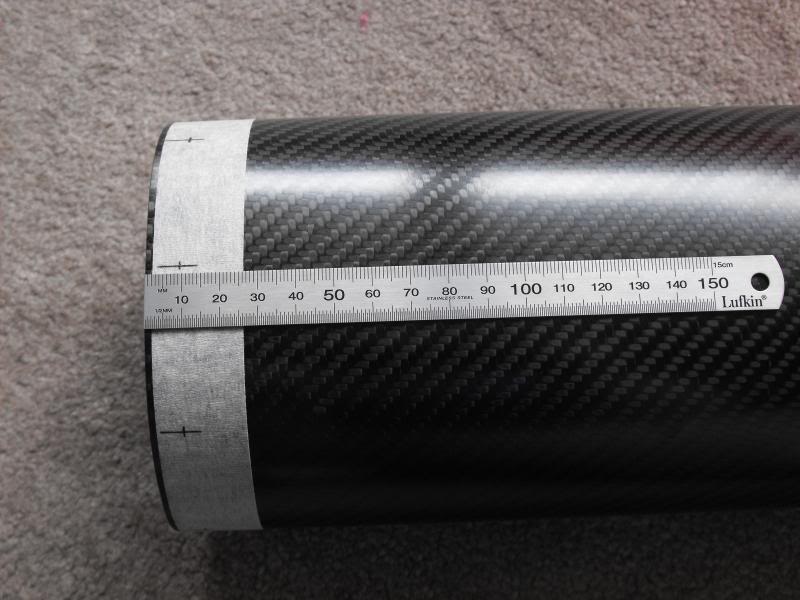
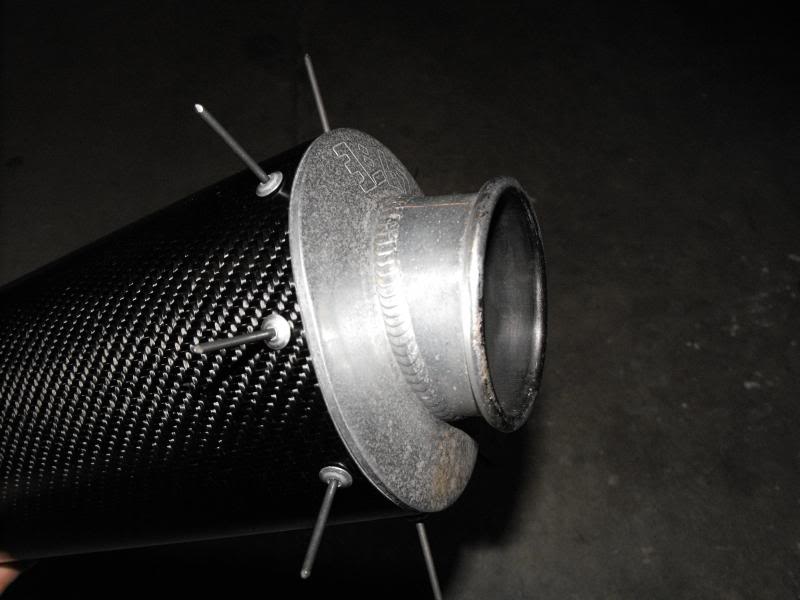
Ok, so I then wrapped masking tape around the carbon sleaves at each end so I could mark up were to drill the holes.
Then put the sleave on the end cap for hole alignment and also did the same for the inlet end.
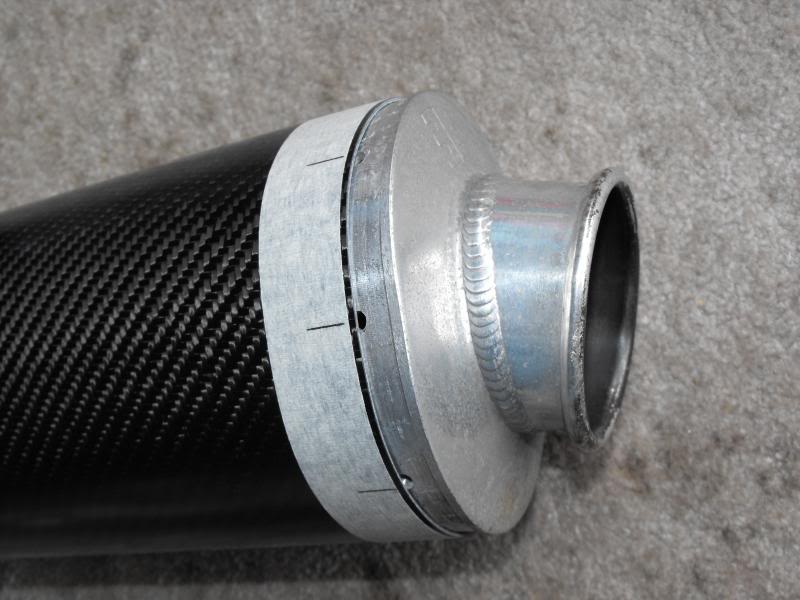
Measured the hole distance, 9.5mm.
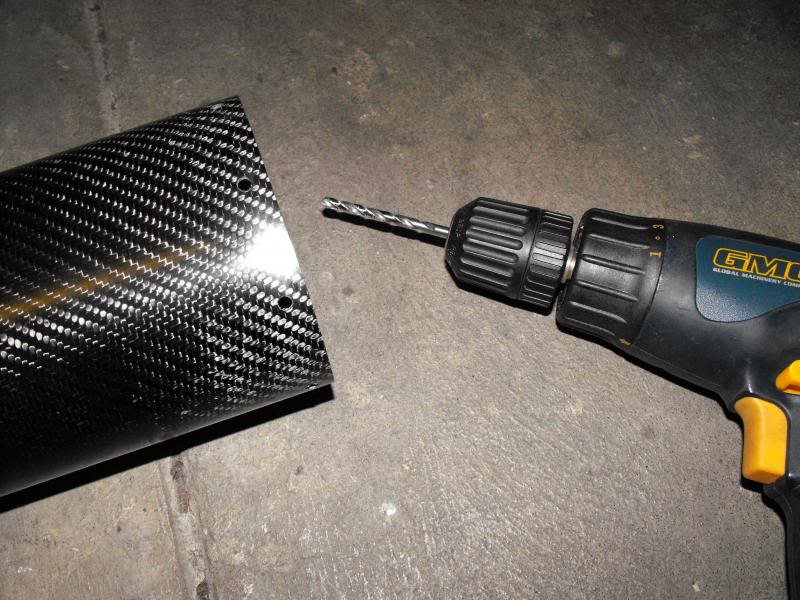
Start drilling the holes. I used a 5mm drill bit.

Then put the sleave on the end cap for hole alignment and also did the same for the inlet end.

Measured the hole distance, 9.5mm.

Start drilling the holes. I used a 5mm drill bit.

Last edited by hondavtr1000sp2; Feb 8, 2014 at 02:07 AM.
Thread Starter
Senior Member
Superstock
Joined: Jul 2009
Posts: 348
From: Melbourne Australia
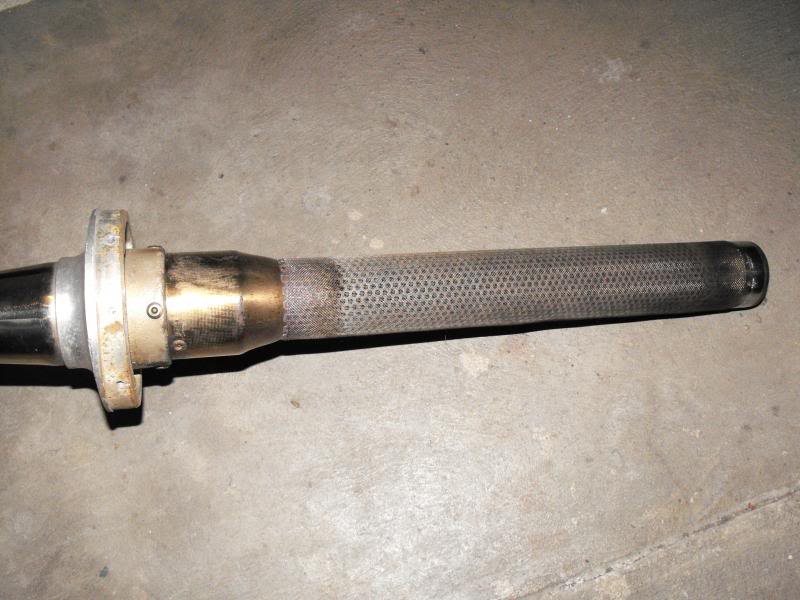
Next step is to wrap the perforated tube with stainless steel wool, I had a bit of trouble getting the steel wool here in Australia, first I contacted Yoshimura, there reply was to try and source it locally, so I tried some bike shops with no luck, next a steel wool manufacturer, they wanted $100, I ended up getting a huge roll of stainless steel wool from a exhaust supplier for like $6.00 , and that is not a typo, just 6 bucks.
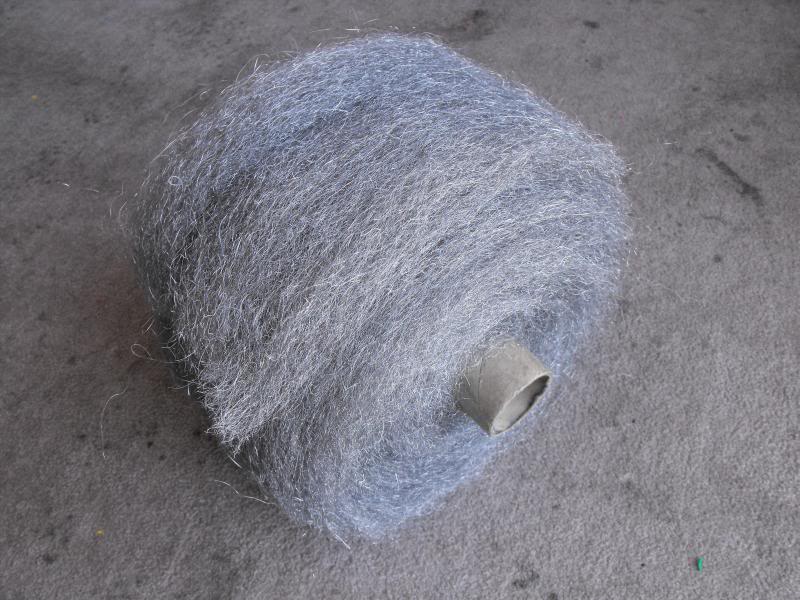
Roll around the tube.
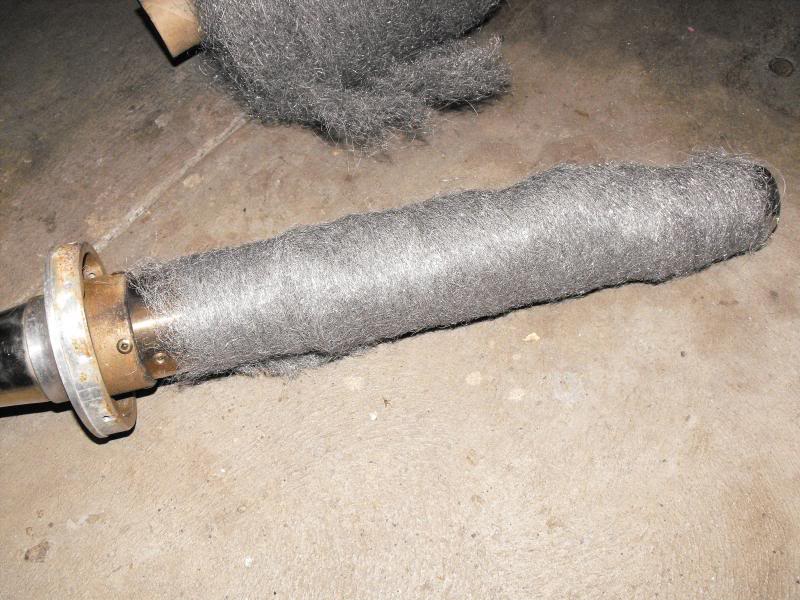
Then roll the fibre glass matting around the stainless steel wool and wrap masking tape to hold in position.
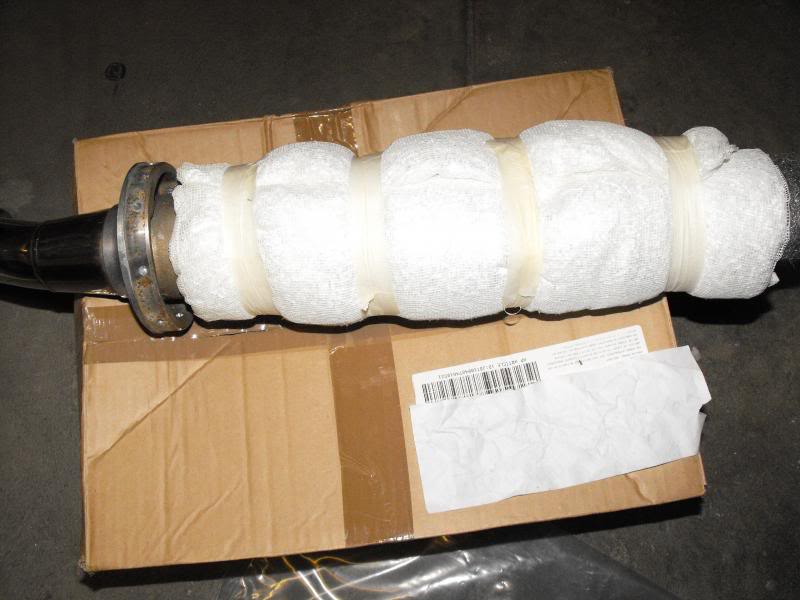
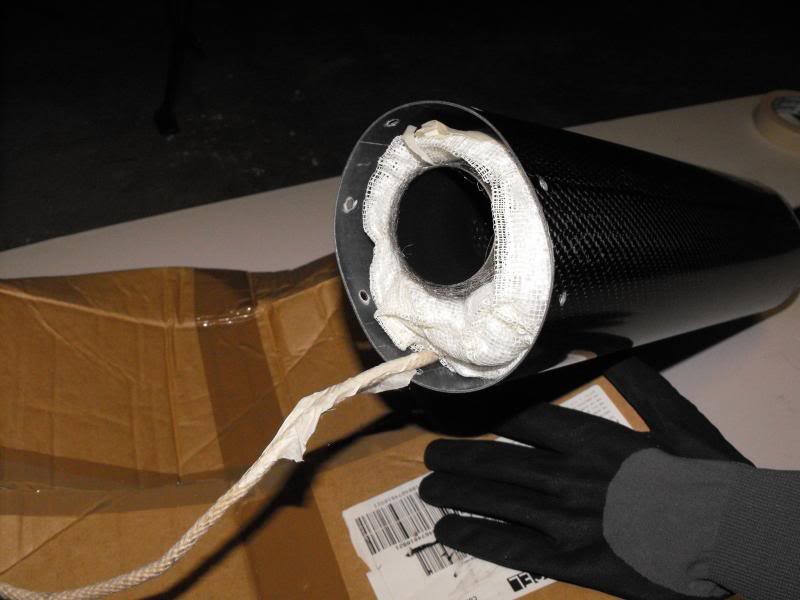
I found a good tip on the internet to make things a little easier, get some rope and wrap over the fibre glass matting starting from the inlet end and working up to the outlet end with some extra rope at the outlet end.
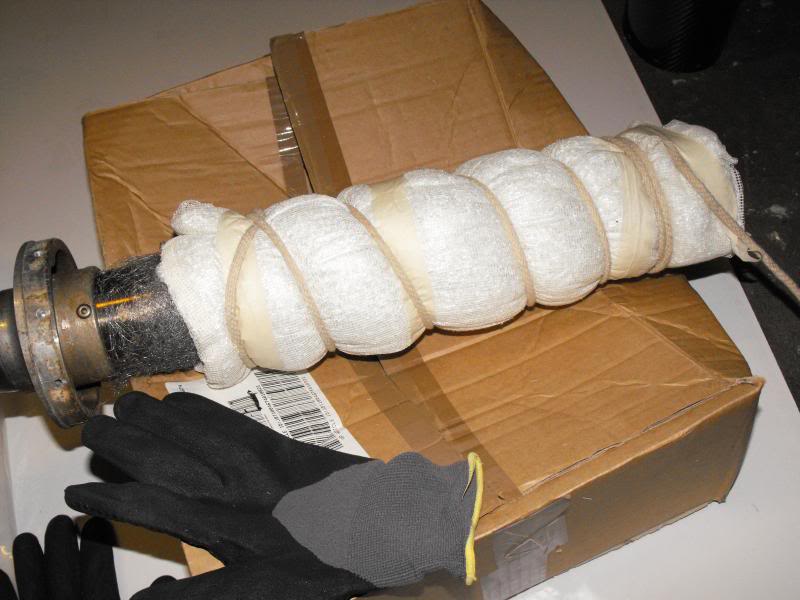
Slide your sleave over and into place then pull on the rope, it will take a little effort but it is not too hard.

Roll around the tube.

Then roll the fibre glass matting around the stainless steel wool and wrap masking tape to hold in position.

I found a good tip on the internet to make things a little easier, get some rope and wrap over the fibre glass matting starting from the inlet end and working up to the outlet end with some extra rope at the outlet end.

Slide your sleave over and into place then pull on the rope, it will take a little effort but it is not too hard.

Thread Starter
Senior Member
Superstock
Joined: Jul 2009
Posts: 348
From: Melbourne Australia
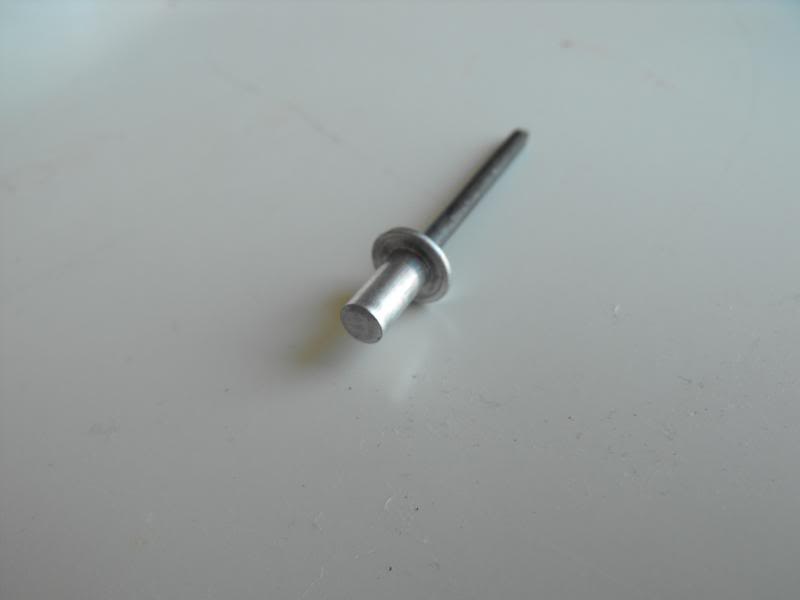
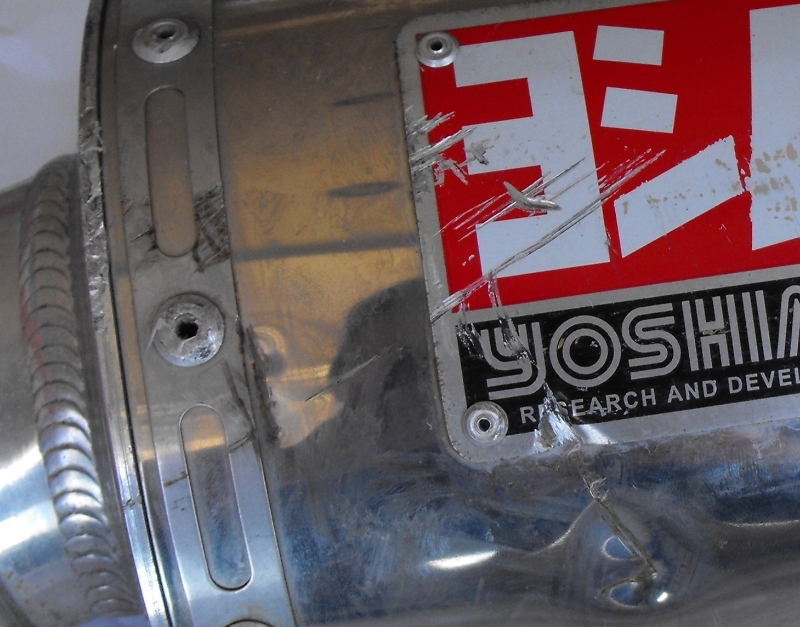
As I mentioned at the start Yoshimura use stainless rivets and I used aluminium rivets, I did this for a few reasons, to start with I already had the aluminium rivets and didn't want to spend the money on stainless rivets (budget build remember), also I only have a hand rivet gun and didn't want to try and pull 32 stainless rivets by hand. I have heard of many people using aluminium rivets on V twins with no problems. So I used sealed aluminium rivets.
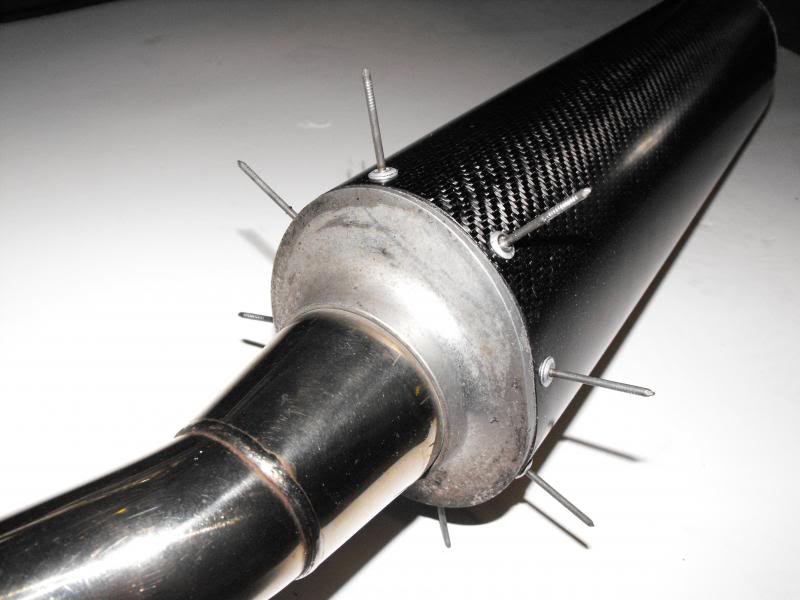
Started at the inlet end and installed all rivets before pulling them. My bands were damaged so I decided not to use them.
.
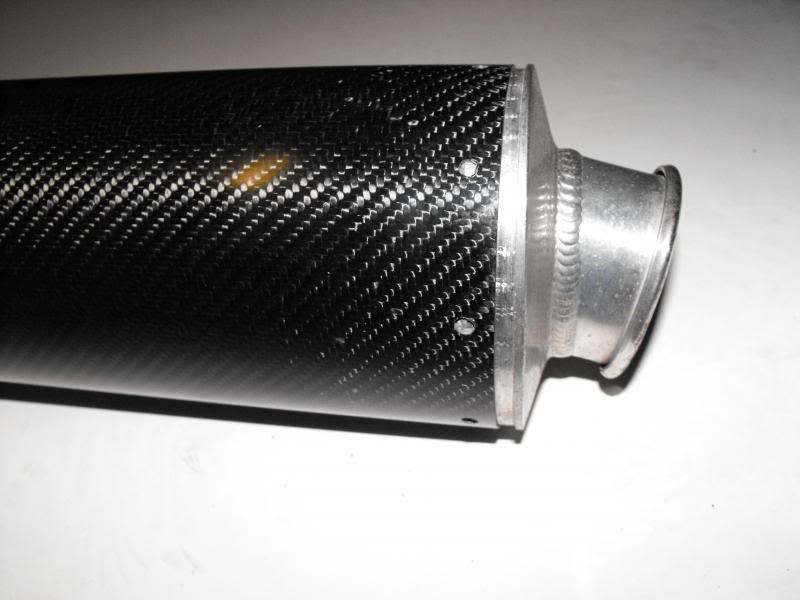
Then fitted end cap into position. I didn't take a picture, but I used high temp black silicone sealant on both inlet and end caps, put caps on as below picture then added sealant before pushing inlet and end caps all the way on.
Same as inlet end installed all rivets before pulling them.


Started at the inlet end and installed all rivets before pulling them. My bands were damaged so I decided not to use them.
.

Then fitted end cap into position. I didn't take a picture, but I used high temp black silicone sealant on both inlet and end caps, put caps on as below picture then added sealant before pushing inlet and end caps all the way on.

Same as inlet end installed all rivets before pulling them.


Last edited by hondavtr1000sp2; Feb 8, 2014 at 03:27 AM.


Thread Starter
Senior Member
Superstock
Joined: Jul 2009
Posts: 348
From: Melbourne Australia
And now for some weights. In kilograms/grams, on medical grade baby scales.
OEM Honda mufflers 9.92kg
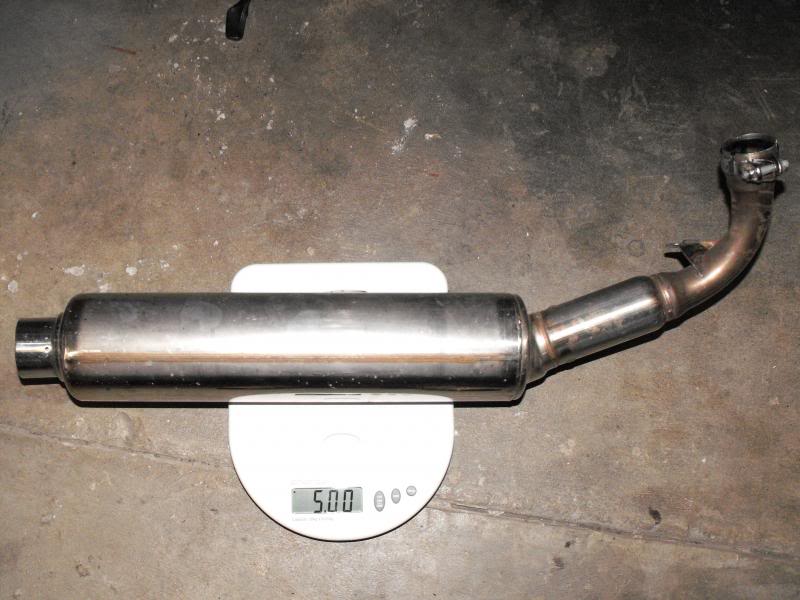
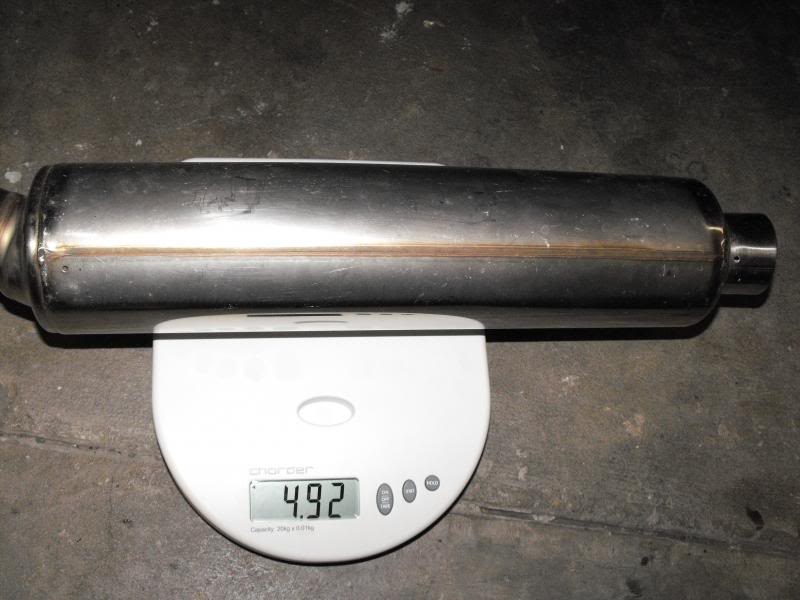
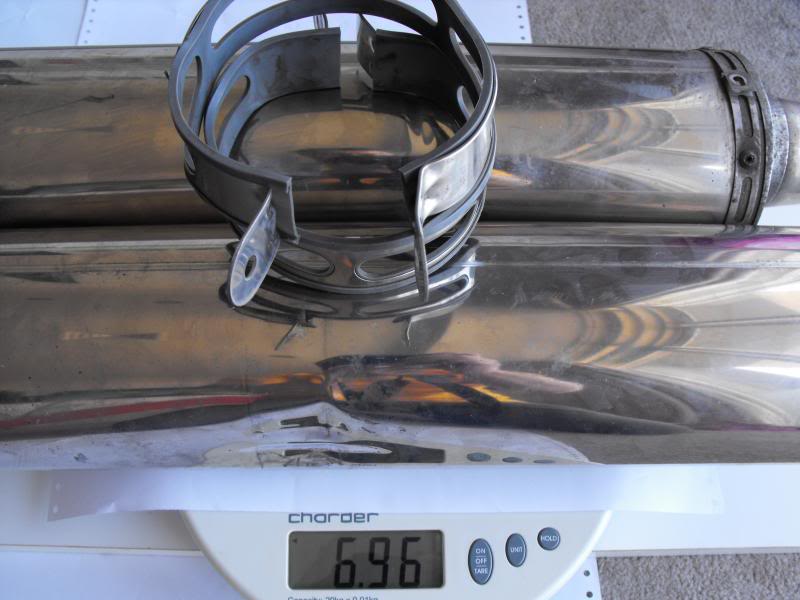
Yoshimura Stainless steel mufflers 6.96 kg
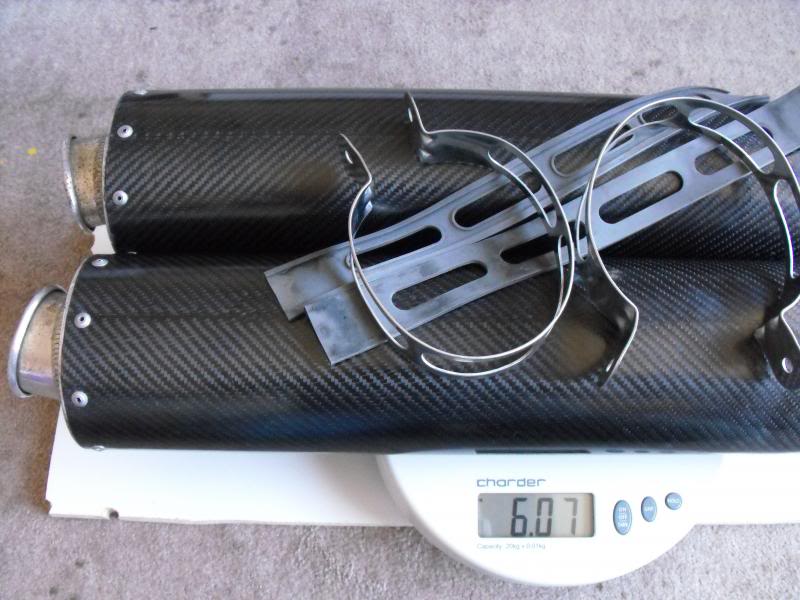
Yoshimura Carbon fibre mufflers 6.07 kg
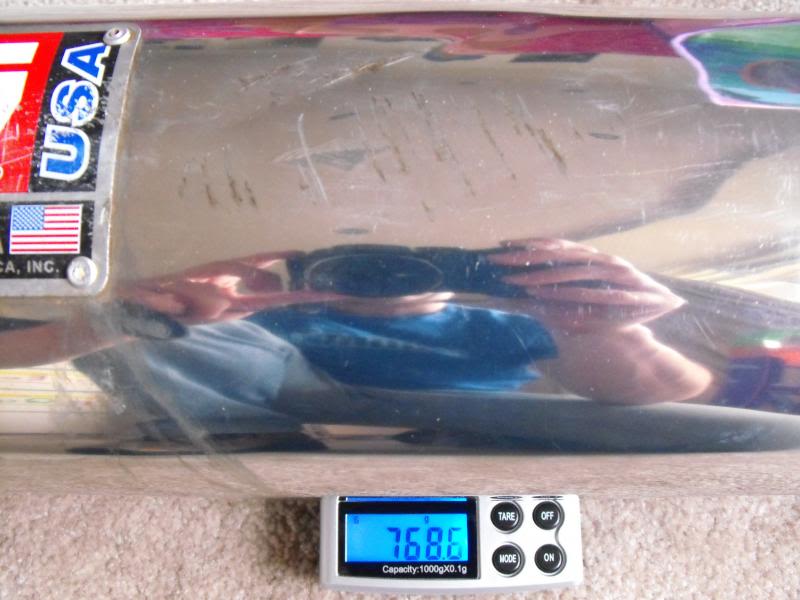
Yoshimura stainless sleave 768.6 grams
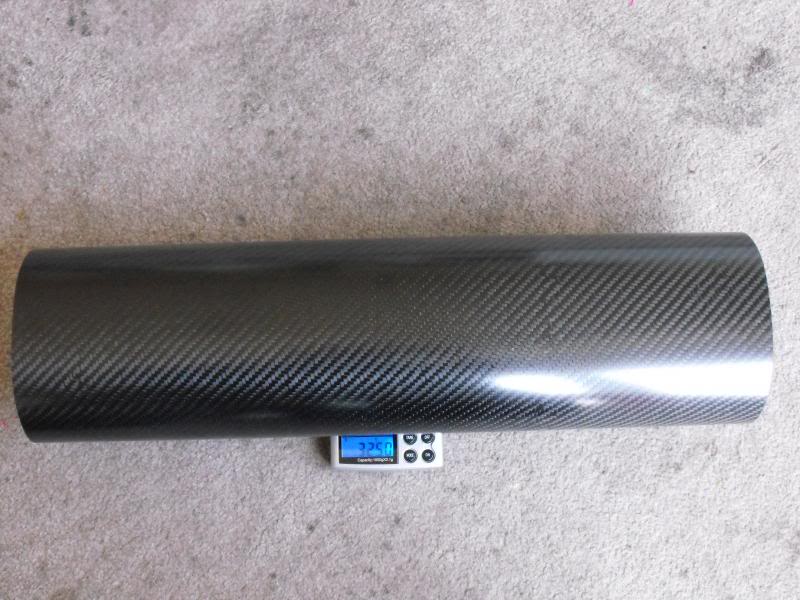
Carbon fibre sleave 325 grams
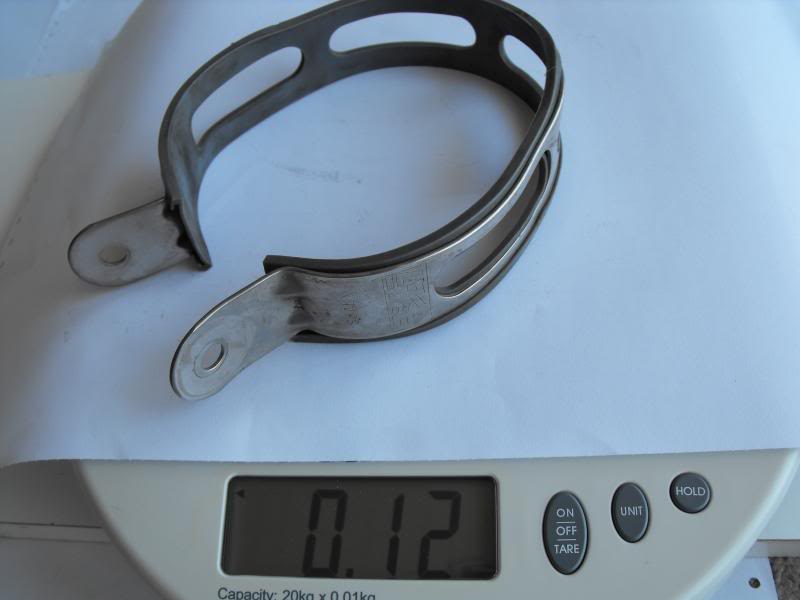
Yoshimura muffler clamp/bracket 0.12 grams
OEM Honda mufflers 9.92kg


Yoshimura Stainless steel mufflers 6.96 kg

Yoshimura Carbon fibre mufflers 6.07 kg

Yoshimura stainless sleave 768.6 grams

Carbon fibre sleave 325 grams

Yoshimura muffler clamp/bracket 0.12 grams

Last edited by hondavtr1000sp2; Feb 8, 2014 at 03:55 AM.


evil man of nothing
MotoGP
Joined: Jan 2006
Posts: 4,517
From: Boynton Beach, FL
You said this was a budget build, but I'm sure the sleeves weren't cheap-how much more did they want for the straps? They look fine in the pics at least, they were all damaged? I just did a pair of Hayabusa tri-ovals and don't remember them being much, but I reused 2 of them. Anyhow they still look great. As was said if you rub a little awesome on those inlet and outlet caps they'll really look great. And it's worth mentioning I was really impressed with Yoshimura's customer service.
Thread Starter
Senior Member
Superstock
Joined: Jul 2009
Posts: 348
From: Melbourne Australia
Thanks matt365,
Thanks James, and when I get some time I will clean up the end caps.
Hey captain, I got the sleaves from Germany around 4 and a half years ago, they were $90 each, Yoshimura wanted $170 each, I had the rivets so they were free, Yoshimura wanted 95 cents per rivet, 95 cents times 32 rivets = $30.40. As I said I contacted Yoshimura and they said try getting parts in Australia first, I tried that and had no luck. As for the straps, I could have reused them, but decided not to, from a distance they looked ok but up close there was some scratches/scrapes in them. Time will tell and if there is any sort of failure as a result of not using the straps I will update what happens. Like I said in the opening post, This is not a how to, just the way I did it, if any one wants to do it like Yoshimura then use stainless rivets and use the straps. So it cost me all up around $200 for sleaves, steel wool, and fibre glass matting, It would have cost me around $450 for parts and postage from Yoshimura or $800 for new mufflers. In the end I am happy with how they turned out and the sound is just a little louder than the Stainless Yoshimura.
Thanks James, and when I get some time I will clean up the end caps.
You said this was a budget build, but I'm sure the sleeves weren't cheap-how much more did they want for the straps? They look fine in the pics at least, they were all damaged? I just did a pair of Hayabusa tri-ovals and don't remember them being much, but I reused 2 of them. Anyhow they still look great. As was said if you rub a little awesome on those inlet and outlet caps they'll really look great. And it's worth mentioning I was really impressed with Yoshimura's customer service.
Hey captain, I got the sleaves from Germany around 4 and a half years ago, they were $90 each, Yoshimura wanted $170 each, I had the rivets so they were free, Yoshimura wanted 95 cents per rivet, 95 cents times 32 rivets = $30.40. As I said I contacted Yoshimura and they said try getting parts in Australia first, I tried that and had no luck. As for the straps, I could have reused them, but decided not to, from a distance they looked ok but up close there was some scratches/scrapes in them. Time will tell and if there is any sort of failure as a result of not using the straps I will update what happens. Like I said in the opening post, This is not a how to, just the way I did it, if any one wants to do it like Yoshimura then use stainless rivets and use the straps. So it cost me all up around $200 for sleaves, steel wool, and fibre glass matting, It would have cost me around $450 for parts and postage from Yoshimura or $800 for new mufflers. In the end I am happy with how they turned out and the sound is just a little louder than the Stainless Yoshimura.

Last edited by hondavtr1000sp2; Feb 9, 2014 at 12:46 AM.

Thread
Thread Starter
Forum
Replies
Last Post


