
Latest OCMD project: modded airbox lid


Member
Squid
Joined: Mar 2013
Posts: 51
From: Tampa, FL

Flash of brilliance (or insanity, lol)
I was wondering if there would not be some additional benefit to possibility adding a "gate" of sorts at the open end of the air diffuser. One could then use a small stepper motor, working though a likage, to have it open above, say half-throttle. THis would (theoretically) give you better intake velocity at low throttle opening (by limiting the filter area) for better power at low speeds while giving max flow at high speed when the engine can use more air..... I am nil in electronics, but I imagine it couldn't be that hard to split the wire coming off the TPS to get a reading (ie. throttle opening) and have some means to it activating the stepper motor once half-throttle is reached. Alternatively, some form of reverse polarity switch could be mounted on the throttle linkage to get the same result.
thoughts?

Thread Starter
Senior Member
MotoGP
Joined: Apr 2005
Posts: 5,631
From: Montreal
Jack Flash came over today and helped me to put the re-jetted carbs and "filtered" lid on...... looks awesome. The front of the tank is lifted slightly and the foam seals up against the tank right to the front, leaving the front "mouth" open. The air is now free to come in from the normal area (directly behind the steering head) as well as from the gap at the front of the tank; she won't be starving for air now 
Looking forward to firing it up when the temps warms a bit.
Looking forward to firing it up when the temps warms a bit.
Last edited by mikstr; Mar 8, 2014 at 03:04 PM.
Thread Starter
Senior Member
MotoGP
Joined: Apr 2005
Posts: 5,631
From: Montreal
Inspired by the lid portion of this:
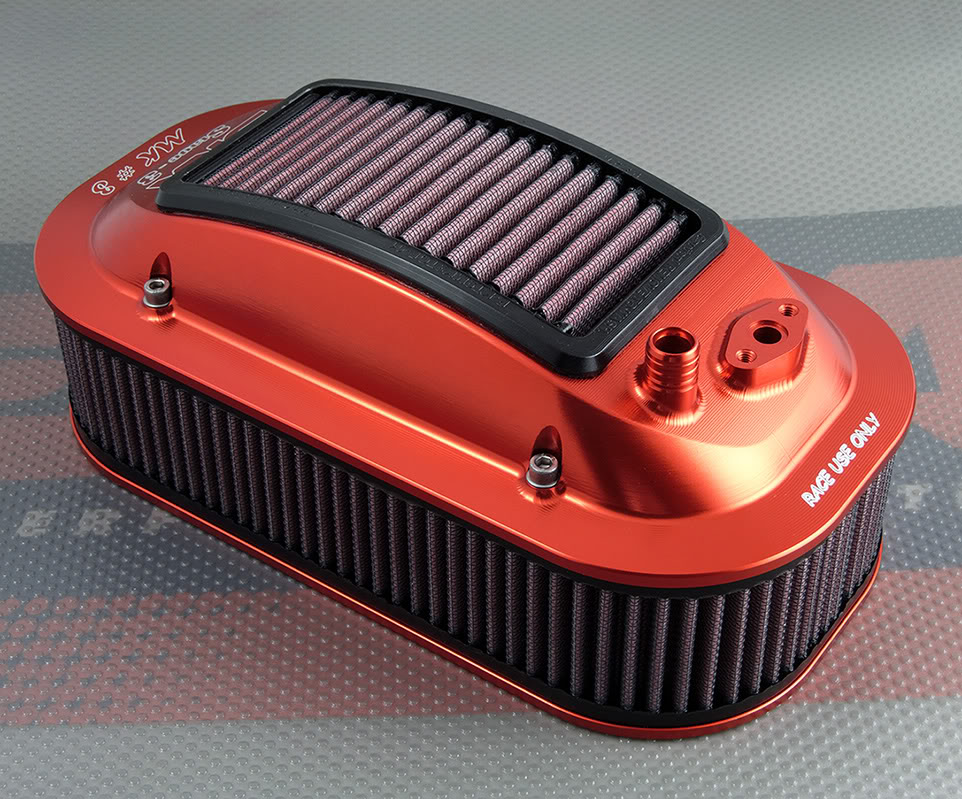
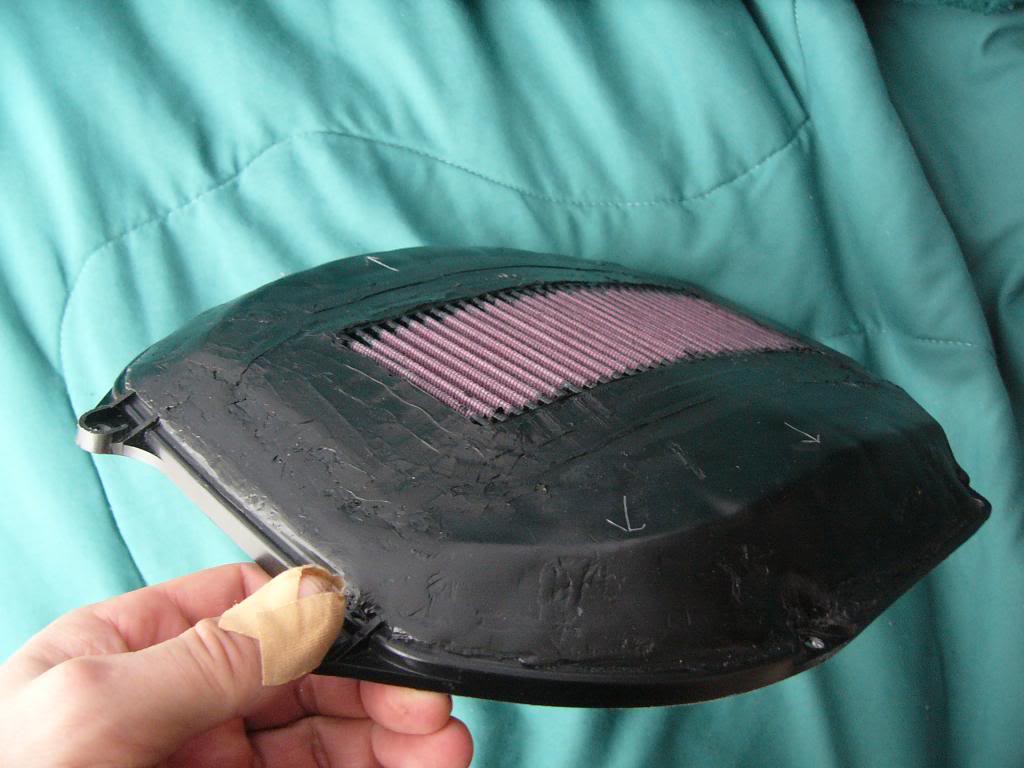
I set about thinking and came up with this (sorry for blurry pics):
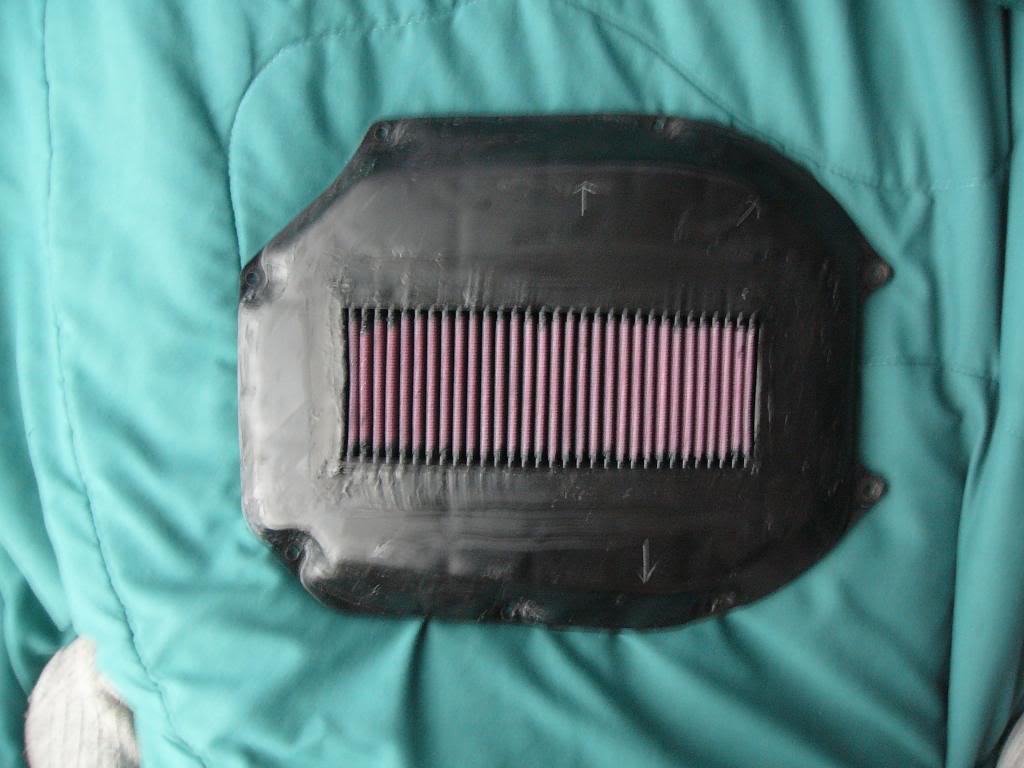


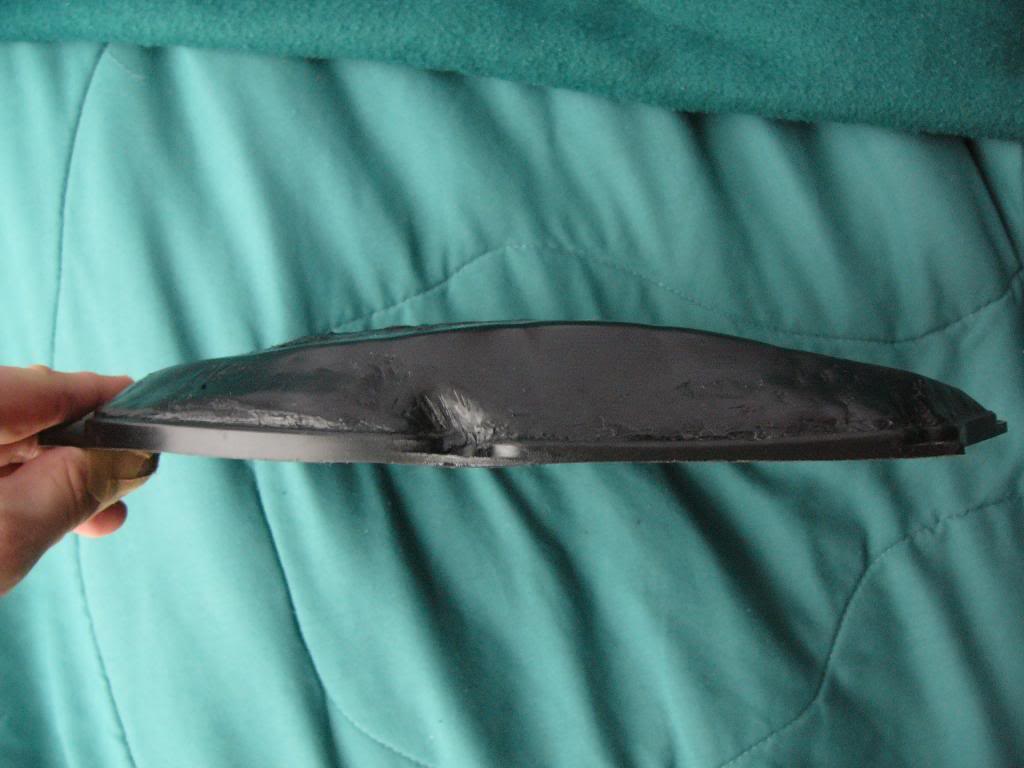
The idea here is to build on the Roger D�s lid-less configuration (including positioning the filter directly above the bell-mouths) while at the same time creating more free space above the stacks for improved airflow. A slight increase in post-filter volume should also help slightly�.
Before anyone makes a comment, yes it�s been a long winter, lol. Also, I like to experiment and the cost for this is minor, the main investment being in time and effort�..
I now have two lids to try and see what gains, if any, will be achieved...... fun times ahead when the weather warms, lol
I set about thinking and came up with this (sorry for blurry pics):
The idea here is to build on the Roger D�s lid-less configuration (including positioning the filter directly above the bell-mouths) while at the same time creating more free space above the stacks for improved airflow. A slight increase in post-filter volume should also help slightly�.
Before anyone makes a comment, yes it�s been a long winter, lol. Also, I like to experiment and the cost for this is minor, the main investment being in time and effort�..
I now have two lids to try and see what gains, if any, will be achieved...... fun times ahead when the weather warms, lol

RUNLEVELZERO #99
SuperBike
Joined: Jan 2007
Posts: 2,219
From: Skokie
Curious what material and process you use to "pot"/'integrate"/"encapsulate" the filter into the polyethylene (polypropylene?) OEM air box lid; i.e., plastic welder or a hot knife & poly rod filler/epoxy/RTV "liquid rubber"/silicone? Wha???? 

Rex Kramer-Thrill Seeker
SuperBike
Joined: Jan 2011
Posts: 2,312
From: Brookfield, WI
Haha, Micky I tried doing the same thing! I just coudn't get my filter to fit the lid, because the riffles on my filter went the wrong way. And if I did turn it 90 degrees, it was just a bit to long to fit the width of the lid.
I also didn't want to spend the money on another filter unless I knew this actually worked.
I'm glad you did it. This seems like the best option for the most post filter volume. Good work man.
I also didn't want to spend the money on another filter unless I knew this actually worked.
I'm glad you did it. This seems like the best option for the most post filter volume. Good work man.
Thread Starter
Senior Member
MotoGP
Joined: Apr 2005
Posts: 5,631
From: Montreal
the filter has a lip on its outer perimeter, so I cut the hole in the lid to match the largest (outside) dimension. I then plastic welded some pieces on the underside to match the smaller dimension and dropped the filter in, so it sits on the "welded" pieces. I put some black RTV silicone on the welded pieces to glue the filter in place. I then applied said silicone on the inside to seal it up good and hold it in place. The finishing touch was to fill in the remaining small holes on the topside, and smooth everything over for better airflow (again, using silicone).
RUNLEVELZERO #99
SuperBike
Joined: Jan 2007
Posts: 2,219
From: Skokie
If there is a flange around the perimeter of the filter (K&N model number?), why not cut a hole in the air box lid the size of the filter "body" and set the filter down in this opening from the top side (the filter should function the same with air flow from either side), and then fabricate a frame that battens down the filter flange fastened hex-drive pan head screws with nylok nuts? Then the filter could be readily removed for cleaning and re-oiling.
Or do you thing the negative pressure on the filter would draw (suck) it through the opening in the air box lid. The only caveat to my design is how much clearance is there between the top of the air box and the underside of the fuel tank (which could be increased by shimming up the front of the tank), in relation to the combined thickness of the filter flange and the frame with fasteners...
Or do you thing the negative pressure on the filter would draw (suck) it through the opening in the air box lid. The only caveat to my design is how much clearance is there between the top of the air box and the underside of the fuel tank (which could be increased by shimming up the front of the tank), in relation to the combined thickness of the filter flange and the frame with fasteners...
Thread Starter
Senior Member
MotoGP
Joined: Apr 2005
Posts: 5,631
From: Montreal
If there is a flange around the perimeter of the filter (K&N model number?), why not cut a hole in the air box lid the size of the filter "body" and set the filter down in this opening from the top side (the filter should function the same with air flow from either side), and then fabricate a frame that battens down the filter flange fastened hex-drive pan head screws with nylok nuts? Then the filter could be readily removed for cleaning and re-oiling.
Or do you thing the negative pressure on the filter would draw (suck) it through the opening in the air box lid. The only caveat to my design is how much clearance is there between the top of the air box and the underside of the fuel tank (which could be increased by shimming up the front of the tank), in relation to the combined thickness of the filter flange and the frame with fasteners...
Or do you thing the negative pressure on the filter would draw (suck) it through the opening in the air box lid. The only caveat to my design is how much clearance is there between the top of the air box and the underside of the fuel tank (which could be increased by shimming up the front of the tank), in relation to the combined thickness of the filter flange and the frame with fasteners...
Rex Kramer-Thrill Seeker
SuperBike
Joined: Jan 2011
Posts: 2,312
From: Brookfield, WI
This is why I absolutely love doing R&D. I have a GPR V4 steering stabilizer, and part of the mounting hardware mounts to the front two gas tank bolts (I will not get rid of my steering stabilizer). I cannot lift the front of my gas tank. Micky can. His airbox lid can be made taller to take advantage of lifting the tank.
I am excited to learn what happens! The weather is getting warmer and I have a couple things lined up to experiment with. So does Micky. Who knows, we might have found something that works better than going "lidless", or we could both fail. You never know
RUNLEVELZERO #99
SuperBike
Joined: Jan 2007
Posts: 2,219
From: Skokie
I'm not sure a bit of turbulence is a bad thing, smooth laminar flow may pass right over the filter. If you look at the photo that provided your "inspiration, the perimeter flange of the filter is above the top surface of the airbox, and installs from above as I was pro porting in "my" design...
Front of tank is already shimmed. As for my manner of proceeding, I went the simplest way possible with the tools I had at my disposal (essentially a hacksaw and solderin iron). What I ended up with is a filter that is flush at the top (no ridge to create turbulence and impair airflow) and well held in place. As for washing and servicing, no big deal... I now have an oversize grab handle to hang onto while I clean and rinse it....
RUNLEVELZERO #99
SuperBike
Joined: Jan 2007
Posts: 2,219
From: Skokie
Have you measured the clearance between the bottom of the tank and top of the airbox?
It has to be at least the thickness of the heat resistant foam on the bottom of the tank; although some non-hardening clay could be used to check (like you would bearing clearance).
It has to be at least the thickness of the heat resistant foam on the bottom of the tank; although some non-hardening clay could be used to check (like you would bearing clearance).
Thread Starter
Senior Member
MotoGP
Joined: Apr 2005
Posts: 5,631
From: Montreal
Foam was removed eons ago...... I haven't fitted it yet as my other modded lid is in place at the moment. Having gone through the exercise of checking for clearance many moons ago, I am confident there is sufficient room for airflow, notably at the front. If there is any area that may be a bit deficient clearance-wise, it would be where the upper "corners" are located along the sides. However, as this lid is a fiar bit lower than the OEM piece, it should work. Worse case, I will cut the corner back a bit and smooth it down (pu a straight piece in place of the said corner).

Thread Starter
Senior Member
MotoGP
Joined: Apr 2005
Posts: 5,631
From: Montreal
Great f****in' day. So, I put gas in the tank and open up the petcock... surprise, gas is pissing out under the bike!!!! So, pull carb, checke the float bowl screws, could use a bit of tightening, do so and re-install. Re-open petcock... still gas pouring out &^#$@!! Pull carbs out, put new jetting set-up in old carbs and re-install everything (found the source of the leak: spent fuel bowl gaskets). Go to start and..... battery is dead! &^$#@(*^%%
So, gave it a boost to start it, runs good, has wicked throttle response but there is no way I am heading out anywhere with a battery that is screwed. So, a ride will have to wait for a new battery.......
So, gave it a boost to start it, runs good, has wicked throttle response but there is no way I am heading out anywhere with a battery that is screwed. So, a ride will have to wait for a new battery.......
Last edited by mikstr; Apr 18, 2014 at 01:24 PM.

Thread Starter
Senior Member
MotoGP
Joined: Apr 2005
Posts: 5,631
From: Montreal
well, thanks to the generosity of my friend Jack Flash (who lent me a battery to use until my new one comes in), I finally got to take the bike out for a ride (with Mr. Flash). I am currently trying the Gen 1 airbox lid (with internal air dam) and the results are.... WICKED!!!!! I guess it helps that I estimated very well with the jetting (went up 1 size on pilot, 1.5 on needle, and 2 sizes on mains). It runs clean everywhere with no stubles whatsoever and throttle response is instant. While the seat-of-the-pants is unreliable at best (especially after a winter away) but the bike seems to pull better everywhere. Jack noted that I was leaving small puffs of smoke when rolling on the gas, so I backed off the F-Commander screw an extra turn and leaned off the handy adjustable fuel screws and it runs even crisper now, with no plume when giving it gas.
Overall, am quite pleased with the results. Will get around to trying the Gen 2 at some point, but for now, I have to worry about a move at the end of the month so I will continue to run and evalute Gen 1, smiling all the while.
Overall, am quite pleased with the results. Will get around to trying the Gen 2 at some point, but for now, I have to worry about a move at the end of the month so I will continue to run and evalute Gen 1, smiling all the while
Rex Kramer-Thrill Seeker
SuperBike
Joined: Jan 2011
Posts: 2,312
From: Brookfield, WI
Awesome results! Now I'm even more antsy to get out on the bike.
It still looks like rain here tomorrow and Monday, so I'm hoping Tuesday I can try out my lid as well.
Thanks Mr. Flash for making that possible
It still looks like rain here tomorrow and Monday, so I'm hoping Tuesday I can try out my lid as well.
Thanks Mr. Flash for making that possible
Thread Starter
Senior Member
MotoGP
Joined: Apr 2005
Posts: 5,631
From: Montreal
Time to try Gen 2 has arrived.....
OK, I was looking at having to pull the carbs to fine-tune jetting for Gen 1 (pilot circuit was a bit too rich, as were needles; bike emitted puffs of black smoke when punching it hard) so I cheated and thought I'd give Gen 2 a try So, idle is smoother than it has even been (tended to wander a bit with Gen 1), I mean very smooth. I had to richen up the fuel screws ever so lightly (half-turn from the leanest setting I tried with Gen 1, whch still felt too rich with it; it had a mild hesitation when rolling on it from very low revs and the half-turn richer seems to have cleaned it up). It still smoked a bit when punching it at higher revs so I decided to lower the needels slightly this morning (equivalent to half a notch). Took it out this PM and it runs perfectly, no smoke or hesitation, great response at all speeds. I will run it this way for a while to get a better evaluation.
Intake is definitely audible now too.....
P.S. FWIW, I smoothed off the ridges (ie. corners) on the edges since this pic was taken; the arc from the edges to the filter medium is now lower and smoother, the idea being to improve airflow between the tank and lid
OK, I was looking at having to pull the carbs to fine-tune jetting for Gen 1 (pilot circuit was a bit too rich, as were needles; bike emitted puffs of black smoke when punching it hard) so I cheated and thought I'd give Gen 2 a try
Intake is definitely audible now too.....
P.S. FWIW, I smoothed off the ridges (ie. corners) on the edges since this pic was taken; the arc from the edges to the filter medium is now lower and smoother, the idea being to improve airflow between the tank and lid
Last edited by mikstr; May 3, 2014 at 02:44 PM.
Thread Starter
Senior Member
MotoGP
Joined: Apr 2005
Posts: 5,631
From: Montreal
Well, I have to say I am pleased so far..... Truth be told, success in this case is the cherry on the sundae, as I like to tinker. If all else fails, I have a K&N waiting to go on as per Roger D's proven set-up......

European Member
Back Marker
Joined: Mar 2013
Posts: 194
From: Netherlands
I was thinking of buying like 6 of those little K&N filters for the crank vent
and mounting them behind one and other on the place where my steering damper begins at the frame
")
did not think that through but maybe a idea for somebody without a steering damper....still probably gonna attempt this because its post filter and some nice cold air is going in the back portion of the filter
edit K&N filters are %$#@ exspensive
possible ideas are
2 on each side of these

or 2 of these (cheapest)
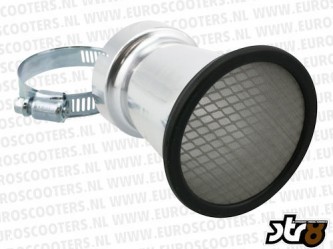
wich would look the best the best ?
and mounting them behind one and other on the place where my steering damper begins at the frame
did not think that through but maybe a idea for somebody without a steering damper....still probably gonna attempt this because its post filter and some nice cold air is going in the back portion of the filter
edit K&N filters are %$#@ exspensive
possible ideas are
2 on each side of these
or 2 of these (cheapest)
wich would look the best the best ?
Last edited by RoadManiac; May 6, 2014 at 10:10 AM.
Rex Kramer-Thrill Seeker
SuperBike
Joined: Jan 2011
Posts: 2,312
From: Brookfield, WI
If I understand you right, you are going to stick these into the side of your airbox? If so, that's just adding to the total filter area. They won't be post filter. They will be underneath the stock filter, but that's about it. Honestly, it's more work than it's worth. If you want more CFM (Cubic Feet per Minute), then enlarge the hole in your airbox lid or just take the lid off.
EDIT: Thinking about it a little more, those little filters stuck in the side won't have any restriction like the stock filter does through the airbox lid. So, your carbs would be inhaling a lot of air, similar to those who have gone "lidless". However, doing this creates more tuning problems. A lot of people have had tuning problems from going lidless. Just an FYI.
EDIT: Thinking about it a little more, those little filters stuck in the side won't have any restriction like the stock filter does through the airbox lid. So, your carbs would be inhaling a lot of air, similar to those who have gone "lidless". However, doing this creates more tuning problems. A lot of people have had tuning problems from going lidless. Just an FYI.
Last edited by CruxGNZ; May 6, 2014 at 07:23 PM. Reason: I like summer sausage from Held's!
Senior Member
SuperSport
Joined: Apr 2014
Posts: 932
From: Auckland, new Zealand

I just need another airbox. I think being the other side of the world i may need to start from scratch with jetting though.
I have a K&N from a SuperHawk, should be the right size.


