
Another Build Thread - 74 cb550

2nd mouse gets the cheese
SuperBike
Joined: Jan 2008
Posts: 1,697
From: Beaverton, OR

If you end up needing a fork brace let me know I make one that works really well for my 500, and it should work well for the 550 too.
I like what you have going so far keep on trucking along. It always is fun at this stage since things change, looks wise, so quickly. Once the detail stuff comes is where the real work begins as it takes patience.
~LH
I like what you have going so far keep on trucking along. It always is fun at this stage since things change, looks wise, so quickly. Once the detail stuff comes is where the real work begins as it takes patience.
~LH
Senior Member
Back Marker
Joined: Dec 2008
Posts: 116
From: Lunenburg, MA
Brad;
A couple of seat thoughts. Might be a good idea to epoxy some narrow plywood strips to the inside bottom of the glass seat pan, based on where you want the upholstery to begin and end. That way you could simply staple the leather to the wood. Also, with a slight underlap (1/8") the wood would protect the fabric from abrasion. How far back on this piece did you envision the upholstery going?
What method were you going to use to attach it to the frame? You gotta build a base for it out of either sheet metal or glass, right? I would trust sheet metal alot more on that basis and again, maybe the wood and epoxy could be the interface between the two.
You could also screw it (the pan) through the sides of the seat as wrapping the upholstery over it would cover the screws, and if the turned metal extended slightly below the line of the seat base, it would too protect the upholstery from abrasion by the sharp edge.
Hope that helps!
Scott
Scott
Senior Member
Back Marker
Joined: Dec 2008
Posts: 116
From: Lunenburg, MA
OK Brad, got the seat all worked out in my head. When you get closer to pulling the seat trigger, just make sure I can have the piece it will mount on for a little while, so I can pattern to it. I'm thinking 3 snaps on each lower side and one on the upper back plane of both sides. I could make the line of the back of the seat similar to the line of the tail back, or reverse cut it, like the front of the tank. Don't have any white thread, but just ordered a spool of "nickel" that I think would look pretty slick too.
What are you gonna do w/ bars, battery cover and the color and cut of the gas tank? Are you gonna notch out the rear ala cafe racer? Do the tach and speedo work? I assume you're only putting on the tach. Do you need a new graduated face for it? Looked like the old one was pretty dried out and split.
Scott
Thread Starter
Senior Member
Back Marker
Joined: Dec 2008
Posts: 226
From: Corpus Christi, TX
did some big work over the past two weeks. I had to cram it all in one weekend. Friday saturday and sunday last week a welder friend of mine and I dove head first into the project. My job was to cut/test fit/grind/ prep all pieces then my buddy did the welding. We got the brackets for the seat pan made, cut the extra part of the sub-frame off (where the rear fender bolts up to), made the 4 into one exhaust, and moved the petcock forward 3 inches.
For the pipes we used 3 sets of pipes to make one. To get the clutch side pipes to meet up with the brake side pipes we used 4 of the 90 degree bends from the extra header pipes. For the collector we used the 2 into 1 collectors, split them in half, bent and shaped the pieces to fit all four pipes. We took a mid pipe and yoshi muffler from a early 90's fzr, chopped the mid-pipe and welded the two ends together then just slid the muffler onto the mid-pipe...I'll let the pics do the rest of the talking
For the pipes we used 3 sets of pipes to make one. To get the clutch side pipes to meet up with the brake side pipes we used 4 of the 90 degree bends from the extra header pipes. For the collector we used the 2 into 1 collectors, split them in half, bent and shaped the pieces to fit all four pipes. We took a mid pipe and yoshi muffler from a early 90's fzr, chopped the mid-pipe and welded the two ends together then just slid the muffler onto the mid-pipe...I'll let the pics do the rest of the talking
Thread Starter
Senior Member
Back Marker
Joined: Dec 2008
Posts: 226
From: Corpus Christi, TX
What are you gonna do w/ bars, battery cover and the color and cut of the gas tank? Are you gonna notch out the rear ala cafe racer? Do the tach and speedo work? I assume you're only putting on the tach. Do you need a new graduated face for it? Looked like the old one was pretty dried out and split.
Scott
Thread Starter
Senior Member
Back Marker
Joined: Dec 2008
Posts: 226
From: Corpus Christi, TX
all torn down! took just over 2 hours, I couldn't believe it. I have to clean the engine before painting it. With the hawk it wasn't that back cause it doesn't have the fins on the heads that the cb does. I'm trying to figure out a effective cheap way to clean the engine that is cheap and easier than using simplegreen + endless amounts of scrubbing. I don't mind if some of the paint comes off with the grime, in fact that would be better, save me some time with prep-work. I don't have a sand blaster or anything. Does anyone have any recommendations? please! As for the frame I'm considering dropping the cash to get the frame powdercoated due to the durability...Any help wold be appreciated!
Thread Starter
Senior Member
Back Marker
Joined: Dec 2008
Posts: 226
From: Corpus Christi, TX
I've done some prep work on the frame. Mainly just cleaning areas that I ground off the tabs not being used. Again, I haven't done this before so any comments or suggestions are welcome

Senior Member
Back Marker
Joined: Dec 2009
Posts: 169
From: Southern New Hampshire
Hi B.
I haven't tried this yet but I have built one to clean up aluminum on my project.
http://www.aircooledtech.com/tools-o.../soda_blaster/
I haven't tried this yet but I have built one to clean up aluminum on my project.
http://www.aircooledtech.com/tools-o.../soda_blaster/
Thread Starter
Senior Member
Back Marker
Joined: Dec 2008
Posts: 226
From: Corpus Christi, TX
got the headers wrapped. took about 95 ft of 1" wrap to do all four pipes. got into some tricky wrapping around the collector but turned out good. I'll post pics later.
Thanks for the soda blaster idea. tried that today with 1/4" tube and the compressor at 120psi. It was a no go. I might try again with thinner tube so I can get some more velocity out of it. The compressor won't go up much higher than that, Its just a little cheap-o type compressor. Other than that I'm not sure what to try other than elbow grease...Found someone on CL up here in Maine that does powder coating, sent him a message to see what he wants for money, do you guys know what the price range should be on the CB frame start to finish?
Thanks for the soda blaster idea. tried that today with 1/4" tube and the compressor at 120psi. It was a no go. I might try again with thinner tube so I can get some more velocity out of it. The compressor won't go up much higher than that, Its just a little cheap-o type compressor. Other than that I'm not sure what to try other than elbow grease...Found someone on CL up here in Maine that does powder coating, sent him a message to see what he wants for money, do you guys know what the price range should be on the CB frame start to finish?
Senior Member
Back Marker
Joined: Dec 2009
Posts: 169
From: Southern New Hampshire
The site calls for 7/16 diameter tube. There has to be room for the soda to make it by the tip of your air guns nozzle. I think I read the air pressure has to be set at 90PSI.
got the headers wrapped. took about 95 ft of 1" wrap to do all four pipes. got into some tricky wrapping around the collector but turned out good. I'll post pics later.
Thanks for the soda blaster idea. tried that today with 1/4" tube and the compressor at 120psi. It was a no go. I might try again with thinner tube so I can get some more velocity out of it. The compressor won't go up much higher than that, Its just a little cheap-o type compressor. Other than that I'm not sure what to try other than elbow grease...Found someone on CL up here in Maine that does powder coating, sent him a message to see what he wants for money, do you guys know what the price range should be on the CB frame start to finish?
Thanks for the soda blaster idea. tried that today with 1/4" tube and the compressor at 120psi. It was a no go. I might try again with thinner tube so I can get some more velocity out of it. The compressor won't go up much higher than that, Its just a little cheap-o type compressor. Other than that I'm not sure what to try other than elbow grease...Found someone on CL up here in Maine that does powder coating, sent him a message to see what he wants for money, do you guys know what the price range should be on the CB frame start to finish?
2nd mouse gets the cheese
SuperBike
Joined: Jan 2008
Posts: 1,697
From: Beaverton, OR
A lot of powder coating places have a minimum dollar amount which your frame and all the little pieces should not exceed. The place I go to is $150 minimum but I could do 5 frames for that if I had them so I usually lump orders together.
Thread Starter
Senior Member
Back Marker
Joined: Dec 2008
Posts: 226
From: Corpus Christi, TX
Got the frame and swing arm sanded down as much as I am going to. Its difficult because there were two layers of paint on the frame with rust under the paint in a lot of areas. I left some of it but tried to get the majority of it. Even still, there are these worm-like lines of rust bored into frame itself. It would be better off if the frame was completely stripped but its just a cb and this is my first project. I don't expect it to last forever either. So it is pretty much ready for primer.
Got the pipes finished up today too. To make the wrapping easier, I soaked the wrap in water, which took out some of the color which was to be expected. I bought some DEI silicone paint to gain it back and sprayed that on today They are the first part of the bike that is completely done!
Tomorrow I am going to try to tackle the engine cleaning that needs to be done. Thanks for the tips and information!
Thread Starter
Senior Member
Back Marker
Joined: Dec 2008
Posts: 226
From: Corpus Christi, TX
Yeha I a lapse in judgement when I bought the hose for the soda blaster. It was 1/2" haha. oops, not wonder it didn't work. Today I got some 7/16" and 5/16 just to try them out. the 7/16" does work but the 5/16 is a little more applicable for my weak 5 gallon compressor. I got the engine cleaned. It took soda blasting, brake cleaner, scrubbing, and lots of air. It sucked having to wait for my compressor to catch up on the ammount of air I was using so it was start, stop, start, stop...all the way through. Now I have to wait for the temp to get warm enough where I can start painting!
Thread Starter
Senior Member
Back Marker
Joined: Dec 2008
Posts: 226
From: Corpus Christi, TX
I made some decent progress of painting since the last update. I prepped and painted all the little things, front caliper, center of the disk, MC, kickstand, battery box, triple trees, sprocket cover, lower fork tubes, and swing arm. All these little things I was painting to get practice under my belt before moving on to the frame, wheels, and body work. Most of it came out pretty good.
Had a couple I screw-ups though. I put chip-guard clear coat on the sprocket cover which is really thick, has bubble that slowly dissipate as the clear coat sets. I think I had it too hot in the garage; what happened is the bubbles dried under the clear. Not a huge deal but definitely a learning curve for me.
I messed up with the swing arm too. Sanded it down just like the frame, cleaned it with this prep-spray stuff that is supposed to get the grease, finger prints, and dust off. Third, did the primer then 2 coats of the paint. It all looked great, then when I went to put the clear coat on about 8 hours later, the paint started to wrinkle and crack. When I tried to sand it down again the paint rolled up in little sticky *****. I thought it was due to the prep-spray that I used, so I did the whole process again, minus the prep-spray. and it did it again. I read some stuff that may indicate that the wrinkling/cracking is due to my timing. I've heard that you have to do the clear between 1 and 4 hours, or after 36 hours. So I'm going to sand it down in a couple days and try this again, third time is the charm!
Thread Starter
Senior Member
Back Marker
Joined: Dec 2008
Posts: 226
From: Corpus Christi, TX
Painted the engine last week, it took a lot of thinking to decide on the paint scheme I was going to do. I settled on doing the lower part of the engine silver, and doing the heads and valve cover black. I left the clutch cover, sprocket cover, and the very top of the valve cover aluminum so I could polish them up. I started with silver on the bottom part of the engine but I didn't like the color so I found a darker more metallic graphite, When it dried it came out with a more tan/brown tinge that I didn't expect. I don't mind the surprise, I like how it turned out.
Thread Starter
Senior Member
Back Marker
Joined: Dec 2008
Posts: 226
From: Corpus Christi, TX
Finished up the wheels today. I wanted to paint the spokes cause the rust was pretty bad and they looked like crap. Plus a new set of spokes is like $150. I also like the look of a black hub and the black center stripe on the wheels that I have on the superhawk. I mimicked that look with the cb wheels, finished those up this morning, Heres some pics.
Senior Member
Back Marker
Joined: Dec 2008
Posts: 116
From: Lunenburg, MA
Brad;
The seat leather I'm using and those wheels are gonna make you look like James Dean kid! I'm finishing my and Dana's seats tomorrow. Tonight, I was trying to finish stitching mine. I had to change the thread, and when I went to rewind the lower bobbin on the machine, I couldn't get it off. I'm a total loser as a mechanic Brad. So, I got to sketch your seat tonight and mark out the base for size. I'll send you the sketch from work after scanning it in. I like it and think you will. When you look at it, I have a dark silver thread, coral, a light red and black thread. Let me know what your thoughts are. I'll look at your bike on here and see what I think, but so far, I'm thinkin that titanium/ nickel color. My plan is to use 1" rebond for the body of the seat, and shave the corners (especially on the front where your legs ride). Then I'm thinkin I'll take some soft 1/2" foam and quilt that under an upper layer of leather, at 2 or 3" cross stitch lines (like a late sixties Triumph seat). We'll wrap that over the 1" layer, and finish it with 1/4" round cording around the base of the seat. Check out the drawing and I'll think you'll get it.
Sean's drill team is going to do a Bruins/ Montreal playoff game and a Sox game this summer, Cool, huh!
Scott
Last edited by BluStreak; Apr 8, 2011 at 07:10 PM.
Thread Starter
Senior Member
Back Marker
Joined: Dec 2008
Posts: 226
From: Corpus Christi, TX
Brad;
The seat leather I'm using and those wheels are gonna make you look like James Dean kid! I'm finishing my and Dana's seats tomorrow. Tonight, I was trying to finish stitching mine. I had to change the thread, and when I went to rewind the lower bobbin on the machine, I couldn't get it off. I'm a total loser as a mechanic Brad. So, I got to sketch your seat tonight and mark out the base for size. I'll send you the sketch from work after scanning it in. I like it and think you will. When you look at it, I have a dark silver thread, coral, a light red and black thread. Let me know what your thoughts are. I'll look at your bike on here and see what I think, but so far, I'm thinkin that titanium/ nickel color. My plan is to use 1" rebond for the body of the seat, and shave the corners (especially on the front where your legs ride). Then I'm thinkin I'll take some soft 1/2" foam and quilt that under an upper layer of leather, at 2 or 3" cross stitch lines (like a late sixties Triumph seat). We'll wrap that over the 1" layer, and finish it with 1/4" round cording around the base of the seat. Check out the drawing and I'll think you'll get it.
Sean's drill team is going to do a Bruins/ Montreal playoff game and a Sox game this summer, Cool, huh!
Scott
The seat leather I'm using and those wheels are gonna make you look like James Dean kid! I'm finishing my and Dana's seats tomorrow. Tonight, I was trying to finish stitching mine. I had to change the thread, and when I went to rewind the lower bobbin on the machine, I couldn't get it off. I'm a total loser as a mechanic Brad. So, I got to sketch your seat tonight and mark out the base for size. I'll send you the sketch from work after scanning it in. I like it and think you will. When you look at it, I have a dark silver thread, coral, a light red and black thread. Let me know what your thoughts are. I'll look at your bike on here and see what I think, but so far, I'm thinkin that titanium/ nickel color. My plan is to use 1" rebond for the body of the seat, and shave the corners (especially on the front where your legs ride). Then I'm thinkin I'll take some soft 1/2" foam and quilt that under an upper layer of leather, at 2 or 3" cross stitch lines (like a late sixties Triumph seat). We'll wrap that over the 1" layer, and finish it with 1/4" round cording around the base of the seat. Check out the drawing and I'll think you'll get it.
Sean's drill team is going to do a Bruins/ Montreal playoff game and a Sox game this summer, Cool, huh!
Scott
Scott it sounds really cool. Can't tell you how much I appreciate you taking this on. I don't think my mom would have liked me trying to stitch a seat together with her sewing machine!
How did Sean's drill team get this opportunity?! They never gave us anything like that. Must be the prize for winning? Thats so cool, he's a lucky kid. Tell him to keep working hard! I'm sure that won't be a problem for a motivated guy like him.
Thread Starter
Senior Member
Back Marker
Joined: Dec 2008
Posts: 226
From: Corpus Christi, TX
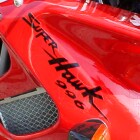
Haha your doing the logical progression of new bikes. I'm all over the place. 1st was a 91 katana, 2nd was the superhawk, and now I have to CB... Congrats with the superhawk, best money I ever spent! I'm sure you'll enjoy it.
Thread Starter
Senior Member
Back Marker
Joined: Dec 2008
Posts: 226
From: Corpus Christi, TX
its Shiny!
got some updates. Got a lot put together today, all i'm missing right now is
the pipes, lights, tach, cables, then I still have to do work on the tank tail side covers.
the pipes, lights, tach, cables, then I still have to do work on the tank tail side covers.
Thread Starter
Senior Member
Back Marker
Joined: Dec 2008
Posts: 226
From: Corpus Christi, TX
almost there!
Things are coming together. All electrics work. had to sort out issues with LED's not using enough juice to make the turn signal relay work. I bought a new relay that is made for LED's. Plug and play. works perfectly. All I need now is a tail section and some gasoline! Pics show progress...
Senior Member
Back Marker
Joined: Jan 2011
Posts: 160
From: Sunny Central Illinois
looking REALLY good. I read through the whole thing and I am tired! I imagine you are too. I had an old CB360 that I wanted to do something similar too several years ago but I never got very far with it. Congrats on a great job!
Thread Starter
Senior Member
Back Marker
Joined: Dec 2008
Posts: 226
From: Corpus Christi, TX
I couldn't leave this thread hanging. I've completed the project with the help from some good buds. The kinks have been worked out. I don't have time to write the rest of the story. I'm moving to FL for the navy in 6 days. Now I can finally close this chapter, if anyone is seriously interested in "how to's" or "where do I get these" or other questions shoot me a PM
Brad
Brad

Thread
Thread Starter
Forum
Replies
Last Post
SuperBlink
Modifications - Performance
60
Mar 17, 2011 01:02 PM


