
Another Build Thread - 74 cb550

Thread Starter
Senior Member
Back Marker
Joined: Dec 2008
Posts: 226
From: Corpus Christi, TX

Another Build Thread - 74 cb550
I wanted something new to me so I picked up a 74 cb550 in almost running condition on Dec 11. My goal is to have something to fix and work on and be able to ride periodically. I still have the hawk and I'm going to keep both. I'd like to turn the cb550 into a cafe style sort of thing.
I'm starting the thread a little late, sorry. And yeah, you missed to fun part, I had the enjoyment of getting it started already. Its going to take a lot of work though cause its running like crap. The progress this month has been slow because of the holidays, it has been at 3 houses so far this month but the pace should pick up next week once I get settled back up at school. So here's a little background of the project I've already started:
Its a 74 cb550 four, it came with a spare 78 cb550k parts bike which was in boxes. Got both of them from a guy Edgecomb Maine for $500. Brought it home, took the fenders off and got all the parts organized to see what I had and didn't have. Then took some pictures (what you'll see below). I knew it would be hard to start the first try, dead battery and it had been sitting outside with velocity stack pods and no filters. I cleaned the spark plugs and set the gaps, I got it to fire a little but nothing encouraging. Took the carbs off, cleaned the float bowls which had huge amounts of rusty looking dust. Tried again, Nothing.
Then it was time to take it home for Christmas break and try to get more done while pleasing the family and gracing them with my presence Got a new battery, and jerry-rigged the 78 carbs onto the bike. the interesting thing here is that the cable-disks on the carbs open in opposite directions. Also; the 74 carbs have a manual choke, and the 78's have a cable choke. I did however get it set up and got the bike to fire up and run.
It sounded decent for a bike that had not run in a couple years but there were some obvious clanks and rattles. Next I got into the timing and points. learned a lot about the points system and setting the points gap and adjusting the timing with the condensers and rotating the disks under the points cover to make the condenser to send current at the right time. Its all really fascinating stuff and it helping me get some confidence in tinkering and a background on how technology has developed.
Took a break from that to work on other stuff. I made a bracket for the tach so I can run it as a single gauge display. I eliminated the indicator light display and worked on the forks. I am using the forks from the 78 because they have good seals. I just wanted to go through them so I drained the oil from them and cleaned everything inside. It calls for SAE 10W 30 for fork oil. I wanted to slow the compression and rebound down a little so I used 15 40 instead. Its an experiment but its easy enough to change if it doesn't work out like I expect. Took a wire wheel and scrubbed the age off the bottom tubes and I'll be repainting them before I put them on the bike. One thing I like about the 78's forks is that they are an inch shorter than the 74's so that will tighten up the steering a bit. That pretty much gets me to where I'm at tonight...I rebuilt the 74 carbs today, slapped them on, and the bike loved it. I could tell the fuel/air mix was much better than when I had the 78 carbs on.
So to sum it up I've set to spark plug gaps, points gap, set the timing, and got fresh carbs. The problem I have now is that the clanking and slapping noises in the engine got worse. I think part of it is due to the fact that when I corrected the timing and the carbs it made the problems with the valves more apparent. Tomorrow I am going to try to tackle the valve clearances and then recheck the timing after that. Oh and the compression is really low right now too #1-3-4 are at 110 and #2 is at 135. Spec is between 155 and 170. I don't expect to get those number cause it is an old tired engine but I would like to get around 145 in each cylinder.
Other things on the list:
Go through the electrical system, replace old tube style fuses with new style flat fuses, replace the clutch/clutch cable, throttle cable, wheel/head tube bearings, rebuild brakes, new tires.
After that I'll get into the fun stuff - I want to put an old harley style flat track tail on it, make some rear-sets and reposition the foot pegs, build a 4 into 2 high-mount exhaust, and eliminate the electric starter/hand controls. Then Repaint! Its ambitious but I feel like I've got a good start for having the bike in 3 different places over the past 3 weeks. Stay tuned!
I'm starting the thread a little late, sorry. And yeah, you missed to fun part, I had the enjoyment of getting it started already. Its going to take a lot of work though cause its running like crap. The progress this month has been slow because of the holidays, it has been at 3 houses so far this month but the pace should pick up next week once I get settled back up at school. So here's a little background of the project I've already started:
Its a 74 cb550 four, it came with a spare 78 cb550k parts bike which was in boxes. Got both of them from a guy Edgecomb Maine for $500. Brought it home, took the fenders off and got all the parts organized to see what I had and didn't have. Then took some pictures (what you'll see below). I knew it would be hard to start the first try, dead battery and it had been sitting outside with velocity stack pods and no filters. I cleaned the spark plugs and set the gaps, I got it to fire a little but nothing encouraging. Took the carbs off, cleaned the float bowls which had huge amounts of rusty looking dust. Tried again, Nothing.
Then it was time to take it home for Christmas break and try to get more done while pleasing the family and gracing them with my presence
It sounded decent for a bike that had not run in a couple years but there were some obvious clanks and rattles. Next I got into the timing and points. learned a lot about the points system and setting the points gap and adjusting the timing with the condensers and rotating the disks under the points cover to make the condenser to send current at the right time. Its all really fascinating stuff and it helping me get some confidence in tinkering and a background on how technology has developed.
Took a break from that to work on other stuff. I made a bracket for the tach so I can run it as a single gauge display. I eliminated the indicator light display and worked on the forks. I am using the forks from the 78 because they have good seals. I just wanted to go through them so I drained the oil from them and cleaned everything inside. It calls for SAE 10W 30 for fork oil. I wanted to slow the compression and rebound down a little so I used 15 40 instead. Its an experiment but its easy enough to change if it doesn't work out like I expect. Took a wire wheel and scrubbed the age off the bottom tubes and I'll be repainting them before I put them on the bike. One thing I like about the 78's forks is that they are an inch shorter than the 74's so that will tighten up the steering a bit. That pretty much gets me to where I'm at tonight...I rebuilt the 74 carbs today, slapped them on, and the bike loved it. I could tell the fuel/air mix was much better than when I had the 78 carbs on.
So to sum it up I've set to spark plug gaps, points gap, set the timing, and got fresh carbs. The problem I have now is that the clanking and slapping noises in the engine got worse. I think part of it is due to the fact that when I corrected the timing and the carbs it made the problems with the valves more apparent. Tomorrow I am going to try to tackle the valve clearances and then recheck the timing after that. Oh and the compression is really low right now too #1-3-4 are at 110 and #2 is at 135. Spec is between 155 and 170. I don't expect to get those number cause it is an old tired engine but I would like to get around 145 in each cylinder.
Other things on the list:
Go through the electrical system, replace old tube style fuses with new style flat fuses, replace the clutch/clutch cable, throttle cable, wheel/head tube bearings, rebuild brakes, new tires.
After that I'll get into the fun stuff - I want to put an old harley style flat track tail on it, make some rear-sets and reposition the foot pegs, build a 4 into 2 high-mount exhaust, and eliminate the electric starter/hand controls. Then Repaint! Its ambitious but I feel like I've got a good start for having the bike in 3 different places over the past 3 weeks. Stay tuned!
Thread Starter
Senior Member
Back Marker
Joined: Dec 2008
Posts: 226
From: Corpus Christi, TX
Sorry there aren't more pictures of the progress so far, I'll be better about it when I get back next week and the cb and I am settled back at school. either way, heres the beauty queen, shes in the living room getting put back together. Replaced the clutch on it and stripped it down to the engine, frame and wiring harness cleaned everything with simple green, scotch-brite and Q-tips. Not even an ounce of dirt or grime on it! Not bad for 34,000 miles!
Senior Member
SuperSport
Joined: Jun 2010
Posts: 636
From: Baltimore, Maryland
Looks like a good project bike. The Hawk looks awesome, I've thought about doing that kind of detailing to mine, maybe if I do a rebuild haha. I like the CB series bikes, my dad has a 1979 CB750K in good shape. Look forward to seeing your transformation into a cafe bike.
2nd mouse gets the cheese
SuperBike
Joined: Jan 2008
Posts: 1,697
From: Beaverton, OR
congrats on the buy.
Prepare to become addicted. I personally like the style of the 500/550 cb's engine better then the 750 aesthetically at least. These motors clatter a little bit I think because of the fact the rocker arms are built into the valve cover transferring sound better. I have chased the clatter sounds alot on my 500. Tried everything from cct adjustment to valves. In the end it didn't change anything, but I am getting good mpgs and power and its smooth and not overheating so I have resigned to being ok with it. You may too but I would encourage you to continue with checking everything anyways.
If you find you need some help with custom cafe parts let me know.
~LH
Thread Starter
Senior Member
Back Marker
Joined: Dec 2008
Posts: 226
From: Corpus Christi, TX
Thanks guys, I almost took on a 78 400T II hawk but found out through some forums that the cb platform (specifically the 500, 550, and 750) are the best for converting. So I went with the cb instead of a mini Hawk. Eitherway, its going to be a fun overall project. At the moment whats really grinding my gears is the low compression. I think If I could fix that I would be fine with the rattles and clanks. I've been told that if you pour a teaspoon of oil into each cylinder, turn the motor a few times and check the compression, you should find the compression to go up if the rings are bad, and compression to stay the same if the valves are bad...

Banned
MotoGP
Joined: Aug 2007
Posts: 5,942
From: Lake View Terrace, CA
This is correct and also make sure that the throttle is all the way open when doing the compression tests.
Thread Starter
Senior Member
Back Marker
Joined: Dec 2008
Posts: 226
From: Corpus Christi, TX
Throttle all the way open? This will make a significant difference? Thanks for the tip, can't wait to try it out tomorrow! See, thats what I don't really like about clymer, they are good for describing how to do something very well and in good detail, and even offer insight into a problem that might be the cause of a certain symptom, but they do miss some crucial information. When I was doing the points I noticed a type-o in the manual. In the front of the book (specs/clearances/setting) section it indicates something like .4mm for a gap in the points, in the instructions part of the description on how to set them it says .04mm. Same thing with the fork oil. in the fron of the book it says to use ATF for my bike, and in the "how to" it says 10w-30. Its too late for that as I already did the fork oil, if its acting real bad I'll change it but that can wait. It was a good thing I double checked with the points though, I think I need an additional manual!
Today I adjusted the valves, set the cam chain tension, tightened the headers a bit to make sure I wasn't getting additional noise from an exhaust leak, and greased up the swingarm joints. All went well, and started it up after the adjustments. It quieted down quite a bit, the clanking rattling and knocking subsided a significant amount. And it idles well.
Question for you guys - It runs and sounds good when I let it idle or keep the rpms under 4k rpm. I could sit there and rev it all day long under 4k and it would be fine, but today, after I had it warmed up and idling good at 1500 rpm without the choke (no airbox or fliters) I brought it up to about 5krpm and held it for 10 seconds. Sounded good, no misfires. Revved it up to 6500 twice and let it come back down to idle. When I let it come back down to idle it was spitting an sputtering like crazy then died. Started it back up, and it wouldn't hold an idle and sounded like ****. I shut it off and let be. This seems to be a typical thing when I do this maneuver on the throttle. I did it before when I was running the 78 carbs, thought it could be a bad fuel/air mixture or something to do with the wrong carbs. Is it possible that I am getting unburned fuel sitting in the cylinders when this happens? My plan is to get new fuel, new spark plugs and change the oil after I do the clutch tomorrow to see if this helps out at all. Do you have any ideas of what it is? Any other suggestions of what to do to try to fix it, or figure out what it is? Thanks, Oh and I'll be putting pics up tomorrow so don't tell me my thread is worthless yet!
2nd mouse gets the cheese
SuperBike
Joined: Jan 2008
Posts: 1,697
From: Beaverton, OR
your running issue sounds to me like a fuel flow not being enough so a couple of carbs stop working until there is enough fuel again. Also the 78 carbs are they also mechanical slides or are the vacuum slide? Vacuum slide carbs don't work well without an airbox generally if you are having issues its a good idea to put it all back together before thinking all is lost and scratching your head for hours... I have never done this  .
.
The other thing to check when the motor exhibits your problem is whether the plugs are fouling.
Oh and more pics needed and we want to know what the "dream is" you know the plan for all the details.
The other thing to check when the motor exhibits your problem is whether the plugs are fouling.
Oh and more pics needed and we want to know what the "dream is" you know the plan for all the details.
Slacker
Superstock
Superstock
Joined: Jun 2005
Posts: 489
From: San Antonio, TX

additional manual!
Question for you guys - It runs and sounds good when I let it idle or keep the rpms under 4k rpm. I could sit there and rev it all day long under 4k and it would be fine, but today, after I had it warmed up and idling good at 1500 rpm without the choke (no airbox or fliters) I brought it up to about 5krpm and held it for 10 seconds. Sounded good, no misfires. Revved it up to 6500 twice and let it come back down to idle. When I let it come back down to idle it was spitting an sputtering like crazy then died. Started it back up, and it wouldn't hold an idle and sounded like ****. I shut it off and let be. This seems to be a typical thing when I do this maneuver on the throttle. I did it before when I was running the 78 carbs, thought it could be a bad fuel/air mixture or something to do with the wrong carbs. Is it possible that I am getting unburned fuel sitting in the cylinders when this happens? My plan is to get new fuel, new spark plugs and change the oil after I do the clutch tomorrow to see if this helps out at all. Do you have any ideas of what it is? Any other suggestions of what to do to try to fix it, or figure out what it is? Thanks, Oh and I'll be putting pics up tomorrow so don't tell me my thread is worthless yet!
Question for you guys - It runs and sounds good when I let it idle or keep the rpms under 4k rpm. I could sit there and rev it all day long under 4k and it would be fine, but today, after I had it warmed up and idling good at 1500 rpm without the choke (no airbox or fliters) I brought it up to about 5krpm and held it for 10 seconds. Sounded good, no misfires. Revved it up to 6500 twice and let it come back down to idle. When I let it come back down to idle it was spitting an sputtering like crazy then died. Started it back up, and it wouldn't hold an idle and sounded like ****. I shut it off and let be. This seems to be a typical thing when I do this maneuver on the throttle. I did it before when I was running the 78 carbs, thought it could be a bad fuel/air mixture or something to do with the wrong carbs. Is it possible that I am getting unburned fuel sitting in the cylinders when this happens? My plan is to get new fuel, new spark plugs and change the oil after I do the clutch tomorrow to see if this helps out at all. Do you have any ideas of what it is? Any other suggestions of what to do to try to fix it, or figure out what it is? Thanks, Oh and I'll be putting pics up tomorrow so don't tell me my thread is worthless yet!
Try covering half of the carb intake area with tape and then do your test again and see if it has not improved.
Thread Starter
Senior Member
Back Marker
Joined: Dec 2008
Posts: 226
From: Corpus Christi, TX
your running issue sounds to me like a fuel flow not being enough so a couple of carbs stop working until there is enough fuel again. Also the 78 carbs are they also mechanical slides or are the vacuum slide? Vacuum slide carbs don't work well without an airbox generally if you are having issues its a good idea to put it all back together before thinking all is lost and scratching your head for hours... I have never done this .
The other thing to check when the motor exhibits your problem is whether the plugs are fouling.
Oh and more pics needed and we want to know what the "dream is" you know the plan for all the details.
The other thing to check when the motor exhibits your problem is whether the plugs are fouling.
Oh and more pics needed and we want to know what the "dream is" you know the plan for all the details.
Hahaha. Atleast you scratch your head. I go "f-it! there's plenty other things to do!" and then I move on and do something completely different. Hence why I have the bracket for the tach made and the rear swingarm greased up. Anyway, Mechanical slides. I am 90% sure. I say this because when you open the throttle it mechanically moves an arm which lifts the slides in the body of the carb and the butterflies stay stationary unless you're fiddling with the choke. Check the plugs for fouling, got it. On a similar note should I replace the plugs or am I just being too ambitious for not having the airbox on it?
Plan of all the details! HA! I have so many different things I want to to that are contingent on something else, like the forks. If I like the 78 forks (as they are an inch shorter) I'm not going to do clipons. I'd keep the drag bars that are on it. If I don't like the 78 forks then I'm going to put the 74 forks back on (rebuilt) and drop them 2 inches and put the clipons on top and grind down the tripple clamp flat and fill in the holes with weld. I want to lower the front headlight bucket but in oder to do that I am going to have to know which forks I am going to use and if I am going to do clipons or not...
I am going to put a harley style flat track tail on it, this is probably the part of the bike I am most excited about. I think it looks great.
The rearsets will be determined after I decide which handlebar configuration I go with. I will most likely relocate them higher and further forward (L&H I might use your idea of take the rear foot peg brackets from the hawk and use those as my foot pegs, thanks!)
Exhaust - I want to run a 4 into 2 highmount that comes out in line with the angle of the frame and the tail I am going to use (like the one in the picture but not quite so long and sharp bends.
I might delete the starter once it is a well running machine. I'll figure this out once it gets warm out and I can determine how easy it it to kick start when its warmer than 30 degrees. If I decide to keep the starter I am going to take off the hand control, put on a cheap VIP on/off switch as a killswitch and push button starter relocated under the seat or under the tank.
I'm going to keep the side panels so there's no need to relocate the wires/battery, but I might do it just for the hell of it.
And its going to be white, most cafes I see people try to black them out light a night rider-badass machine. Plus when I get down to Pensecola next year I am going to need something white to remind me of the North East winter! Heres some pics that combine elements of what I want to incorporate. I haven't found anything that has all the aesthetic stuff I want to do so I have to work from a bunch of different pics and use my imagination to combine them. Hope it looks as good in your head as it does in mine!
Thread Starter
Senior Member
Back Marker
Joined: Dec 2008
Posts: 226
From: Corpus Christi, TX
Last week on thursday I went to replace the clutch because it was really stiff and would be unbearable to ride in traffic. I ordered everything for a 74 engine cause thats what I thought I had. I soon found out that the only thing that fit was the gasket. The plates I got were a set of 8, 7 of which were the correct size, the 8th was to wide and the splines were too big. the springs I got were took long. So I resorted to changing the oil, cleaning the slipper plates and everything inside the clutch cover, re-greasing the clutch lifter assembly and polishing the clutch cover. After I got it all back together it worked better but still not great.
The pictures, first one is the tach mounted how I want it, the second is the bracket, then some pics of the clutch.
The pictures, first one is the tach mounted how I want it, the second is the bracket, then some pics of the clutch.
2nd mouse gets the cheese
SuperBike
Joined: Jan 2008
Posts: 1,697
From: Beaverton, OR
an old cable can sure make a clutch feel like it is not working right. Even if an old one seems to function right a new one will surprise you in how much better it works. Its cheap too.
Thread Starter
Senior Member
Back Marker
Joined: Dec 2008
Posts: 226
From: Corpus Christi, TX
So I picked up a set of nasty 4 into 2 pipes from a 500. They have a lot of rust as pitting on them but I am planning on painting them anyway so I'm not worried about it, plus they were cheap. So I'm back up in Maine now, I missed the snow thankfully so I didn't have to worry about cleaning the bike when I got up here. Unpacked and organized in the garage. Spent all day saturday making the garage user friendly in the winter time. Its a 3 car garage that my landlord decided to add after the house was built so its almost like working in a barn. The only thing its good for is a roof and walls. I tried insulating the ceiling with wood and tarps and closed off my little area with plastic sheets to help my small space heater be more efficient. As for the bike, today I got around to the little things. for example I put the 78 forks on it after polishing them with 600 grit. I worked on sanding the tach bracket, to the rough edges worn down so I can paint that. I put about a teaspoon of grease in the tach hole on the top of the engine, apparently these things are notorious for weeping oil from this hole and greasing it is the solution. Found the correct size fuses, ect and mounted the headlight brackets. I did a lot, but didn't get anything done at the same time.
pic 1 getting the rust off, in progress.
pic 2 the mac 4 into 2 exhaust with rusted out baffles
pic 3 the 78 forks with new headlight brackets
classes start tomorrow. I hope I can get some time to keep chipping away at the pipes. If there is time I might also start looking at a way to make a K&N from a 2006 triumph speed master fit the stock cb550 airbox...
Thread Starter
Senior Member
Back Marker
Joined: Dec 2008
Posts: 226
From: Corpus Christi, TX
That was what I considered first, before digging into the entire clutch. But I disconnected it and it all seemed to move freely. Is it possible that when it is connected it could create friction in the housing that can't be felt with the cable disconnected? It seems probable...I ordered a new cable anyway, we'll see what happens.

Senior Member
MotoGP
Joined: Jul 2010
Posts: 3,871
From: Phoenix, AZ
Cool stuff man. So you're still figuring out what year motor you have in there to order the correct size parts, or is that still a mystery? Tach placement looks good- I'm excited to see where you go with this.
2nd mouse gets the cheese
SuperBike
Joined: Jan 2008
Posts: 1,697
From: Beaverton, OR
That was what I considered first, before digging into the entire clutch. But I disconnected it and it all seemed to move freely. Is it possible that when it is connected it could create friction in the housing that can't be felt with the cable disconnected? It seems probable...I ordered a new cable anyway, we'll see what happens.
Thread Starter
Senior Member
Back Marker
Joined: Dec 2008
Posts: 226
From: Corpus Christi, TX
Thread Starter
Senior Member
Back Marker
Joined: Dec 2008
Posts: 226
From: Corpus Christi, TX
Next project in line is the airbox/air filter. I have to mate the K&N to the airbox. The hole for the filter on the box is 3 inches tall and 2.5 inches wide, the hole on the filter (mounting side) is 3.25 inches tall, and 2.65 inches wide. I know I've got easy stuff to work with, but I'm stuck with the problem mating two females
Senior Member
MotoGP
Joined: Jul 2010
Posts: 3,871
From: Phoenix, AZ
On a more PG note, my boss has a '74 cb550 four as well. I think it's orange and I'm positive he won't have time to work on it. Are these pretty easy bikes to wrench?
Edit: it doesn't run
Last edited by 7moore7; Jan 10, 2011 at 11:56 AM.
Thread Starter
Senior Member
Back Marker
Joined: Dec 2008
Posts: 226
From: Corpus Christi, TX
Depending on what you want to do with it, yes. If you want to turn it into some race bike that is gonna keep up with brand new r6's - not gonna happen, you'd be chasing hp, handling and lightweight components for years, not to mention the $ you'd dump. The positive aspects, they are resilient machines; they can be parked uncovered for years and will still run with a new battery. It won't run great, eveything will need to be worked over (as in my case), yet you will have the basics . 2 parts are cheap. and you'll find tons on ebay, and if you know the right people locally you'll find a friend of a friend who used to be into motorcycles 30 years ago and has 5 of them parked in a barn. 3 - mechanically - Simple compared to modern technology. With a good manual you can teach yourself how to do everything with a 8, 10, and 12 mm wrench (not to be taken literally but you get the idea). You'll spend more money in chemical cleaning supplies than you will in tools. You have to remember that these bikes are primitive compared to what we have now. And the fun part is, if you break something, scratch that. When you break something, you really do not need to worry - theres more parts out there. I mean they sold so many of these bikes in the US, and a lot of the different models used a lot of the same parts (Honda is cheap). I'd recommend it. Its a fairly inexpensive way to keep your hawk unmolested, and a way for you to get your wrenching jollies.
Thread Starter
Senior Member
Back Marker
Joined: Dec 2008
Posts: 226
From: Corpus Christi, TX
I conjured up a way to mate the filter to the box. This was the idea: Make a fiberglass mold that hugs the contours of the airbox, and will hold the outside of the air filter at the same time. Then use the existing bracket holes on the airbox to fashion a U- shape bracket to hold the air filter snug to the airbox. heres what I did:
I found something with the same inner diameter as the air filter, luckly it wasn't hard at all. My first stop was to the dollar tree. I figured if I didn't find anything I could always use Styrofoam and cut it to the shape I needed. Wasn't necessary though! I found a thing of wet wipes that looked like a good diamter and size. (yea I brought the airbox into the store with me to make sure what I would buy wasn't too big) . The wet wipes not only fit in the airbox, but the inner diameter of the air filter and the outer diameter of the wet wipes were the exact same size! When I got home I layered 2 inch painters tape and notebook paper around the wet wipes container to achieve an outer diameter the same size of the air filter. The taped everything together and lathered it up with bicycle bearing grease. Layered on the fiberglass and let it set. This is what I ended up with...
I found something with the same inner diameter as the air filter, luckly it wasn't hard at all. My first stop was to the dollar tree. I figured if I didn't find anything I could always use Styrofoam and cut it to the shape I needed. Wasn't necessary though! I found a thing of wet wipes that looked like a good diamter and size. (yea I brought the airbox into the store with me to make sure what I would buy wasn't too big)
Thread Starter
Senior Member
Back Marker
Joined: Dec 2008
Posts: 226
From: Corpus Christi, TX
More progress this weekend, my brother came up to Maine and hung out sat a sun. He brought up my spare set of wheels, some tools I forgot at home, and his 360T tank that he's not going to be using. Sat we tried fitting the 360 tank to the 550 frame. I'd really like ot fit a smaller tank to the 550 for additional clearance with the bars, lose some weight, and I like the look of it - not as tall as the 550 tank and much more narrow. Man, What a squeeze! the 550 frame is obviously wider than the 360, and it shows! the tabs on the rear and front of the tank rub on the frame and the underside/middle part of the tank rubs on the top-tube of the frame. We started by hammering the underside of the tank with a 1.5 in steel bar and got that issue straightened out. then we bent the rear tabs of the tank ever-so-slightly to fit the seat part of the frame. It fit! it is now possible to bolt down the tank, then we had to figure out the petcock issue. the PO of the 360 tank re-threaded the petcock pipe that comes off the tank, and added a pipe fitting. the pipe fitting didn't fit my petcock, but the original petcock pipe did fit. We took out the pipe fitting and got my petcock on the tank, put the tank on the bike and the carbs are now in the way. So what will have to happen:
1. I'll have to find two L shaped pipe fittings to relocate my petcock.
2. add some sort of in-line valve so I can turn the gas on and off without the use of a petcock.
3. call the reinforcements and cut/weld the petcock pipe to a new location on the tank to avoid running into the carbs. Other than that, it will work.
Today:
got the airbox/air filter, battery/battery box on the bike. went on nice and easy. I got really lucky with the fitment. I didn't take measurements before making the air filter adapter So I didn't know what sort of clearances between the electronics/ battery box I had. I put evertyhing on and theres about a half inch of space, WHEW! After that we took off the wire harness bracket with the plan of relocating the wires to a pan under the seat. Quickly ruled that out. We cleaned up the connections, re-wrapped the wires but still had to find a place for the starter motor and the fuse box. Ended up using the under-seat pan idea, made it out of thin aluminum, cut and bent it to fit the frame and bolted the two components on. Looks good and clean. Got the bike started up with the air filter and everything on it. Sounds good, runs good. The issue I was having with it being too lean was fixed with the air filter/airbox combo. I'm hoping that adding some non-stock pipes with homemade baffles will keep the mixture at a level where I won't have to re-jet or play with the adjustments too much...
The stuff I ordered will be coming in some time this week. Wheel bearings, clutch cable, fork seals so I can rebuild the spare set of forks, header wrap, and the new tail section. I ended up with the dark wing seat from hotwingsglass.com I talked to the owner over the phone who convinced me I needed to go with the dark wing instead of the XR-1 that I originally wanted. Really nice guy, shot the breeze with me about bikes/riding for a half hour. He has reasonable prices, and does all of his own work. He agreed to cut the front tabs to adapt easier to the wider 550 frame and is going to add a bracket for the taillight. I'd anyone with cafe plans - I'd recommend you talk to him. I will have to come up with another bracket to mount the seat to the bike once I get it but its one of those thing - deal with it when it comes. Once I get the seat fitted I will decide which tank I will end up using, then I'll deal with the pet-**** issue in more depth. Then all I'll have left is the pipes, bars, rearsets and rebuild the wheels! Hopefully the bike rides as good as it sounds!
Thread Starter
Senior Member
Back Marker
Joined: Dec 2008
Posts: 226
From: Corpus Christi, TX
Decided I am going to use the 360 tank so I started working on cleaning it out. the tank sealer that the PO had used to seal off the rust was flaking so I used some acetone to get it out of the tank. I also bought some rust release (rustrelease.com) so I can get the rust out of the tank. I tested out the rust release on the exhaust clamps first cause I had no idea if it was going to work or not. Turns out the product does exactly what it is supposed to do. Money well spent. Other than that I started working on the front brake. pretty much just took it apart so I can clean the piston, MC, and lines.
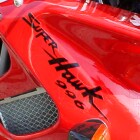
Other progress with the hawk, I got the black/maroon discoloring off the header pipes by using goof-off and scotch-brite pads, took a long time but it came out well. Since the headers looked so good I felt I had to do something with the dull finish on the carbon mufflers. I turned my downstairs bathroom shower into a temporary spray booth and shot some clear after sanding them down a little with 600 grit. I only put two coats on and didn't bother sanding it down and putting a 3rd coat on. They look a lot better than they did before, and having such a nice clean exhaust system really makes the bike look good. its too bad the finish on the headers won't last long when the riding season begins but it looks good for now, sooo yeah...thanks for reading
Other progress with the hawk, I got the black/maroon discoloring off the header pipes by using goof-off and scotch-brite pads, took a long time but it came out well. Since the headers looked so good I felt I had to do something with the dull finish on the carbon mufflers. I turned my downstairs bathroom shower into a temporary spray booth and shot some clear after sanding them down a little with 600 grit. I only put two coats on and didn't bother sanding it down and putting a 3rd coat on. They look a lot better than they did before, and having such a nice clean exhaust system really makes the bike look good. its too bad the finish on the headers won't last long when the riding season begins but it looks good for now, sooo yeah...thanks for reading
Thread Starter
Senior Member
Back Marker
Joined: Dec 2008
Posts: 226
From: Corpus Christi, TX
I haven't been neglecting the project, just neglecting the forum. Progress: new steering bearings, new wheel bearings, sanded the rust off the spokes, new tires, made a fiberglass bracket for the taillight, painted the headlight bucket, and cut the tail section to size. Put it together tonight to have a look at what it will look like when I'm done, and to make sure its coming together like I envisioned it. In the next couple weeks I'm going to be making brackets to hold the tail section, cut off the extra bit of frame under the tail + weld in a brace between the shock mounts, fix the issue with the placement of the petcock on the 360 tank, and hopefully doing something about an exhaust...Heres a couple pics if anyone is still around


