CCT OEM to manual?
 02-13-2012, 03:45 AM
#1
Senior Member
Back Marker
Back Marker
Thread Starter

CCT OEM to manual?
Hi, i was trying to get some manual CCTs for cheap and found someotne to make them but he will not do less that 20 pieces, so i searched another way.
I just bought 2 OEM CCTs from ebay and am waiting to arrive.
So how to make the manual?
I remember i saw some i the forum but just can`t find them
I plan to use just tje bodies of the OEM and put a 8mm bolt like the manual ones.
Should i think of anything else?
I just bought 2 OEM CCTs from ebay and am waiting to arrive.
So how to make the manual?
I remember i saw some i the forum but just can`t find them
I plan to use just tje bodies of the OEM and put a 8mm bolt like the manual ones.
Should i think of anything else?
 02-13-2012, 07:36 AM
#2
Senior Member
SuperBike

Join Date: Sep 2008
Location: Essex, UK
Posts: 1,707

Search for bazza or krieger (here or on the UK VTR1000.org / www.vtr1000.org • Login forum)
02-13-2012, 07:40 AM
#3
Senior Member
SuperSport

Join Date: Nov 2011
Posts: 700
You will need:
All hardware should be stainless steel:
2 5/16 coarse thread carriage bolts
2 5/16 coarse thread hex head nuts
2 5/16 coarse thread nyloc nuts
5/16 tap
17/64(?) Drill bit. The tap package will tell you what size bit to get.
Blank gasket sheet
Rtv gasket sealer
Everything can be found at a local hardware store for under $20.
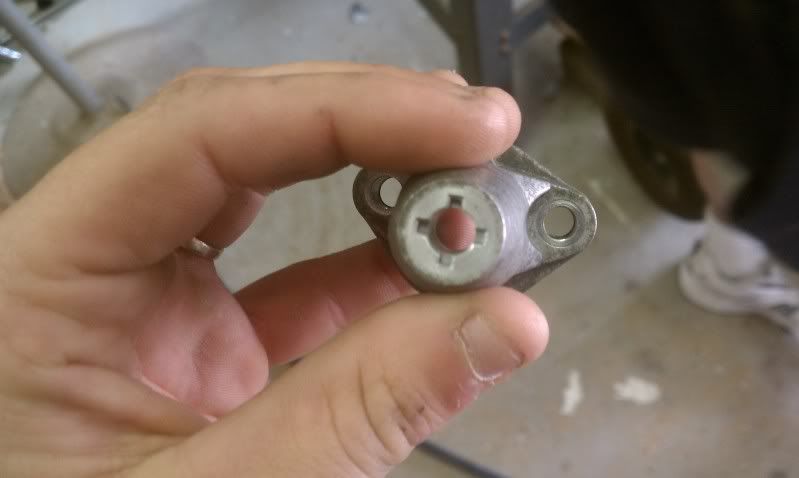
Disassemble the oem pieces, including the 6mm bolt on top.
I used a 5/16ths carriage bolt, its the same as 8mm but I was having a hard time finding 8mm stainless hardware. If you can find metric hardware, just get everything in 8mm instead of 5/16.
You will want to use a drill press to make sure you drill the oem housing straight and true. Use plenty of lubrication while drilling and tapping, such as WD40.
With the housing standing up, drill out the threads where the 6mm bolt was removed.
Use compressed air to blow out the housing and get all of the metal remnants out.
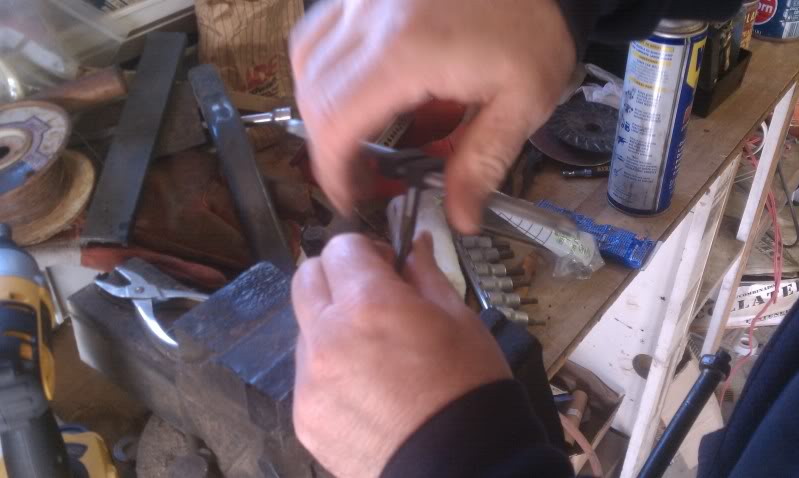
If you are not skilled with a tap, do it by hand. You can start it I'm the press, but it should be finished by hand to ensure you don't damage the housing.
Slowly cut the threads with the tap. Remember to use plently of lube and go slow, cut some threads, then back it out, then cut more, back out etc until you have threaded the entire hole.
Thread the carriage bolt from the inside of the housing. Put the nyloc nut on first, followed by the hex head nut. (in the following picture I used a hex head, then nyloc, followed by another hex head nut. The first hex head is not needed, and the last one is not shown yet)
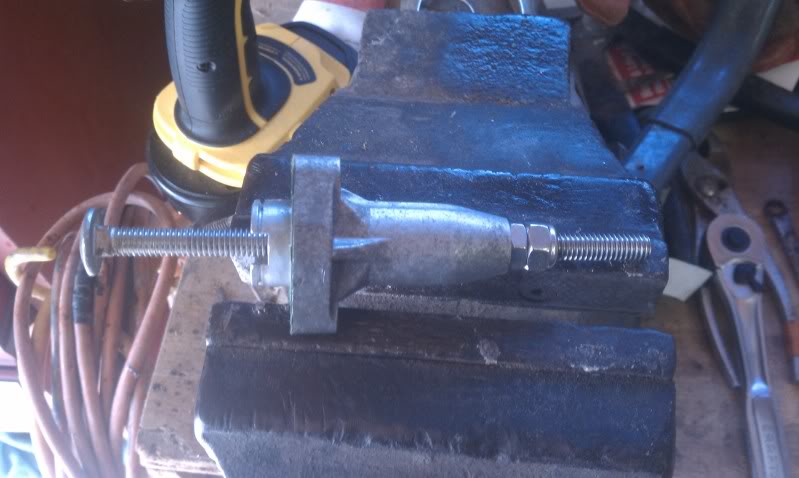
The nyloc nut is your locking nut to hold your adjustment. The hex head nut needs to be welded to the end of the threads to create your torque nut to hold while you adjust the ccts.
Now all you have to do is cut out the gaskets and use the steps found in knowledge base to remove and install the ccts. Follow those to the T, I highly recommend using a zip tie to hold the timing chain to sprocket like is mentioned.
Once you have them in and adjusted, you need 2 half inch wrenches to lock down the cct and you are done.
The rear cct will leak a small ammount of oil over time from where the carriage bolt threads into the housing. Use some teflon tape on the threads and it will fix the problem.
If you need help pm me.
All hardware should be stainless steel:
2 5/16 coarse thread carriage bolts
2 5/16 coarse thread hex head nuts
2 5/16 coarse thread nyloc nuts
5/16 tap
17/64(?) Drill bit. The tap package will tell you what size bit to get.
Blank gasket sheet
Rtv gasket sealer
Everything can be found at a local hardware store for under $20.
Disassemble the oem pieces, including the 6mm bolt on top.
I used a 5/16ths carriage bolt, its the same as 8mm but I was having a hard time finding 8mm stainless hardware. If you can find metric hardware, just get everything in 8mm instead of 5/16.
You will want to use a drill press to make sure you drill the oem housing straight and true. Use plenty of lubrication while drilling and tapping, such as WD40.
With the housing standing up, drill out the threads where the 6mm bolt was removed.
Use compressed air to blow out the housing and get all of the metal remnants out.
If you are not skilled with a tap, do it by hand. You can start it I'm the press, but it should be finished by hand to ensure you don't damage the housing.
Slowly cut the threads with the tap. Remember to use plently of lube and go slow, cut some threads, then back it out, then cut more, back out etc until you have threaded the entire hole.
Thread the carriage bolt from the inside of the housing. Put the nyloc nut on first, followed by the hex head nut. (in the following picture I used a hex head, then nyloc, followed by another hex head nut. The first hex head is not needed, and the last one is not shown yet)
The nyloc nut is your locking nut to hold your adjustment. The hex head nut needs to be welded to the end of the threads to create your torque nut to hold while you adjust the ccts.
Now all you have to do is cut out the gaskets and use the steps found in knowledge base to remove and install the ccts. Follow those to the T, I highly recommend using a zip tie to hold the timing chain to sprocket like is mentioned.
Once you have them in and adjusted, you need 2 half inch wrenches to lock down the cct and you are done.
The rear cct will leak a small ammount of oil over time from where the carriage bolt threads into the housing. Use some teflon tape on the threads and it will fix the problem.
If you need help pm me.
02-21-2012, 01:29 PM
#6
aka tony.mon, vtr1000.org
Squid

Join Date: Mar 2009
Posts: 45
If you use 8mm metric fine thread throughout it leaks less, is easier to seal with a smear of silicon sealant, and has a finer adjustment range.
But apart from that, there's nothing difficult about making these.
But apart from that, there's nothing difficult about making these.
08-20-2013, 08:33 AM
#8
Senior Member
MotoGP

Join Date: Jul 2010
Location: Phoenix, AZ
Posts: 3,869
A little ways down in this thread, Tweety suggest 180mm. I believe that's the length I used. Mind you, that is very generous. Probably could get away with 160mm.
https://www.superhawkforum.com/forum...76/#post198209
https://www.superhawkforum.com/forum...76/#post198209
 08-21-2013, 02:54 PM
#10
Senior Member
Back Marker

Join Date: Sep 2012
Location: California
Posts: 133
If you didn't have the machinery and technical know~how to complete this work. I would highly recommend just buying the Manual CCT's....lol....A drill press....lol I rent and don't have a machine shop to go use....
You sound like you know what you are doing, but man...CCT's....don't mess it up <winkie winkie> Best of luck to you~! Always feels good to do it yourself....unless I think it may kill me.... lol
You sound like you know what you are doing, but man...CCT's....don't mess it up <winkie winkie> Best of luck to you~! Always feels good to do it yourself....unless I think it may kill me.... lol
 08-23-2013, 03:26 PM
#14
Senior Member
Back Marker
Join Date: Sep 2012
Location: California
Posts: 133
Just be carful guys, you don't want a do~it~yourself to turn into a unintentional self death......
Doing the auto to manual CCT is hard enough for most of us...fabricating your own manual CCT..... <face palm> it may work, but..ahh you guys know what I mean..
Just be safe!
Doing the auto to manual CCT is hard enough for most of us...fabricating your own manual CCT..... <face palm> it may work, but..ahh you guys know what I mean..
Just be safe!
08-23-2013, 11:10 PM
#16
Out of my mind, back in 5
MotoGP

Join Date: Nov 2006
Location: Skurup, Sweden
Posts: 6,109
Dude, it's bolt through a solid chunk of alu plus a nut... If you can't fabricate that, you probably shouldn't wrench on a bike at all...
09-13-2013, 01:41 PM
#17
Member
Squid

Join Date: Jun 2013
Location: Bangor,Maine
Posts: 32
Hahaha well said tweety. I'm thinking of doing this myself, but im also looking at a set of Krieger's on Ebay. I'm also taking tweetys advice and buying a MOSFET voltage R/R because he knows electronics more than i could ever hope to
Last edited by MaineHawk; 09-13-2013 at 01:47 PM.
 06-07-2014, 04:18 PM
#19
Senior Member
SuperSport

Join Date: Apr 2014
Location: Auckland, new Zealand
Posts: 932
06-07-2014, 09:16 PM
#20
Senior Member
SuperBike
SuperBike

Join Date: Feb 2013
Posts: 1,509
I've done 4 of these so far by hand. I used a large adjustable wrench to keep the oem cct from turning, and i set it on a piece of wood. Drilled using a new bit, and a 3/8 Milwaukee hand drill. It worked great. Tapping is easy with a little cutting oil. It's really a piece of cake. Even with all polished stainless hardware i spent less than $20.
James
James

Thread
Thread Starter
Forum
Replies
Last Post
Crashrat
Classifieds
40
10-11-2012 08:25 PM


