
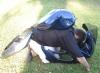
Carb Job Live ish stream

Thread Starter
Senior Member
SuperSport
SuperSport
Joined: Jan 2011
Posts: 521
From: Tampa Florida

Carb Job Live ish stream
To make this as easy as possible you can recap the image and video posts here
http://wp.me/pYEbB-82
Pics and videos as I move along.
Hopefully this will help others who will be cleaning their carbs.
If you see anything I am doing wrong please say something!!
YouTube - ‪Carb Job Part 1 Tank Off‬‏
Overview with the tank off

YouTube - ‪Carb Job Part 2 Hoses‬‏
Petcock connections

YouTube - ‪Carb Job Part 3 Inside the air-box‬‏
Inside the airbox

Look Ma no velocity stacks!

Air-box removed
Left side between Frame and carbs

Right-side between frame and carbs

Carb Sync adjuster

Throttle cables

YouTube - ‪Carb Job Part 4 Carbs exposed‬‏
http://wp.me/pYEbB-82
Pics and videos as I move along.
Hopefully this will help others who will be cleaning their carbs.
If you see anything I am doing wrong please say something!!
YouTube - ‪Carb Job Part 1 Tank Off‬‏
Overview with the tank off
YouTube - ‪Carb Job Part 2 Hoses‬‏
Petcock connections
YouTube - ‪Carb Job Part 3 Inside the air-box‬‏
Inside the airbox
Look Ma no velocity stacks!
Air-box
removedLeft side between Frame and carbs
Right-side between frame and carbs
Carb Sync adjuster
Throttle cables
YouTube - ‪Carb Job Part 4 Carbs exposed‬‏
Last edited by geekonamotorcycle; Jun 25, 2011 at 08:53 PM.
Thread Starter
Senior Member
SuperSport
SuperSport
Joined: Jan 2011
Posts: 521
From: Tampa Florida
Throttle Attack!
YouTube - ‪Carb Job Part 5‬‏
Throttle bolts and nuts

Upper elbow removed

YouTube - ‪Carb Job Part 5.5‬‏
Carb side removed

Where is my throttle?!

Throttle bolts and nuts
Upper elbow removed
YouTube - ‪Carb Job Part 5.5‬‏
Carb side removed
Where is my throttle?!

Banned
MotoGP
Joined: Aug 2007
Posts: 5,942
From: Lake View Terrace, CA
Well a couple of quick things.
First where you have the fuel line tie wrapped to the carb stays actually goes through the the pound clip on the frame above the thermostat.
Second, there is no need to remove the throttle, just remove the 2 screws that hold the cable stay to the carbs themselves as it is a bit easier.
First where you have the fuel line tie wrapped to the carb stays actually goes through the the pound clip on the frame above the thermostat.
Second, there is no need to remove the throttle, just remove the 2 screws that hold the cable stay to the carbs themselves as it is a bit easier.
Thread Starter
Senior Member
SuperSport
SuperSport
Joined: Jan 2011
Posts: 521
From: Tampa Florida
Disconnected Carb Bodies
http://www.youtube.com/watch?v=qqzkIywVPT0&hd=1
Throttle Position sensor long view

Throttle Position sensor Close up say cheese!

Coolant line, I disconnected this to drain excess fluid. Be sure to put a pan beneath this

This is the boot that connects the front carb to the engine. You only need to loosen the top one. Its 8mm btw

Coolant line (front), be careful while removing these

Fuel enrichment plunger Rear. 10mm open wrench. Pull the boot back first.

Look Ma no carbs!

Time to drain

http://www.youtube.com/watch?v=qqzkIywVPT0&hd=1
Throttle Position sensor long view
Throttle Position sensor Close up say cheese!
Coolant line, I disconnected this to drain excess fluid. Be sure to put a pan beneath this
This is the boot that connects the front carb to the engine. You only need to loosen the top one. Its 8mm btw
Coolant line (front), be careful while removing these
Fuel enrichment plunger Rear. 10mm open wrench. Pull the boot back first.
Look Ma no carbs!
Time to drain
Last edited by geekonamotorcycle; Jun 25, 2011 at 12:07 PM.
Thread Starter
Senior Member
SuperSport
SuperSport
Joined: Jan 2011
Posts: 521
From: Tampa Florida
Inside the carbs
Spring is here! and oh christ is it hard to get back in

Boing!

This is a serious needle.

Chamber with butterfly valve below.

This is where the Needle and slide go

I threaded one of the diaphram cap screws and wiggled this assembly side to side until it came out.

Chemtool, this got really murky with the second set.

Floats

This is what happens when you run chemtool and seafoam through your carbs every few tanks.

Spring checks out.

If you dont use chemtool regularly this is why you should.

Butterfly

Open, I cleaned up the carbon deposit ring around the valve.

Maybe this is my problem? What does this say to yall?

Maybe this is my problem? What does this say to yall?

Spring is here! and oh christ is it hard to get back in
Boing!
This is a serious needle.
Chamber with butterfly valve below.
This is where the Needle and slide go
I threaded one of the diaphram cap screws and wiggled this assembly side to side until it came out.
Chemtool, this got really murky with the second set.
Floats
This is what happens when you run chemtool and seafoam through your carbs every few tanks.
Spring checks out.
If you dont use chemtool regularly this is why you should.
Butterfly
Open, I cleaned up the carbon deposit ring around the valve.
Maybe this is my problem? What does this say to yall?
Maybe this is my problem? What does this say to yall?
Last edited by geekonamotorcycle; Jun 25, 2011 at 03:52 PM.
Thread Starter
Senior Member
SuperSport
SuperSport
Joined: Jan 2011
Posts: 521
From: Tampa Florida
This is the sync mod I made.
http://www.youtube.com/watch?v=AxbaoHRJ6Hs&hd=1
http://www.youtube.com/watch?v=AxbaoHRJ6Hs&hd=1
Last edited by geekonamotorcycle; Jun 25, 2011 at 04:42 PM.
Banned
MotoGP
Joined: Aug 2007
Posts: 5,942
From: Lake View Terrace, CA

Senior Member
MotoGP
Joined: Jul 2010
Posts: 3,871
From: Phoenix, AZ
The two small hoses that are zip tied in between your carbs... those are better off not woven into the frame of the carbs. Something about a plugged vent under heavy braking or something. Just pull them out and aim them down into the bike when you re-assemble.
Banned
MotoGP
Joined: Aug 2007
Posts: 5,942
From: Lake View Terrace, CA
So I'm not sure if it has any bearing on later bikes, as it was supposedly fixed though I still route the lines straight down on any bikes I work on.
Though it is nice to see you have been paying attention Ian
Thread Starter
Senior Member
SuperSport
SuperSport
Joined: Jan 2011
Posts: 521
From: Tampa Florida
Well I ran into a problem.
The needles are realtively clean I have them chilling in some B12 right now with some flakes having developed at the bottom, problem is that the pilot screw is not a screw but a funky shaped circle with a portion taken out. I really wanted to clean out what was underneath there. Now I am worried all this work and I wont correct the problem I was having at all.
YouTube - ‪06-22-11 Carb problems? You decide‬‏
all of the needles were screwed all the way down. is this correct?
I will let this sit for a bit re assemble and move to the rear carb.
Banned
MotoGP
Joined: Aug 2007
Posts: 5,942
From: Lake View Terrace, CA
Which needles were screwed all the way dawn?
As for the pilot screws, that is the Honda "D" shaped screw head. You can either make your own "D" driver out of a piece of brass tubing and then flatten one side or take a dremel and cut some std. screwdriver slots in them.
As for the pilot screws, that is the Honda "D" shaped screw head. You can either make your own "D" driver out of a piece of brass tubing and then flatten one side or take a dremel and cut some std. screwdriver slots in them.

Senior Member
MotoGP
Joined: May 2008
Posts: 3,452
From: San Clemente, CA
I've never drained any coolant when pulling my carbs, and I've never lost more than a few drops when removing the hoses from the carbs.
Did you remove the jets and emulsion tubes? Those should be soaked then blown out with carb spray, followed by compressed air, if possible.
And like 8541Hawk said, go easy on tightening the jets, brass is very soft.
Patience is important when reinstalling the "choke" cables too. Very fine plastic threads...use light finger pressure to start the threads.
Isn't this fun?
Last edited by VTRsurfer; Jun 25, 2011 at 03:03 PM.
Thread Starter
Senior Member
SuperSport
SuperSport
Joined: Jan 2011
Posts: 521
From: Tampa Florida
So I made a huge effing mistake. I broke off the threads on the rear cylinder choke plunger! its made of plastic btw. I am not sure what to do now. I think it might possibly still work but am not sure. oh boy.

Oh Snap!

Oh Snap!
Last edited by geekonamotorcycle; Jun 25, 2011 at 05:58 PM.
Thread Starter
Senior Member
SuperSport
SuperSport
Joined: Jan 2011
Posts: 521
From: Tampa Florida
Am I going to need number 11 on this page to replace that part?
Xtreme Powersports' 2000 Honda Street Bike VTR1000F SUPER HAWK Parts List
any Ideas on how to get the threaded collar out? the plunger portion is stuck inside beyond the threads so I have to wirk with the circuit partially inserted. gah I feel so stupid. it snapped off when I was getting the wrench onto it to loosen it so I could seat it better. It is very delicate.
Thread Starter
Senior Member
SuperSport
SuperSport
Joined: Jan 2011
Posts: 521
From: Tampa Florida
Lol it was hand tight and I was loosening it. damn such a silly part to break after going through so much other stuff.
looks like it happens often too
https://www.superhawkforum.com/forum...50/#post199309
https://www.superhawkforum.com/forum...ng-carb-25462/
I need to figure out how to get it out.. hmm
looks like it happens often too
https://www.superhawkforum.com/forum...50/#post199309
https://www.superhawkforum.com/forum...ng-carb-25462/
I need to figure out how to get it out.. hmm
Banned
MotoGP
Joined: Aug 2007
Posts: 5,942
From: Lake View Terrace, CA
The assy. is a lot cheaper here: Honda, ATV Parts, Scooter Parts, Motorcycle Parts,CRF,CR,MX Parts, Goldwing parts $22.38

Thread Starter
Senior Member
SuperSport
SuperSport
Joined: Jan 2011
Posts: 521
From: Tampa Florida
Oh neato thanks! the only thing would be shipping. The place I linked to is bicycle distance from my house and has no shipping fee if it goes to the store. I am going to call them up on monday to see if they have it in stock. I am stopping for the day. now that I know the proper sequence for getting the carbs off I can take them out much faster tomorrow. I woke up early today and purposely took my time. it is really only a 1.5 hour job if I get all the tools out and prepped before hand. This was a great learning experience and now that I have done my first carb job I feel like a man LMAO.
I hope this doesnt take too long. If I go awhile without riding I turn into a whinny little bitch.
I hope this doesnt take too long. If I go awhile without riding I turn into a whinny little bitch.
Last edited by geekonamotorcycle; Jun 25, 2011 at 06:58 PM.
Thread Starter
Senior Member
SuperSport
SuperSport
Joined: Jan 2011
Posts: 521
From: Tampa Florida
lol I know right! didnt even twist it. I was mounting the nut with the open ended wrench and it just suddenly snapped. it was the damnedest thing. Like I had barley even touched it.
Senior Member
MotoGP
Joined: May 2008
Posts: 3,452
From: San Clemente, CA
Use a small Easy-out, it should come out with no problem. Or even a small screwdriver blade might work, if you jam it in there by hand.


