
Installed the Factory Pro Shift Star Kit Today... WOW!


RUNLEVELZERO #99
SuperBike
Joined: Jan 2007
Posts: 2,223
From: Skokie

Can U post some pics from top & side views?
I hope I have read this correctly. I am assuming that the shift rod is threaded on later models, whereas the early model shift rod is tapped. Hope that is right.
Ok, so here is what I reckon you should do. One of my favourite mods.
Because it was my idea.
Ok, sorry about that.")
You ditch the standard shift rod end joints and install heim joints. Waaaay better than the factory joints, and they can be bought with left and right hand threads on them to fit straight into the shift rod. Here is my write up on how to do it.
This is a mod I did 3 or 4 years ago, but have never written it up properly. I have just realised this now, when I went to pass the info on to someone.
The VTR gearshift leaves a lot to be desired in my opinion. It has a few shortcomings, all of which can be fixed. The first mod is to improve the throw of the shifter by moving the spline position, and this is detailed in the "Archive" already so I will not repeat it here. Another mod is to change the shift star to a Factory Pro unit which is far superior to the Honda part. This does necessitate the removal of the clutch to fit it, and it is also reasonably expensive.
The third mod to do is to improve the actual linkage itself. This is a two part job, the first part is to improve the tolerance between the shifter bolt shaft and the shifter body. There is a lot of play in this even on a new bike. I got a machine shop to install a brass bush in the shifter body to match the bolt shaft size better. Hard to do this mod at home without the proper equipment, but the next step you can do easily, and will give a nice improvement to the shifter feel. The reason I re-bushed the shifter rather than installing a bearing, was simply because I could not get a suitable size bearing to fit the bolt and shifter body.
The shift rod has a ball and cup joint on each end which has a lot of play in it. If you have a look at CBR you will see Honda have used heim joints on this part. We can use similar parts to improve the VTR. Here is a pic of a heim joint.

These can be bought from your local engineering or bearing supplier. Last time I looked they were $17.50 each. You will need one with a right hand thread and one with a left hand thread.
Honda use riveted joints on their shift rods, so you cannot use a Honda part (on the bikes I have seen anyway), you will need an aftermarket heim joint. This also means you will need to get the grinder out to remove the old joints. Grind the rivet flat and knock it out with a punch. This will leave the shift rod with a hole in the end that will take a 6mm bolt to locate the heim joint. In the picture above you can see bolts to locate them.
Before you remove the old joints, it is a good idea to measure your shift rod length, to enable you to easily get your lever position right after the new joints are fitted.
As a finishing touch you can fit rubber boots to cover the heim joints. This will keep dirt out of them. I applied grease to mine and then put the boots over them to keep them working nicely. Last time I looked Honda didn't fit boots over their shift rod heim joints on the CBR, but Yamaha do on their bikes, and the joints are the same size. Yamaha spare parts will sell you a set for about $10 from memory.
This mod takes a lot of play out the standard VTR shift mechanism, and for the small cost and little time to do the job, is well worth doing.
Ok, so here is what I reckon you should do. One of my favourite mods.
Because it was my idea.
Ok, sorry about that.
You ditch the standard shift rod end joints and install heim joints. Waaaay better than the factory joints, and they can be bought with left and right hand threads on them to fit straight into the shift rod. Here is my write up on how to do it.
This is a mod I did 3 or 4 years ago, but have never written it up properly. I have just realised this now, when I went to pass the info on to someone.
The VTR gearshift leaves a lot to be desired in my opinion. It has a few shortcomings, all of which can be fixed. The first mod is to improve the throw of the shifter by moving the spline position, and this is detailed in the "Archive" already so I will not repeat it here. Another mod is to change the shift star to a Factory Pro unit which is far superior to the Honda part. This does necessitate the removal of the clutch to fit it, and it is also reasonably expensive.
The third mod to do is to improve the actual linkage itself. This is a two part job, the first part is to improve the tolerance between the shifter bolt shaft and the shifter body. There is a lot of play in this even on a new bike. I got a machine shop to install a brass bush in the shifter body to match the bolt shaft size better. Hard to do this mod at home without the proper equipment, but the next step you can do easily, and will give a nice improvement to the shifter feel. The reason I re-bushed the shifter rather than installing a bearing, was simply because I could not get a suitable size bearing to fit the bolt and shifter body.
The shift rod has a ball and cup joint on each end which has a lot of play in it. If you have a look at CBR you will see Honda have used heim joints on this part. We can use similar parts to improve the VTR. Here is a pic of a heim joint.
These can be bought from your local engineering or bearing supplier. Last time I looked they were $17.50 each. You will need one with a right hand thread and one with a left hand thread.
Honda use riveted joints on their shift rods, so you cannot use a Honda part (on the bikes I have seen anyway), you will need an aftermarket heim joint. This also means you will need to get the grinder out to remove the old joints. Grind the rivet flat and knock it out with a punch. This will leave the shift rod with a hole in the end that will take a 6mm bolt to locate the heim joint. In the picture above you can see bolts to locate them.
Before you remove the old joints, it is a good idea to measure your shift rod length, to enable you to easily get your lever position right after the new joints are fitted.
As a finishing touch you can fit rubber boots to cover the heim joints. This will keep dirt out of them. I applied grease to mine and then put the boots over them to keep them working nicely. Last time I looked Honda didn't fit boots over their shift rod heim joints on the CBR, but Yamaha do on their bikes, and the joints are the same size.
This mod takes a lot of play out the standard VTR shift mechanism, and for the small cost and little time to do the job, is well worth doing.

Senior Member
SuperSport
Joined: Dec 2005
Posts: 963
From: Sunshine Coast, Australia
I can't take pics of anything at the moment, as I do not have my bike with me or a camera either.
What did you want a pic of anyway? Maybe I can explain it in writing for you.
What did you want a pic of anyway? Maybe I can explain it in writing for you.
RUNLEVELZERO #99
SuperBike
Joined: Jan 2007
Posts: 2,223
From: Skokie
I wanted to see the fastening of the heim joints to the shift lever and shift shaft bracket. Did you drill out the holes in them, then drill and tap them to accept the bolts? Also, normally the bolts would not be thread where they pass through the heim joints.

Out of my mind, back in 5
MotoGP
Joined: Nov 2006
Posts: 6,109
From: Skurup, Sweden
Here you can see the same concept on my bike... Not stock shift gear, but the concept remains...
http://images.tweety.se/#1.4
RUNLEVELZERO #99
SuperBike
Joined: Jan 2007
Posts: 2,223
From: Skokie
On the older VTR's (Mine is a 97) the shift rod is aluminium and already has the threads tapped into the ends... You just replace the sloppy stock ball and cup with the heim joint... Stock the ball part is fitted to the shift lever and to the arm with a rivet... Drill it and then thread out the cup from the shaft... Throw away and replace with those in the pic above... Replace the rivet with a bolt and locknut through the shiftarm and heim joint... Done...
Here you can see the same concept on my bike... Not stock shift gear, but the concept remains...
http://images.tweety.se/#1.4
Here you can see the same concept on my bike... Not stock shift gear, but the concept remains...
http://images.tweety.se/#1.4
I too have an early 1997 with the aluminum shift shaft with threaded "female" ends, so I know the new heim joints will simply thread into each end of the shift shaft. What I was asking is after the "ball & stem" riveted to the shift shaft "bracket" and shift lever are removed, could the existing holes in the shift shaft "bracket" & shift lever be drilled & tapped to receive a button head cap screw (for lower profile versus a socket head screw) to attach the heim joints rather than using a nut on these screws? Meaning after the existing rivet/stem is removed, are the holes in the shift lever & shift shaft bracket small enough that they can be drilled & tapped to permit the presumably 6mm screws required (i.e., the ID of the heim joint holes is 6mm+)? In other words, what is the OD of the "stem" of the existing ball fitting?
Last edited by skokievtr; Feb 14, 2010 at 05:34 PM.

Senior Member
SuperSport
Joined: Dec 2005
Posts: 963
From: Sunshine Coast, Australia
Tweety,
I too have an early 1997 with the aluminum shift shaft with threaded "female" ends, so I know the new heim joints will simply thread into each end of the shift shaft. What I was asking is after the "ball & stem" riveted to the shift shaft "bracket" and shift lever are removed, could the existing holes in the shift shaft "bracket" & shift lever be drilled & tapped to receive a button head cap screw (for lower profile versus a socket head screw) to attach the heim joints rather than using a nut on these screws? Meaning after the existing rivet/stem is removed, are the holes in the shift lever & shift shaft bracket small enough that they can be drilled & tapped to permit the presumably 6mm screws required (i.e., the ID of the heim joint holes is 6mm+)? In other words, what is the OD of the "stem" of the existing ball fitting?
I too have an early 1997 with the aluminum shift shaft with threaded "female" ends, so I know the new heim joints will simply thread into each end of the shift shaft. What I was asking is after the "ball & stem" riveted to the shift shaft "bracket" and shift lever are removed, could the existing holes in the shift shaft "bracket" & shift lever be drilled & tapped to receive a button head cap screw (for lower profile versus a socket head screw) to attach the heim joints rather than using a nut on these screws? Meaning after the existing rivet/stem is removed, are the holes in the shift lever & shift shaft bracket small enough that they can be drilled & tapped to permit the presumably 6mm screws required (i.e., the ID of the heim joint holes is 6mm+)? In other words, what is the OD of the "stem" of the existing ball fitting?
I used bolts on mine, and using nyloc nuts and spring washers, have had no problems. I agree that having a section of plain shaft before the thread starts would be ideal where it passes through the heim joint, but once tight there is no movement in them anyway. The picture I used is not of the actual parts used on my bike - I found it on the net.
Senior Member
SuperSport
Joined: Dec 2005
Posts: 963
From: Sunshine Coast, Australia
I moved the shift arm on the spline to shorten the throw.
I re-bushed the shifter mounting bolt to take play out of it.
I fitted heim joints as listed above.
And the Factory Pro kit was fitted.
All added up it makes a big improvement to the shifting. When you hit that lever it just slots into the next gear straight away. A lot smoother and quicker than standard. It takes all the slop out of it.
Out of my mind, back in 5
MotoGP
Joined: Nov 2006
Posts: 6,109
From: Skurup, Sweden
Tweety,
I too have an early 1997 with the aluminum shift shaft with threaded "female" ends, so I know the new heim joints will simply thread into each end of the shift shaft. What I was asking is after the "ball & stem" riveted to the shift shaft "bracket" and shift lever are removed, could the existing holes in the shift shaft "bracket" & shift lever be drilled & tapped to receive a button head cap screw (for lower profile versus a socket head screw) to attach the heim joints rather than using a nut on these screws? Meaning after the existing rivet/stem is removed, are the holes in the shift lever & shift shaft bracket small enough that they can be drilled & tapped to permit the presumably 6mm screws required (i.e., the ID of the heim joint holes is 6mm+)? In other words, what is the OD of the "stem" of the existing ball fitting?
I too have an early 1997 with the aluminum shift shaft with threaded "female" ends, so I know the new heim joints will simply thread into each end of the shift shaft. What I was asking is after the "ball & stem" riveted to the shift shaft "bracket" and shift lever are removed, could the existing holes in the shift shaft "bracket" & shift lever be drilled & tapped to receive a button head cap screw (for lower profile versus a socket head screw) to attach the heim joints rather than using a nut on these screws? Meaning after the existing rivet/stem is removed, are the holes in the shift lever & shift shaft bracket small enough that they can be drilled & tapped to permit the presumably 6mm screws required (i.e., the ID of the heim joint holes is 6mm+)? In other words, what is the OD of the "stem" of the existing ball fitting?
RUNLEVELZERO #99
SuperBike
Joined: Jan 2007
Posts: 2,223
From: Skokie
No I don't think so. I am sure I did not drill out the holes, so left as they are a 6mm bolt fits through nicely. So you will not have enough metal for drilling and tapping to be able to use these sizes.
I used bolts on mine, and using nyloc nuts and spring washers, have had no problems. I agree that having a section of plain shaft before the thread starts would be ideal where it passes through the heim joint, but once tight there is no movement in them anyway. The picture I used is not of the actual parts used on my bike - I found it on the net.
I used bolts on mine, and using nyloc nuts and spring washers, have had no problems. I agree that having a section of plain shaft before the thread starts would be ideal where it passes through the heim joint, but once tight there is no movement in them anyway. The picture I used is not of the actual parts used on my bike - I found it on the net.
Yes, as long as you only drill the rivet, the hole is drop in size for a 6 mm bolt... I used an hex socket/Allen head as I'm using that all over the bike... I dislike hex heads with a vengeance as I always end up with them getting rounded off at inopportune moments... There is plenty of space for it...
I prefer for these type of "low-profile" applications button head cap screws versus even socket head (g-d forbid use of hex head); i.e., http://images.google.com/images?hl=e...ed=0CB0QsAQwAA
Senior Member
SuperSport
Joined: Dec 2005
Posts: 963
From: Sunshine Coast, Australia
I used button heads on mine.
I am not sure I would want to just have it straight into the ally anyway. I like the idea of being able to use a nyloc nut or spring washer or both. If you are worried about clearance they take up very little space. I have had no problems with mine at all. They are not even visible behind the dust caps unless you really have a close look.
I am not sure I would want to just have it straight into the ally anyway. I like the idea of being able to use a nyloc nut or spring washer or both. If you are worried about clearance they take up very little space. I have had no problems with mine at all. They are not even visible behind the dust caps unless you really have a close look.
RUNLEVELZERO #99
SuperBike
Joined: Jan 2007
Posts: 2,223
From: Skokie
Thanks, i just want to confirm the heim joint ends are in fact 6mm-1.0, as I found a stainless L-R set for around $13US each. If anyone else wants to go in with me on a "group buy" this unit price goes down significantly if the order count goes up.
I used button heads on mine.
I am not sure I would want to just have it straight into the ally anyway. I like the idea of being able to use a nyloc nut or spring washer or both. If you are worried about clearance they take up very little space. I have had no problems with mine at all. They are not even visible behind the dust caps unless you really have a close look.
I am not sure I would want to just have it straight into the ally anyway. I like the idea of being able to use a nyloc nut or spring washer or both. If you are worried about clearance they take up very little space. I have had no problems with mine at all. They are not even visible behind the dust caps unless you really have a close look.

Administrator
MotoGP
Joined: Apr 2006
Posts: 4,402
From: Kempner, TX
Yes, the shank is 6mm x 1.0 ,, one each left hand and one each right hand threaded rod end
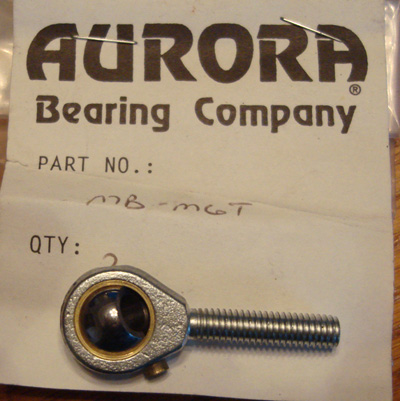
I found that the OEM riveted ball and socket end used had what amounted to built in stand off that kept every thing aligned and bind free.
When put the rod end tight up against the shifter, it bound up.
So my solution was to use a 6mm nut on the back side as a spacer. The added effect was to provide good clamp load on the fastener used as a stud for the rod end.

Now I use a DMr shifter, and the Aurora rod end on both ends of the shifter rod.


RUNLEVELZERO #99
SuperBike
Joined: Jan 2007
Posts: 2,223
From: Skokie
Thanks to you both. I checked my 97 rod ends and verified they were M6-1.
I also found the Aurora pieces (they are located 1.3 hrs west of me) but all their rod ends are coated, nickeled or otherwise plated for corrosion resistance but I wanted all stainless steel.
I found some from another outfit in downstate Illinois that are all stainless hi-precision/load rated for actually a bit less dosh. I have to call them about the axial '"stand-off". I'll report back once I can swing the purchase and get it done but I'm going to be one-armed here for a month after rotator cuff surgery next Tuesday.
Assuming we are talking about the early model male threaded end used on the 98 SH.
Yes, the shank is 6mm x 1.0 ,, one each left hand and one each right hand threaded rod end
I found that the OEM riveted ball and socket end used had what amounted to built in stand off that kept every thing aligned and bind free.
When put the rod end tight up against the shifter, it bound up.
So my solution was to use a 6mm nut on the back side as a spacer. The added effect was to provide good clamp load on the fastener used as a stud for the rod end.
Now I use a DMr shifter, and the Aurora rod end on both ends of the shifter rod.

Senior Member
MotoGP
Joined: Apr 2005
Posts: 5,631
From: Montreal
So, after reading this thread, I broke down and ordered a Shift Star (it`ll sit stored away until my rebuild at some point in the future). I want thank all of you bastiges for once again helping me spend money.... victim of my OCMD... again! Is there no justice in this world? lol
Last edited by mikstr; Feb 18, 2010 at 01:16 PM.
Senior Member
MotoGP
Joined: Apr 2005
Posts: 5,631
From: Montreal
Not done with you yet my Swedish friend.... am looking at a BMC (street) filter... am in the midst of the rationalization phase at the moment..... should be over soon with a predictable outcome, lol
As for the rearsets, not for me, I ride on the street and don`t want a more forward-leaning position (why I installed Helis)....
As for the rearsets, not for me, I ride on the street and don`t want a more forward-leaning position (why I installed Helis)....
Senior Member
MotoGP
Joined: Apr 2005
Posts: 5,631
From: Montreal
Don`t rush me now, these things have to take their course, lol You of all people should know 
again, no to the rearsets, spend too much to get my shifter all set up (and it works too darn well now)....
again, no to the rearsets, spend too much to get my shifter all set up (and it works too darn well now)....
Administrator
MotoGP
Joined: Apr 2006
Posts: 4,402
From: Kempner, TX
So, after reading this thread, I broke down and ordered a Shift Star (it`ll sit stored away until my rebuild at some point in the future). I want thank all of you bastiges for once again helping me spend money.... victim of my OCMD... again! Is there no justice in this world? lol

Senior Member
MotoGP
Joined: Apr 2005
Posts: 5,631
From: Montreal
I have now. The bike shifts very well as it is, but I thought with the Shift Star, it'll be even better and I'll be able to use the shorter throw on my JamieD shifter and still have light effort....
Administrator
MotoGP
Joined: Apr 2006
Posts: 4,402
From: Kempner, TX
You will like it for sure. I have the whole factory Pro kit, Jamie's Shifter and a rod end on the shift shaft end of the shifter as well. Very smooth.
Senior Member
MotoGP
Joined: Apr 2005
Posts: 5,631
From: Montreal
the only things missing from your set-up are the other rod end and the needle bearing on the shifter, he he If you haven't already, move the linkage arm on the splines (want to get it as close to 90 degrees as you can; I went two splines) in order to optimize the geometry. It works and the best part is that it's free
Administrator
MotoGP
Joined: Apr 2006
Posts: 4,402
From: Kempner, TX
the only things missing from your set-up are the other rod end and the needle bearing on the shifter, he he If you haven't already, move the linkage arm on the splines (want to get it as close to 90 degrees as you can; I went two splines) in order to optimize the geometry. It works and the best part is that it's free
I have a needle bearing sitting on the bench to install in the shifter, but need a new pivot bolt machined and have not gotten to that yet.
Senior Member
MotoGP
Joined: Apr 2005
Posts: 5,631
From: Montreal
RUNLEVELZERO #99
SuperBike
Joined: Jan 2007
Posts: 2,223
From: Skokie
Most of the heim joint ends I've found spec the ball width 2mm more than the head width but depending on the angularity through the range of motion, 2mm may not be enough. However, use of properly sized spacer washers on one or both sidea of the ball (rather than the nut used by one member) should permit adequate clearance while keeping overall width to the minimum.
Administrator
MotoGP
Joined: Apr 2006
Posts: 4,402
From: Kempner, TX
Heim being a brand name, Spherical rod end being a type.. Skokievrt is dead on, there are thousands of designs for rod ends, some of which include high angularity designs, built in stand off, and then there are high angle spacers used with a rod end that allow even more off angle install. The market is huge, from Military apps, to aviation to motor vehicle racing to industrial. Basically if you have a project that needs to transfer motion with a shaft, rod, cable, lever, or such, there is a rod end available in the right design, strength, quality, material, sealing, ect.
On my shifter MOD when I added the rod ends,, I used the aurora male 6mm item because I had them available. When installed them to the shift shaft arm and the shifter on the other end; directly without a spacer. They bound up by a few deg. My solution of using a 3mm width nut on the back side of the mounting stud worked well for the binding issue and had no clearance problems. Your mileage may very.
On my shifter MOD when I added the rod ends,, I used the aurora male 6mm item because I had them available. When installed them to the shift shaft arm and the shifter on the other end; directly without a spacer. They bound up by a few deg. My solution of using a 3mm width nut on the back side of the mounting stud worked well for the binding issue and had no clearance problems. Your mileage may very.


