
Painting For Dummies


Thread Starter
Senior Member
SuperBike
Joined: Apr 2010
Posts: 1,090
From: Big Lick

Painting For Dummies
I'm a novice when it comes to paint, and not a patient person to boot. Those two things don't lend themselves to a quality paint job, but....
This is actually a very small "project" to paint a couple of optional body pieces for my other bike. I plan to use duplicolor rattle can paint and a rattle can clearcoat over it. What I'm looking for is the steps to do the job to look like reasonable quality work.
Specifically, what grades of sandpaper to use as pre-sanding, number of coats of paint and clear, and what grades dry or wet sanding to do in between. Also, rubbing or polishing compounds to use for final buffing.
I plan to do all of this by hand. The pieces I am using are in good shape and do not require any bodywork prior to the painting except sanding to rough them up so the paint will stick well.
Ok....teach me!

Senior Member
MotoGP
Joined: Jul 2010
Posts: 3,871
From: Phoenix, AZ
Yeller- I'm somewhat of an amateur myself, but have had some nice paint jobs turn out, so I can go over how I have done it.
First, quality primer is key. Find some sandable primer- Anything lacquer based will work with Duplicolor and will dry faster. Enamels require like a day to dry, lacquers take like 20 minutes. It's also never a good idea to mix the two types.
Light coats of primer- 3-5 of them is usually enough. I've put on coats that are too heavy before and it may crack later and take much longer to dry. Then I will sand starting with around 240 grit and work my way down to about 600 or 800 grit. Most of the sanding is done in this stage, so take your time.
Two things when you're sanding the primer:
1) You can never be wet enough for wet sanding. Let the primer dry for at a couple of hours, then start the process. I just get a bucket and towel and slap it on a table and watch tv/listen to the radio or something. Continuously cover the plastics in water. Dip the sandpaper in it, slap in on with your hands, whatever- it keeps the material free of debris and if you hold it at an angle to the light, you can see the bumps in the surface (these bumps will also show through paint)
2) Sand in alternating directions. Go over your model with 220 in one direction, then with 320 perpendicular to your sanding motions with the first. Don't use swirls, as those lines will catch the light- just go back and forth.
At this point, I usually take a breather and set the stuff down for a day...
Getting on with it: Rattle a couple of light coats of Duplicolor onto the surface. Usually I do two or three- you're starting to lay color, so the first coat will look pretty light. Use slow, back and forth motions. Not sure how much description you want, but when painting, start spraying on either side of the model and don't stop until you've completely crossed over to the other side. Starting the spray while pointing directly at the model can cause speckling and heavy spots.
Then, lay a "wet" coat. Basically, you want to paint the model so that it is very wet, but not quite dripping. Start at the top if you can, then work your way down the sides. This is somewhat tough to do, and it's good to practice on some scrap to see how the paint acts. Drips are a total bummer. Err on the side of not wet enough if you're worried (but the paint is not too hard to work with). This coat will create that candy look.
If you feel like doing some sanding after this, you may, but you'll have to work into the 1000 grit range to make sure it stays shiny. I usually don't mess with it, and have usually used up my sanding patience in the primer stage anyway
Then, wait at least an hour or two, and lay a couple wet coats of clear (waiting an hour in between coats). I don't do more than three. Clear really makes it look nice, and duplicolor is pretty quality stuff for rattlecan.
The paint will be somewhat soft for a week, so that's when to handle it very carefully. I wouldn't polish it or wax it until after that, but once it hardens it is pretty resilient and you can treat it just like car paint.
Mid-level Member
Superstock
Joined: Dec 2004
Posts: 268
From: Chicago

one thing i'd add is that a dust mask, or better yet, a low-cost respirator is worth the money. unless you're painting in a fume hood, even with small paint jobs, the aerosol and particulates are right there in your face and you will inhale them.
also, i'm not privy to *real* body-work paints, but pro painters suggested to me while i was doing my stuff that 'baking' the newly applied paint by subjecting it to something like 12 hours of heat would not just hasten curing, but would harden the paint surface. so in July, i shut up my garage and fired up my propane heater at 55K BTU until it burned through most of a 5 gallon tank. not sure if it made any difference with my non-pro paint, but it sure was bizarre, counter-intuitive and perversely entertaining to heat the garage when it was humid and in the 90s outside.
note to myself. 'add vents to garage roof before it gets hot this year.'
--fred

Senior Member
SuperBike
Joined: Aug 2009
Posts: 1,978
From: thorold ontario
this is good info, i need to paint a lower and re paint my tail as its cracked to hell. i dont wanna do it, and avoided doing it over the winter, and now were into riding season so i wanna do it even less, lol. but i need to do it. anyone wanna make 50 bucks? 

Senior Member
SuperBike
Joined: Sep 2008
Posts: 1,707
From: Essex, UK
Only the 2-pack paints that use baking to speed up the hardening, and if use 2-pack you'll definitely need an air-fed mask as it contains Isocyanates which is toxic! If you use acrylic rattle cans then baking is not really necessary.
Spray Painting Safety
Spray Painting Safety
nice details and tips, 7moore7. the only body painting i've done was restoring my cracked and scratched VTR1KF bodywork to a flat-black. so i'll use some of your advice myself next time i paint.
one thing i'd add is that a dust mask, or better yet, a low-cost respirator is worth the money. unless you're painting in a fume hood, even with small paint jobs, the aerosol and particulates are right there in your face and you will inhale them.
also, i'm not privy to *real* body-work paints, but pro painters suggested to me while i was doing my stuff that 'baking' the newly applied paint by subjecting it to something like 12 hours of heat would not just hasten curing, but would harden the paint surface. so in July, i shut up my garage and fired up my propane heater at 55K BTU until it burned through most of a 5 gallon tank. not sure if it made any difference with my non-pro paint, but it sure was bizarre, counter-intuitive and perversely entertaining to heat the garage when it was humid and in the 90s outside.
note to myself. 'add vents to garage roof before it gets hot this year.'
--fred
Thread Starter
Senior Member
SuperBike
Joined: Apr 2010
Posts: 1,090
From: Big Lick
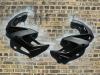
Thanks for the info. It helps a lot. One question. The two small subject pieces already have a nice green metalflake finish on them. they are in pristine condition, but unfortunately need to be painted to match my bike's color. Wish I didn't have to because they look perfect the way they are.
So the question....should I rough sand the original paint before primer is applied?
One other thing....I'm considering using a rattle can of ColorRite instead. does that change the procedure any?
So the question....should I rough sand the original paint before primer is applied?
One other thing....I'm considering using a rattle can of ColorRite instead. does that change the procedure any?
Last edited by Old Yeller; May 5, 2011 at 05:03 AM.
Senior Member
SuperBike
Joined: Sep 2008
Posts: 1,707
From: Essex, UK
Just wet rub down with wet&dry 1200, rinse, dry and add 3–4 of finish coats as necessary.
Leave for a day or two then use a good quality lacquer ( my fave is Pro XL Ultra Gloss Lacquer)
http://www.autopaintsbrighton.co.uk/...osol-751-p.jpg
What's your final colour? if yellow you might need to a white primer/undercoat over the existing green to help with the finish.
Leave for a day or two then use a good quality lacquer ( my fave is Pro XL Ultra Gloss Lacquer)
http://www.autopaintsbrighton.co.uk/...osol-751-p.jpg
What's your final colour? if yellow you might need to a white primer/undercoat over the existing green to help with the finish.
Last edited by Wicky; May 5, 2011 at 06:25 AM.
Senior Member
MotoGP
Joined: Jul 2010
Posts: 3,871
From: Phoenix, AZ
Thanks for the info. It helps a lot. One question. The two small subject pieces already have a nice green metalflake finish on them. they are in pristine condition, but unfortunately need to be painted to match my bike's color. Wish I didn't have to because they look perfect the way they are.
So the question....should I rough sand the original paint before primer is applied?
One other thing....I'm considering using a rattle can of ColorRite instead. does that change the procedure any?
So the question....should I rough sand the original paint before primer is applied?
One other thing....I'm considering using a rattle can of ColorRite instead. does that change the procedure any?
One thing I forgot to mention is that you should avoid painting while it's raining outside or just after it's done raining. The moisture in the air can mess with the paint... even if you're painting in your garage (which I recommend outside if it's not too windy). I forget that that's an issue, b/c it rains like twice a year here
Thread Starter
Senior Member
SuperBike
Joined: Apr 2010
Posts: 1,090
From: Big Lick
Ok, so based on what you guys are telling me and some other net research, here's the process I have. Does it sound like a good plan?
1. 1200 grit to prep original painted surface prior to painting primer.
2. clean with soap/water and let dry thoroughly
3. 3 to 5 coats of primer. light coats. Let dry thoroughly prior to sanding.
4. sanding with 240 to 800 grit progression. Clean again with soap/water and let dry thoroughly.
5. 3 coats of paint in 15 minute intervals. start light, then final "wet" coat.
6. Let dry 24 hours
7. 1200 grit wet sanding then clean with soap/water. let dry thoroughly.
8. 2 to 3 coats of clear, waiting an hour in between each one.
9. Let cure for a week.

Senior Member
Superstock
Joined: Jan 2011
Posts: 258
From: Santa Clara, CA
Ok, so based on what you guys are telling me and some other net research, here's the process I have. Does it sound like a good plan?
1. 1200 grit to prep original painted surface prior to painting primer.
2. clean with soap/water and let dry thoroughly
3. 3 to 5 coats of primer. light coats. Let dry thoroughly prior to sanding.
4. sanding with 240 to 800 grit progression. Clean again with soap/water and let dry thoroughly.
5. 3 coats of paint in 15 minute intervals. start light, then final "wet" coat.
6. Let dry 24 hours
7. 1200 grit wet sanding then clean with soap/water. let dry thoroughly.
8. 2 to 3 coats of clear, waiting an hour in between each one.
9. Let cure for a week.
9. Let cure for a week.
If you do decide to tack it, make sure to move in only one direction and "turn" the cloth when you reach the edge not to drop any of the crap you picked up back onto the surface. You only want one edge of the cloth to pick anything up.
Mid-level Member
Superstock
Joined: Dec 2004
Posts: 268
From: Chicago
Head Scratcher
Back Marker
Joined: Jun 2008
Posts: 202
From: Corvallis, Oregon
One trick I learned while wet sanding is to get a dish sponge and wrap the sand paper around it. Holding it form the sides, it keeps your fingers from putting any uneven pressure on the surface and also helps keep the sandpaper wet. Like 7moore7 says, you can never have too much water.
If you decide to wet sand the clear coat to get rid of the orange peel look, I would reccommend laying down an extra coat or two of clear and stepping the sand paper up to at least 2000 grit, and be very careful when sanding near the edges as the paint tends to not build up there as much and you'll sand back down to primer very quickly. I used 2500 when I did mine and the surface was like glass.
If you decide to wet sand the clear coat to get rid of the orange peel look, I would reccommend laying down an extra coat or two of clear and stepping the sand paper up to at least 2000 grit, and be very careful when sanding near the edges as the paint tends to not build up there as much and you'll sand back down to primer very quickly. I used 2500 when I did mine and the surface was like glass.
Mid-level Member
Superstock
Joined: Dec 2004
Posts: 268
From: Chicago
One trick I learned while wet sanding is to get a dish sponge and wrap the sand paper around it. Holding it form the sides, it keeps your fingers from putting any uneven pressure on the surface and also helps keep the sandpaper wet. Like 7moore7 says, you can never have too much water.
If you decide to wet sand the clear coat to get rid of the orange peel look, I would reccommend laying down an extra coat or two of clear and stepping the sand paper up to at least 2000 grit, and be very careful when sanding near the edges as the paint tends to not build up there as much and you'll sand back down to primer very quickly. I used 2500 when I did mine and the surface was like glass.
If you decide to wet sand the clear coat to get rid of the orange peel look, I would reccommend laying down an extra coat or two of clear and stepping the sand paper up to at least 2000 grit, and be very careful when sanding near the edges as the paint tends to not build up there as much and you'll sand back down to primer very quickly. I used 2500 when I did mine and the surface was like glass.
b. i didn't even know that anything near 2500 grit existed.
c. like glass! and done at home! that's cool!
d. i'll try some of these things next time i want to paint a bike shiny.
Head Scratcher
Back Marker
Joined: Jun 2008
Posts: 202
From: Corvallis, Oregon
Rattle Can Paint Job - Kawasaki ZX-10R.net
This is where I got most of the information for painting my bike. Good write up with good techniques.
I did forget to mention that after wet sanding the clear coat the finish will look very hazy. This is where the wax/polish comes in. As stated in the write up, two coats of each type of wax. Having done it this way and trying only a single coat of each wax, I can attest to the fact that the two coats does indeed make a difference.

Senior Member
MotoGP
Joined: Jul 2007
Posts: 5,066
From: NYC
Man these always pop up right after I do them. Just painted some race pieces. Had to fiberglass some of it so painted too. The fairing was quick and easy but I made a lava lamp out of the gas tank (mixed enamel and laquer). TWO full sand downs later & it is almost there. This thread will help finish it though.
Head Scratcher
Back Marker
Joined: Jun 2008
Posts: 202
From: Corvallis, Oregon
Also an FYI for anyone painting with a factory color: I got roped into believing that Color-Rite was the only place to get factory matched paint... and spent close to $35 a can for two rattle cans from them. By chance I took the factory paint code to a local body shop and they were able to get the mixture code for me which I took to Napa Auto Parts and they were able to get it mixed for me and put into 3 aerosol cans for $30.. I used the Color-Rite paint on the tail fairing and the Napa mix on the seat cowl and there is no distinguishible difference between the two.
However, Color-Rite does sell a clear coat specifically for the gas tank that I was not able to find off the shelf at any auto parts store.
However, Color-Rite does sell a clear coat specifically for the gas tank that I was not able to find off the shelf at any auto parts store.

Senior Member
Back Marker
Joined: Jun 2009
Posts: 155
From: Sudbury ON
All painting requires a clean surface so go buy a can of surface cleaner to remove grease and wax. Clean surface before starting. Lightly sand the surface with with 600 grit wet dry sand paper. Clean surface surface again. Prime surface sufficiently to cover surface. The new primers can hide a lot of surface imperfections with multiple coats. Sand if you most (clean surface afterwards) and apply the paint. Now this may sound a little stupid for us guys that know everything but read the instructions on the can! It will tell you the dry time between coats. Paints nowadays are meant to be applied one after the other (10 minutes) without sanding, although sanding is possible shortly after applying the paint. I had a small run and sanded it out before applying the next coat. Apply only enough paint (2-3 Light coats) for an even surface coverage without runs. If you wait too long, you will need to sand lightly before subsequent coats of paint. Did I mention cleaning the surface? I would suggest sanding on the next to last coat to remove imperfections, if required. Again clean surface if sanding. 3-4 coats of clear is good. Yes you can sand between coats for that mirror shine. The tricky part is keeping dust off the part.
Senior Member
Back Marker
Joined: Jun 2009
Posts: 155
From: Sudbury ON
When I painted some of the bike, I only sanded prior to the primer coat and a small amount when I had a run in the paint. I may have used a finer grit for that i.e. 1000. The paint was soft and sanded out really easy so go easy.
It goes very quickly if you have everything. I ran out of primer and had to lightly sand the clear coat ( 1200) the next day so that I could apply 2 more coats. Like I said, 10-15 minutes before coats goes by really fast. Not even enough time for a beer. Depending on how many pieces you are panting, by the time you painted all the pieces, you can apply a second coat to the first. The same goes for the clear. If you leave it overnight, you will have to sand lightly.
For a very nice job, I rely on my friend who used to paint for a living. A spray bomb isn't the same as a real paint gun setup but you can do a nice job none the less.
If you start getting a lot of dust, then you might want to sand before the last clear coat. My paint job came out fairly good considering what I started with. The primer can fill in a lot of imperfections!
Last edited by D VTR RIDER; May 8, 2011 at 02:08 PM.

Speed Demon
Superstock
Joined: May 2009
Posts: 272
From: Seattle, Wa
Yeller,
Heres what u do bud.... First off if u got a DA sander or any electric sander it will save time drastically. I am currently in the process right now doing repair work to my fairings in my Autobody class. Since this will be rattle can u can skip a few steps but this is ur basic layout of the right way to do this.
Step one: Sand down with DA or electric sander with 240 grit. this will break throught the clear quick and beging the process of feather edging ( blending of layers of material AKA Paint films)
Step two: Once u are done with that take some 320 and then DA that until u see the different layers of paint I.E. Red to pink to black etc. Sand until there is NO shiny spots on the fairing. There will be spots u cant get to With a DA so improvise by rolling a magazine up and taping the ends. This will fit in the contours. Just take the sand paper and wrap it around the magazine.
Step three: When u are done sanding with 320 grit, take compressed air and blow off all particles and take some blue shop towels and wipe part off.
Step four: Spray a light tack coat on part. Let flash for 3 mins. then come back and spray medium to heavy coat on part. Let flash for however long can says. Repeat for second coat. Let dry per cans instructions
Step five. Take black spray paint and MIST paint over dry primer. This is ur guide coat. U will be trying to sand this down without burning through the primer. If u do, no biggie. Just continue sanding and then re prime.
Step six: Wet sand with 500 wet to get surface smooth by sanding down guide coat. Remember lots of water and to use a soft pad and squeegy.
Step seven. If u managed to do the following steps without burning through congrats, U are now ready for color. For this u will start of spraying a light tack coat. Then continue on to a medium wet coat. Let flash for however long can says then repeat however many coats u want on. Let dry per cans instructions.
Step eight: Spray however many coats of clear using same procedures as decribed above for color expect u want to spray on heavy coats. if u get runs, wait til the clear is dry then wet sand with 800 until smooth. using backand forth motion
Step nine: Now this is where u will wet sand with 800, then progressing to 1200 grit then to 1500 and finally 2000. This is where it is crucial u keep the paper and part wet to avoid having to redo everything. Sand until the clear becomes dull and has no shine but not buring into the paint beneth
Step ten: Take a variable buffer at 1400 RPm and use Like mequires 3 step paint resto system and buff until part starts to shine back up. Try to be careful not to burn through on the edges. And walla! good as new.
Philip

Army Aviation
Squid
Joined: Aug 2009
Posts: 55
From: Colorado Springs. Colorado
If I was going for a matte look, wood I just follow all the same steps up until the clear coat?
Also, after the matte paint, would it be possible and are there any advisories against hand painting a small phrase on it?
Also, after the matte paint, would it be possible and are there any advisories against hand painting a small phrase on it?
Head Scratcher
Back Marker
Joined: Jun 2008
Posts: 202
From: Corvallis, Oregon
As far as hand painting a small phrase, have you looked into having it made up with vinyl and then applying it before spraying the clear. Should be able to have it made on the cheap and much easier to fix mistakes...
Speed Demon
Superstock
Joined: May 2009
Posts: 272
From: Seattle, Wa
I agree with the OP on the clear and about vinyl cutouts. for the hand painted section i would paint that before u clear. and u can find a flat clear or even semi-gloss that would go with a matte look but still offer u some sort of protection against grime and dirt and stuffs.
Mid-level Member
Superstock
Joined: Dec 2004
Posts: 268
From: Chicago
There are different types of clear coat, you should be able to find one without a glossy finish. This is going to protect the finish of the paint. I have painted random body pieces a matte finish without using a clear coat and it seems to have stains adhere to it easier than a gloss finish (fingerprints, etc.).
if i decide to clear coat my body work, can i just degrease it and move to the clear coat step. or is there something else (e.g., sanding) that i should do as well?
thanks,
--fred
[edit] ps. i believe the answer is yes, considering that there is sanding between each step including before clear coat in the massive amounts of great instructions above.
Last edited by fred; May 16, 2011 at 07:22 PM.
Head Scratcher
Back Marker
Joined: Jun 2008
Posts: 202
From: Corvallis, Oregon
I would say yes too Probably use 1500-2000 grit sandpaper (wet sand). I use a product called Automotive Prep Clean, it's an aerosol that I bought at Napa that cleans off polish, grease and most other surface contaminates that I actually use after any sanding and still using it prior to any polishing. It's a little spendy at $8 a can but well worth the money and lasts quite a while.
Also one more thing to remember is use the same base for the clear as for the paint (enamel or laquer) as it has been mentioned that mixing these two will have horrible results.
Also one more thing to remember is use the same base for the clear as for the paint (enamel or laquer) as it has been mentioned that mixing these two will have horrible results.
Mid-level Member
Superstock
Joined: Dec 2004
Posts: 268
From: Chicago
I would say yes too Probably use 1500-2000 grit sandpaper (wet sand). I use a product called Automotive Prep Clean, it's an aerosol that I bought at Napa that cleans off polish, grease and most other surface contaminates that I actually use after any sanding and still using it prior to any polishing. It's a little spendy at $8 a can but well worth the money and lasts quite a while.
Also one more thing to remember is use the same base for the clear as for the paint (enamel or laquer) as it has been mentioned that mixing these two will have horrible results.
Also one more thing to remember is use the same base for the clear as for the paint (enamel or laquer) as it has been mentioned that mixing these two will have horrible results.
i'm gonna try and boycott my neighborhood NAPA dealer for 6 months, or at least 6 weeks, so i'll try and find another NAPA where i can get that Auto Prep Clean.
thanks,
--fred
Senior Member
Back Marker
Joined: May 2009
Posts: 213
From: Pac NW
When wet sanding, a few drops of dish washing soap in the bucket you are using to wet your paper breaks the surface tention in the water and also helps keep the sand paper from clogging, especially the finer grits. Or you can use a pump spray bottle like an old Windex bottle. Rinse well when done sanding.


