
Undertail Hack?


Thread Starter
Senior Member
Back Marker
Joined: Jun 2010
Posts: 121

Undertail Hack?
I see on the forums that several people have cut the stock undertail to make it look cleaner (and they repositioned the tag) But the only thread I found where someone seemed to have put up pictures of the progress/ finished product, no longer had pictures. Anyone have pictures or coaching as to what to do to clean out the undertail? Id really appreciate it. Me and my dremel are standing by!


Senior Member
Back Marker
Joined: Apr 2005
Posts: 187
From: Massachusetts

When I did mine I used a 4" metal putty knife, heated it with a torch, and cut the plastic. It made a nice straight line and took about 5 minutes. I did have to smooth the edges up a bit after, but not much.

Snap, Tap or Nap!!!!
Back Marker
Joined: Feb 2012
Posts: 197
From: Melbourne, FL
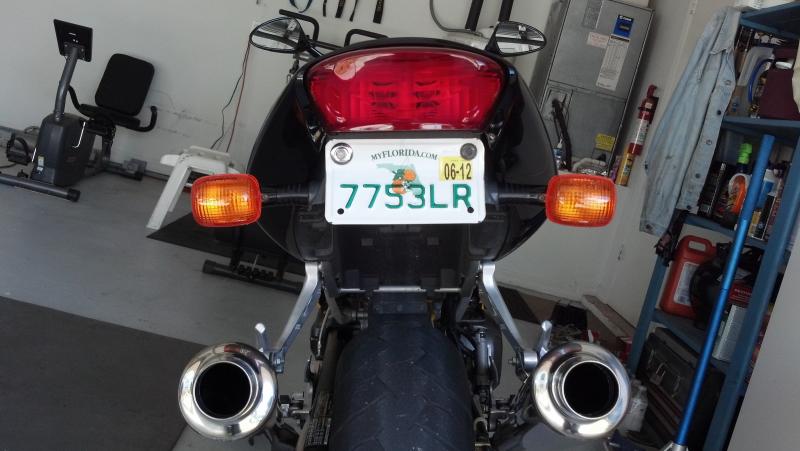
Thats a good way VT. OP careful with the dremel as you done want to get the plastic top hot then you will have melted/hardend plastic to debur and clean up. I use a str8 edge and fallowed a line I made. Removed the rear red reflector and use a multi drill bit I have to make a 3/4 in hole in the plate, using the original hole on the left side. Everything fits tight and neat.


Senior Member
MotoGP
Joined: Aug 2006
Posts: 2,934
From: altoona, pa
Cut the underside of tail lite and replaced with a clear piece of plastic to satisfy state law for license light. Shortened tail lights by cutting out the rubber section and drilled top left hole for seat lock.

Snap, Tap or Nap!!!!
Back Marker
Joined: Feb 2012
Posts: 197
From: Melbourne, FL
Question about making the rear turns shorter. Been wanting to do this but does the threaded stud need to be cut as well? Give me a little help please.
Snap, Tap or Nap!!!!
Back Marker
Joined: Feb 2012
Posts: 197
From: Melbourne, FL
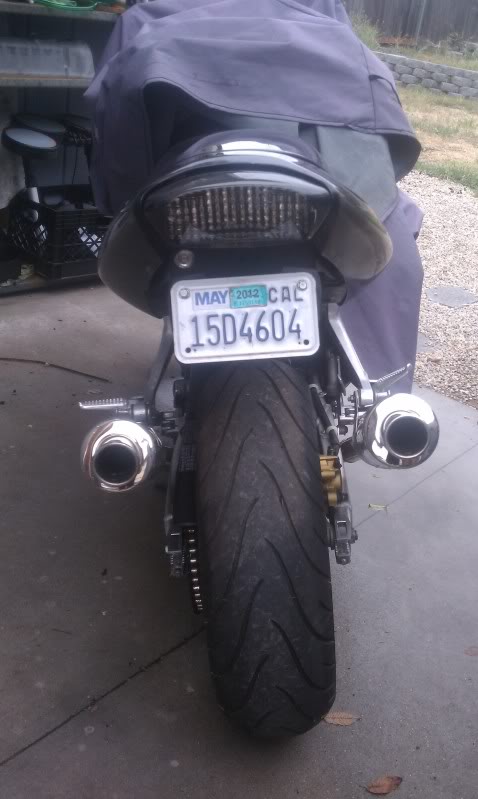
My tag light I wired in a 12v LED 6 light strip, and it 3m tapes to the underside of the break light. Lights it up from far past what the law states (50ft). My second pic shows how bright it is.
Senior Member
MotoGP
Joined: Aug 2006
Posts: 2,934
From: altoona, pa
yeah that's a nice set-up and certainly agree that it improves plate readability. However, i want to make my license way less readable for reasons i'd rather not discuss here.
Senior Member
MotoGP
Joined: Aug 2006
Posts: 2,934
From: altoona, pa
Thread Starter
Senior Member
Back Marker
Joined: Jun 2010
Posts: 121
So you guys that did the 3/4" drill hole to house the lock, did you have to take the lock out of the bike and put it back in to basically use it as the second bolt or did you just put the hole over the lock and rely on gravity, and the tightness of the right bolt to hold it in place? This is mostly directed at 00Superhawk, but if anyone else knows how he did it, feel free to chime in :-) Thanks a ton for all the help and advice guys seriously... Im proud to ride this thing around town finally, and its mostly thanks to this forum.... and my lovely GF, she has small hands and it makes wiring easier :-)
Senior Member
MotoGP
Joined: Aug 2006
Posts: 2,934
From: altoona, pa
So you guys that did the 3/4" drill hole to house the lock, did you have to take the lock out of the bike and put it back in to basically use it as the second bolt or did you just put the hole over the lock and rely on gravity, and the tightness of the right bolt to hold it in place? This is mostly directed at 00Superhawk, but if anyone else knows how he did it, feel free to chime in :-) Thanks a ton for all the help and advice guys seriously... Im proud to ride this thing around town finally, and its mostly thanks to this forum.... and my lovely GF, she has small hands and it makes wiring easier :-)


Thread Starter
Senior Member
Back Marker
Joined: Jun 2010
Posts: 121
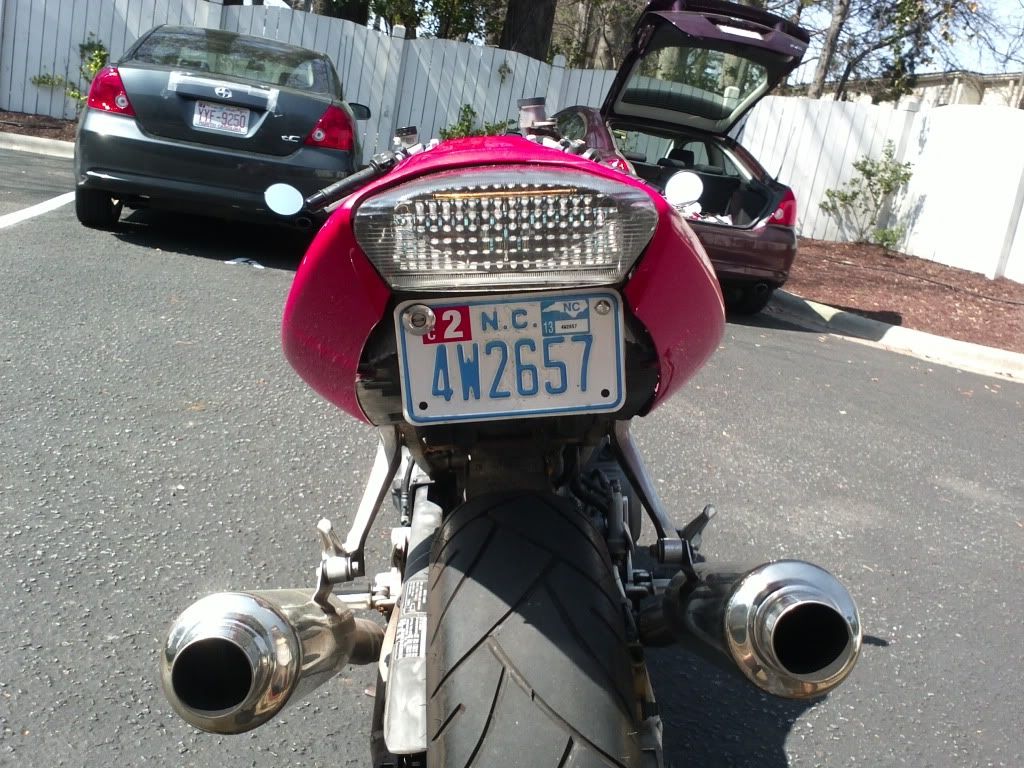
All I did was dremel the undertail to where I wanted it, then drilled a 7/8" hole in the top left of the tag, used the lock as my left hand bolt and drilled another hole for the right hand bolt... took all of 10 minutes
Snap, Tap or Nap!!!!
Back Marker
Joined: Feb 2012
Posts: 197
From: Melbourne, FL
Looks good Camel!!! Glad I could help. Like I said I since removed the stock rear turns and installed red LED's for turns. Much like yours it makes it cleaner at the back of the bike.
Last edited by 00SUPERHAWK; Mar 14, 2012 at 06:04 PM.

Thread
Thread Starter
Forum
Replies
Last Post
Crashrat
Modifications - Cosmetic
8
Nov 28, 2009 04:15 AM


