Tweety's RC51 swingarm swap
 03-15-2009, 03:34 PM
#1
Out of my mind, back in 5
MotoGP
Thread Starter

Join Date: Nov 2006
Location: Skurup, Sweden
Posts: 6,109

Tweety's RC51 swingarm swap
I'm in the middle of attaching a (RC51) SP2 swingarm to my VTR... So I thought I'd start a thread with pictures of my progress...
A note though... I don't move at the speed of lightning as truckinduc does... If you get one update a week, be happy about it... If not bugger of and read another thread until I get around to it...
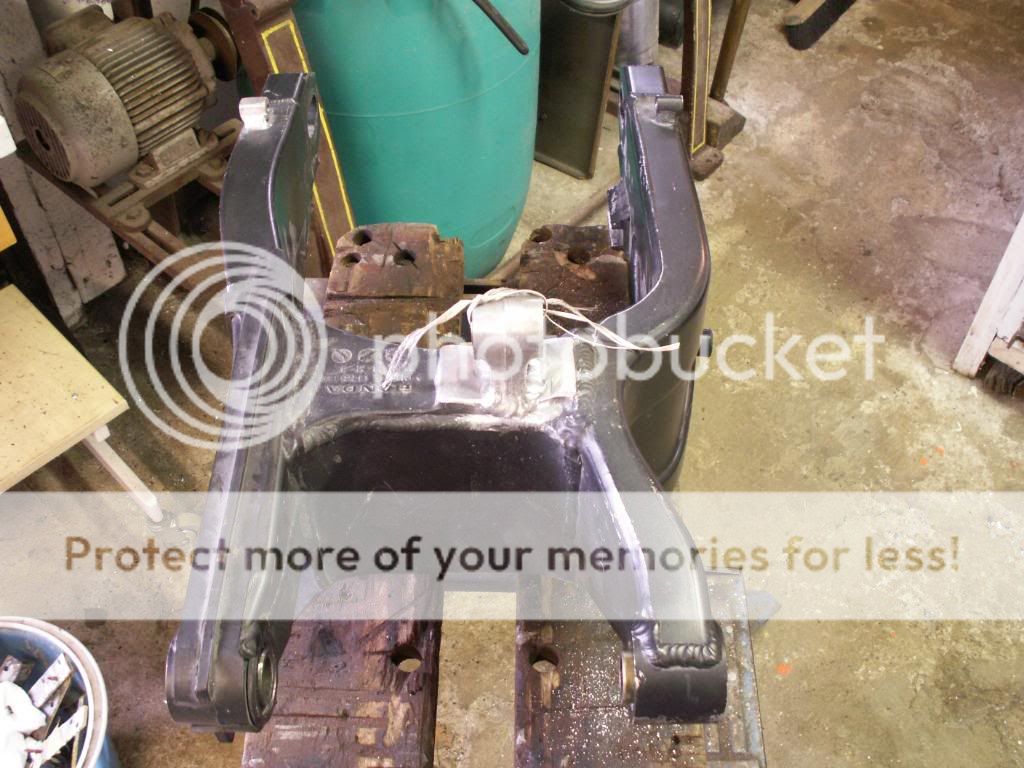
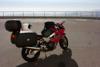
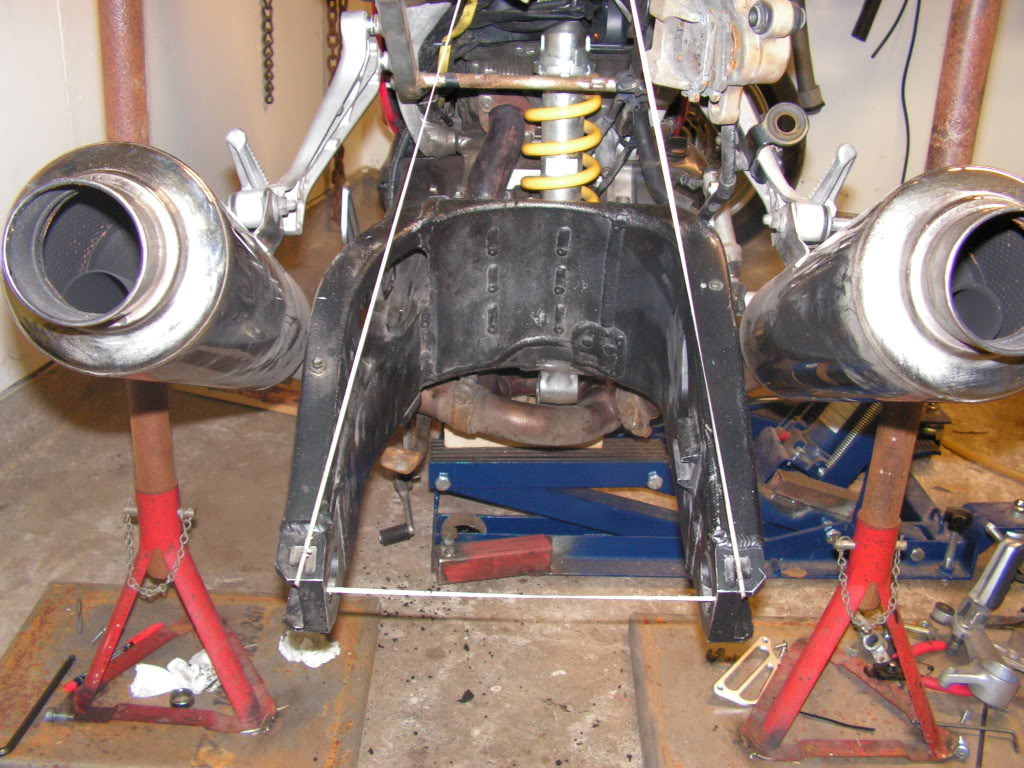
Ok... Here is what we start with...
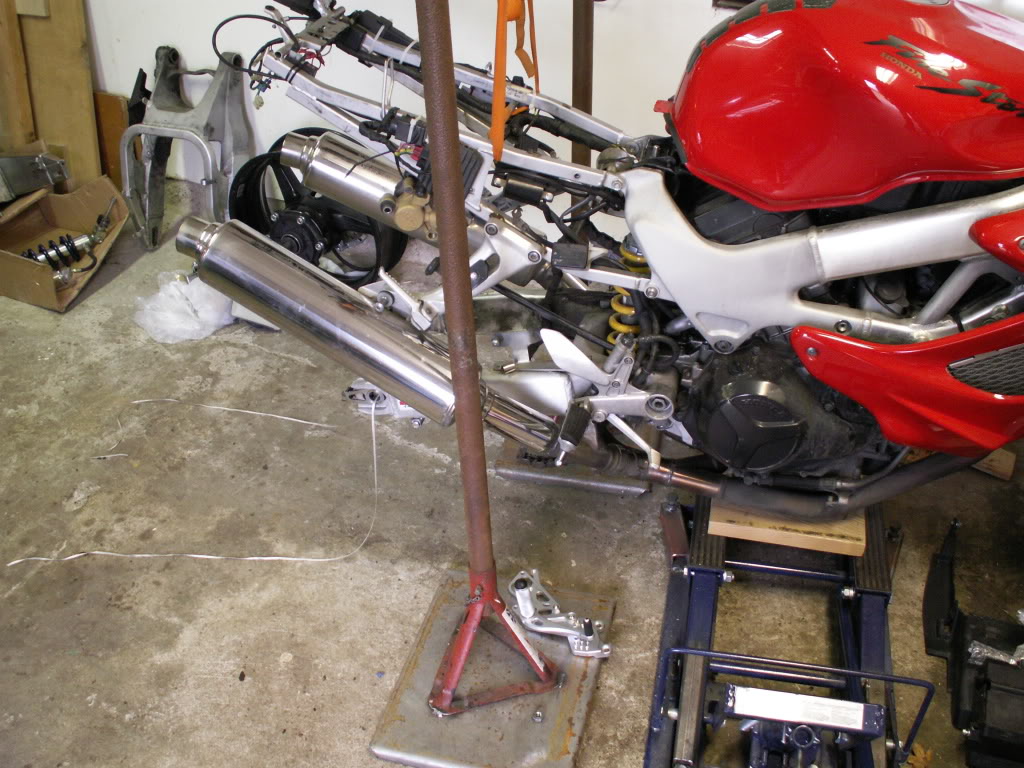
And a sneak update to the stock part...
BTW... Note the assortment of swingarms in the background of the first pic... Not all are featured... The SP2 and 954 is missing and the 929 is just halfway into the shot...
A note though... I don't move at the speed of lightning as truckinduc does... If you get one update a week, be happy about it... If not bugger of and read another thread until I get around to it...
Ok... Here is what we start with...
And a sneak update to the stock part...
BTW... Note the assortment of swingarms in the background of the first pic...


 03-15-2009, 03:50 PM
#3
Out of my mind, back in 5
MotoGP
Thread Starter
Join Date: Nov 2006
Location: Skurup, Sweden
Posts: 6,109
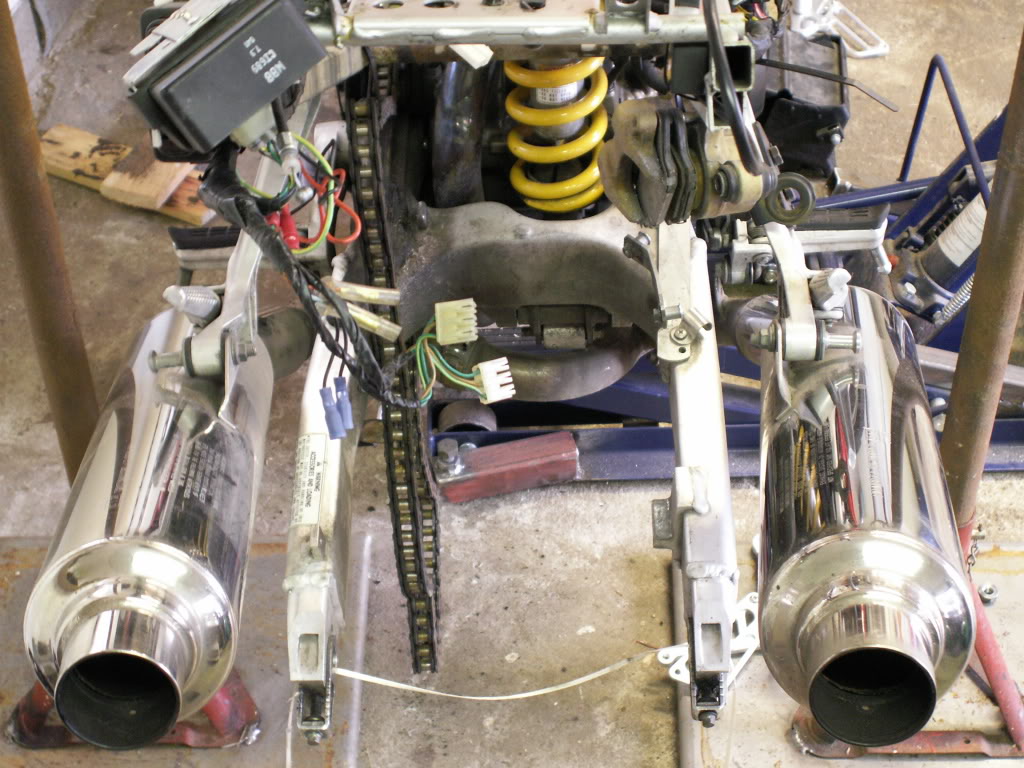
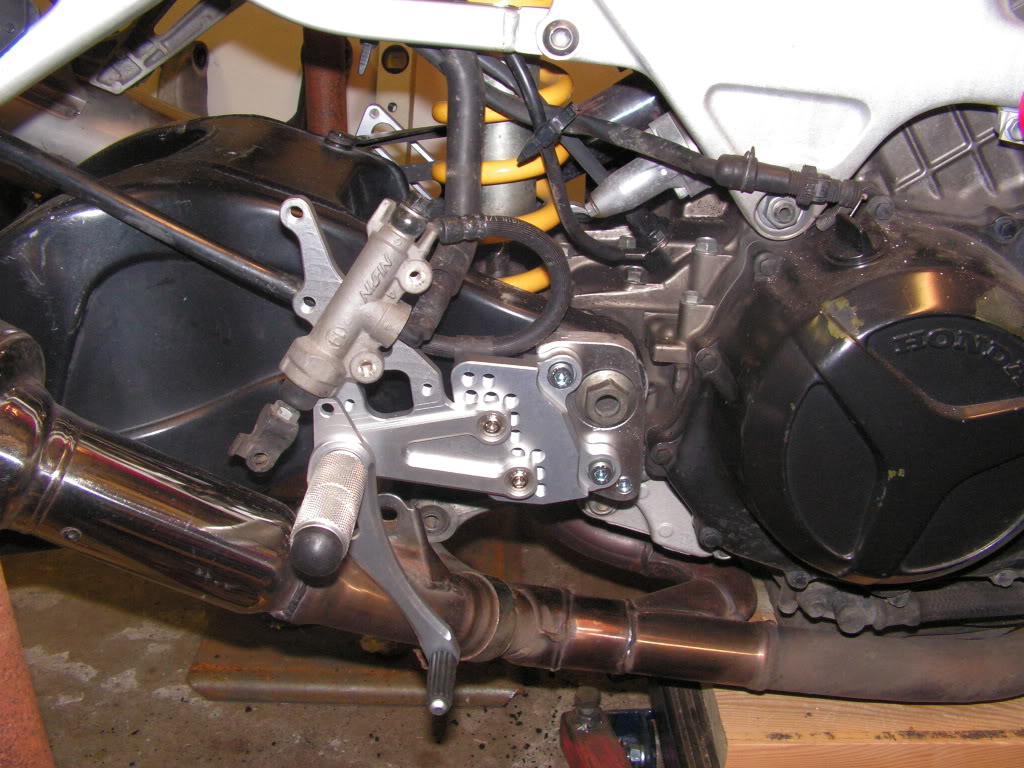
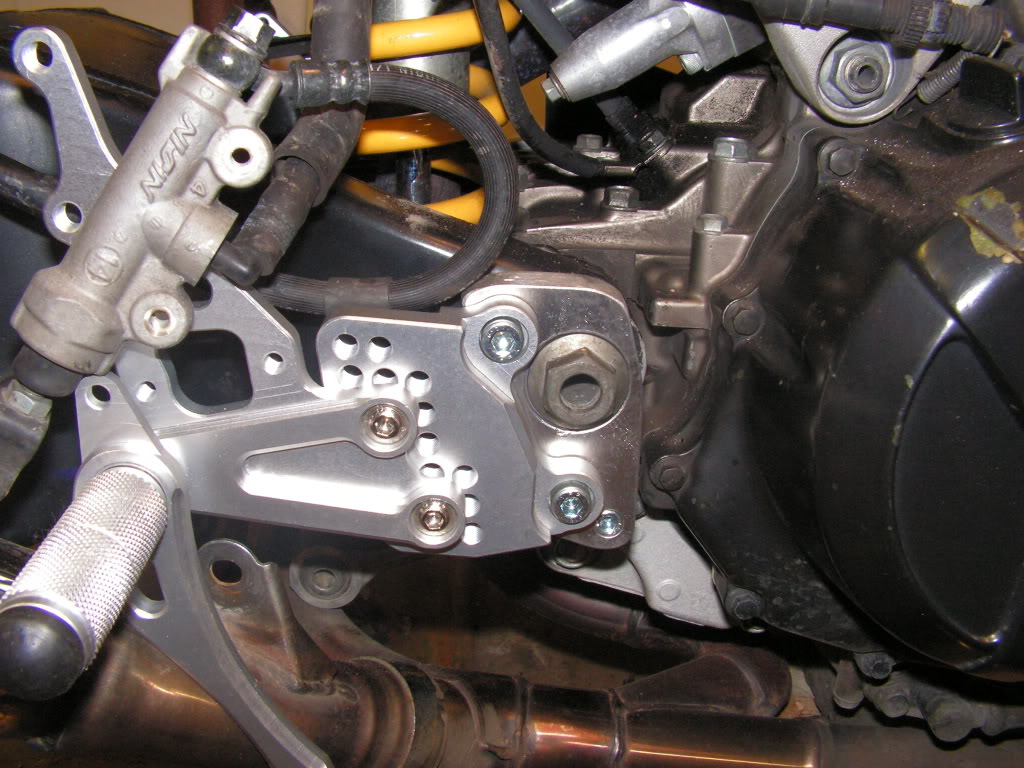
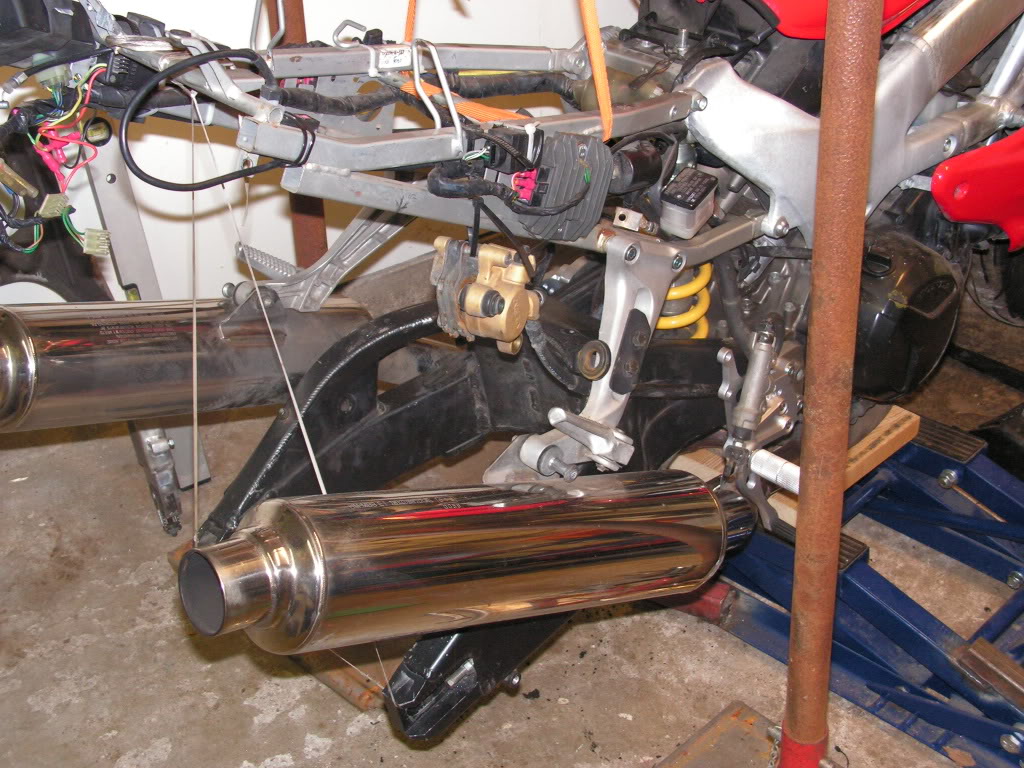
Somehow I managed to not take any pictures of the whole bike with the new swingarm in place... 
But, here is a few of the custom mount plate for my adjustable rearsets...
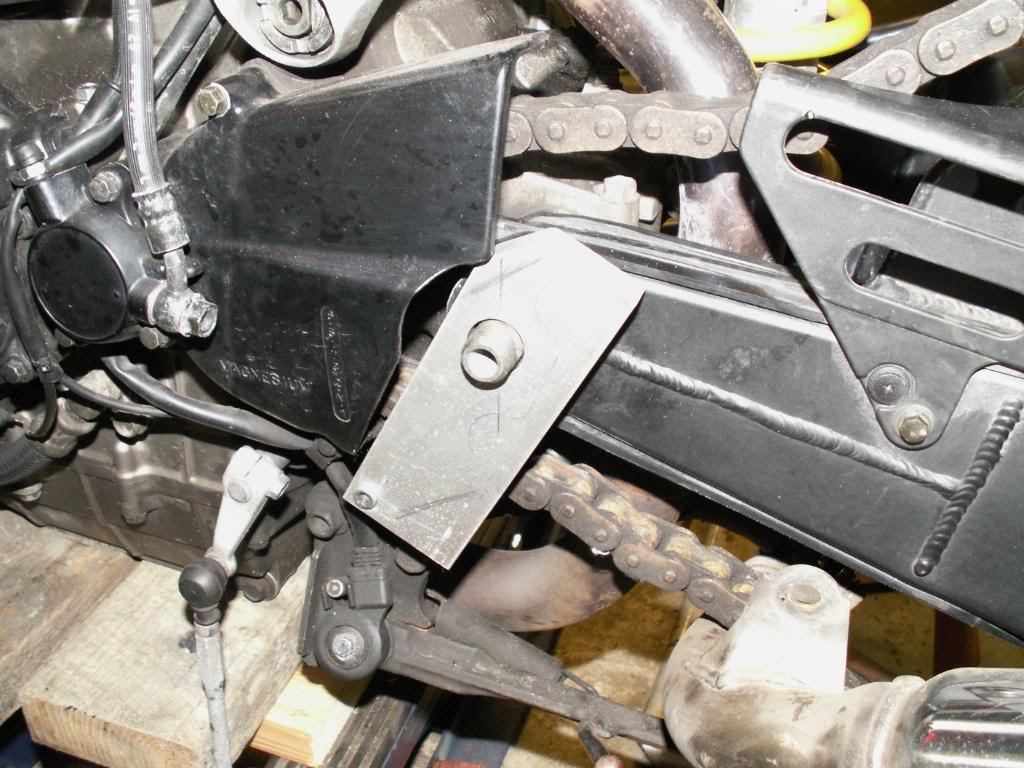
More to follow once I get a new chuck for the tower drill... It decided to lock up for no apparent reason... So now I can't continue...
And before anyone comments on it... Yes, my chain is a mess... That's the result of my bout of abstinence 2 weeks ago... I thought I got is clean... now it's rusted and links are stuck... Road salts is aggressive... The rest of the bike I managed to get reasonably clean though...
Oh well... It's already removed and a new chain and sprockets are waiting to go on as the swingarm is mounted permanently...
But, here is a few of the custom mount plate for my adjustable rearsets...
More to follow once I get a new chuck for the tower drill... It decided to lock up for no apparent reason... So now I can't continue...
And before anyone comments on it... Yes, my chain is a mess... That's the result of my bout of abstinence 2 weeks ago... I thought I got is clean... now it's rusted and links are stuck...
Oh well... It's already removed and a new chain and sprockets are waiting to go on as the swingarm is mounted permanently...
Last edited by Tweety; 03-15-2009 at 03:52 PM.
03-15-2009, 04:51 PM
#4
Senior Member
SuperBike

Join Date: Jul 2005
Location: MN
Posts: 1,548
well, I don't think anybody moves as fast as trucknduc........
its a big job, good luck on it. will be fun to watch. Its amazing the differences looking at the RC51 arm vs. the superhawk! the rc arm looks like it could support a small house.
its a big job, good luck on it. will be fun to watch. Its amazing the differences looking at the RC51 arm vs. the superhawk! the rc arm looks like it could support a small house.
03-15-2009, 05:41 PM
#5
ole dirty bastard
SuperSport

Join Date: Jul 2004
Location: my house
Posts: 975


HEY!.......you stole my arm!
looks good,did you follow my lead on arm?
if so thanks for the vote of confidence.
i decided to wait until my support payments are over before i continue.
should be able to get started again late this summer,road ready mid to late fall.
03-16-2009, 12:57 AM
#6
Out of my mind, back in 5
MotoGP
Thread Starter
Join Date: Nov 2006
Location: Skurup, Sweden
Posts: 6,109
 Not by much... But it is...
03-16-2009, 01:07 AM
Not by much... But it is...
03-16-2009, 01:07 AM
#7
Out of my mind, back in 5
MotoGP
Thread Starter
Join Date: Nov 2006
Location: Skurup, Sweden
Posts: 6,109
With that and the fact that you had it mounted up (not road tested though) I decided that I'd rather have the option of two triangle plates that can be re-cut for fiddeling with the ratio than dealing with trying to mate the RC linkage and VTR linkage...
I looked at that and just trying to visualize it and doing the math for the ratio gave me a headache... This I can calculate to a reasonable degree and then some trial'n'error to get it finalized...
BTW I figured out what you meant with mixing the spacers...
My measuring say's it's 2.5 mm each side... And that should center both wheel and arm... Can you verify or debunk this?
03-16-2009, 05:06 AM
#8
ole dirty bastard
SuperSport
Join Date: Jul 2004
Location: my house
Posts: 975
with the combination of spacers i came up with,i didnt need to cut any.
if i recall correctly it is a combo of rc and superhawk spacers.
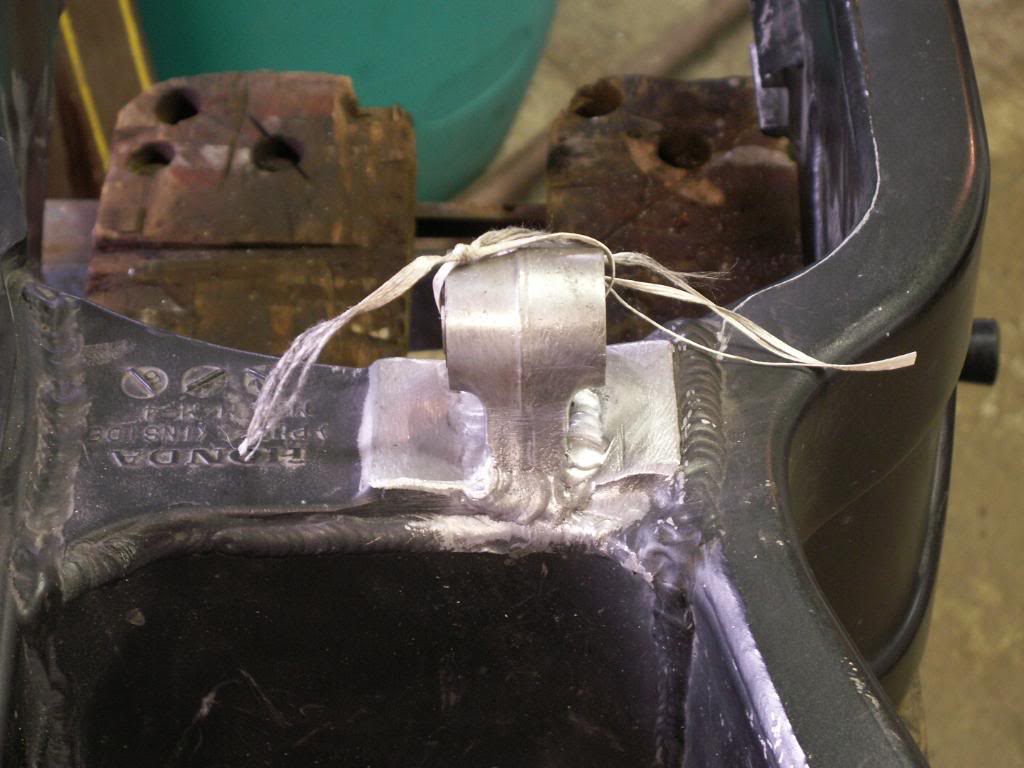
my main concern and the reason i was reluctant to share info on swingarm
is the welded on suspension mount.
will it hold?
if it doesnt and someone gets hurt,i would feel terrible.
but yeah cutting flat plates is much easier,even if you have to do it several times.
im sure i will have to also.
if i recall correctly it is a combo of rc and superhawk spacers.
my main concern and the reason i was reluctant to share info on swingarm
is the welded on suspension mount.
will it hold?
if it doesnt and someone gets hurt,i would feel terrible.
but yeah cutting flat plates is much easier,even if you have to do it several times.
im sure i will have to also.
03-16-2009, 06:16 AM
#9
Senior Member
SuperBike
Join Date: Jul 2005
Location: MN
Posts: 1,548
its those concerns that intimidated me about modifying swingarms and structural parts that require modification from stock. I have confidence in the factory testing and development to believe its strong enough, but wouldn't trust my own decisions there. I freely admit its out of ignorance and familiarity with welding and having no background in engineering. So I personally just stay away from and watch in admiration for those of you with that experience to allow you to do it. I'm still just trying to find a JMC or other arm I can bolt on!
 03-16-2009, 09:08 AM
#11
Fastest Color
SuperBike
Join Date: Jul 2007
Location: Lithia, FL
Posts: 2,091
03-16-2009, 10:51 AM
#12
Out of my mind, back in 5
MotoGP
Thread Starter
Join Date: Nov 2006
Location: Skurup, Sweden
Posts: 6,109
Well, the two above mentioned... Weight and stability...
And I personally see it as a positive, some see it as a negative... It's a bit longer than stock and moves more weight up front...
That should make the bike less wheelie prone and get the power down...
As for strength and possible failures... My own responsibility... None other involved... I know it and I live by it...
The guy welding this did a wery thoughout job of putting it in an x-ray machine and giving me a good estimate on the mechanical strenght of the weld he could perform on that material and thickness... also x-rayed the weld afterwards to look for imperfections in the weld... I ran the numbers and I'm trying it...
But... I have the same reservations as you... Anyone trying it is on there own as far as testing and safety... I'm giving no numbers, and no promises...
03-16-2009, 06:20 PM
#14
Out of my mind, back in 5
MotoGP
Thread Starter
Join Date: Nov 2006
Location: Skurup, Sweden
Posts: 6,109
Um... I spent the afternoon trying to replicate your success with the spacers... So far all I got for my trouble was a headache...
Plus I broke my chaintool...
The new chuck seems to work though, but after breaking the grinder as well I decided that I'd better stay out of the garage for the day otherwise I'd probably end up breaking something really expensive...
Tomorrow I'll get a new chaintool and grinder and start over with the fabrication of my rearset mounts...
 03-18-2009, 01:22 PM
#19
Out of my mind, back in 5
MotoGP
Thread Starter
Join Date: Nov 2006
Location: Skurup, Sweden
Posts: 6,109
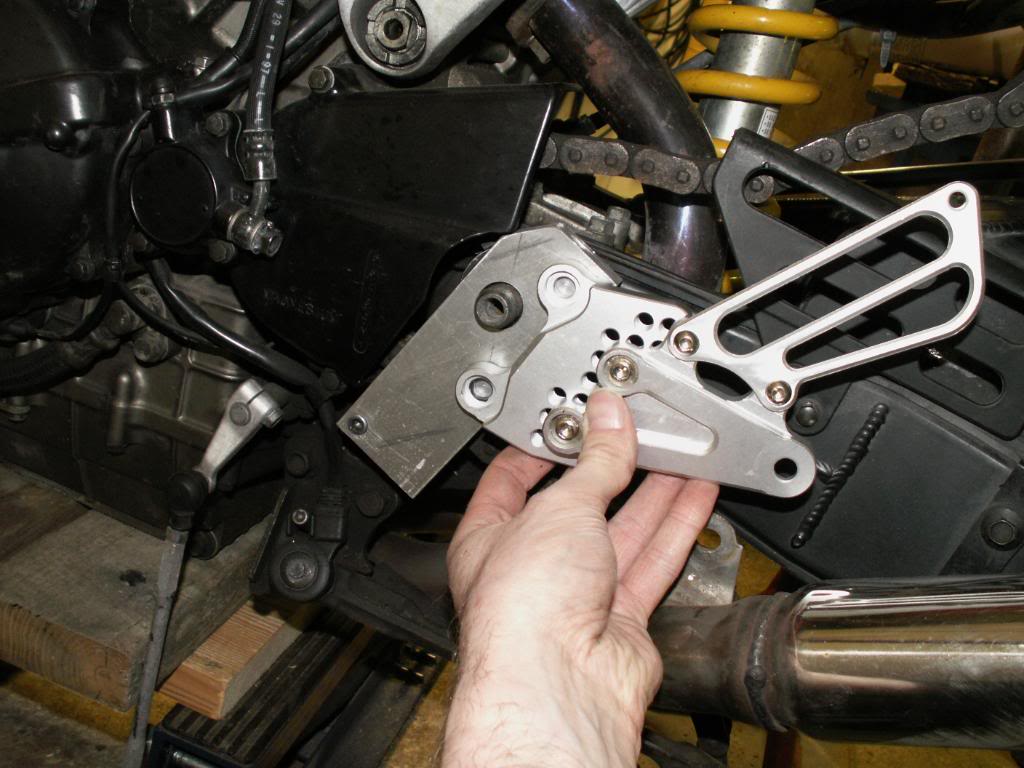
Sure... But I'm not so sure it's going to help much...
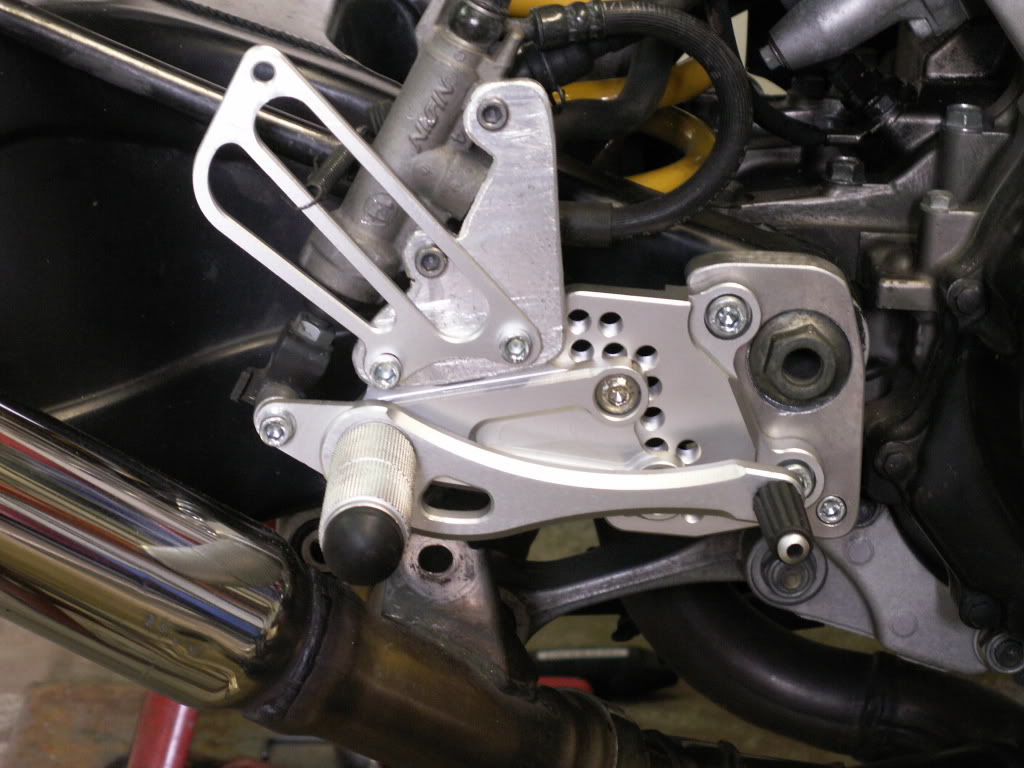
The rearsets are for a CBR 1000RR (can anybody see a pattern here?!) And are actually cheap knock-offs from Thailand somewhere... I was prepared to get something rather simple for the money I was paying, but they are actually really solid, and light as a feather, high grade aluminium for sure... The bolts are high grade steel according to the markings, and the CNC work is top notch... Even the ball bearings are a reasonable quality it seems and are fully sealed...
But as you can see from the pictures I have made the mounting plates holding them myself... The reason being I can now quite easily use just about any CBR rearsets, OEM or otherwise as they have the same bolt pattern... There is a 2 mm difference from the 929/954 to the 1000RR/600RR, but the bolts are smaller then the actual hole, so I can wiggle it that much until I put a lock washer in there and torque them...
03-18-2009, 01:30 PM
#20
Out of my mind, back in 5
MotoGP
Thread Starter
Join Date: Nov 2006
Location: Skurup, Sweden
Posts: 6,109
BTW I can't make up my mind...
Do I need the lower mount points for the pipes to the foot pegs? It's obviously going to reduce vibrations in the pegs if I'm not using them... But are they necessary for the pipes to stay put?
Are they used on aftermarket pipes?
And they are ugly... But If I cut them off, going back to stock footpegs isn't going to help, as they are missing then...
I'll probably wait with the actual cutting, I'd like to be able to swap everything back to stock, atleast until I have ridden the bike a while with the new swing and decided I'm keeping it this way...
Yeah I know... I'm a bit ****... I'm also stubborn...
03-30-2009, 12:01 PM
#21
Out of my mind, back in 5
MotoGP
Thread Starter
Join Date: Nov 2006
Location: Skurup, Sweden
Posts: 6,109
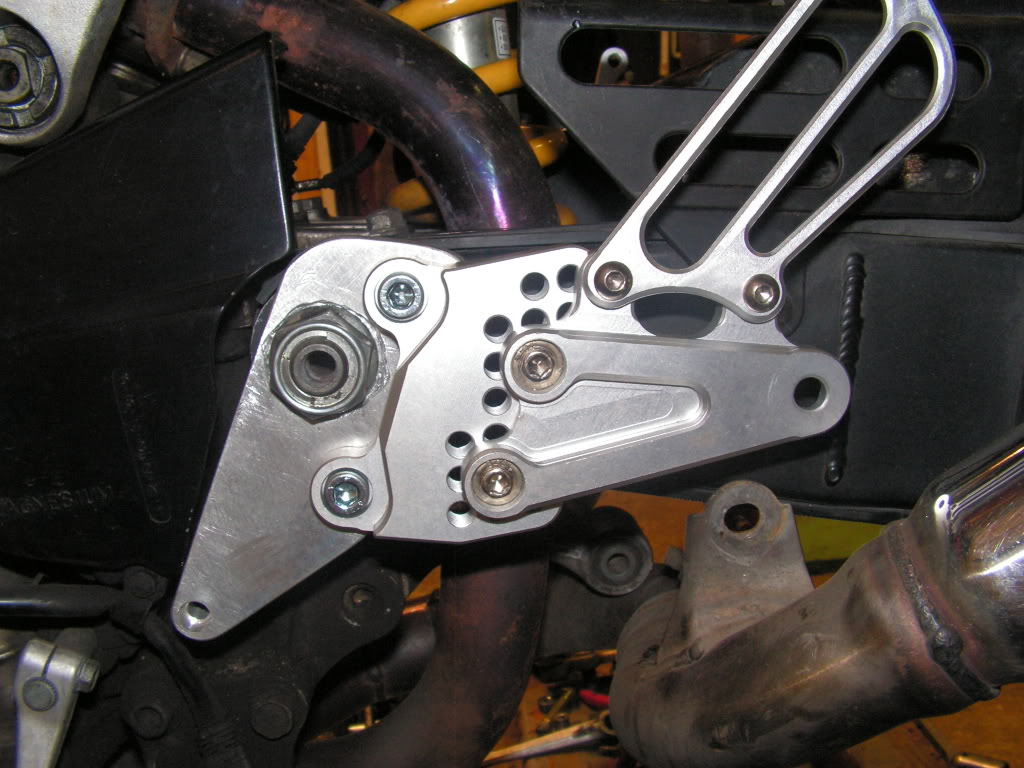
Final result of my rearsets...
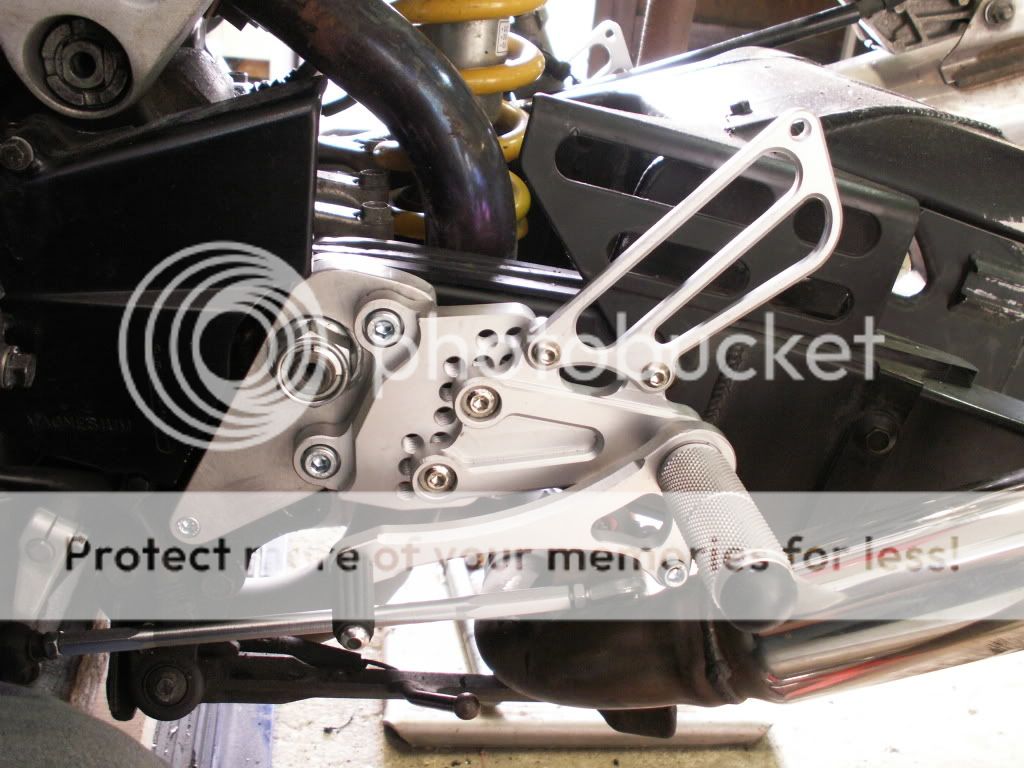
Now I'm waiting for my banjobolt pressure switch for the rear brake and a new rear sprocket... 600RR's use a 6 bolt pattern... Not 5 like the VTR... Doh!
Should have checked that before ordering...
Once I get that I can put the new chain on and get some rubber on the new wheel... Then I'm done... I think...
As for finish, nope... Not doing that... I'm gonna ride it for a while and decide... Then it's going to get blinged...
 03-30-2009, 04:06 PM
#25
Senior Member
SuperBike
Join Date: Jul 2005
Location: MN
Posts: 1,548
Nice work so far can't wait to hear ride report.
03-30-2009, 05:17 PM
#26
Out of my mind, back in 5
MotoGP
Thread Starter
Join Date: Nov 2006
Location: Skurup, Sweden
Posts: 6,109
Need to work on actually working too...
Oh... And I plan to put the stock arm on a scale to compare to you braced and my new one...
Actually the pegs are probably narrower than stock!
The reason I chose that arrangement was that the SP2 swing is actually more narrow across the pivot than the stock swing...
The bolt I'm using is the VTR wheel axle, which is about 20mm shorter (I think?!) And also I'm to lazy to tap thread in a bunch of holes... easier to use the existing plates...
To be able to use the stock pivot axle, I would have had to use at least 10 mm more material on each side...
Last edited by Tweety; 03-30-2009 at 05:22 PM.
03-30-2009, 05:18 PM
#27
Out of my mind, back in 5
MotoGP
Thread Starter
Join Date: Nov 2006
Location: Skurup, Sweden
Posts: 6,109
Ok... that probably settles it then... If nothing is out of the ordinary once tested I'll probably just cut them away...
03-30-2009, 08:49 PM
#28
Senior Member
SuperBike
Join Date: Oct 2008
Posts: 1,033
awesome.
I kept mine as narrow as possible. Whats the point in having a vtwin if its gonna be wide?
That swinger is gonna look great, but high mount cans would show it off.
rearsets outside to outside, 13 3/8"

Footpegs outside to outside, 19 1/2"

keeping it NARROW.
I kept mine as narrow as possible. Whats the point in having a vtwin if its gonna be wide?
That swinger is gonna look great, but high mount cans would show it off.
rearsets outside to outside, 13 3/8"
Footpegs outside to outside, 19 1/2"
keeping it NARROW.