Carb set up
 05-14-2016, 01:10 AM
#391
VTR virgin
Superstock
Join Date: Mar 2015
Location: Auckland, New Zealand
Posts: 446

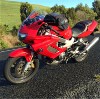
This is not a VTR question, I also have an 1990 Honda ST1100 that I have resurrected after 8 years parked, so predictably needed a full carb disassembly and clean. Running totally stock aside from a replaced fuel pump.
Is it reasonable to use plug appearance to judge how to to adjust my fuel screws? The ST has inaccessible fuel screws, and I don't have an accurate tacho, so idle drop isn't for me. I can clearly see fuelling differences on the plugs, so I'm thinking to screw in the screw on the carb that feeds the most rich looking plugs.
Is it reasonable to use plug appearance to judge how to to adjust my fuel screws? The ST has inaccessible fuel screws, and I don't have an accurate tacho, so idle drop isn't for me. I can clearly see fuelling differences on the plugs, so I'm thinking to screw in the screw on the carb that feeds the most rich looking plugs.
Last edited by Cadbury64; 05-14-2016 at 01:15 AM.
 05-14-2016, 06:52 AM
#392
Rex Kramer-Thrill Seeker
SuperBike

Join Date: Jan 2011
Location: Brookfield, WI
Posts: 2,312
This is not a VTR question, I also have an 1990 Honda ST1100 that I have resurrected after 8 years parked, so predictably needed a full carb disassembly and clean. Running totally stock aside from a replaced fuel pump.
Is it reasonable to use plug appearance to judge how to to adjust my fuel screws? The ST has inaccessible fuel screws, and I don't have an accurate tacho, so idle drop isn't for me. I can clearly see fuelling differences on the plugs, so I'm thinking to screw in the screw on the carb that feeds the most rich looking plugs.
Is it reasonable to use plug appearance to judge how to to adjust my fuel screws? The ST has inaccessible fuel screws, and I don't have an accurate tacho, so idle drop isn't for me. I can clearly see fuelling differences on the plugs, so I'm thinking to screw in the screw on the carb that feeds the most rich looking plugs.
(This was taken from xlforum.net. It will work with our VTR's and your ST1100)
Bring the bike up to operating temperature. Make sure the enrichener is off. Turn the idle speed down using the idle SPEED adjustment screw (the one by the throttle cables on a CV) until the bike is only barely able to stay running, maybe a little higher than that. 800 RPM is a good RPM if you have an accurate tach. With the RPM lower than normal, you will be able to see the effect that adjusting the mixture screw has.
The idea is to turn the mixture screw in until the idle speed drops, then turn the screw back out until the idle speed drops again, and set the screw in the middle of those two points. What you are doing is making the mixture leaner, so lean that the engine does not like the mixture and runs poorly, then you make the mixture richer until it doesn't like that, and the perfect setting is half-way between the point where is falls off either way.
A couple things to remember:
1. If the bike gets overheated during this procedure, you will need to let the bike cool off a bit and try again. If you are already at operating when you start this procedure, running more than about 5 minutes while trying to get the setting correct will make the bike too hot. If the bike is too hot when you set the idle mixture, the final setting will be too lean.
2. The screw should be set at least 1/2 turn out from fully seated, and no more than 3 turns out. If it is less than 1/2 turn out from fully seated when it runs best, you should install a smaller pilot jet and perform the idle drop procedure again. If it is more than 3 turns out, you should install a larger pilot jet and perform the idle drop procedure again. If the screw ends up more than around 3-1/2 turns out from fully seated, the spring tension on the screw is insufficient and there is a chance the screw can vibrate out.
3. A tachometer is helpful for seeing the rise and fall of engine RPM if you are not comfortable listening for the changes.
4. The enrichener should be completely off to perform this procedure.
5. An intake leak will foul these results. If the mixture screw seems to have no effect, you may not be able to perceive the change in idle speed, there may be an intake leak, or you may already be either too lean or too rich and you need a different size pilot jet
05-14-2016, 12:52 PM
#393
VTR virgin
Superstock
Join Date: Mar 2015
Location: Auckland, New Zealand
Posts: 446
I don't have the special tool required to get to the screws so I can't do the idle drop method, but I can haul the carbs on and off without too much trouble.
I guess I was really asking whether the spark plug appearance is a reliable way to diagnose whether the fuel screws need to be adjusted?
I guess I was really asking whether the spark plug appearance is a reliable way to diagnose whether the fuel screws need to be adjusted?
05-14-2016, 01:26 PM
#394
Senior Member
SuperSport

Join Date: Apr 2014
Location: Auckland, new Zealand
Posts: 932
I don't have the special tool required to get to the screws so I can't do the idle drop method, but I can haul the carbs on and off without too much trouble.
I guess I was really asking whether the spark plug appearance is a reliable way to diagnose whether the fuel screws need to be adjusted?
I guess I was really asking whether the spark plug appearance is a reliable way to diagnose whether the fuel screws need to be adjusted?
05-14-2016, 04:22 PM
#395
Junior Member
Squid

Join Date: Apr 2016
Posts: 29
I followed these instructions again today. Thanks for reposting. I'm still having trouble with tuning below 3500rpm - runs terrible, chiefs and pops, backfires off throttle, and sounds like the PAIR is still installed but it's long gone.
I checked for intake leaks by spraying carb cleaner everywhere but found none. It's definitely running lean at low rpm, but it runs awesome above 4000rpm. Above 4000 it just goes and there's no hesitation. It actually surprised me because it didn't expect this much power. I found the clutch slips a bit at high power too.
I will pull the carbs tomorrow.
05-14-2016, 07:28 PM
#396
VTR virgin
Superstock
Join Date: Mar 2015
Location: Auckland, New Zealand
Posts: 446
05-26-2016, 06:01 PM
#397
Member
Squid

Join Date: Feb 2014
Location: Central Coast NSW Australia
Posts: 30
DR Honda stacks
I'm wondering if anyone is running the dr Honda stacks and have you blocked one lift hole on each slide with success. I had mine on the dyno on Monday and it had a great low and mid range but ran lean up top. I had the set up that Hawk mentioned with shimmed needles etc but it ran lean up high from 7500-9000rpm and I'm thinking it might be the main jets need to be increased in size but was wondering if the lift holes to be partly to blame as well. Looking for any feedback at all
Thanks
Thanks
05-27-2016, 06:05 AM
#399
Member
Squid
Join Date: Feb 2014
Location: Central Coast NSW Australia
Posts: 30
 05-28-2016, 08:49 PM
#401
Member
Squid
Join Date: Feb 2014
Location: Central Coast NSW Australia
Posts: 30
Yeah my butt dyno said exactly the same until the proper dyno took it past the revs that I'm able to. It had a very fat mid range which was awesome but sadly up top it took a massive hit..... Will play with it a bit more to see if I can dial this out before putting it back on the dyno. Thanks
05-30-2016, 12:13 AM
#404
Member
Squid
Join Date: Feb 2014
Location: Central Coast NSW Australia
Posts: 30
06-01-2016, 01:42 PM
#405
Who are you?
SuperSport

Join Date: Aug 2009
Location: Las Vegas, NV
Posts: 731
So no, unless you're having midrange issues, that is not your issue.
06-02-2016, 01:28 AM
#406
Member
Squid
Join Date: Feb 2014
Location: Central Coast NSW Australia
Posts: 30
Slides are going to affect midrange, dictating how quickly or how slowly the slide rises. Going larger causes it to rise more quickly, but there is a point where it is too large and the pressure differential becomes unequal and causes the slide to drop again. So simply making a huge hole is not the answer.
So no, unless you're having midrange issues, that is not your issue.
So no, unless you're having midrange issues, that is not your issue.
06-02-2016, 04:23 AM
#407
Senior Member
SuperBike

Join Date: Mar 2012
Location: New South Wales Australia
Posts: 1,544
When I fitted the Dynojet kit to my bike I drilled the slide as instructed and even though I had done a lot to the motor it felt shithouse!
I replaced the slides with a standard set from a spare set of carbs I have and "Hey Presto" it was like a new bike . The moral is don't F with the slides.
Everyone of our bikes is different, the above worked for me and my set up.
The H Power stacks work better with this set up as well !
I replaced the slides with a standard set from a spare set of carbs I have and "Hey Presto" it was like a new bike . The moral is don't F with the slides.
Everyone of our bikes is different, the above worked for me and my set up.
The H Power stacks work better with this set up as well !
06-02-2016, 05:00 AM
#408
Who are you?
SuperSport
Join Date: Aug 2009
Location: Las Vegas, NV
Posts: 731
More importantly, do you have PAIR or is it disabled? If you do an AFR with the PAIR system active, which injects air from the airbox to theoretically more cleanly burn excess combustion byproducts, your readings will not be accurate. They'll be too lean due to excess air. So always make sure any bike you do a wideband Dyno with does not have any sort of system that injects extra air into the exhaust, because it will give you a false AFR
 06-02-2016, 01:03 PM
#410
Member
Squid
Join Date: Feb 2014
Location: Central Coast NSW Australia
Posts: 30
More importantly, do you have PAIR or is it disabled? If you do an AFR with the PAIR system active, which injects air from the airbox to theoretically more cleanly burn excess combustion byproducts, your readings will not be accurate. They'll be too lean due to excess air. So always make sure any bike you do a wideband Dyno with does not have any sort of system that injects extra air into the exhaust, because it will give you a false AFR
No, no pair on the bike so it should all be good readings.
06-02-2016, 02:43 PM
#411
Who are you?
SuperSport
Join Date: Aug 2009
Location: Las Vegas, NV
Posts: 731
09-15-2018, 02:19 PM
#412
Junior Member
Squid

Join Date: Sep 2018
Posts: 1
I am new to this forum. I have an 01 vtr1000f with 18k. Super nice bike but it ran real rough and idled too high when I got it. It has M2 exhaust K&N air filter, with the stack breather tube holes blocked off, and I am not sure what kind of carb kit. I followed advice above from 8541Hawk with a factory carb kit and #48 slow jets. I also followed the mixture screw settings front and rear. What was the total shimming for the front and rear needles? I have a total of .032 (as close as I could get with what I had) on the front and .040 on the rear, but I dont know what the stock shims were since they were gone and the kit did not come with them. The bike runs great like this but I think It lost a little power in low rpms. I have read a lot of threads on these and your advice seemed the most logical. What are your thoughts on the lighted flywheel?
09-15-2018, 04:56 PM
#413
Senior Member
Superstock
Join Date: Sep 2013
Location: Costa Mesa, CA
Posts: 460
I run a tweaked (to my bike, use, and altitude) 8541 Hawk jetting. Runs great and has for 20k miles. Over the years I've tried FP, Dyno Jet, K&N, OEM combo's, Some picked up a little HP up top but ran marginal in the mid and down low, Some vice versa. The Hawk/HRC seems to run good at all RPM for me. Erik's lightened flywheel is the single most noticeable engine performance upgrade I've done. Well worth the $ and the little bit of labor involved. Spins up quicker and makes it easier to match RPM when down shifting. No true power gain but revs noticeably quicker.
09-16-2018, 08:32 AM
#414
Senior Member
SuperBike

Join Date: Aug 2005
Location: Fort Wayne, IN
Posts: 1,858
12-25-2018, 04:17 AM
#415
Senior Member
SuperSport
Join Date: Jul 2018
Posts: 565
Notes on Jetting:
@ Sea Level
If you have purchased a DJ Kit do not open the box yet. If you are about to order a jet kit, do not pass go, do not collect $100, go directly to the crap below I just wrote. If it's winter and you have a garage, give your wife the keys to the bike and do not ask for them until spring. By then you will have read this article and removed the jet kit from your bike, installed something sensible and arranged for a dyno run in early April.
AIRFLOW--
The K&N is a bad idea all around, go with oem.
Don't change the v stacks.
Don't cut holes in the airbox.
Remove the Pair
Check for leaks
Balance the damn carbs
Main Jets--
DJ is different from Keihin & FP
Unless you have cans there is no need for a bigger main (unless you violate rule 1 and use a K&N)
Use Euro/US/Non-CA Jetting (175, 180)
Double check emulsion tube.
Use a bigger one in the rear than up front (insert joke)
Needle--
The DJ and the OEM are almost identical, adjustable is key
All 3 types are quite similar
Without cans or other mods, save your money and use shims.
Shims should be .020" each, start with 1 at a time.
DJ needles work with OEM mains
Check OEM for front or rear markings, DJ seem to be universal.
Pilots--
Euro is 48, ours are 45.
Rule of thumb is that if the screw is nearing 3 turns out, use a bigger pilot
Book says 2 3/4 turns out therefore... Use a bigger pilot (48)
If 48 is too big, turn the screw in.
If turning the screw in doesn't do it, something is amiss, start over from the top.
Don't use a 50
Slides/Springs--
Use the factory springs
Don't use DJ springs
Don't cut the springs
Don't stretch the springs
Don't remove the springs unless you have some time on your hands and patience.
Check the diaphragm for tears
Don't drill the slide
Fill in one of the OEM slide lift holes for the front cylinder with epoxy
Clean the slide and check for smooth operation
TPS--
Please set the TPS to 500 ohms +/- 10 and call it good for now.
Plug the TPS back in
If you live above sea level you will need to adjust your settings from here because you will be too rich depending on how high you are ( ). The books says use the next size down main jet and less turns on the screw. The opposite is true for those of you living below sea level. I think that the Thunderjet/Intellijet product would probably help those of us who have to fiddle with things or live at sea level and commute to Denver in the morning. Everyone pretty much agrees that the VTR is touchy, they are right. Set it and leave it alone until you make some mods other than a slip can but whatever you do don't do any mods because there are none other than slip on cans. Cams are valuable but expensive, the same goes for pistons, porting, cranks etc. The only easy and good mod is the flywheel. If you have not yet changed your flywheel, stop reading right now and go get a flywheel from Marquez and while you're there get an RR and start thinking about stick coils and how they will improve your marriage, earn you a promotion, increase girth etc. In order to get the slow jetting correct a digital tach is a good idea, preferably one with 50 rpm increments. Some old timers on the site have bionic ears and can hear a slight change, I am deaf from years of nagging and can therefore hear nothing other than the sound of my wife's car door, I trust you are of the same caste as I. A manometer is another critical tool, I think a digital manometer for HVAC might work well but I have yet to test this theory. None of this is worth a damn if you have leaking intake rubbers, leaking exhaust gaskets, fouled/incorrect spark plugs/weak ignition or mis-adjusted valves, bad coolant temp sensor, junk fuel-- or you are a moron. I am in the process of developing a "are you a moron" flow chart, I will disperse soon.
Put your bike on a dyno, pay closer attention to the AF ratio throughout the run than you do the HP. Torque is also important because from there you can calculate the BMEP. Spoiler alert, if your engine is healthy and you followed the instructions above, you will make 100 HP +/- 5 and 70 Lb/Ft of torque +/- 2.
Ok internet... do your worst.
AV
@ Sea Level
If you have purchased a DJ Kit do not open the box yet. If you are about to order a jet kit, do not pass go, do not collect $100, go directly to the crap below I just wrote. If it's winter and you have a garage, give your wife the keys to the bike and do not ask for them until spring. By then you will have read this article and removed the jet kit from your bike, installed something sensible and arranged for a dyno run in early April.
AIRFLOW--
The K&N is a bad idea all around, go with oem.
Don't change the v stacks.
Don't cut holes in the airbox.
Remove the Pair
Check for leaks
Balance the damn carbs
Main Jets--
DJ is different from Keihin & FP
Unless you have cans there is no need for a bigger main (unless you violate rule 1 and use a K&N)
Use Euro/US/Non-CA Jetting (175, 180)
Double check emulsion tube.
Use a bigger one in the rear than up front (insert joke)
Needle--
The DJ and the OEM are almost identical, adjustable is key
All 3 types are quite similar
Without cans or other mods, save your money and use shims.
Shims should be .020" each, start with 1 at a time.
DJ needles work with OEM mains
Check OEM for front or rear markings, DJ seem to be universal.
Pilots--
Euro is 48, ours are 45.
Rule of thumb is that if the screw is nearing 3 turns out, use a bigger pilot
Book says 2 3/4 turns out therefore... Use a bigger pilot (48)
If 48 is too big, turn the screw in.
If turning the screw in doesn't do it, something is amiss, start over from the top.
Don't use a 50
Slides/Springs--
Use the factory springs
Don't use DJ springs
Don't cut the springs
Don't stretch the springs
Don't remove the springs unless you have some time on your hands and patience.
Check the diaphragm for tears
Don't drill the slide
Fill in one of the OEM slide lift holes for the front cylinder with epoxy
Clean the slide and check for smooth operation
TPS--
Please set the TPS to 500 ohms +/- 10 and call it good for now.
Plug the TPS back in
If you live above sea level you will need to adjust your settings from here because you will be too rich depending on how high you are (
Put your bike on a dyno, pay closer attention to the AF ratio throughout the run than you do the HP. Torque is also important because from there you can calculate the BMEP. Spoiler alert, if your engine is healthy and you followed the instructions above, you will make 100 HP +/- 5 and 70 Lb/Ft of torque +/- 2.
Ok internet... do your worst.
AV
12-25-2018, 07:35 PM
#416
Senior Member
SuperBike
Join Date: Jul 2011
Location: South of Live Free or Die & North of Family Guy
Posts: 1,456
I run a tweaked (to my bike, use, and altitude) 8541 Hawk jetting. Runs great and has for 20k miles. Over the years I've tried FP, Dyno Jet, K&N, OEM combo's, Some picked up a little HP up top but ran marginal in the mid and down low, Some vice versa. The Hawk/HRC seems to run good at all RPM for me. Erik's lightened flywheel is the single most noticeable engine performance upgrade I've done. Well worth the $ and the little bit of labor involved. Spins up quicker and makes it easier to match RPM when down shifting. No true power gain but revs noticeably quicker.
03-11-2019, 02:53 PM
#417
Senior Member
SuperSport
Join Date: Jul 2018
Posts: 565
If anyone is still reading this thread: I ran a front slide with one hole only and in my situation the signal was too weak to lift the slide correctly, it lagged far behind the rear cylinder to the point that it was a total dog. Old slide with 2 holes back in and whammo, back in business.
03-12-2019, 09:13 AM
#419
Member
Squid

Join Date: Jun 2018
Location: Boston, MA
Posts: 41
If anyone is still reading this thread: I ran a front slide with one hole only and in my situation the signal was too weak to lift the slide correctly, it lagged far behind the rear cylinder to the point that it was a total dog. Old slide with 2 holes back in and whammo, back in business.
Also, in your big post with all the directions, you say that the stock jets are 175 and 180. I though they were 175 and 178? That is what shows up on the parts diagram and what my service manual says.
Thanks for writing it all out and keeping the thread current!
03-12-2019, 08:42 PM
#420
Senior Member
SuperBike
Join Date: Jul 2011
Location: South of Live Free or Die & North of Family Guy
Posts: 1,456
Interesting. I have been reading the whole thread of the past 2 weeks and just got to your long post with all the steps in it. Seems like most people work out better with the one plugged hole. I made all the mods in this thread to my bike last weekend, getting in on the road in a few weeks I will see how it goes. I wonder if the one you plugged the hole in warped or binds in the slide? I have had other bikes with similar issues that required some lapping to get it right. Also, could you have a leak in the diaphragm or maybe the edge of the diaphragm wasn't seated right in the groove when installed? I know you have been posting up about all the stuff you are having done to the bike's engine, what is the current setup of the rest of the bike you are having this issue with?
Also, in your big post with all the directions, you say that the stock jets are 175 and 180. I though they were 175 and 178? That is what shows up on the parts diagram and what my service manual says.
Thanks for writing it all out and keeping the thread current!
Also, in your big post with all the directions, you say that the stock jets are 175 and 180. I though they were 175 and 178? That is what shows up on the parts diagram and what my service manual says.
Thanks for writing it all out and keeping the thread current!


