03-24-11 The Road to Recovery
 03-24-2011, 11:47 AM
#1
Senior Member
SuperSport
SuperSport
Thread Starter
Join Date: Jan 2011
Location: Tampa Florida
Posts: 521

03-24-11 The Road to Recovery
Original post on my blog
https://www.superhawkforum.com/forum...18/#post296820
So after fixing my cars alternator problem I finally had a moment to inspect my Bike. I took of the cowl and documented what I saw.
The first thing I need help (and ya'lls help is appreciated) with is building a parts list. Below are all the pictures I snapped. Are there any other tests I should run? It looks like I am going to need a complete wiring harness R/R and what else?
This is the hole that made it through my fairing.

Voltage measured at the battery

My Battery

Main Fuse 1

Main Fuse 2

R/R and wiring 1

R/R and wiring 2

R/R and wiring 3

R/R and wiring 4

R/R and wiring 5

R/R and Wiring 6

R/R and Wiring 7 - Close up of the wiring on the R/R

ECU ? - is this in the right place?

Unknown box 1 - What is this?

Unknown box 2 - What is this box? It seems like it does not belong

Unknown box 3 - The connector going into the box

https://www.superhawkforum.com/forum...18/#post296820
So after fixing my cars alternator problem I finally had a moment to inspect my Bike. I took of the cowl and documented what I saw.
The first thing I need help (and ya'lls help is appreciated) with is building a parts list. Below are all the pictures I snapped. Are there any other tests I should run? It looks like I am going to need a complete wiring harness R/R and what else?
This is the hole that made it through my fairing.
Voltage measured at the battery
My Battery
Main Fuse 1
Main Fuse 2
R/R and wiring 1
R/R and wiring 2
R/R and wiring 3
R/R and wiring 4
R/R and wiring 5
R/R and Wiring 6
R/R and Wiring 7 - Close up of the wiring on the R/R
ECU ? - is this in the right place?
Unknown box 1 - What is this?
Unknown box 2 - What is this box? It seems like it does not belong
Unknown box 3 - The connector going into the box
Last edited by geekonamotorcycle; 03-24-2011 at 12:05 PM.
 03-24-2011, 01:16 PM
#2
Senior Member
Back Marker
Join Date: Mar 2008
Location: Brisbane, Australia
Posts: 139
The service manual in the knowledge base section will give you the answers to all the above. Suggest you download it and have a read, it will show positions and descriptions of all the boxes in the pics.
03-24-2011, 01:20 PM
#3
Senior Member
SuperSport
SuperSport
Thread Starter
Join Date: Jan 2011
Location: Tampa Florida
Posts: 521
Ok, I have it. I found a place an hour away nearby that has the relay and harness for about 160 total. they are open 9-3 though and its too late. gonna get up extra early tomorrow and head up there to get em. I might be running tomorrow. I may pick up an r1 RR what is the best model to get? also what adapters do I need to make to get her to fit?
03-24-2011, 01:25 PM
#4
Out of my mind, back in 5
MotoGP

Join Date: Nov 2006
Location: Skurup, Sweden
Posts: 6,109
Rule No.1 in electronics... Bundles of wiring is a bad, bad, baaad thing...
To me that looks like a classic R/R failure... Take R/R (tyristor based) with connectors on wires... Splice in wiring, but isolate them a bit haphasardly and fail to make sure they are protected from moisture... Leave it long enough to get corrosion and resistance build up... You get enough heat to make the isolation burn through and you have a wire roasting party...
I fail to see why you need a new wiring harness? The only things that are toast are wires the you easily can cut away and replace when you attach the R1 R/R... You still need to start cutting in those same wires on the "new" harness...
Just keep in mind, "electricians tape" isn't really used by electricians (or at least very rarely)... Only dofuses use that... Make a clean cut, solder and use shrink tube to isolate and seal things... That way you won't have this problem again...
Last edited by Tweety; 03-24-2011 at 01:29 PM.
03-24-2011, 01:27 PM
#5
Senior Member
SuperSport
SuperSport
Thread Starter
Join Date: Jan 2011
Location: Tampa Florida
Posts: 521
Rule No.1 in electronics... Bundles of wiring is a bad, bad, baaad thing...
To me that looks like a classic R/R failure... Take R/R (tyristor based) with connectors on wires... Splice in wiring, but isolate them a bit haphasardly and fail to make sure they are protected from moisture... Leave it long enough to get corrosion and resistance build up... You get enough heat to make the isolation burn through and you have a wire roasting party...
To me that looks like a classic R/R failure... Take R/R (tyristor based) with connectors on wires... Splice in wiring, but isolate them a bit haphasardly and fail to make sure they are protected from moisture... Leave it long enough to get corrosion and resistance build up... You get enough heat to make the isolation burn through and you have a wire roasting party...
03-24-2011, 01:57 PM
#6
Senior Member
SuperSport
SuperSport
Thread Starter
Join Date: Jan 2011
Location: Tampa Florida
Posts: 521
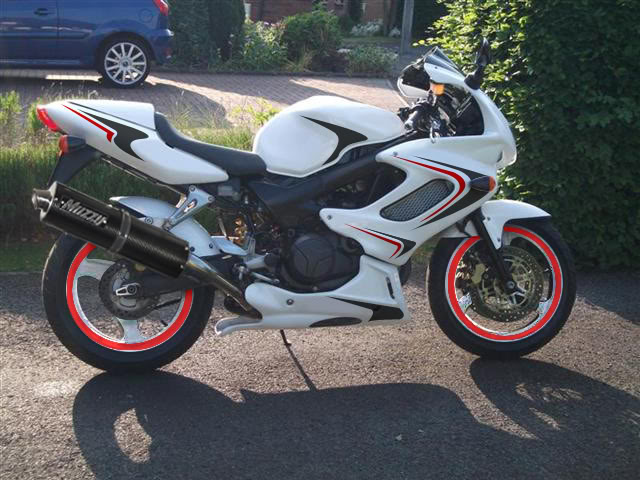
So I am going to need to repaint the bike anyways to match the tail cowl. I am partial to pearl white with red accents. or black with red. Is there any way to mock up what that would look like? any software? I think either would really pop with the polished frame.
Last edited by geekonamotorcycle; 03-24-2011 at 02:00 PM.
 03-24-2011, 02:10 PM
#8
Senior Member
SuperSport
SuperSport
Thread Starter
Join Date: Jan 2011
Location: Tampa Florida
Posts: 521
 03-24-2011, 02:13 PM
#9
Senior Member
MotoGP

Join Date: Jul 2010
Location: Phoenix, AZ
Posts: 3,869
I did that for a member a couple of months back... not sure if he went with it or not. I may make a "how to" for changing a bike's color and adding graphics using Gimp when I get some free time...
03-24-2011, 02:14 PM
#10
Senior Member
SuperSport
SuperSport
Thread Starter
Join Date: Jan 2011
Location: Tampa Florida
Posts: 521
That would be super useful and a great contribution. I couldnt even tell I thought that was a real bike paint scheme.
03-24-2011, 09:32 PM
#12
Senior Member
Back Marker

Join Date: Aug 2010
Posts: 103
Just FYI, three stage pearl paint is VERY expensive (especially when compared to the R/R repair). I paid more for the paint raw materials on mine than you got paid from your insurance...
...but...pearl paint does look freakin cool....and is pretty worth it!
...but...pearl paint does look freakin cool....and is pretty worth it!
04-01-2011, 10:40 PM
#15
Senior Member
SuperSport
SuperSport
Thread Starter
Join Date: Jan 2011
Location: Tampa Florida
Posts: 521
Ok got the brake light working by adjusting the rear brake switch and adding a spacer to my not stock right brake lever(a pice of double sided tape and a spare nut). The right lever was not making contact with the switch and was leaving my brakes turned up all the way.they are working now.
I ordered the d2moto integrated tail led so I can eliminate the non working rear signals.
I need to add connectors to the harness side for my left front running/blinker. I also need to figure out which wire does what and goes where for the front and rear blinkers.
ABS bodywork SuperHawk Firestorm VTR1000F 97 98 99 00 A - eBay (item 270726626423 end time Apr-26-11 10:20:06 PDT)
http://cgi.ebay.com/ebaymotors/ABS-b...ht_4927wt_1172
anybody tried out those plastics?
Last edited by geekonamotorcycle; 04-01-2011 at 10:43 PM.
04-02-2011, 04:39 AM
#16
Senior Member
SuperSport
Join Date: Jun 2010
Location: Baltimore, Maryland
Posts: 636
So I am going to need to repaint the bike anyways to match the tail cowl. I am partial to pearl white with red accents. or black with red. Is there any way to mock up what that would look like? any software? I think either would really pop with the polished frame.
Ok got the brake light working by adjusting the rear brake switch and adding a spacer to my not stock right brake lever(a pice of double sided tape and a spare nut). The right lever was not making contact with the switch and was leaving my brakes turned up all the way.they are working now.
Check that shop you are going to if they have a lever, it would really be a good idea to get the right lever in there.
 04-02-2011, 08:53 AM
#18
Senior Member
SuperSport
SuperSport
Thread Starter
Join Date: Jan 2011
Location: Tampa Florida
Posts: 521
Im sorry I was half drunk when I wrote that.
the bike runs!
I thought that my brakes lights were not working and only the tail running light was on. Turns out that the brake lights were on all the time. This was because the brake lever is not stock and was not closing the switch. Because of this the circuit was always open. I inserted a very small nut and some double sided tape so now the circuit is closed when the lever is not being pulled on. The result is that the running lights and brake lights work. So hooray! Also I replaced some blown fuses and now I have a horn.
I ordered an integrated tail light and will remove the turn signals in the back when it arrives. I do need to find out how each of the three wires on the indicators up front need to be connected.
I have a new pressing problem though.
Over the last few days I noticed a new sound from my exhaust. Also a very strong exhaust smell all over me. It turns out that I am leaking a significant amount of exhaust gas from somewhere behind my rear shock. I can feel it blowing with my hand when I put it back there. I reek of exhaust! I like to say tho that it is like the smell of sex, but with a bike. anyways I will take a video at my 3 o'clock lunch brake so you can see what I mean. If I stand behind my bike while its running and stick my hands near the mufflers the left one blows out hot air and the right one blows much cooler air with less force. There is also some leakage from the exhaust joints beneath the engine. If you recall from my first post with the petcock problems these are the joints where fuel/oil were leaking from.
Xtreme Powersports' 2000 Honda Street Bike VTR1000F SUPER HAWK Parts List
If I had to guess I would say that I need to replace all the #6 on that part list. also I think the big leak is from the joint of #10 and #1. also the joint of #1 and #3 seem to be leaking.
any advise on removing the exhaust system?
should I buy every gasket on the list and replace them all?
Do I need to warm up the system before removing it?
Will this require allot of force?
should I remove the fairings
I do have a swingarm stand now so life should be easier, I know that swapping out the wiring harness was much easier with the stand.
Last edited by geekonamotorcycle; 04-02-2011 at 08:59 AM.
04-02-2011, 12:36 PM
#19
Senior Member
SuperSport
SuperSport
Thread Starter
Join Date: Jan 2011
Location: Tampa Florida
Posts: 521
Ok here is the video
YouTube - 04-02-11 the smell of exhaust is like the smell of sex, but with a bike.
and some pics


It was mentioned on another forum that these bolts and clamps may not be correct. Also the welds may be wrong. Do the clamps look out of place?


YouTube - 04-02-11 the smell of exhaust is like the smell of sex, but with a bike.
and some pics
It was mentioned on another forum that these bolts and clamps may not be correct. Also the welds may be wrong. Do the clamps look out of place?
04-02-2011, 02:53 PM
#20
Senior Member
SuperSport
SuperSport
Thread Starter
Join Date: Jan 2011
Location: Tampa Florida
Posts: 521
Here is a video of the pics from the harness removal
YouTube - 04-02-11 Exia's Wiring harness repair
YouTube - 04-02-11 Exia's Wiring harness repair
04-02-2011, 03:37 PM
#21
Senior Member
MotoGP
Join Date: Jul 2010
Location: Phoenix, AZ
Posts: 3,869
Pretty sure the welds are all correct
Looks like everything else may be off though- Starting with that last pic. I'm pretty sure the flange on the section of the pipe (the part that the clamp is around) is supposed to be up further- so that it covers that ring that's around the header. The ring kind of acts as a stop for the exhaust gasket.
Next pics- My exhaust has these flanges on both mid-pipes as well- looks like yours doesn't but I would guess that it would be better if they were pulled up to the rings as well. This may not be an issue at all though,
Lastly- that fourth pic from the bottom- is that a big crack in your exhaust that I see?
04-02-2011, 03:44 PM
#23
Senior Member
MotoGP
Join Date: Jul 2010
Location: Phoenix, AZ
Posts: 3,869
Mine's all under exhaust wrap and off the bike, so hard to take good pics. Everything's in the right spot, just replace the parts that you were mentioning in the other thread, and when you install, push those two sections of pipe in the rear exhaust header up so that the flange covers the stopper ring.

Thread
Thread Starter
Forum
Replies
Last Post


