Dash LED front lighting
 04-05-2016, 03:28 PM
#1
Administrator
MotoGP
Thread Starter

Join Date: Apr 2006
Location: Kempner, TX
Posts: 4,402

Dash LED front lighting
There are many posts and threads that discuss installing LED "bulbs" #194 style bulb in the 1998-1999 cluster or type 74 in the 2001 and later cluster.
The 2001 and later cluster gauge face is made from a red translucent plastic . In daylight the speedo face is white numbers & lines on black face.. At night the "light" turns the numbers & lines red against a black background. Add the smaller font used on the 2001 and up cluster, and for my 50 year old year's reading the speedo at night was all but impossible without really focusing for an extended period of time to "read" it.. actually i think my mind was just deducing what the blob blurry position on the face indicated..
Adding Cool white, blue, red, green and warm white type 74 LEd's did not help the issue ( I tried all of those one at a time.)
So I decided to light the gauge face from the front.
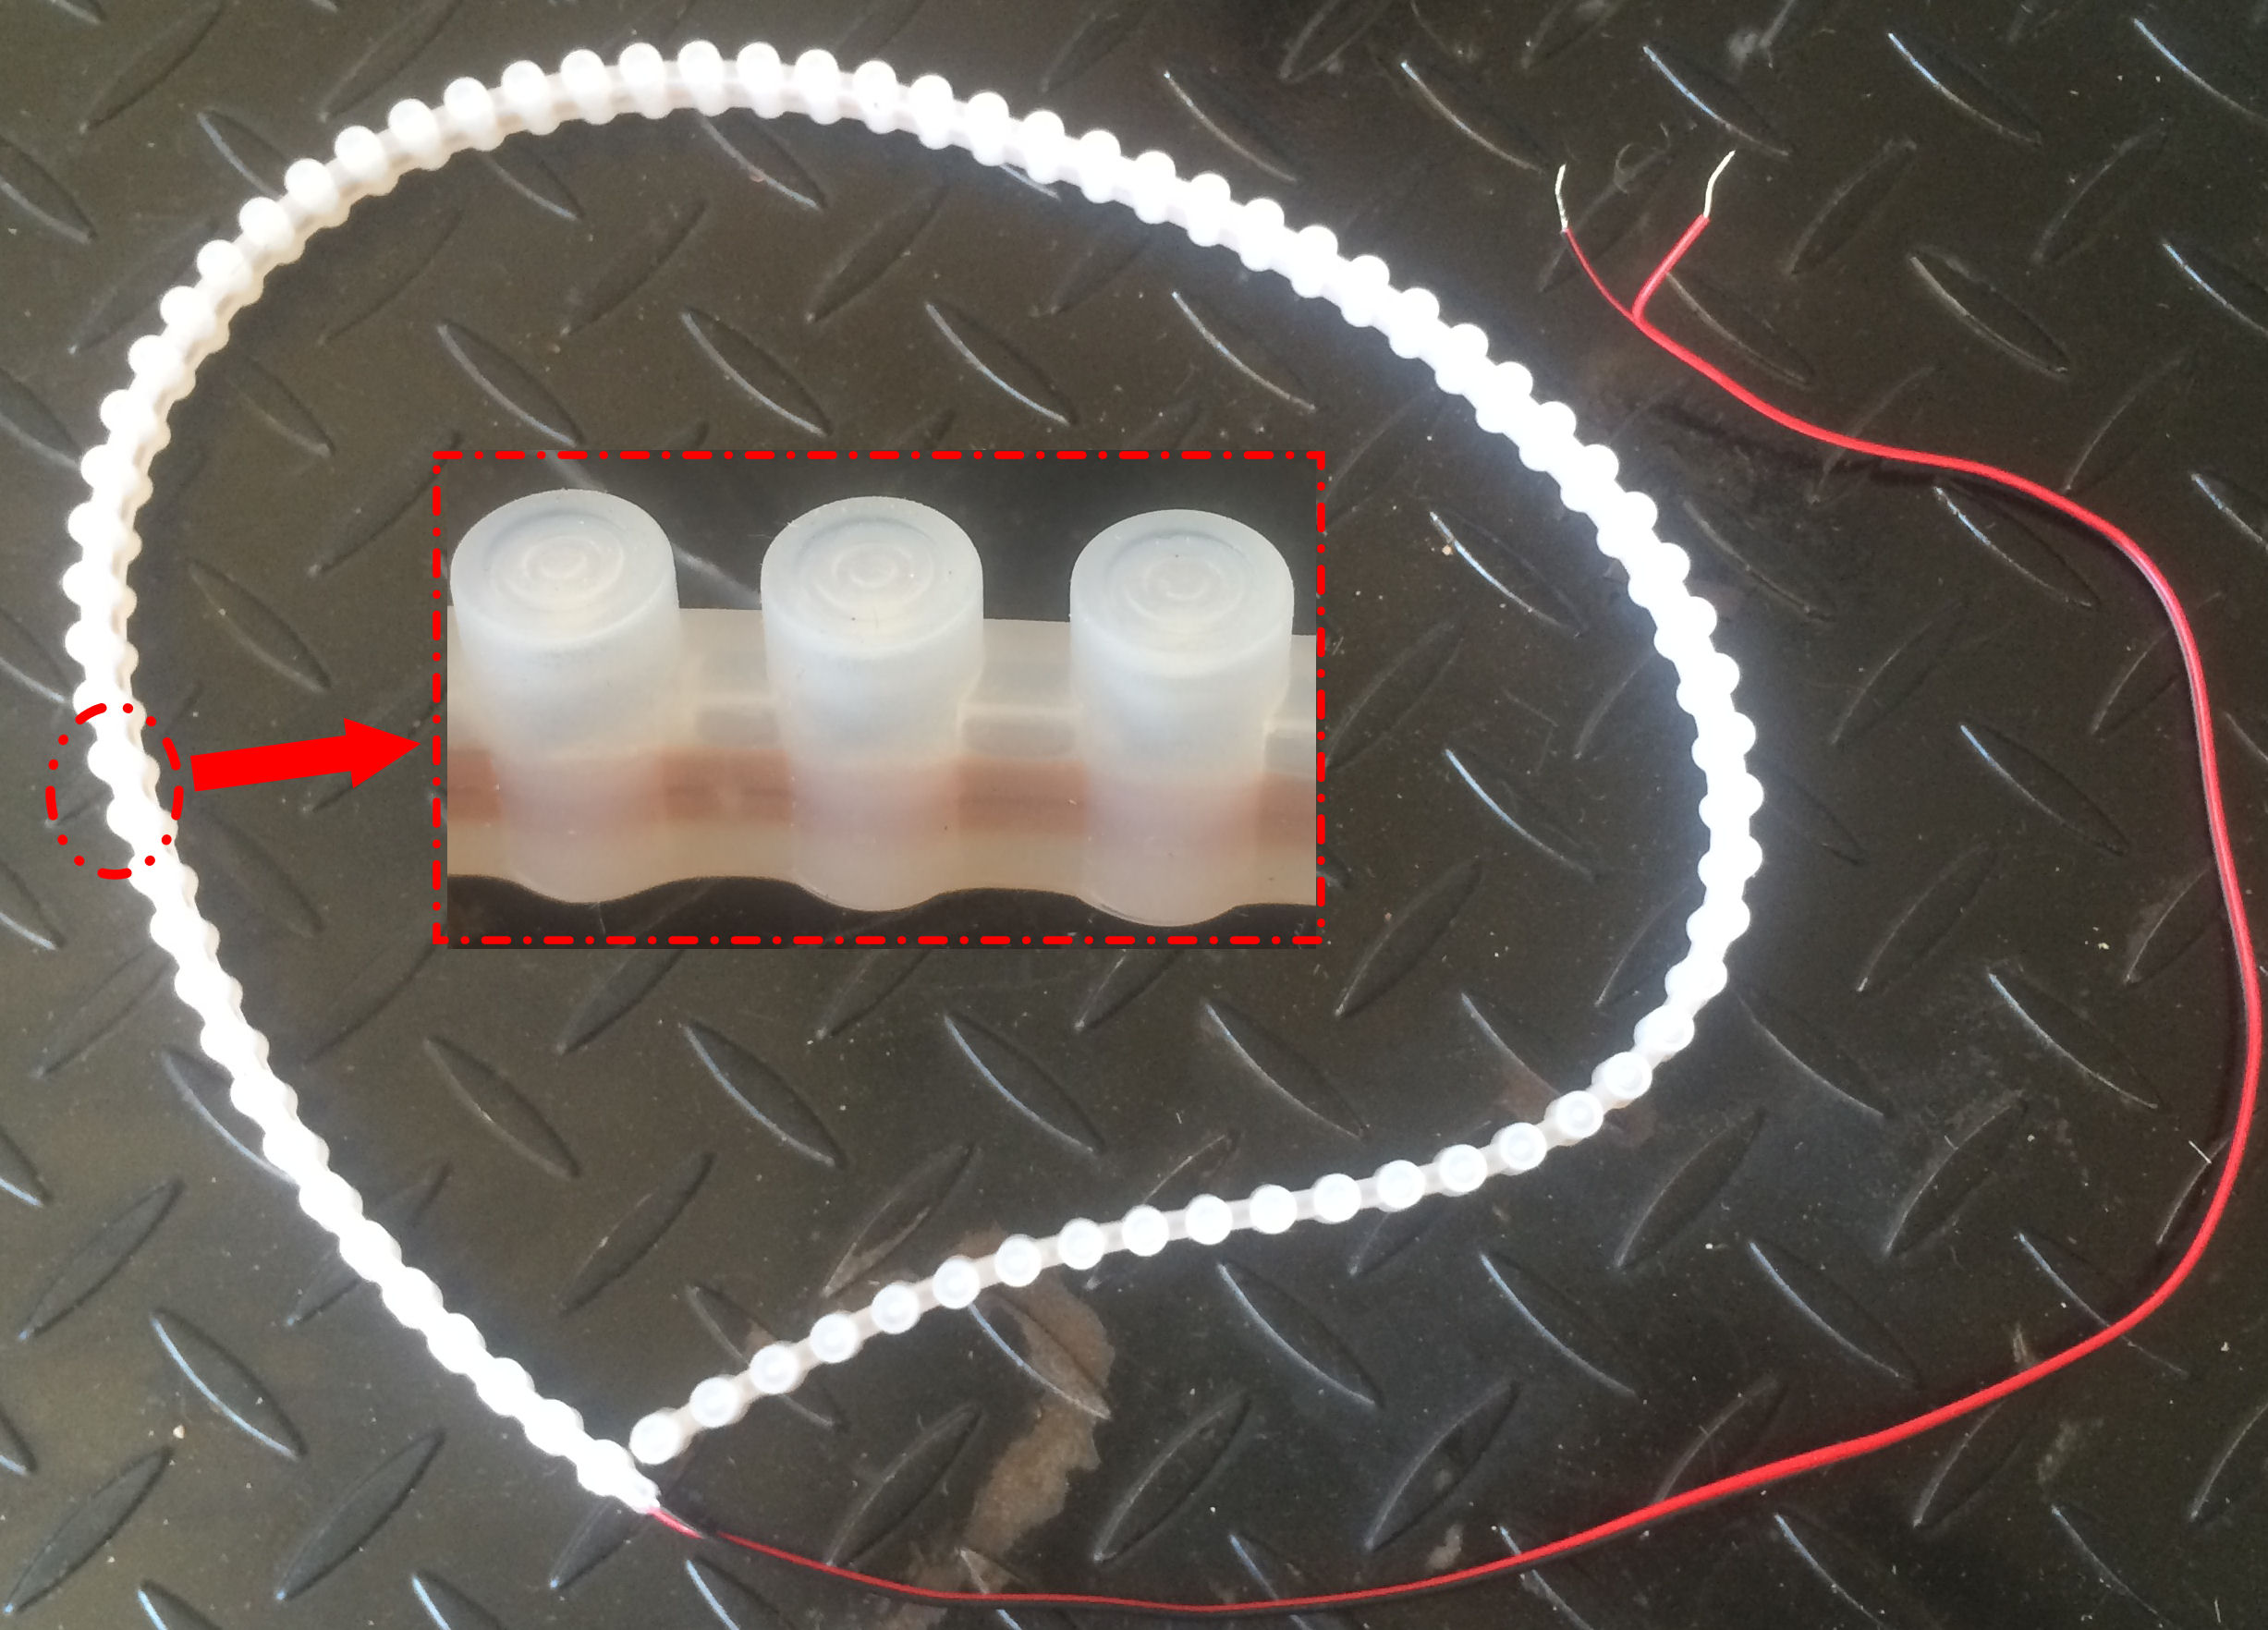
Superbright LED provided the top lit LEd embedded in soft silicone. The string came in a 1 meter strip.. that can be cut down in to 3 LED segments as needed.
https://www.superbrightleds.com/more...p-led/123/544/
I also purchased a dimmer light pattern controller https://www.superbrightleds.com/more...mer/1082/2573/

As I was pretty sure full brightness would be too much....and it was.
The gauge cover came off, and a gap and recess was available to fit the LED strip into... leaving it to sit between the cover and face of gauge.
The Silicone is there as a water proof covering..it proved to be too large overall to fit in the space..As I did not need the silicone for waterproofing, but just to make the LEDs a snug fit and hold them in place.. I trimmed the silicone off the top and bottom of the LED strip i used (12 LEDs in all, or 4 segments of 3 LED's )
The LED power exits the housing at the bottom, goes over to the left fairing stay and is wired to a dimmer for now. Once I settle on the right power setting I will move the dimmer to an out of view location. The Selected dimmer setting is the default at every power on.
I have a European left switch assembly, meaning I have a headlight power switch as OEM. My LED's are wired into that circuit so are only on when the headlight is on.
Very blurry pic taken this morning with crappy cell phone camera . This is headlight and LED's off.
But factory gauge lights on (superbright LED cool white LED type 74 are installed)

This one is with the headlight and LED's on

And a closer view
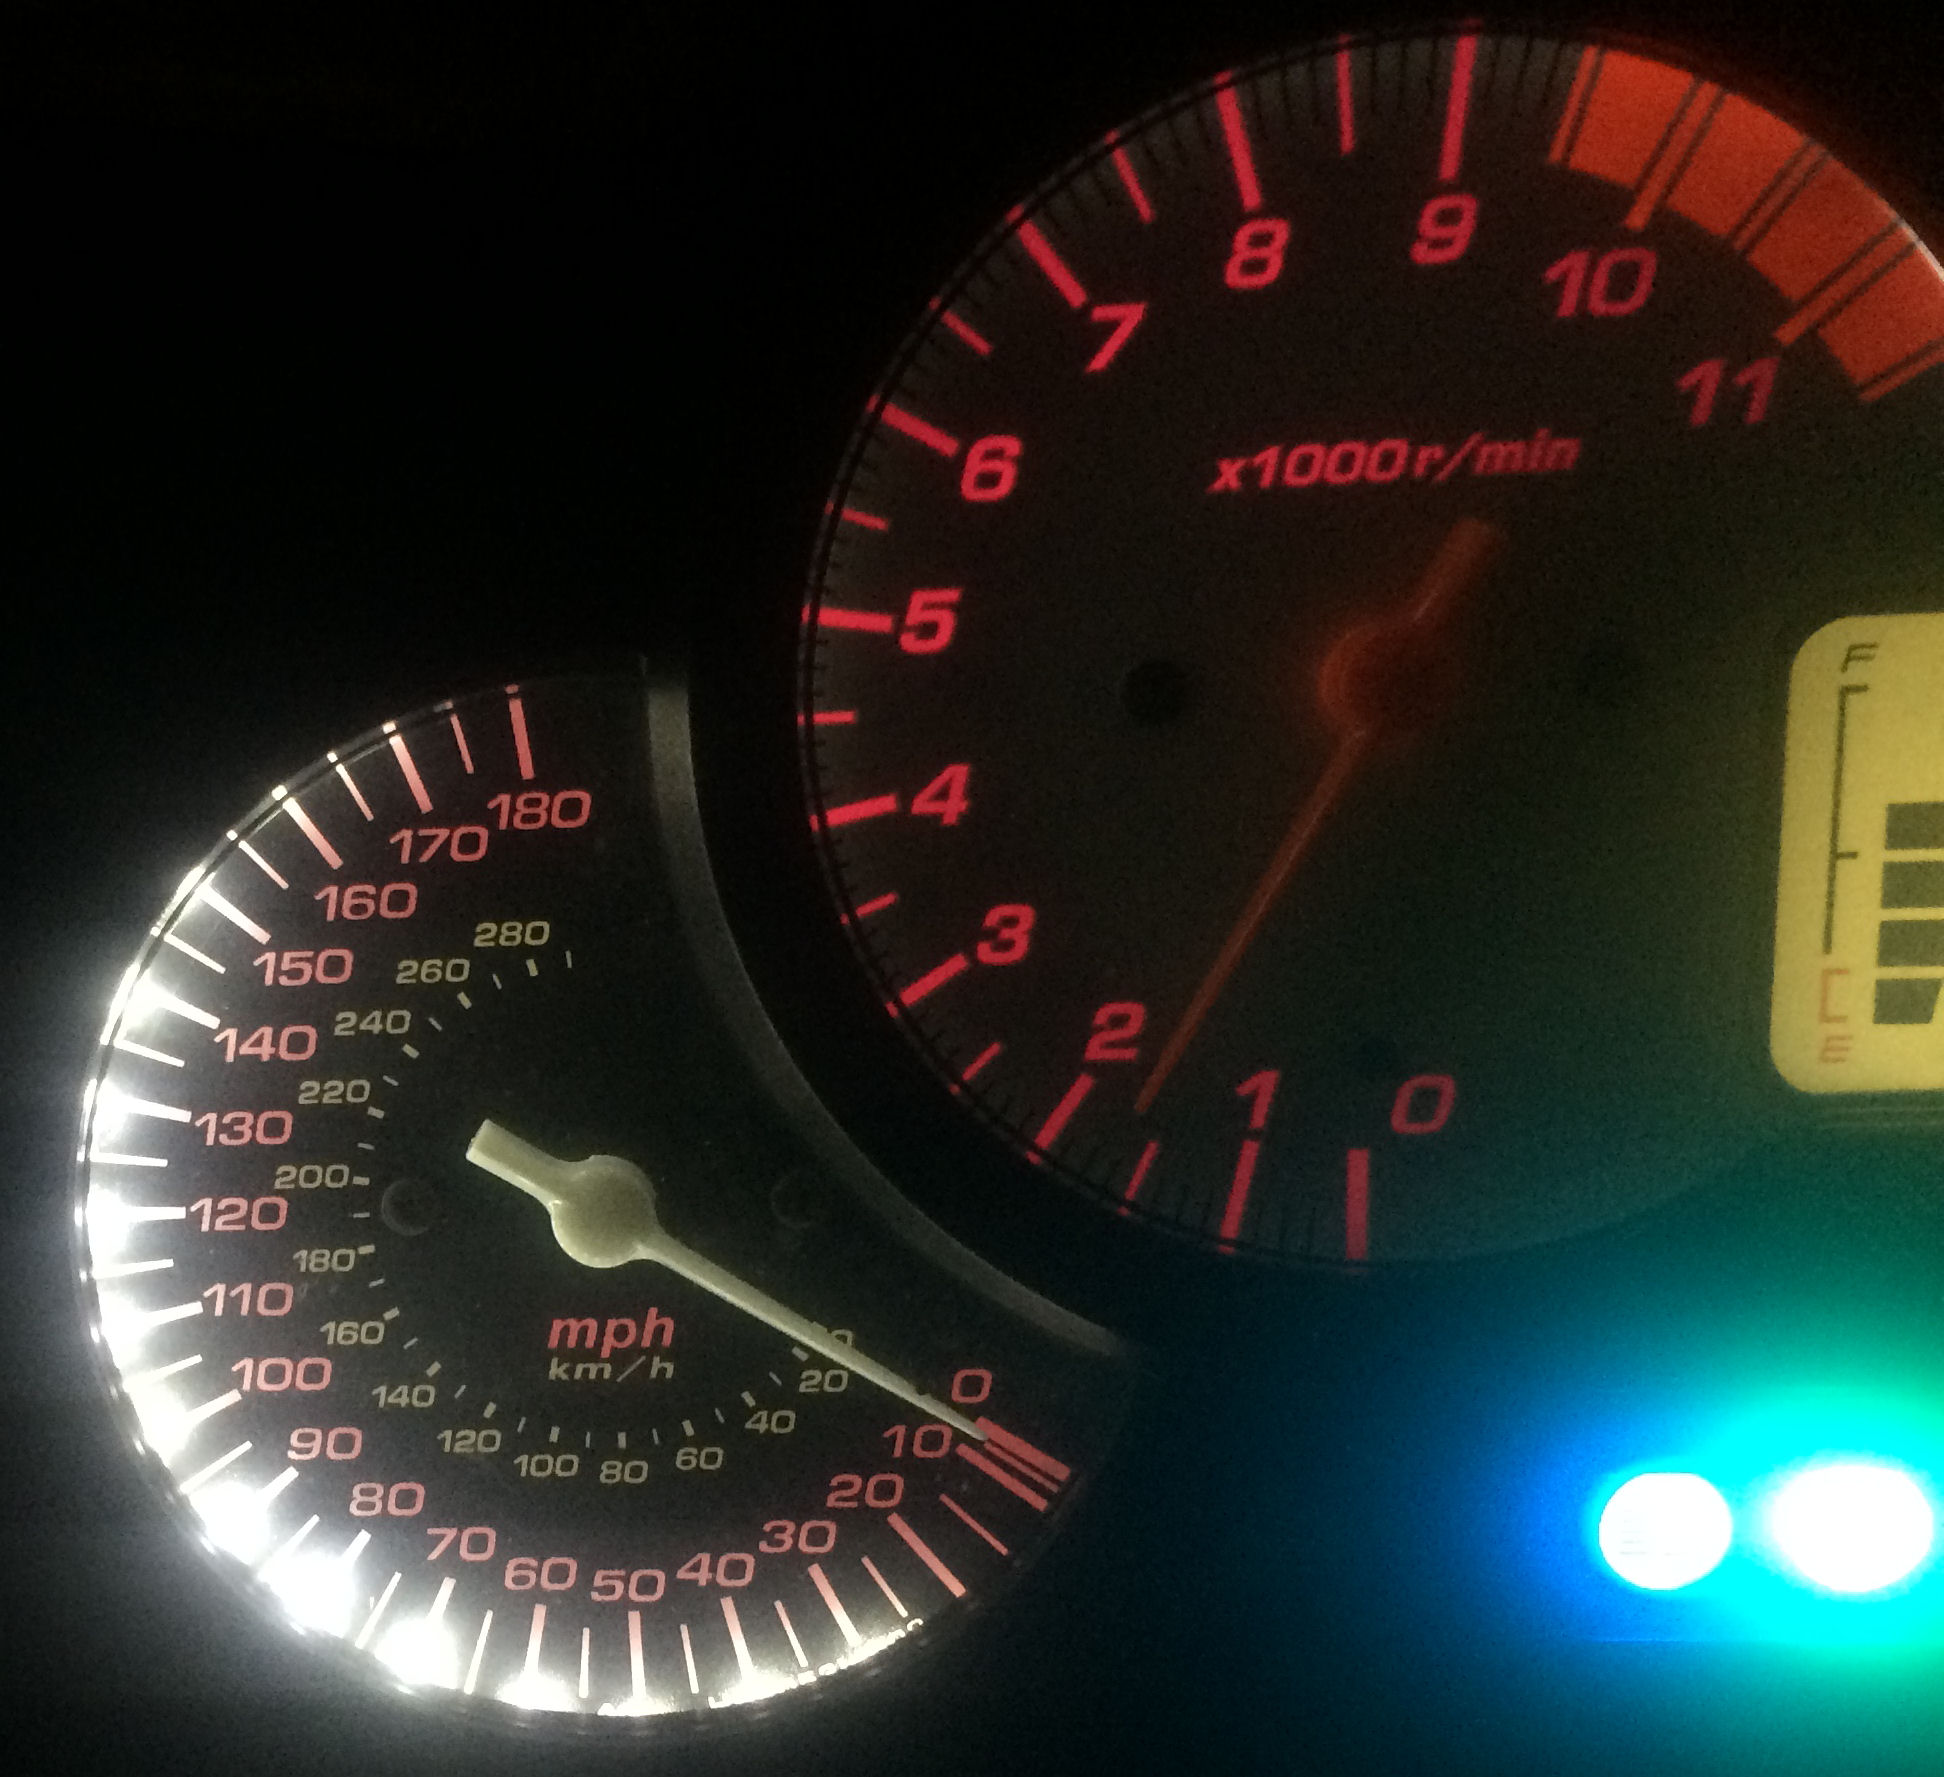
$28 and an hours time took this cluster from unusable (for me) at night to a perfect set up for me.
The 2001 and later cluster gauge face is made from a red translucent plastic . In daylight the speedo face is white numbers & lines on black face.. At night the "light" turns the numbers & lines red against a black background. Add the smaller font used on the 2001 and up cluster, and for my 50 year old year's reading the speedo at night was all but impossible without really focusing for an extended period of time to "read" it.. actually i think my mind was just deducing what the blob blurry position on the face indicated..
Adding Cool white, blue, red, green and warm white type 74 LEd's did not help the issue ( I tried all of those one at a time.)
So I decided to light the gauge face from the front.
Superbright LED provided the top lit LEd embedded in soft silicone. The string came in a 1 meter strip.. that can be cut down in to 3 LED segments as needed.
https://www.superbrightleds.com/more...p-led/123/544/
I also purchased a dimmer light pattern controller https://www.superbrightleds.com/more...mer/1082/2573/
As I was pretty sure full brightness would be too much....and it was.
The gauge cover came off, and a gap and recess was available to fit the LED strip into... leaving it to sit between the cover and face of gauge.
The Silicone is there as a water proof covering..it proved to be too large overall to fit in the space..As I did not need the silicone for waterproofing, but just to make the LEDs a snug fit and hold them in place.. I trimmed the silicone off the top and bottom of the LED strip i used (12 LEDs in all, or 4 segments of 3 LED's )
The LED power exits the housing at the bottom, goes over to the left fairing stay and is wired to a dimmer for now. Once I settle on the right power setting I will move the dimmer to an out of view location. The Selected dimmer setting is the default at every power on.
I have a European left switch assembly, meaning I have a headlight power switch as OEM. My LED's are wired into that circuit so are only on when the headlight is on.
Very blurry pic taken this morning with crappy cell phone camera . This is headlight and LED's off.
But factory gauge lights on (superbright LED cool white LED type 74 are installed)
This one is with the headlight and LED's on
And a closer view
$28 and an hours time took this cluster from unusable (for me) at night to a perfect set up for me.
 10-02-2016, 01:58 PM
#2
Junior Member
Squid

Join Date: Sep 2016
Location: Bloomington, IN
Posts: 28
That is really cool.
That is something that I would do. I am an older guy who can't see so well anymore. Upon purchasing the bike I notice I can barely see the MPH.
This looks like a great solution.
That is something that I would do. I am an older guy who can't see so well anymore. Upon purchasing the bike I notice I can barely see the MPH.
This looks like a great solution.
 10-09-2016, 10:24 AM
#4
Administrator
MotoGP
Thread Starter
Join Date: Apr 2006
Location: Kempner, TX
Posts: 4,402
Im glad it worked for you.
I tried white LED and Red LED in the stock positions... for me it did not illuminate the gage face in a useable way. I concluded after several attempts, backlighting a red translucent gage face with black overlay was not going to work for me. So I lit it from the front
I tried white LED and Red LED in the stock positions... for me it did not illuminate the gage face in a useable way. I concluded after several attempts, backlighting a red translucent gage face with black overlay was not going to work for me. So I lit it from the front

Thread
Thread Starter
Forum
Replies
Last Post
j shizzy wizzy
Modifications - Cosmetic
3
08-10-2013 04:00 PM


