Scottiemann goes streetfighter

 08-01-2015, 11:27 AM
#393

I'm not a fan of clip-type links for street use at all. I've seen them fail lol. At least you've got the clip facing the proper direction to minimize the risk. I always do rivet type on every bike I do.
 08-01-2015, 10:21 PM
#395
Senior Member
SuperBike
Join Date: Jul 2011
Location: South of Live Free or Die & North of Family Guy
Posts: 1,456

Same here Scottie, seen several times what happen to Kenmoore and another rare time a chain that rapped around the rear sprocket and in between the sprocket and the swingarm and locked the wheel, lucky the guy was just playing in a parking lot, imagine this on high speed.... hell no, split link... not a good idea with any big bike
08-02-2015, 05:07 AM
#396
Senior Member
SuperBike
Thread Starter
Join Date: Feb 2007
Location: boston
Posts: 1,252
Damnit guys!!! lol
For the past 9 years I've probably had 4 different chains on this bike, all using clip-type links, never a problem and I ride hard...
Now you got me all paranoid haha I'll get a rivet link ordered tonight
For the past 9 years I've probably had 4 different chains on this bike, all using clip-type links, never a problem and I ride hard...
Now you got me all paranoid haha I'll get a rivet link ordered tonight
08-03-2015, 06:28 PM
#397
Senior Member
SuperBike
Thread Starter
Join Date: Feb 2007
Location: boston
Posts: 1,252
Alright so I havent had an update in about a week since work has beat me up to the point of being physically inable to, school, son, girlfriend etc....
however, stainless hardware and aluminum plate came in so I have all the engine covers permanently mounted. Today the piston for my rear caliper came in so I cleaned up my pads and hardware and got the rear caliper mounted. My new pretty levers came in today as well, and they look good! gonna get those mounted however because no one would seperate sets of levers for me and the fact that the CBR and VTR clutch look EXTREMELY similar I'm going to see if I can get these work with little to no modifcation of the lever itself... If not these were $45 for the set so another $45 gets me the VTR set and they are pretty damn quick with shipping.
Now just gotta get my bleeders mounted, lines mounted, filled and bled and the brakes are done.
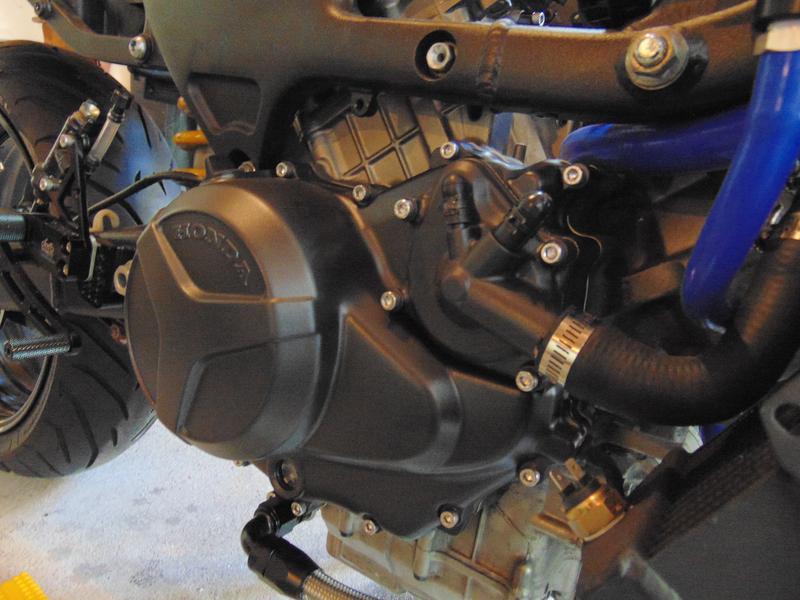
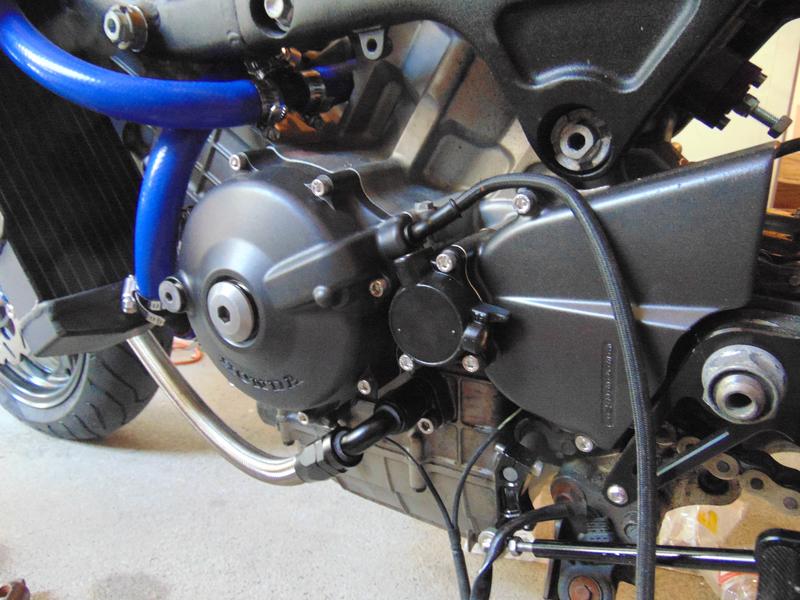
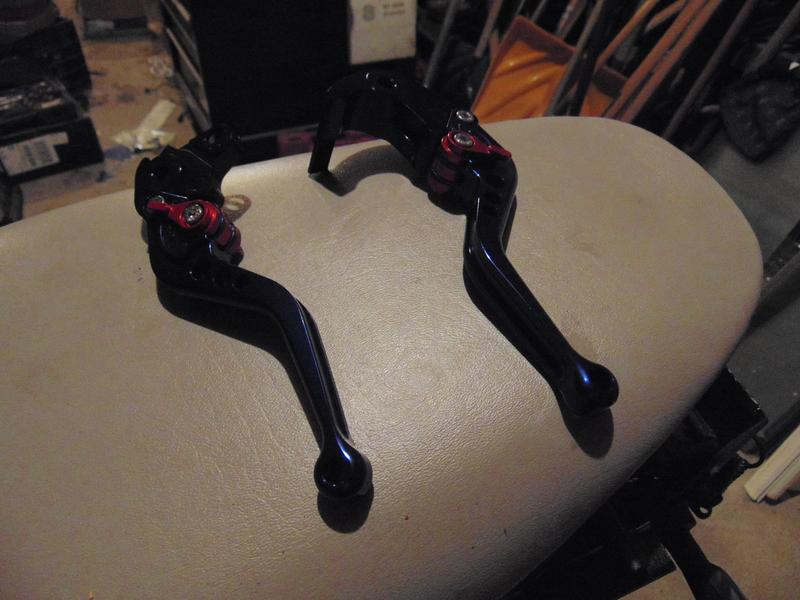
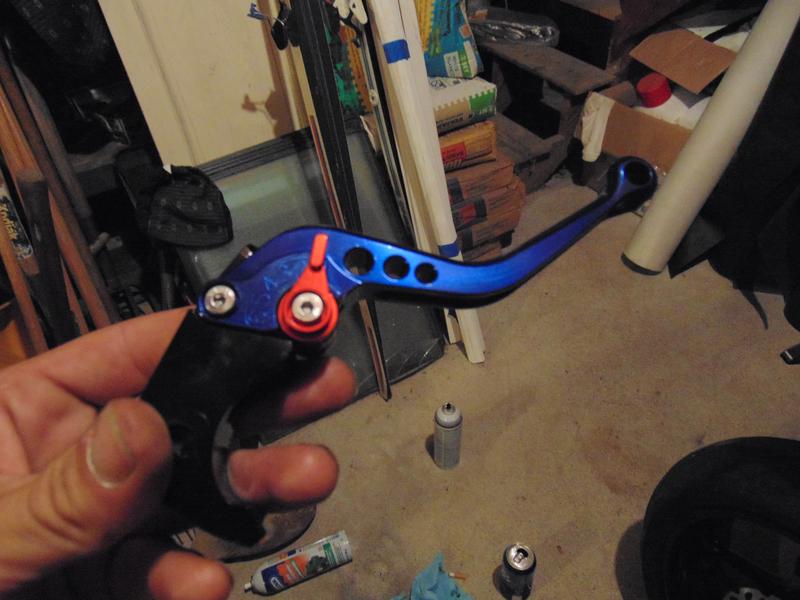
08-04-2015, 05:28 AM
#400
Senior Member
SuperBike
Thread Starter
Join Date: Feb 2007
Location: boston
Posts: 1,252
Inspiration? More like desperate motivation lol
And Ill put some body on it when I finally get around to wetsanding and buffing, still need to paint the tail though, its in real rough shape but I dont care...
And Ill put some body on it when I finally get around to wetsanding and buffing, still need to paint the tail though, its in real rough shape but I dont care...
08-04-2015, 10:50 AM
#401
Senior Member
SuperBike
Thread Starter
Join Date: Feb 2007
Location: boston
Posts: 1,252
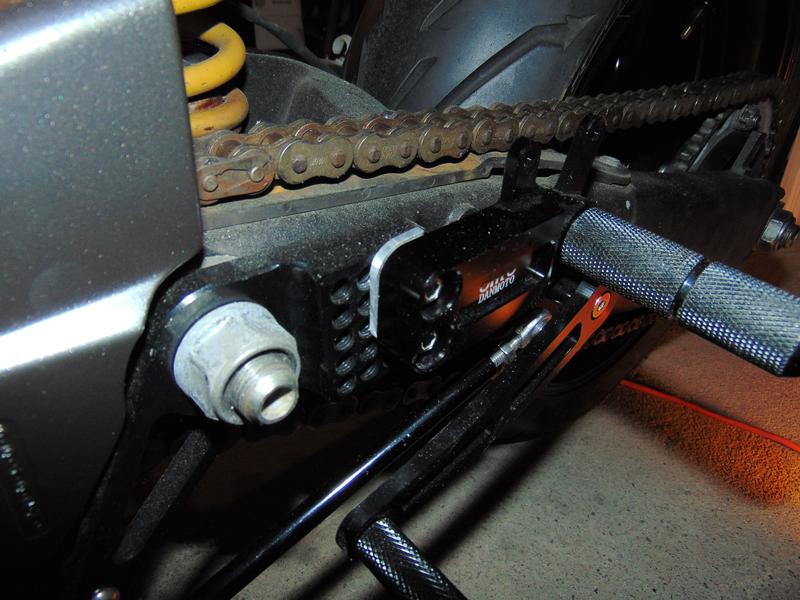
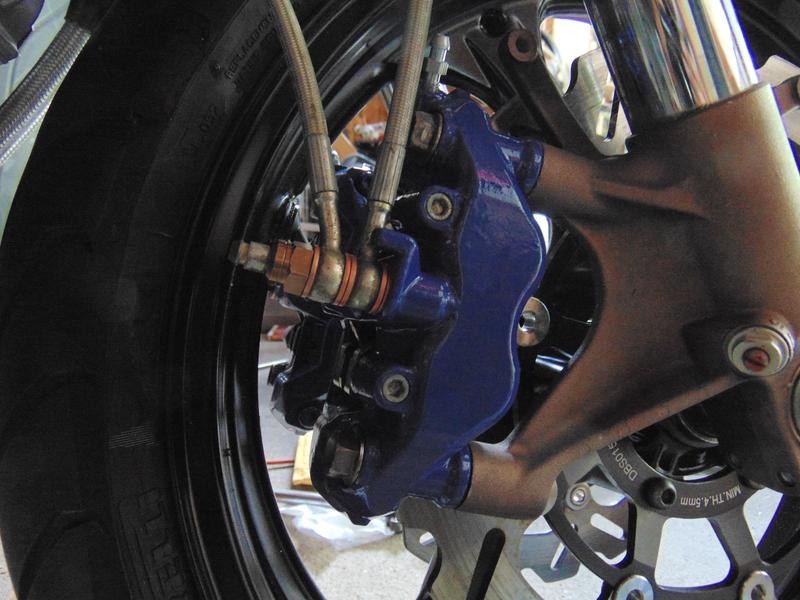
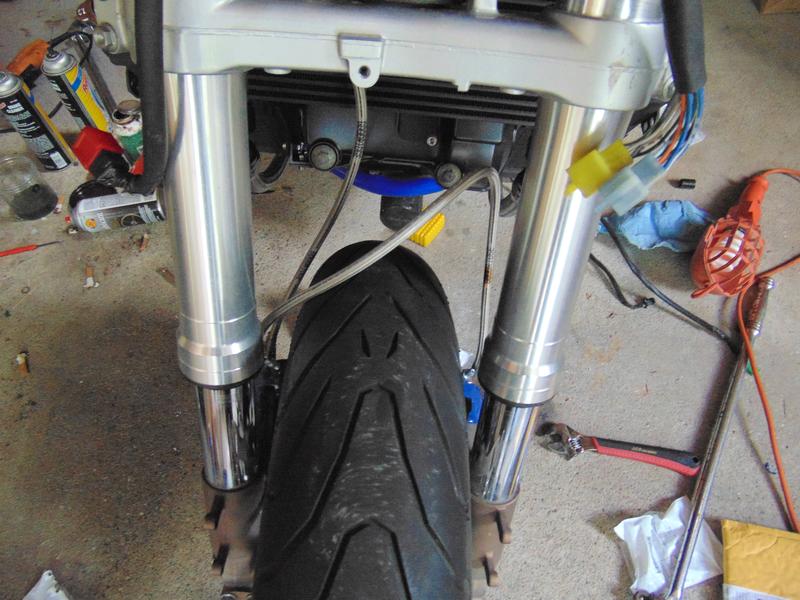
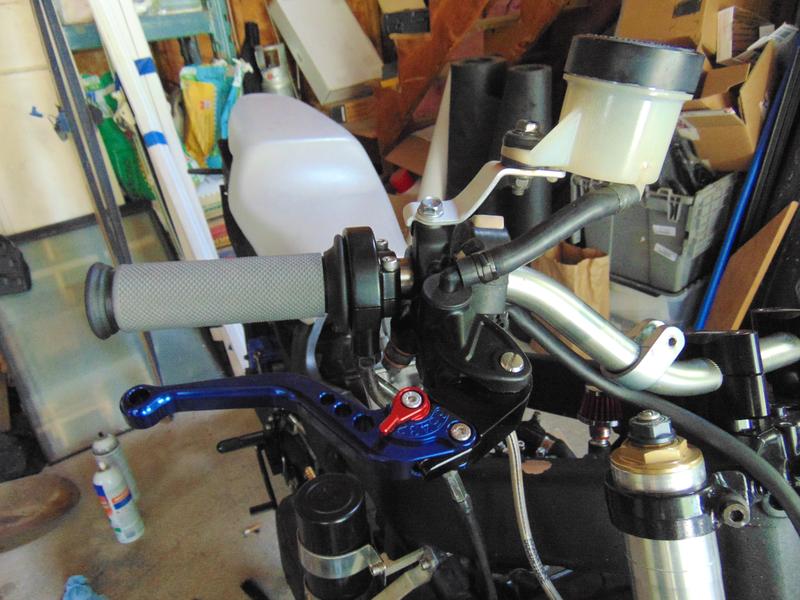
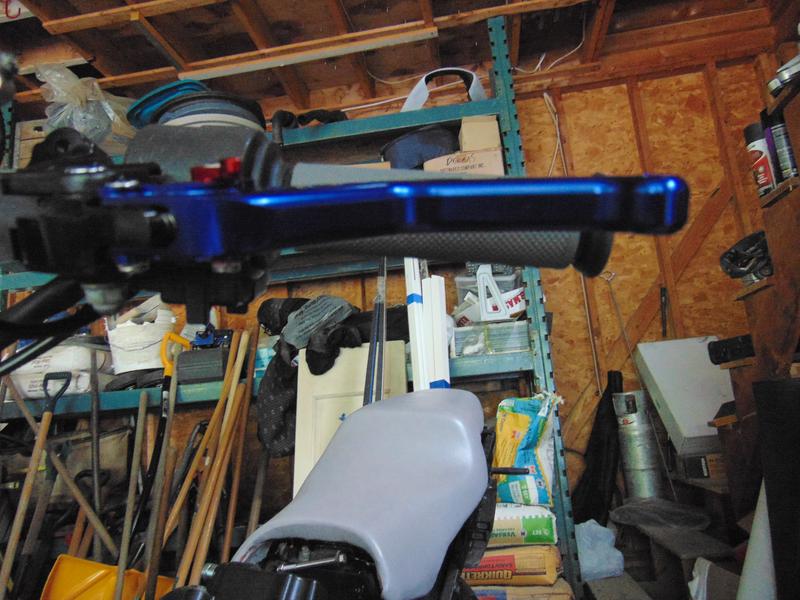
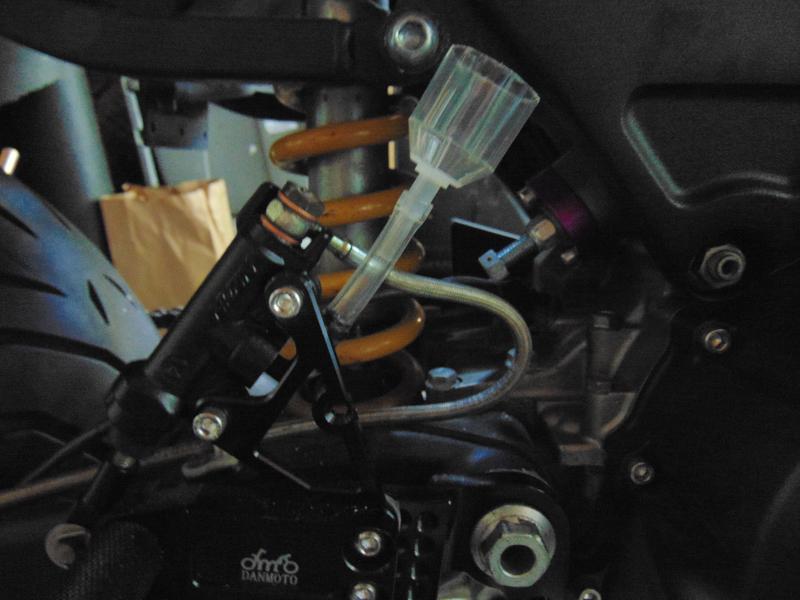
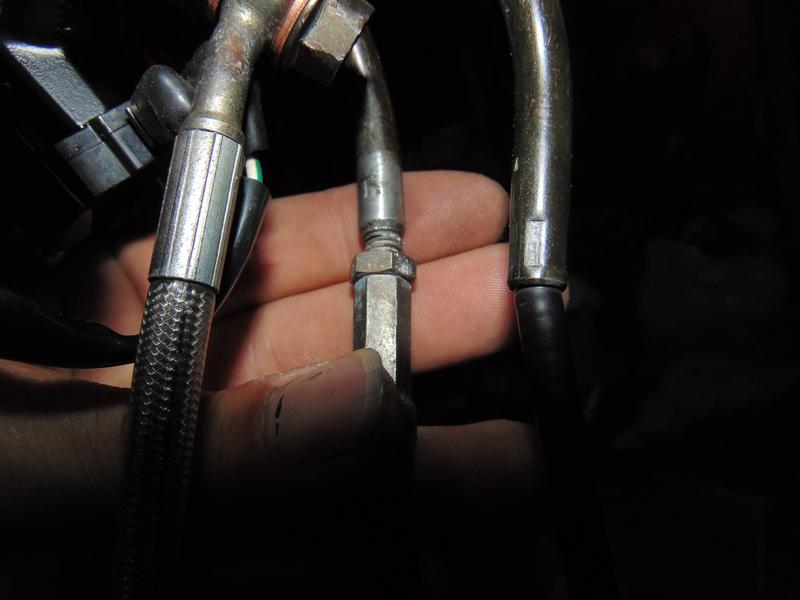
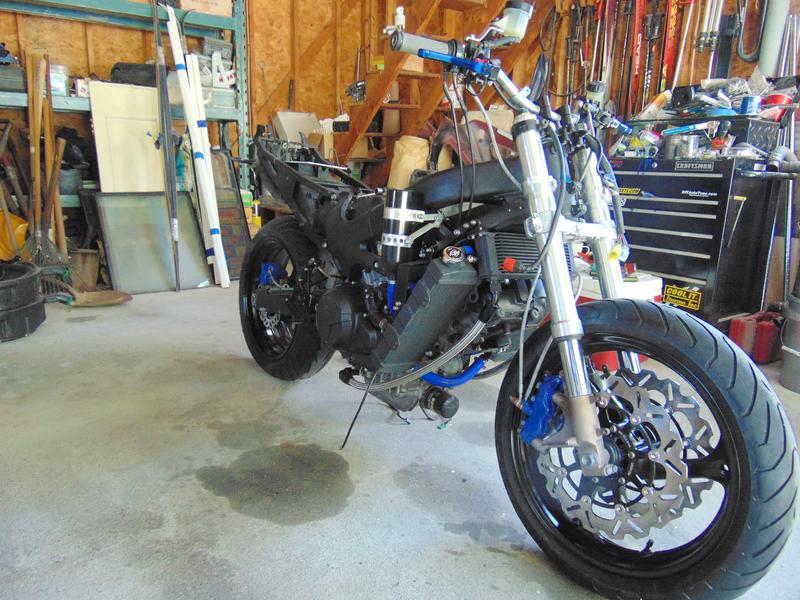
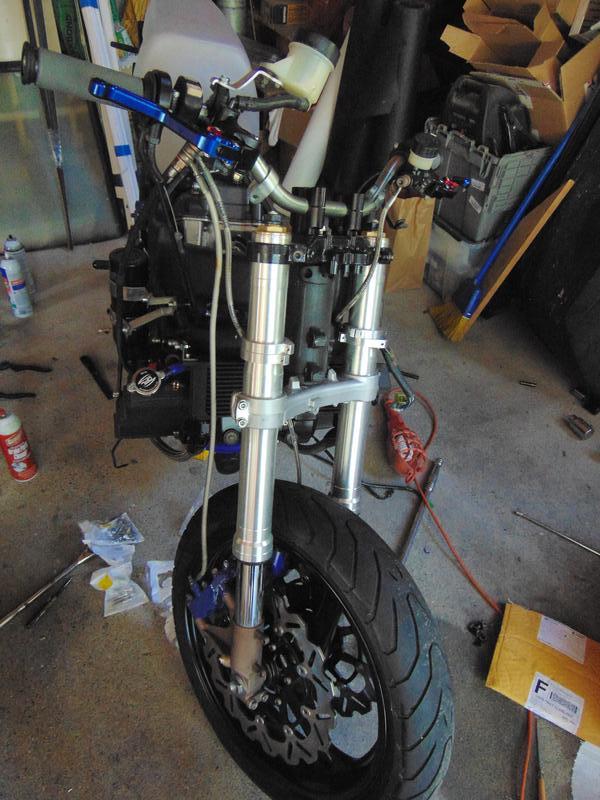
Alright, got the day off today so Im slowly getting work done... these front brakes, levers and controls are taking a while just because I've had to move them dismount them etc... pics will tell the story
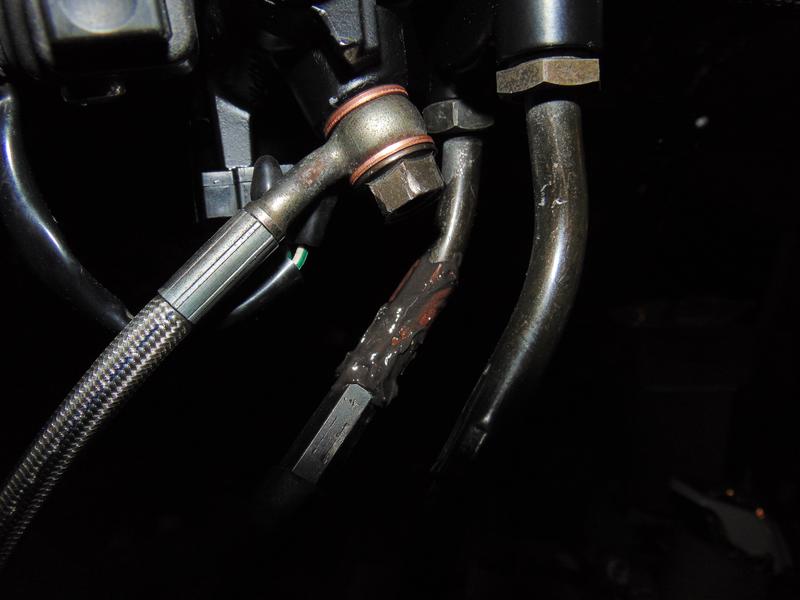
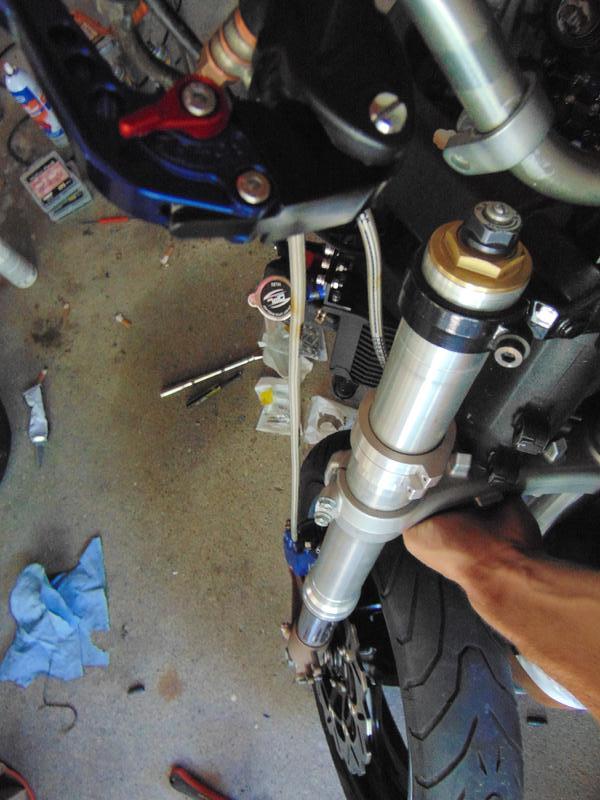
Well when I first mounted up the lines how I had them with clip-ons(double banjo at M/C) it looked like it was going to work barely but when I lifted the front end off the ground I could play the short line like a bass guitar.
RXLSsqt.jpg?1
Vv3n4wm.jpg?1
So I remove them and hooked the double banjo on the right side which leaves plenty of slack, once I get the fender on I should be able to get rid of that awkward bend in the line
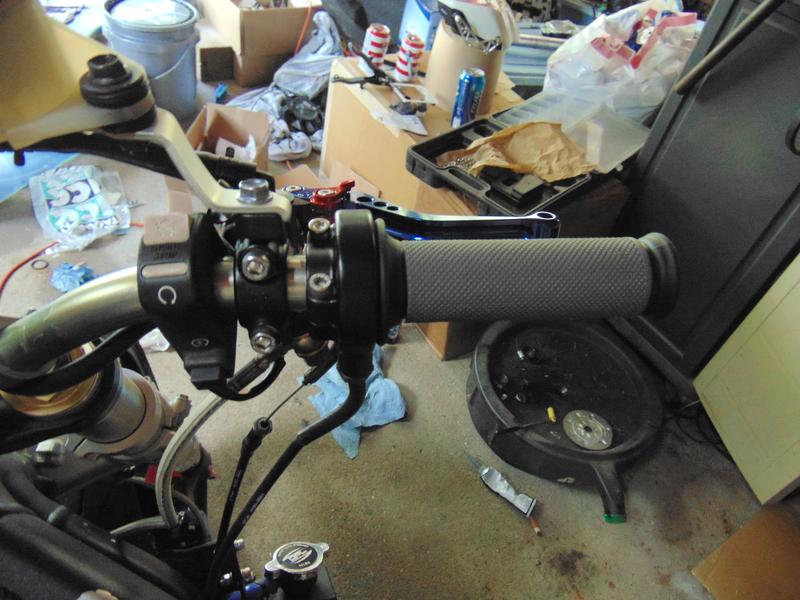
For the brake side setup I had to swap the electronics and M/C to get the right mounting for the lever that felt good to me
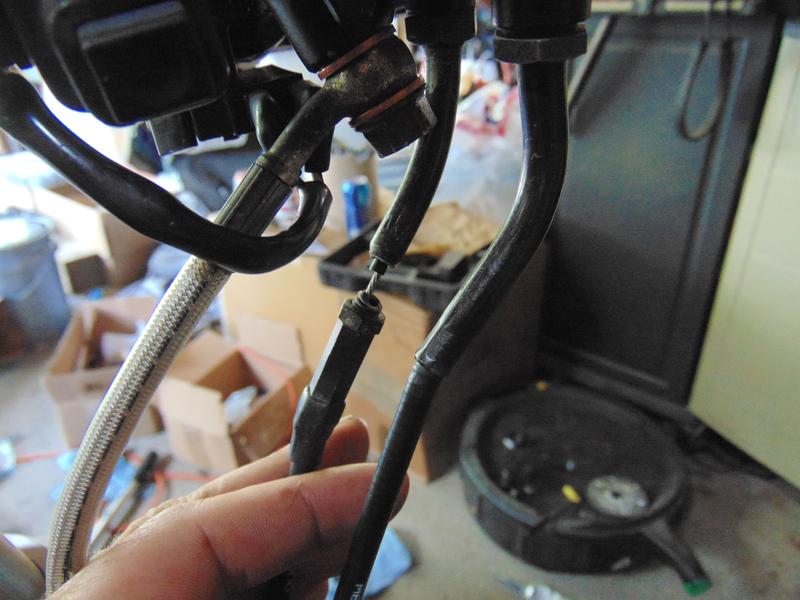
and yea that happened when I was bending the throttle fittings down farther, not sure what I'm going to do about that yet
As for the clutch side I had to push the lever as far as I could towards the forks in order to get a good lever setup, however it is just starting to hit the bend on the handlebar which is putting a slight angle on it, doesnt seem like it will bother me but I'll have to find out once I start riding it
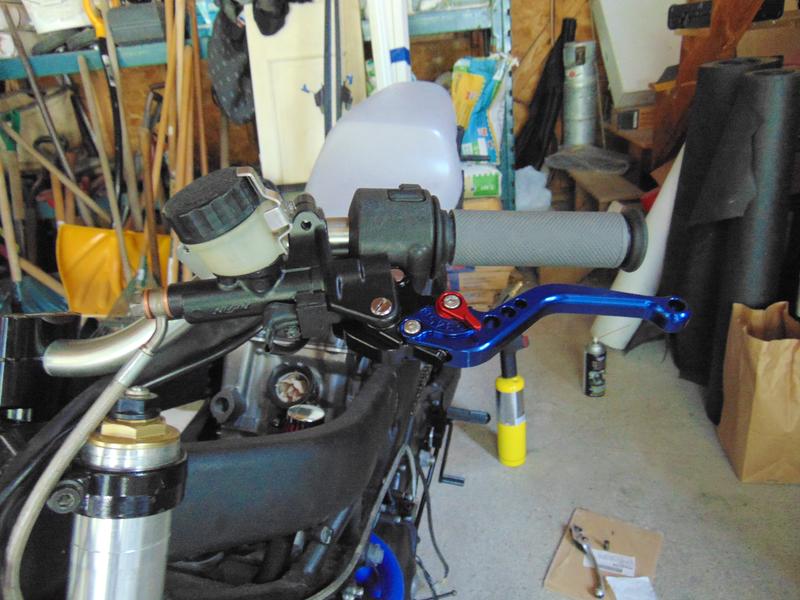
and the whole setup
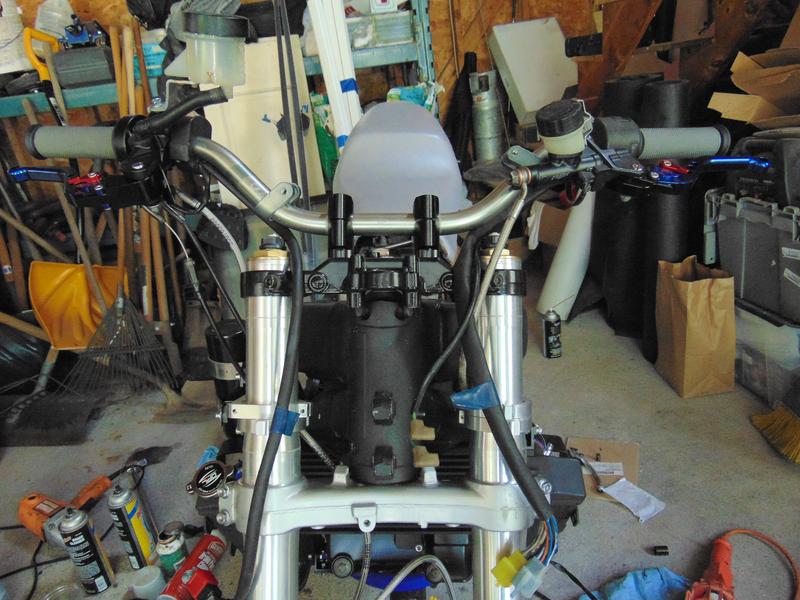
just gotta double check all clearances, crank down the banjos, clean up and install the bleeders, then fill/bleed and brakes are done
Well when I first mounted up the lines how I had them with clip-ons(double banjo at M/C) it looked like it was going to work barely but when I lifted the front end off the ground I could play the short line like a bass guitar.
RXLSsqt.jpg?1
Vv3n4wm.jpg?1
So I remove them and hooked the double banjo on the right side which leaves plenty of slack, once I get the fender on I should be able to get rid of that awkward bend in the line
For the brake side setup I had to swap the electronics and M/C to get the right mounting for the lever that felt good to me
and yea that happened when I was bending the throttle fittings down farther, not sure what I'm going to do about that yet
As for the clutch side I had to push the lever as far as I could towards the forks in order to get a good lever setup, however it is just starting to hit the bend on the handlebar which is putting a slight angle on it, doesnt seem like it will bother me but I'll have to find out once I start riding it
and the whole setup
just gotta double check all clearances, crank down the banjos, clean up and install the bleeders, then fill/bleed and brakes are done
08-04-2015, 04:42 PM
#402
Senior Member
SuperBike
Thread Starter
Join Date: Feb 2007
Location: boston
Posts: 1,252
So for those of you questioning the bleeding procedures of James' HRC style res delete kits, I found this at the store for a couple bucks, cut the top off, cleaned up the edges with a knife, and voila mini funnel
08-04-2015, 04:48 PM
#403
Senior Member
SuperBike
Thread Starter
Join Date: Feb 2007
Location: boston
Posts: 1,252
So rear brakes bled, front brakes bled...i think... god I ****** hate CBR front brakes, it doesnt feel bled when you pull in the lever but every bleeder nipple has been bled many times with absolutely no air, and when I roll the bke forward and back and grab the lever it grabs HARD, guess I'll just have to see if theres any issues while riding... and clutch was bled til I realized the slave is leaking
theres always something...
theres always something...
08-04-2015, 05:35 PM
#404
Senior Member
SuperBike
Thread Starter
Join Date: Feb 2007
Location: boston
Posts: 1,252
working on fixing the throttle cable guide now, pics to follow, then investigating the clutch slave leak. Pretty sure I know what the dealio is with that though... then to get the carbs back together and mounted and then finally electrical
08-04-2015, 06:22 PM
#405
Senior Member
SuperBike
Thread Starter
Join Date: Feb 2007
Location: boston
Posts: 1,252
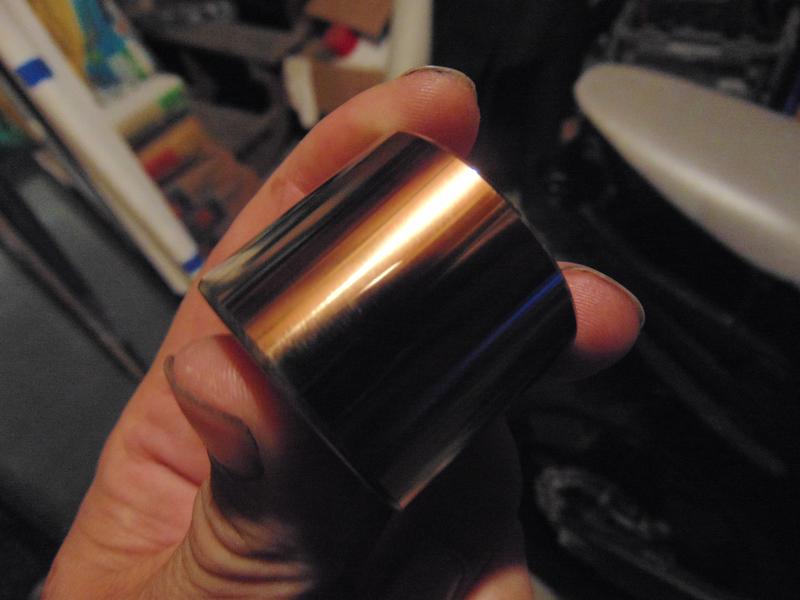
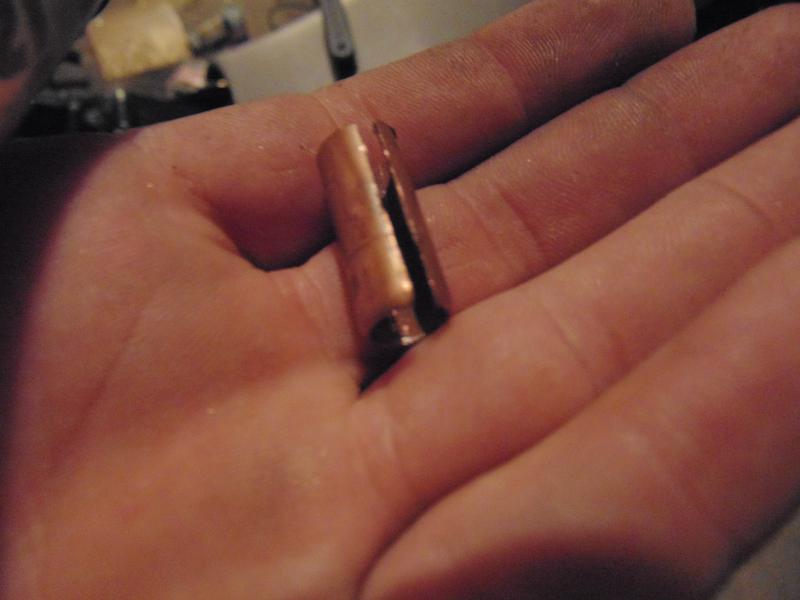
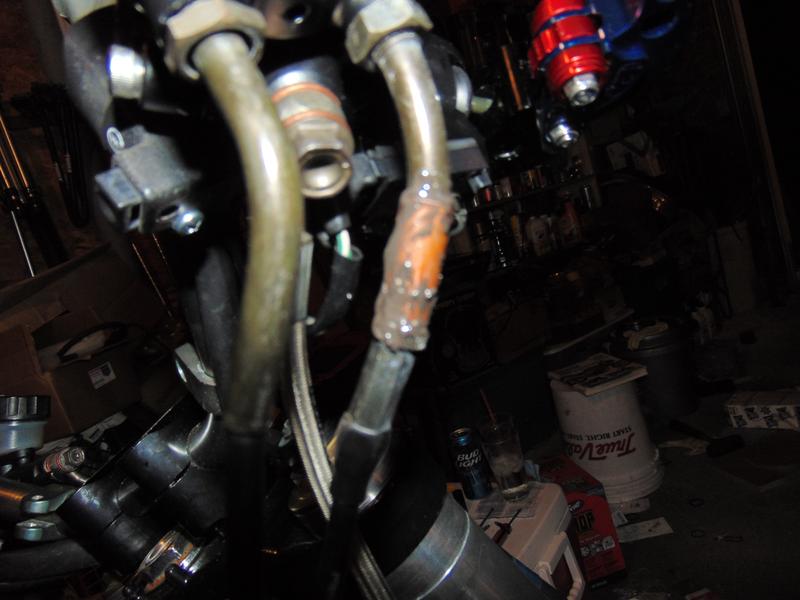
So for the the throttle cable guide I decided to sleave and jb weld it, cleaned up the area with 220 grit, cut a small section of copper tubing I had laying around and put a slit in it, mixed up some jb weld smeared some on the guide before I slipped the sleave on then smeared some jb weld on the nut side and pushed it in the sleave. smeared jb weld into the slit and all seams, here, there and everywhere and held it in place to set up. gonna clean it up tomorrow once its fully cured.
The only problem is-is that I forgot to put my drink next to me so it was a pretty ****** boring couple a minutes waiting for it to set up
The only problem is-is that I forgot to put my drink next to me so it was a pretty ****** boring couple a minutes waiting for it to set up
 08-04-2015, 07:33 PM
#408
Senior Member
SuperBike
Thread Starter
Join Date: Feb 2007
Location: boston
Posts: 1,252
why not just buy a ducati 1198 and be done with it...
I fix the fixable, plus I cant wait for that **** to come in, I'm getting the carbs completely mounted tonight and going to start the electrical tomorrow... plus I dont want to spend anymore money on this build then I have to at this moment. Once its rideable then the random bits and bobs will commence
I fix the fixable, plus I cant wait for that **** to come in, I'm getting the carbs completely mounted tonight and going to start the electrical tomorrow... plus I dont want to spend anymore money on this build then I have to at this moment. Once its rideable then the random bits and bobs will commence
08-04-2015, 08:07 PM
#410
Senior Member
SuperBike
Thread Starter
Join Date: Feb 2007
Location: boston
Posts: 1,252
BTW the rear carb diaphragm cover for years and to this day is the hardest thing to install on this bike period....takes a heat gun, stretching, heat gun stretching.... many failed attempts etc
08-04-2015, 11:47 PM
#413
Senior Member
SuperSport
Join Date: Apr 2014
Location: Auckland, new Zealand
Posts: 932
 08-05-2015, 05:20 AM
#416
Senior Member
SuperBike
Thread Starter
Join Date: Feb 2007
Location: boston
Posts: 1,252
Yea the problem with the rear diaphragm is that the seal doesnt reach all the way around, almost like it shrunk, so I have to take a heat gun heat it up and stretch it with my hands before it will even seat in the groove... the front diaphragm is fine
And yea the choke fitting I was hand screwing it in and I didnt even get half way through the threads and pop... went on paypal right after and sent jack some money
And yea the choke fitting I was hand screwing it in and I didnt even get half way through the threads and pop... went on paypal right after and sent jack some money
08-05-2015, 04:21 PM
#417
Senior Member
SuperBike
Thread Starter
Join Date: Feb 2007
Location: boston
Posts: 1,252
alright so got the day off again, not sure how that happened, if it happens again this week I'm gonna have to dip into my sick days...
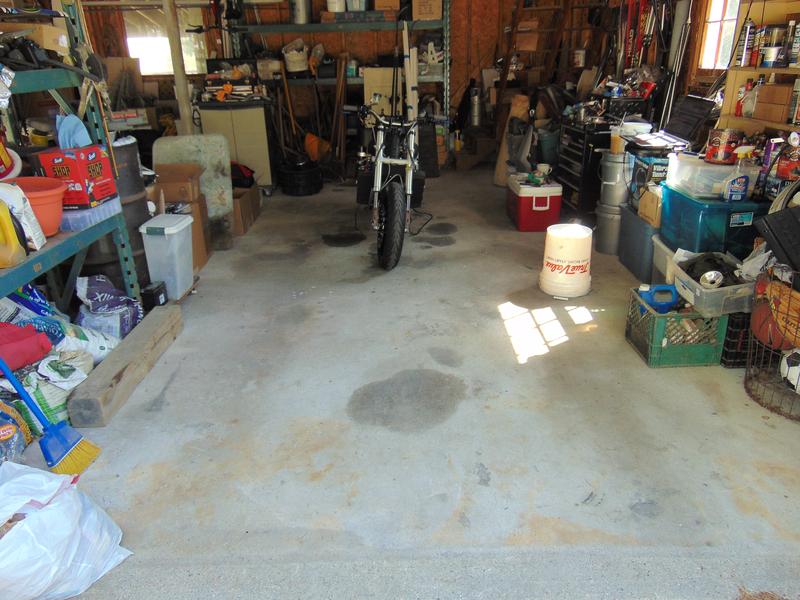
But anyways, my girl came over, was disgusted with my car so she left... with my car... and cleaned it... when she came back she was disgusted with the garage so this happened
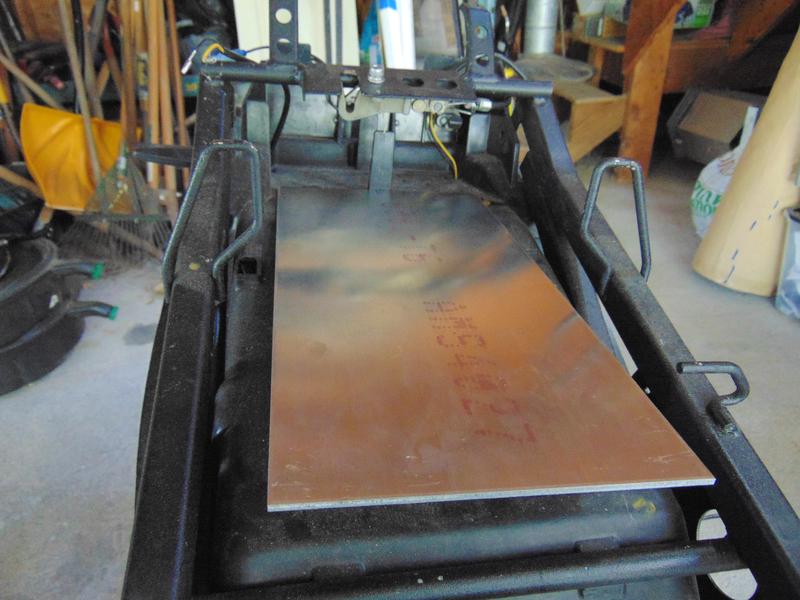
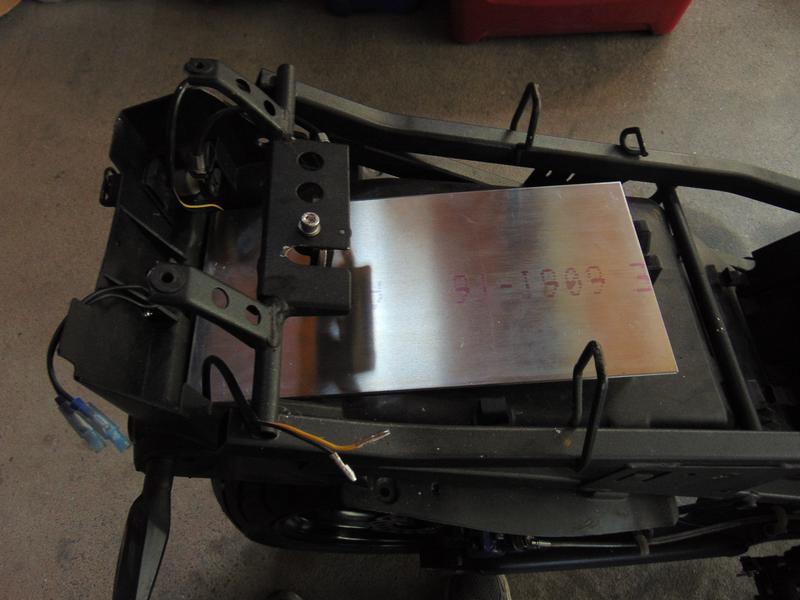
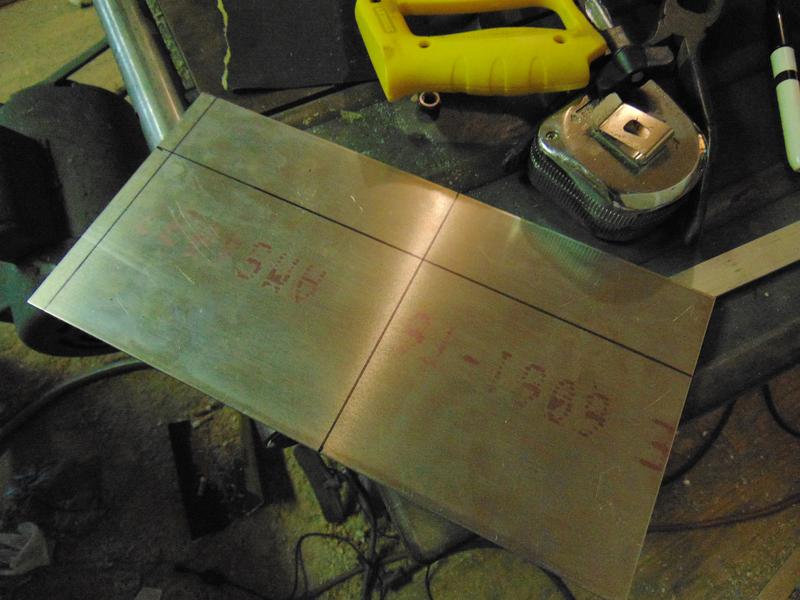
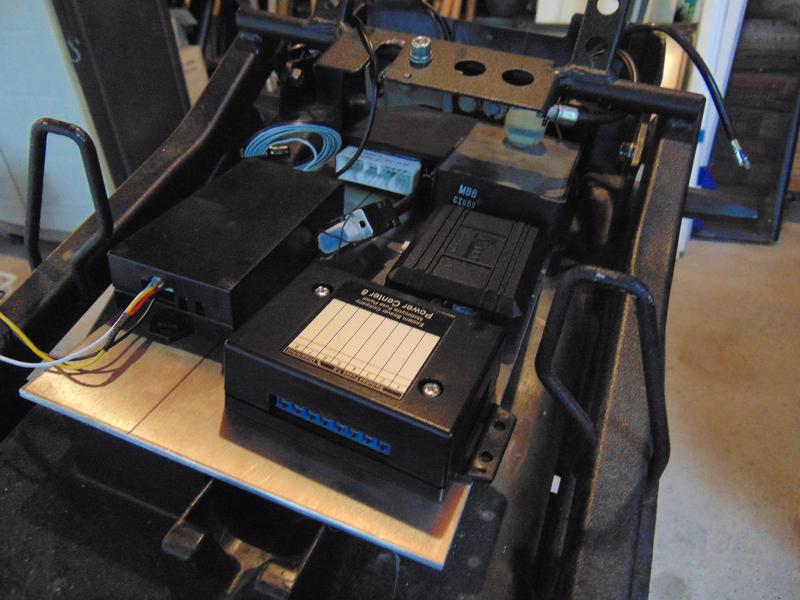
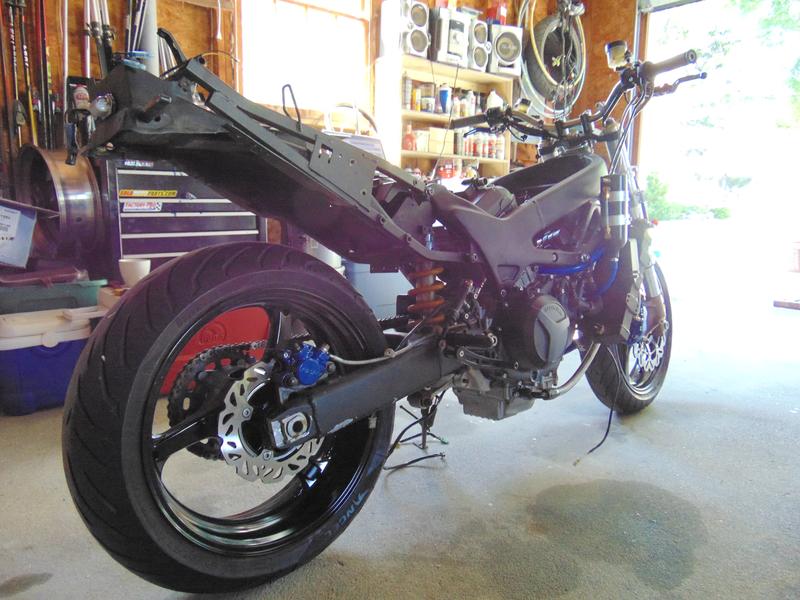
As for the bike, most of the mechanical is done with the exception of a few odds and ends. The electrical has officially commenced, got my 6"X12" aluminum plate out, cut off the tabs on the seat tray that used to mount the CDI and ICU, had to cut off about half inch of the plate to clear the underside of the seat, and now working on placement of all the components. I am trying to make it as compact as possible, not only to clear the seat, but to make it easily transferrable to whatever subframe/seat/tail I come up with in the future... remember we are blessed with a bloated seat and plenty of storage space under the seat compared to most...
Tetris anyone?
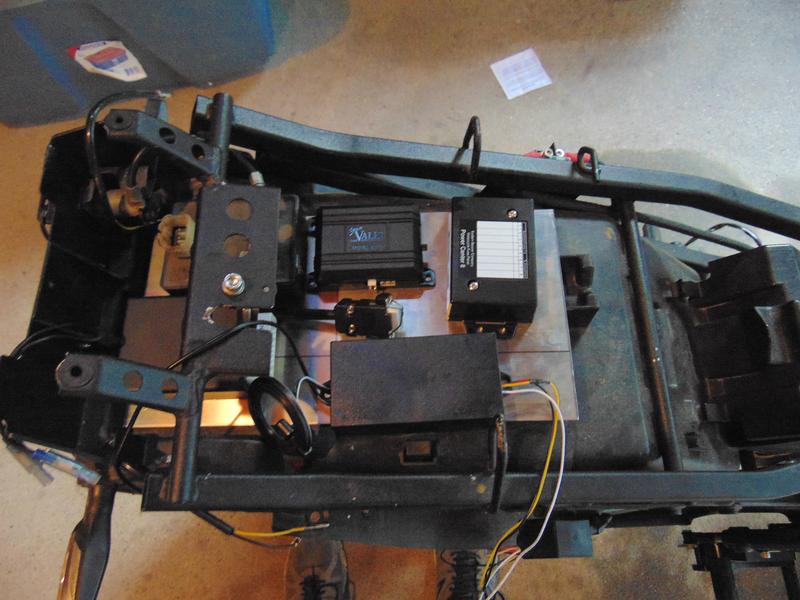
and again...the sexiness...
But anyways, my girl came over, was disgusted with my car so she left... with my car... and cleaned it... when she came back she was disgusted with the garage so this happened
As for the bike, most of the mechanical is done with the exception of a few odds and ends. The electrical has officially commenced, got my 6"X12" aluminum plate out, cut off the tabs on the seat tray that used to mount the CDI and ICU, had to cut off about half inch of the plate to clear the underside of the seat, and now working on placement of all the components. I am trying to make it as compact as possible, not only to clear the seat, but to make it easily transferrable to whatever subframe/seat/tail I come up with in the future... remember we are blessed with a bloated seat and plenty of storage space under the seat compared to most...
Tetris anyone?
and again...the sexiness...
08-06-2015, 10:56 AM
#419
Rex Kramer-Thrill Seeker
SuperBike

Join Date: Jan 2011
Location: Brookfield, WI
Posts: 2,312
I tried figuring out how to install the solid state relay (611T), and the RFID reader/writer for a keyless ignition. I think I finally figured it out, but for fear of frying something, I never went forward with it. You can read about it in this thread.
If possible, can you post how you hooked those components up to the Superhawks wiring?
Edit: Wait....ah nuts, you're making your own wire harness, aren't you? Actually, I think I may have even asked you about this already.
If possible, can you post how you hooked those components up to the Superhawks wiring?
Edit: Wait....ah nuts, you're making your own wire harness, aren't you? Actually, I think I may have even asked you about this already.
08-06-2015, 12:37 PM
#420
Senior Member
SuperBike
Thread Starter
Join Date: Feb 2007
Location: boston
Posts: 1,252
Yea I'm making my own harness, once I'm done with everything I will draw up a wiring diagram for future additions or issues, so I'll post that up. I'm only on step 1 of wiring (component mounting), then I will be working on swapping all the factory connections with weatherpacs, then comes the actual wiring and testing... to be honest I havent even looked into the wiring of the RFID components yet
So did you return it back to stock?
So did you return it back to stock?


